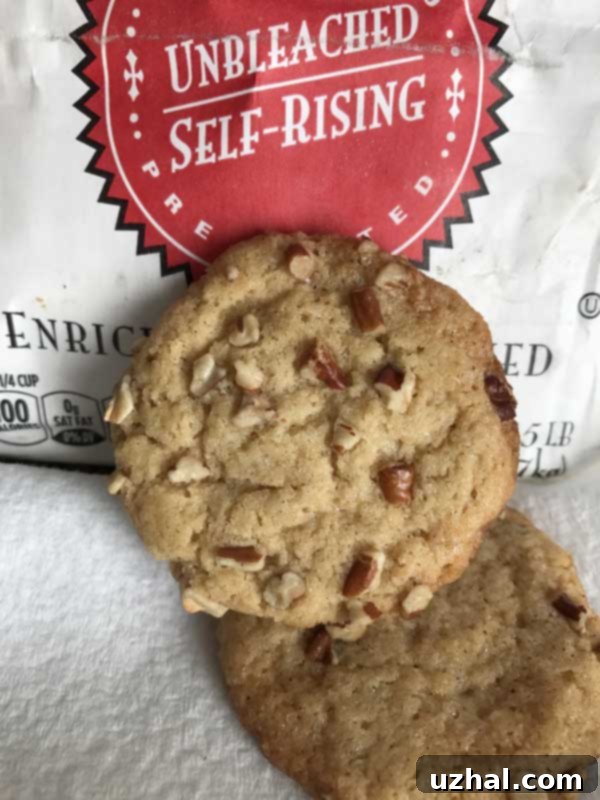
Baking Bliss: Master the Art of Irresistible Butter Pecan Cookies with Self-Rising Flour
The world of baking is often a delightful mix of precision and personal preference, and few ingredients spark as much debate among culinary experts as self-rising flour. Take Mark Bittman, for instance, a renowned cookbook author whose influential work How to Bake Everything dismissively labels it “a silly concept.” His argument typically centers on the increased cost and the perceived lack of versatility, suggesting it can’t universally substitute all-purpose flour. Conversely, the esteemed Shirley Corriher, in her seminal book Bakewise, champions self-rising flour as “a perfectly uniform blend of leaveners and flour,” dedicating an entire page to extolling its many merits and applications in creating tender, consistent baked goods. For many home bakers, myself included, self-rising flour occupies a special, indispensable niche in the pantry. While I primarily rely on it for consistently perfect, fluffy biscuits, I’ve also found it to be the secret ingredient for a select few cookie recipes that demand a particular tender crumb. And now, I’m thrilled to add a new favorite to that exclusive list: these remarkably delicious Butter Pecan Cookies!

This delightful recipe for Butter Pecan Cookies comes with a charming backstory, originating from The Savannah Morning News and shared by Teri Bell, co-owner of Miss Sophie’s Marketplace. Teri, an accomplished baker, frequently prepares these delectable cookies for the various tour groups that visit The Mighty Eight Museum, a place that often evokes a sense of nostalgia and shared community. She aptly describes their flavor as reminiscent of classic Pecan Sandies, a beloved Southern treat. And she’s absolutely right – with every bite, these cookies are bursting with rich, toasted pecan and deeply satisfying buttery notes that truly hit the spot, embodying the comforting essence of Southern hospitality.
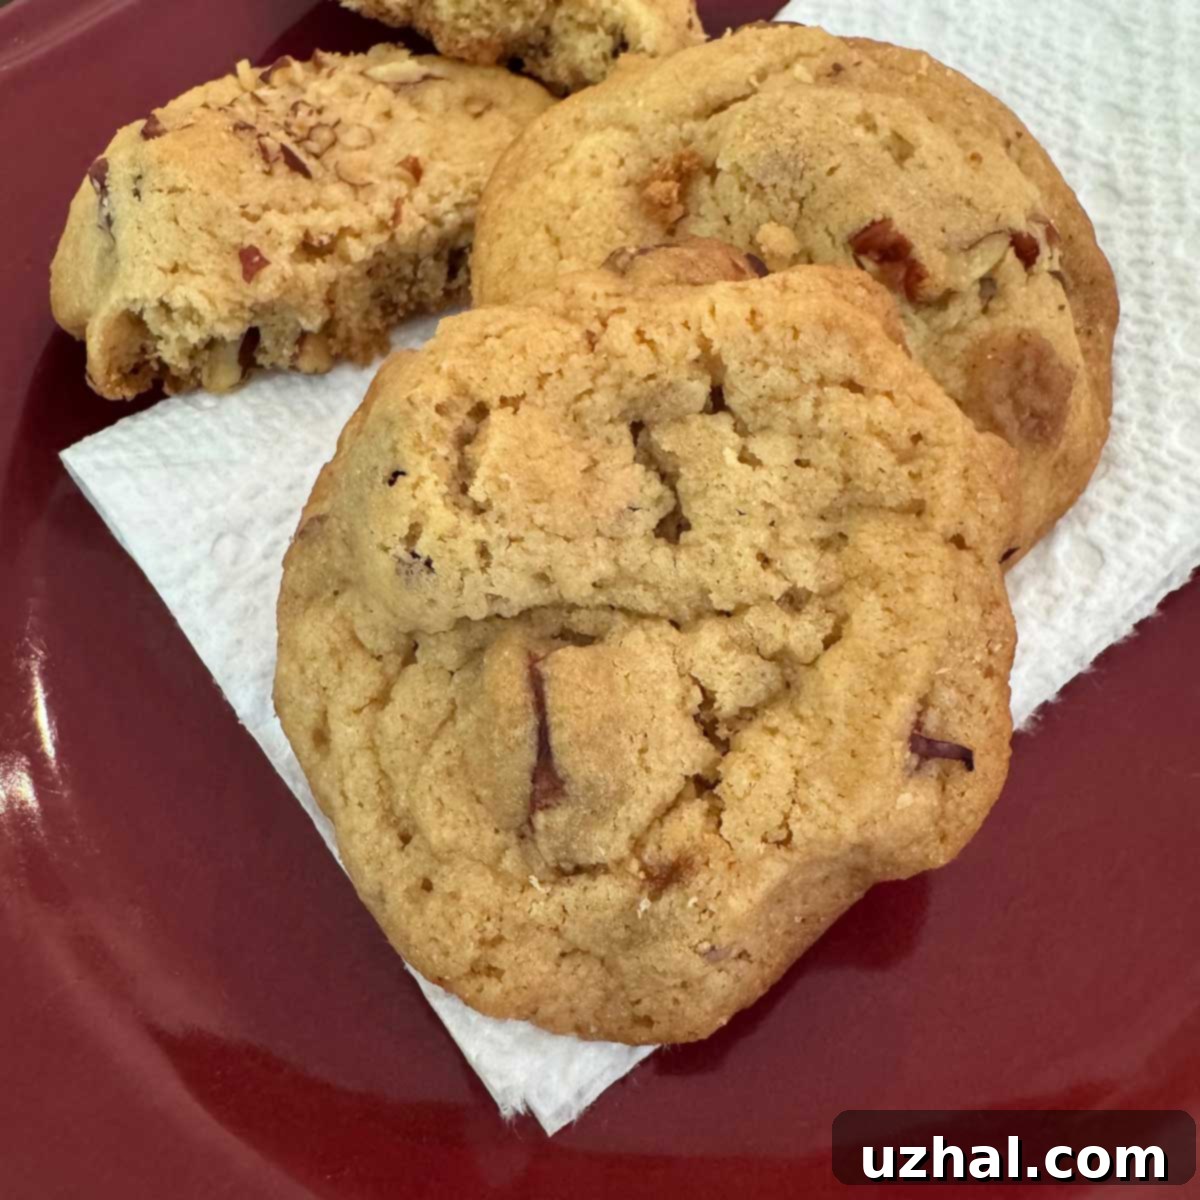
While the flavor profile certainly evokes the comforting familiarity of Pecan Sandies, the texture of these Butter Pecan Cookies offers a delightful distinction that sets them apart. Unlike the typically crumbly, ultra-sandy texture often associated with traditional Pecan Sandies, these cookies possess a slightly firmer yet wonderfully tender and delicate consistency. They remind me more of a refined “tea cookie” – a treat that holds its shape beautifully without being tough, offering a pleasant bite that’s less prone to crumbling and easier to handle. This makes them exceptionally practical for serving to groups or packing into lunchboxes, as they travel well and maintain their integrity. Speaking of groups, I particularly appreciate the thoughtful sizing of these cookies. As someone who often errs on the side of making cookies excessively large, finding a recipe that yields perfectly portioned, manageable treats is a welcome change. This makes them ideal for entertaining, sharing, or simply enjoying a guilt-free indulgence without feeling overwhelmed by a giant cookie.
My first batch of these Butter Pecan Cookies was an absolute success, disappearing from the plate almost as quickly as they were made. I can confidently say that they will be making frequent appearances in my kitchen, destined to become a staple in my baking repertoire. Their ease of preparation, combined with their irresistible flavor and satisfyingly tender texture, makes them a perfect go-to recipe for any occasion, from casual afternoon snacking to elegant dessert platters. The simplicity of using self-rising flour truly streamlines the process, allowing more time for enjoyment and less for intricate measuring.
Understanding Self-Rising vs. Self-Raising Flour: A Key Distinction for Global Bakers
It’s important to clarify a common point of confusion that often arises, especially for bakers navigating recipes from different regions: the subtle yet crucial difference between “self-rising” and “self-raising” flour. While often used interchangeably, there’s a vital distinction primarily related to their salt content, which can significantly impact your final baked good. American self-rising flour, a staple in many Southern kitchens, typically contains a carefully balanced blend of soft all-purpose flour, a precise amount of baking powder, and a significant amount of salt. This pre-mixed salt acts not only as a crucial flavor enhancer, balancing the sweetness in a recipe, but also plays a role in the chemical reactions of the leavening agent. On the other hand, self-raising flour, common in many parts of the world (including the UK, Ireland, and Australia), usually contains flour and baking powder but little to no added salt. This means that if you’re using self-raising flour from a region that omits salt, or only includes a minimal amount, for this particular Butter Pecan Cookies recipe, I highly recommend adding an extra pinch or two (approximately ½ to ¾ teaspoon) of fine-grain salt directly to your dough. This simple adjustment will ensure your cookies achieve the intended flavor balance and depth, as this recipe relies solely on the salt present in the butter and the self-rising flour blend for its salty notes, which are vital for cutting through the sweetness and enriching the pecan flavor.
Choosing Your Self-Rising Flour: The White Lily Story and Beyond Flavor Considerations
When it comes to commercial self-rising flours, the brand you choose can significantly impact the outcome and flavor profile of your baked goods. White Lily is a particularly popular choice, especially in the Southern United States, highly regarded for its finely milled texture and the soft winter wheat from which it’s made, which contributes to a delicate crumb. However, if you opt for White Lily, you might encounter two distinct varieties on the shelves: a red label self-rising flour and a green label self-rising flour. The red label variety is celebrated for being unbleached and, crucially, made with non-aluminum baking powder. The green label, while also self-rising and made from soft wheat, is bleached and still contains aluminum-based baking powder. This distinction is far from trivial, particularly for sensitive palates.
My own experience highlights this point: I recently used the green label variety for a batch of cookies, and I immediately detected a noticeable, unpleasant metallic flavor that can truly detract from the pure taste of delicate recipes like these Butter Pecan Cookies. This experience strongly reinforced my long-standing preference for brands that explicitly use aluminum-free baking powder, such as Rumford, which ensures a cleaner, purer taste. It’s true that not everyone is sensitive to the taste of aluminum in baking powder, but for those who are, it can indeed compromise the enjoyment of an otherwise perfect bake. Therefore, it’s always a prudent practice to scrutinize the labels of your self-rising flour to ensure it aligns with your preferences for taste and ingredients. Alternatively, for complete control, consider making your own self-rising flour, especially if you’re particularly sensitive to certain commercial ingredients.
The presence of aluminum in baking powder is a topic of occasional concern for health-conscious bakers and those who prioritize flavor purity. Aluminum-based baking powders are generally double-acting, meaning they produce gas (and thus leavening) both when wet and when heated. This makes them highly effective and a common choice in many commercial products. However, as mentioned, some individuals report a distinct metallic aftertaste, especially when the baking powder is present in higher concentrations or in recipes with subtle, nuanced flavors, where any off-notes become more pronounced. Non-aluminum baking powders, often made with ingredients like sodium acid pyrophosphate (SAPP) or monocalcium phosphate, offer an excellent alternative for a cleaner, neutral flavor profile. Understanding these chemical nuances allows you to make more informed decisions for your baking, ensuring the best possible outcome for your delicious creations, free from unwanted flavors.
The Convenience of DIY: How to Make Homemade Self-Rising Flour with Confidence
While commercial self-rising flour offers undeniable convenience and consistent results, there might be times when you don’t have it on hand, or perhaps you wish to have greater control over its components. Making your own homemade self-rising flour is surprisingly simple, empowering you to bake with confidence and providing an excellent, fresh alternative. To create a single cup of homemade self-rising flour, simply whisk together 1 cup of all-purpose flour, ¾ teaspoon of baking powder, and ¼ teaspoon of fine-grain salt. For this particular Butter Pecan Cookies recipe, which specifically calls for 2 cups of self-rising flour, you would easily double these quantities: meaning you’d combine 2 cups of all-purpose flour, 1 ½ teaspoons of baking powder, and ½ teaspoon of salt. This ratio is generally reliable, but slight adjustments can be made based on your specific baking powder’s freshness and potency.
When preparing homemade self-rising flour, precision in measurement and thorough mixing are paramount. Ensure your measuring spoons are leveled accurately, and take the time to thoroughly whisk the ingredients together to ensure the leavening agent and salt are evenly distributed throughout the flour. This even distribution is critical for a consistent rise and uniform texture in your baked goods, preventing uneven pockets of leavening or salt. A fine-mesh sieve can also be employed to sift the ingredients together multiple times for an even more uniform and lump-free blend. A word of seasoned baker’s caution: if you’re trying a new recipe, especially one as delicate as these cookies, for the very first time with homemade self-rising flour, consider starting with a half batch. This pragmatic approach allows you to gauge how the leavening and saltiness of your homemade blend perform with the recipe before committing to a larger quantity. It accounts for potential variations in ingredient potency (baking powder can lose strength over time) or your personal taste preference regarding salt. The whole point and enduring appeal of self-rising (or self-raising) flour lies in its ability to impart a wonderfully soft, tender, and often cake-like texture to baked goods, primarily due to the type of softer wheat often used in commercial blends and the perfectly balanced leavening system. However, always remember that the saltiness and/or leavening strength can subtly vary between commercial brands and even homemade versions, so a slight adjustment or attentive observation might sometimes be necessary to achieve your desired perfect bake.
Essential Tips for Baking Perfect Butter Pecan Cookies Every Time
- Ensure Room Temperature Ingredients: Always allow your butter and egg to come to a full room temperature before you begin mixing. This crucial step enables them to cream together more smoothly with the sugar, creating a light, airy, and beautifully emulsified base that traps air effectively, which in turn leads to lighter, fluffier cookies with a tender crumb.
- Toast Your Pecans for Enhanced Flavor: While the recipe calls for chopped toasted pecans, ensuring they are adequately and freshly toasted is key to unlocking their full, rich, nutty flavor. You can easily do this in a dry skillet over medium heat, stirring frequently until fragrant, or by spreading them on a baking sheet in a 350°F (175°C) oven for about 5-7 minutes. Always let them cool completely before chopping and adding to the dough.
- Avoid Overmixing the Dough: Once you add the self-rising flour, mix the ingredients just until they are combined and no dry streaks of flour remain. Overmixing the dough develops gluten, which is desirable in breads but can lead to tougher, chewier cookies, whereas we’re aiming for tenderness here.
- Chilling is Not Optional, It’s Crucial: The one-hour chilling period specified in the recipe is not merely a suggestion; it’s a critical step for optimal results. Chilling allows the butter in the dough to firm up, significantly preventing the cookies from spreading too much in the oven and retaining their shape. It also gives the flavors a chance to meld and deepen, resulting in a more complex and satisfying taste.
- Achieve Baking Uniformity: For professional-looking cookies that bake evenly, use a small cookie scoop or a measuring spoon to portion out your dough. This ensures all your cookies are the same size, leading to consistent baking times and perfectly cooked treats.
- Master the Art of Doneness: Cookies are often at their best when they are slightly underbaked in the center. Look for edges that are nicely golden-brown and centers that appear set but still look a tiny bit soft. They will continue to firm up and cook slightly on the hot baking sheet after being removed from the oven.
- Salted vs. Unsalted Butter Guidance: The recipe specifically calls for salted butter, which contributes to the overall flavor balance. If you only have unsalted butter on hand, be sure to compensate by adding approximately ½ teaspoon of fine sea salt directly to the dry ingredients with the flour to achieve the intended depth of flavor and balance against the sweetness.
These Butter Pecan Cookies are truly a testament to the magic that self-rising flour can bring to your baking, producing a tender crumb and rich, satisfying flavor with minimal fuss. They’re quickly becoming a beloved staple in my recipe collection, and I’m confident they’ll become one of yours too! Enjoy the journey of baking these delightful treats and savor every buttery, nutty bite.
Explore More Self-Rising Flour Favorites
- Kristen Bell’s Everything Cookies
- How to Make Self-Rising Flour and Cake Flour
- Recipes with Self-Rising Flour
- Easy Chocolate Muffins with Self-Rising Flour
- Self-Rising Flour Chocolate Chip Cookies
Recipe: Decadent Butter Pecan Cookies

Butter Pecan Cookies
Anna
Pin Recipe
Ingredients
- 230 grams salted butter, cut into chunks and softened (1 cup, at room temperature for optimal creaming)
- 200 grams packed light brown sugar (1 cup, provides moisture and chewiness)
- 1 large egg (at room temperature, helps bind ingredients)
- 1 teaspoon vanilla extract (pure vanilla for best flavor)
- 270 grams self-rising flour (2 cups, ensures tenderness and rise)
- 1 ¾ cups chopped toasted pecans (I used Trader Joe’s roasted unsalted. Toasted pecans offer a deeper, richer flavor.)
Instructions
-
Step 1: Prepare the Dough Base. In a large mixing bowl, using an electric mixer, cream together the softened salted butter and packed light brown sugar on medium speed until the mixture becomes light, fluffy, and perfectly well combined. This crucial step typically takes about 2-3 minutes. Remember to scrape down the sides of the bowl as needed to ensure all ingredients are thoroughly incorporated. Beat in the large room-temperature egg and the vanilla extract until they are fully incorporated into the mixture.
-
Step 2: Incorporate Dry Ingredients and Chill. With a heavy-duty rubber scraper or by setting your electric mixer to its lowest speed, gradually incorporate the self-rising flour into the butter mixture. Mix just until the flour is fully blended and no dry streaks remain. It’s important to avoid overmixing at this stage, as it can lead to tougher cookies. Once the flour is incorporated, gently stir in the chopped toasted pecans until they are evenly distributed throughout the dough. Cover the cookie dough tightly with plastic wrap and chill in the refrigerator for at least one hour. This chilling step is crucial for flavor development, helps prevent excessive spreading during baking, and makes the dough easier to handle.
-
Step 3: Shape Cookies and Preheat Oven. Preheat your oven to 375 degrees Fahrenheit (190°C). Prepare your baking sheets by lining them with parchment paper (recommended for easy cleanup and preventing sticking). Remove the chilled dough from the refrigerator. Roll the dough into uniform 1-inch balls. For consistent size and even baking, a small cookie scoop works perfectly here. Place the cookie balls approximately 2 inches apart on the prepared baking sheet to allow for proper air circulation and spreading.
-
Step 4: Bake to Golden Perfection and Cool. Bake the cookies in the preheated oven for 10-12 minutes, or until the edges are nicely golden-brown and the centers appear set but still slightly soft. The exact baking time may vary depending on your oven’s calibration, so keep a close eye on them to prevent overbaking. Once baked, remove the baking sheet from the oven and let the cookies cool on the sheet for 2-3 minutes. This allows them to firm up slightly before you move them. Then, carefully transfer the warm cookies to a wire rack to cool completely. These buttery, nutty treats are best enjoyed when fully cooled, allowing their flavors and textures to fully develop.
Notes
Storage Instructions: To maintain their freshness and delicious texture, store cooled Butter Pecan Cookies in an airtight container at room temperature for up to 3-4 days. For longer-term enjoyment, you can easily freeze baked cookies by placing them in a single layer in a freezer-safe bag or container for up to 3 months. When ready to serve, simply thaw them at room temperature.
Exciting Variations: Feel free to experiment and personalize these cookies! A delicate sprinkle of flaky sea salt on top of each cookie before baking can significantly enhance and balance the rich butter-pecan flavor. For a different nutty nuance, you could add a tiny touch of almond extract alongside the vanilla. If you’re a fan of chocolate, finely chopped white chocolate pieces folded into the dough would add an extra layer of sweetness and creaminess.
