The Ultimate Guide to Baking Irresistible Oat Flour Banana Bread (Plus Gluten-Free Options!)
There’s a universal truth in many kitchens: bananas ripen, and sometimes, they ripen *fast*. What starts as a simple fruit snack quickly transforms into a mission to save those sweet, speckled beauties from the compost bin. And for most home bakers, that mission culminates in the comforting aroma of freshly baked banana bread. While classic banana bread holds a special place in our hearts, what if we told you there’s a version that takes everything you love about it and elevates it with a wholesome, flavorful twist? Enter Oat Flour Banana Bread – a delightful variation that promises a richer flavor, a wonderfully tender crumb, and a satisfyingly wholesome profile. Forget your usual banana bread; this recipe is different, and we are absolutely certain you’ll want to add it to your baking repertoire. It’s a perfect way to use up those extra-ripe bananas and treat yourself to something truly special.

This recipe isn’t just another banana bread; it’s an experience. The subtle nuttiness and delicate texture provided by oat flour transform a beloved classic into something truly extraordinary. Whether you’re a seasoned baker looking for a new challenge or a beginner eager to master a simple yet impressive loaf, this Oat Flour Banana Bread is surprisingly straightforward to make and incredibly rewarding. It’s perfect for a leisurely breakfast, a satisfying afternoon snack, or even a thoughtful homemade gift. Let’s dive into what makes this particular banana bread stand out, how to get the most out of your oat flour, and essential tips for baking perfection.
The Magic of Oat Flour: Enhancing Your Banana Bread
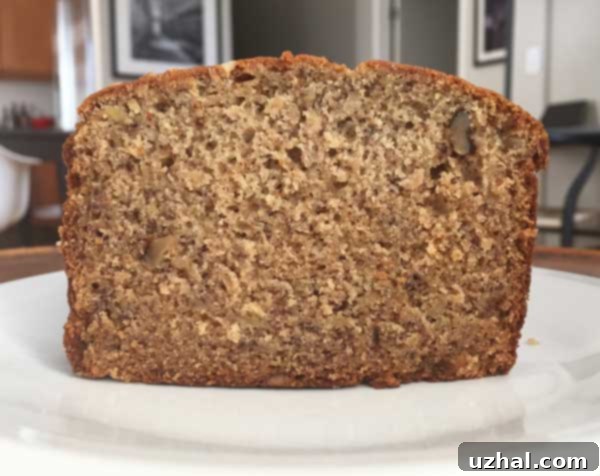
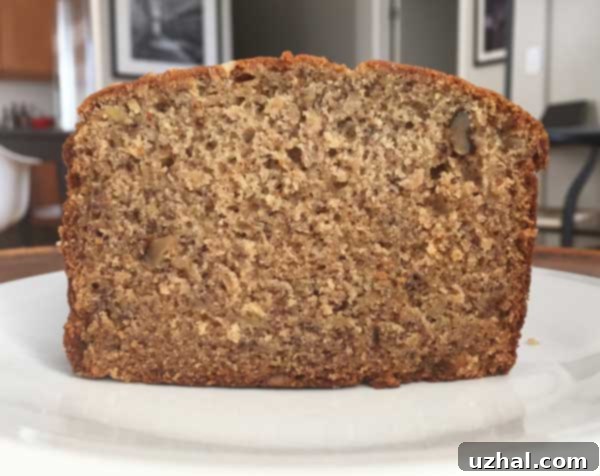
Oat flour is a fantastic ingredient that brings a unique character to baked goods, especially banana bread. Compared to traditional all-purpose flour, oat flour contributes a distinct nutty flavor and a darker hue, which beautifully complements the sweetness of ripe bananas and the warm spice of cinnamon. But the benefits extend beyond just taste and color. Oat flour is rich in soluble fiber, which can contribute to a healthier digestive system and help regulate blood sugar levels. It also adds a wonderful tenderness and moistness to the bread, making it incredibly satisfying.
You have a couple of options when it comes to sourcing your oat flour for this delicious recipe. You can certainly opt for high-quality, pre-packaged store-bought oat flour, which is typically finely ground and consistent. Brands like Bob’s Red Mill or Arrowhead Mills are widely available and produce excellent results. Alternatively, making your own oat flour at home is incredibly easy and cost-effective. Simply grind 1 cup of rolled oats (also known as old-fashioned oats) in a food processor or high-speed blender until they reach a fine, powdery consistency. While homemade oat flour might be slightly coarser than store-bought versions, this difference can actually add a pleasant, rustic texture to your banana bread. Whichever type of oat flour you choose, you’re guaranteed a loaf with an appealing darker color and a deeper, more complex flavor profile that sets it apart from conventional banana bread.
When it comes to additions, toasted walnuts are a timeless complement to banana bread, and they work exceptionally well here, adding a delightful crunch and earthy flavor that perfectly balances the sweetness of the fruit. However, if nuts aren’t your preference, or if you have dietary restrictions, this bread is equally delicious without them. Feel free to experiment with other add-ins like chocolate chips, pecans, or even a sprinkle of shredded coconut to personalize your loaf!

Mastering Pan Preparation for Effortless Baking
One of the most crucial, yet often overlooked, steps in achieving a perfect loaf of banana bread is proper pan preparation. A well-prepared pan ensures that your beautifully baked bread releases easily without sticking, preserving its shape and presentation. This is particularly important for delicate loaves like banana bread, which can sometimes be prone to sticking if not handled correctly. Our preferred method for preparing loaf pans is both simple and highly effective, making cleanup a breeze and guaranteeing a perfect release every time.
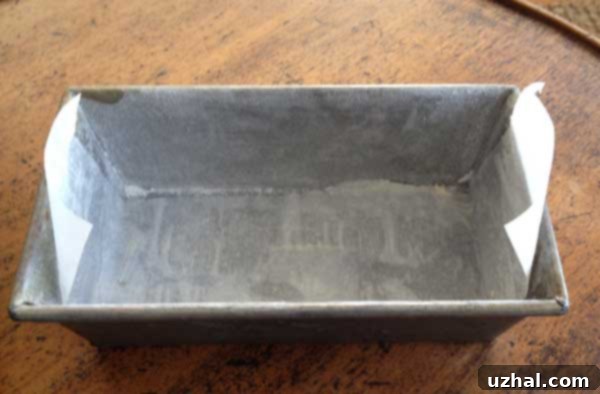
Start by generously greasing your 9×5 inch loaf pan with butter or shortening. This initial layer provides a crucial non-stick base. Next, line the pan with a strip of parchment paper. The parchment strip should be approximately 4 inches wide and long enough so that its ends extend over the sides of the pan. These parchment “handles” are key to effortless removal once the bread is baked. After the pan is fully greased and lined with its parchment strip, lightly dust the entire interior with a thin layer of flour, tapping out any excess. The flour creates a microscopic barrier that further prevents sticking and gives your loaf a beautiful, evenly browned crust. This method works like a charm for any quick bread or cake baked in a loaf pan, ensuring professional-looking results with minimal fuss.
Gluten-Free Oat Flour Banana Bread: A Wholesome Choice
For those seeking a gluten-free option without compromising on flavor or texture, this Oat Flour Banana Bread recipe is remarkably adaptable. While the original recipe incorporates a cup of all-purpose flour for structure and familiarity, making it gluten-free is a simple substitution. The beauty of baking with oat flour is that it naturally contributes to a wholesome, often gluten-friendly, profile. However, if you require a strictly gluten-free bread due to celiac disease or gluten sensitivity, it’s essential to ensure all ingredients, especially your oats and oat flour, are certified gluten-free to avoid cross-contamination.
To transform this into a fully gluten-free treat, simply substitute the 1 cup of all-purpose flour with an equal amount of a high-quality 1:1 gluten-free baking blend. Many excellent blends are available on the market that are specifically formulated to replace wheat flour cup-for-cup in recipes. Popular choices include King Arthur Measure for Measure, Bob’s Red Mill 1:1 Baking Flour, or Cup4Cup. These blends typically contain a combination of rice flour, tapioca starch, potato starch, and xanthan gum, which work together to mimic the properties of wheat flour, ensuring your gluten-free banana bread retains its moistness, structure, and delightful texture. With this simple adjustment, everyone can enjoy a slice of this wholesome and delicious Oat Flour Banana Bread.
- Cinnamon Chip Scones
- Chocolate Pistachio Thins
- Lightest, Flakiest, Buttery Scones
- Biscuits and Scones
- Oreo Ice Cream Cake
Baking Tips for the Perfect Oat Flour Banana Bread
Achieving the perfect loaf of banana bread is an art, but with a few simple tips, you can ensure a consistently moist, flavorful, and beautifully textured result every time. The secret often lies in the details, from choosing the right bananas to understanding the nuances of mixing.
Choosing the Right Bananas
The ripeness of your bananas is paramount to the success of any banana bread. For this oat flour version, aim for bananas that are very ripe, with peels that are heavily speckled brown or even nearly black. These bananas are sweeter and softer, making them easier to mash and imparting a more intense banana flavor to your bread. If your bananas aren’t quite ripe enough, you can speed up the process by placing them in a brown paper bag with an apple or in a low oven (around 250°F / 120°C) for 15-30 minutes until their skins darken.
Don’t Overmix
Once you’ve combined your wet and dry ingredients, it’s crucial to mix just until everything is incorporated. Overmixing can develop the gluten in the flour (even in gluten-free blends, though less so), leading to a tougher, denser bread. A light touch ensures a tender, moist crumb, which is what we all crave in a good banana bread. A few small lumps of flour are perfectly acceptable; they will disappear during baking.
Cooling is Key
While the aroma of freshly baked banana bread is undeniably tempting, resist the urge to slice into it immediately after it comes out of the oven. Allowing the bread to cool in the pan for about 15-20 minutes lets it set properly and makes it much easier to remove without breaking. Transferring it to a wire rack to cool completely before slicing will give you cleaner cuts and allow the flavors to fully develop.
Serving and Storage Suggestions
This Oat Flour Banana Bread is truly versatile. Enjoy it warm with a pat of butter, alongside your morning coffee, or as a delightful dessert. It’s also robust enough to slice and toast lightly, enhancing its nutty flavor. For storage, keep the bread at room temperature in an airtight container for up to 3-4 days. For longer preservation, wrap individual slices or the entire loaf tightly in plastic wrap, then aluminum foil, and freeze for up to 3 months. Thaw at room temperature or gently warm in the oven for a quick treat.
Recipe

Oat Flour Banana Bread
Cookie Madness
Pin Recipe
Ingredients
- 1 cup oat flour (90 grams)
- 1 cup all-purpose flour or a 1:1 Gluten Free blend (130 grams)
- 1 teaspoon baking powder
- 1 teaspoon baking soda
- 1 teaspoon salt
- ¾ teaspoon cinnamon
- 3 large very ripe bananas 280 grams
- 1 stick unsalted butter softened (120 grams)
- 1 cup sugar (200 grams)
- 2 large eggs
- 1 teaspoon vanilla extract
- 1 tablespoon milk (14 grams)
- ⅓ cup walnuts toasted and chopped.
Instructions
-
Preheat the oven to 325 degrees F. Grease a 9×5 inch loaf pan. Line the pan with a strip of parchment, then dust with flour.
-
In a large bowl, whisk together the oat flour, flour, baking powder, baking soda, salt and cinnamon; set aside.
-
Put the bananas in a mixing bowl and beat them with your electric mixer until they are fully mashed. Pour the bananas into a small bowl and set aside.
-
In the mixing bowl, beat the butter and sugar until creamy. Add the eggs, one at a time, beating until fluffy and scraping bowl often. Beat in the vanilla and the milk.
-
Fold the flour mixture into the batter until it is incorporated. Do not overbeat.
-
Stir in the mashed bananas, then stir in the nuts (if using).
-
Spread the batter evenly in the pan and bake for 1 hour or until a toothpick inserted comes out clean.
-
Let cool in the pan for about 20 minutes, then carefully remove from pan.
