Decadent Sour Cream Cheesecake with Artisan Biscotti Crust: Your Ultimate Holiday Dessert
As the holiday season approaches, especially Thanksgiving, the search for the perfect dessert intensifies. Look no further than this exquisite Sour Cream Cheesecake with Biscotti Crust. This recipe offers a delightful blend of rich, creamy texture and a uniquely flavorful crust that will undoubtedly impress your guests. What’s even better? You can prepare one to enjoy immediately and, if you fall in love with its taste (which we’re confident you will!), make a second to freeze, ensuring a stress-free treat for future gatherings.

This particular cheesecake recipe was a delightful new discovery for our family, and it has quickly earned a permanent spot in our baking rotation. One of its appealing aspects is that it calls for just two packages of cream cheese, making it a more accessible and often more economical option compared to some larger cheesecake recipes. Beyond the filling, the choice of crust truly sets this dessert apart. Having a passion for baking biscotti, I often find my freezer stocked with homemade batches. Utilizing these flavorful, crunchy Italian biscuits for a cheesecake crust turned out to be an absolute revelation, adding an unexpected depth and texture that complements the creamy filling beautifully.
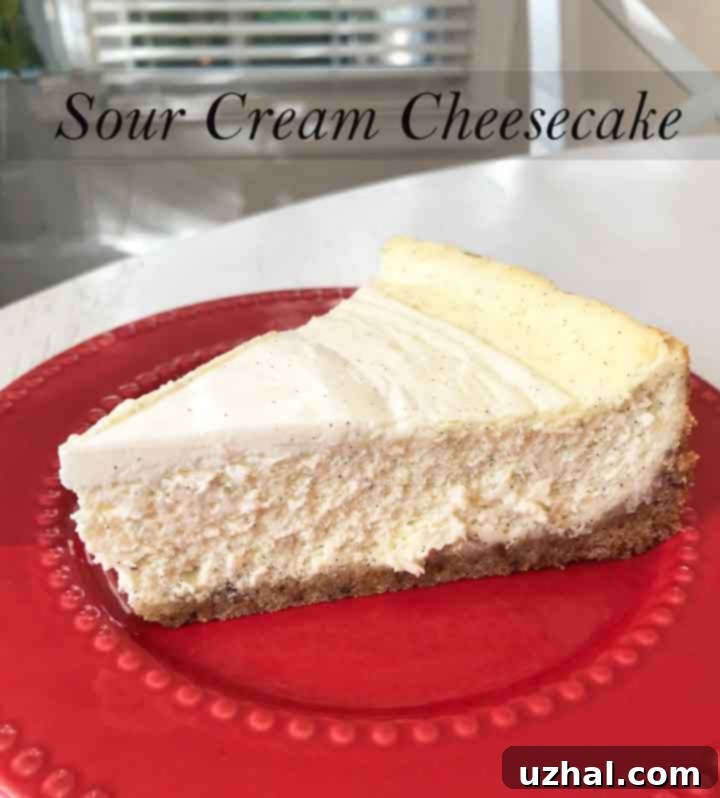
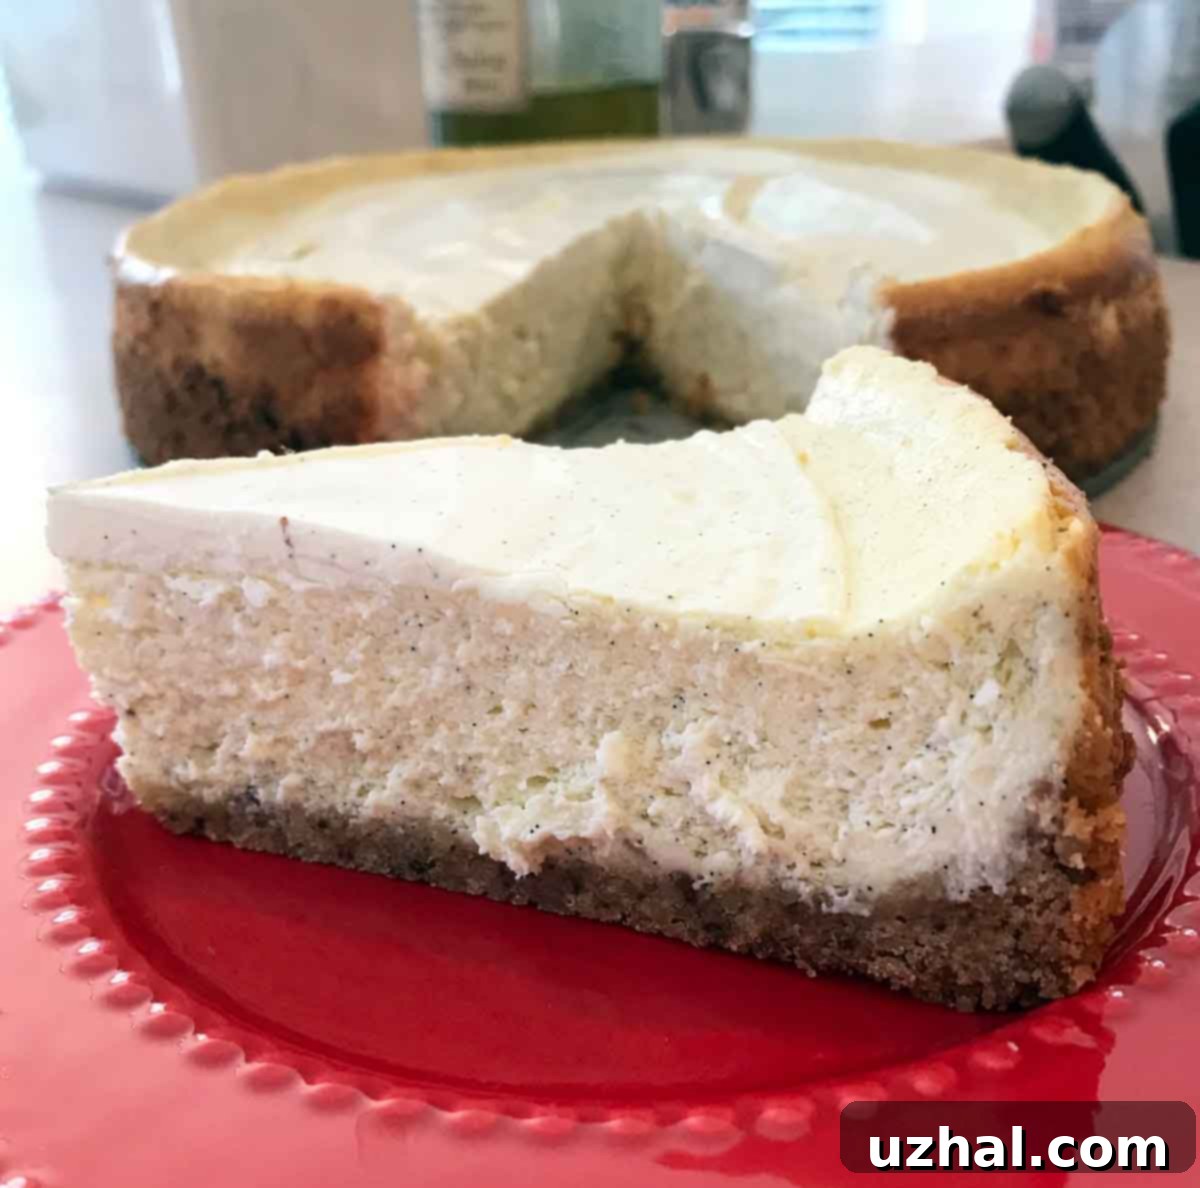
Initially, upon encountering this recipe, I thought it might bear a resemblance to the lighter, airier Fluffy Cheesecake, primarily because it incorporates folded egg whites at the final stage. While the egg whites do indeed lend a subtle aeration, preventing the cheesecake from being overly dense, it remains, for the most part, a wonderfully rich and exceptionally creamy indulgence. What truly distinguishes this cheesecake, however, is its balanced sweetness and delightful tang. It is, perhaps, the least sweet cheesecake I’ve ever had the pleasure of making and tasting. The generous amount of sour cream imparts a distinctive tartness that is incredibly refreshing, eliminating the need for any additional citrus zest or juice. Pure vanilla extract, or even better, vanilla bean paste, provides all the necessary aromatic depth and flavor. And for all the home bakers out there, rejoice! This recipe brilliantly skips the often-dreaded water bath, simplifying the baking process without compromising on quality or texture.
The Art of the Biscotti Crust
While a classic graham cracker crust would certainly be a delicious foundation for this Sour Cream Cheesecake, the opportunity to experiment with something different arose from a very personal circumstance. Our freezer, much like a treasure chest for a baker, is perpetually full of homemade biscotti. This happy abundance is often a result of my ongoing quest to recreate the legendary burnt biscotti we savored during a memorable trip to Rome. It only made sense, then, to put some of these delicious, crisp biscuits to good use in a novel way. The biscotti crust, in contrast to a graham cracker crust, offers a more sophisticated flavor profile and a firmer, slightly more textured bite that perfectly complements the smooth, tangy cheesecake filling. The subtle hints of almond, anise, or whatever flavor your biscotti contains, infuse the crust with an elevated aroma that truly transforms the dessert into something special.
Mastering Your Sour Cream Cheesecake: Detailed Notes for Success
Crafting the perfect cheesecake is an art, and these detailed notes, gathered from experience, are designed to guide you to a flawless finish. I continually refine these tips with each bake, and welcome insights from other passionate bakers. Consider these insights for a truly exceptional Sour Cream Cheesecake with Biscotti Crust:
- The Golden Rule: Room Temperature Ingredients. I cannot emphasize this enough when it comes to cheesecake preparation. The temperature of your ingredients is paramount for a velvety-smooth batter. If you mix room temperature cream cheese with cold eggs or cold sour cream, the temperature shock will cause the cream cheese to seize up, resulting in unpleasant little lumps in your final product. For optimal emulsification and a consistently smooth, uniform texture, every ingredient – from cream cheese to eggs and sour cream – must be at true room temperature, ideally leaning towards lukewarm rather than even slightly cool. Plan ahead by taking them out of the refrigerator at least 1-2 hours before you begin baking.
- Efficient Stand Mixer Technique. If you’re fortunate enough to own a stand mixer but possess only one mixing bowl, don’t fret! You can still streamline your process. Begin by whipping your egg whites to stiff peaks in the stand mixer bowl. Once achieved, carefully scrape them into a separate, clean bowl and set them aside. You can then use the very same stand mixer bowl and attachment (no need to wash it in between, as residual egg white won’t harm the filling) to prepare your cream cheese mixture. The beaten egg whites will maintain their volume and structure perfectly well for the five to ten minutes it takes to prepare the rest of the cheesecake filling.
- Invest in Quality Vanilla. In a cheesecake where the overall sweetness is intentionally dialed back, the nuanced flavors of the ingredients truly shine. Vanilla, in particular, plays a starring role in this recipe. While a budget-friendly vanilla extract might work wonders in cookies or brownies, a cheesecake like this deserves better. You don’t necessarily need to splurge on a $40 bottle, but opting for a good quality pure vanilla extract, or even a vanilla bean paste, will elevate the entire dessert. The difference in depth and aroma is noticeable and contributes significantly to the cheesecake’s overall gourmet appeal.
- The No-Water-Bath Baking Method. One of the most beloved aspects of this recipe is its ingenious water-bath-free baking technique. Baking the cheesecake in a 350°F (175°C) oven for an initial 30 minutes, and then turning off the oven and allowing it to rest inside for 2 hours, creates an incredibly gentle and even cooking environment. This method mimics the slow, moist heat of a water bath, helping to prevent the dreaded cracks that often plague cheesecakes. In my own oven, which tends to hold heat very efficiently, I observed a tiny crack, but this is often a minor cosmetic issue and doesn’t affect the taste or texture. Variations in oven calibration and insulation can lead to different results, but this method generally yields a beautifully smooth top.
- Perfecting the Sour Cream Topping. The sour cream topping isn’t just an afterthought; it’s an integral part of this cheesecake, adding another layer of creamy texture, a delightful tang, and a visually appealing finish. During one of my initial attempts, I unfortunately found myself short on sour cream and had to make do with half the recommended topping amount. While still delicious, the cake wasn’t quite as flawlessly smooth and luscious as it could have been. Ensure you have the full amount of sour cream for the topping, as specified in the recipe, to achieve that signature beautiful, perfectly spreadable layer that elevates both the flavor and presentation of your cheesecake.
Serving and Storage Tips for Your Cheesecake
Once your Sour Cream Cheesecake has had ample time to cool and chill, it’s ready to be the star of your dessert table. For the best texture and flavor, ensure it is thoroughly chilled, ideally overnight. When serving, simply release the springform pan side, and you’ll have a stunning cheesecake ready for slicing. You can enhance its presentation with a simple dusting of cocoa powder, fresh berries (raspberries or strawberries pair wonderfully with the tartness), or a light drizzle of chocolate ganache for an extra touch of indulgence.
This cheesecake is not only delicious but also remarkably versatile when it comes to storage. It can be stored, covered, in the refrigerator for up to 5-7 days, making it an excellent make-ahead option for busy holiday entertaining. Even better, it freezes beautifully! To freeze, ensure the cheesecake is completely cooled and chilled. You can freeze it whole or in individual slices. Wrap the cheesecake (or slices) tightly in plastic wrap, then an additional layer of aluminum foil to prevent freezer burn. It will keep well in the freezer for up to 1-2 months. When you’re ready to enjoy, simply thaw it in the refrigerator overnight. This make-ahead and freeze-ahead capability makes it an ideal choice for Thanksgiving or any special occasion, allowing you to prepare a decadent dessert well in advance, freeing up your time for other preparations on the big day.
- Sour Cream Chocolate Cookies
- Double Chocolate Biscotti Recipe
- Easy Vegan Biscotti Recipe
- High Rising Sour Cream Muffins
- Cheesecake Bars (Small Batch)
Recipe

Sour Cream Cheesecake
Pin Recipe
30 minutes
3 hours
6 hours
9 hours
30 minutes
Dessert
American
12
Ingredients
Biscotti Crust
- ½ pound store bought or homemade biscotti
- 3 tablespoons sugar
- 5 tablespoons unsalted butter melted
- 1 pinch salt
Cheesecake
- 1 pound cream cheese at room temperature and softened
- ½ cup sugar
- 3 large eggs, separated at room temperature
- 1 pint sour cream, divided use at room temperature
- 1 ½ teaspoons vanilla (1 teaspoon goes in batter, ½ in topping)
- 1 tablespoons sugar
Instructions
-
Preheat oven to 350°F (175°C). Grease a 9-inch springform pan thoroughly.
-
In a food processor, crush the biscotti into fine crumbs. You should yield a little over 1 ½ cups of crumbs. For accuracy, I recommend measuring by weight, using 8 oz or half a pound of biscotti.
-
Add the sugar, melted butter, and a pinch of salt to the biscotti crumbs and pulse until well combined. Empty the mixture into the prepared springform pan and press evenly over the bottom and slightly up the sides to form the crust.
-
Place the pan with the crust on a rimmed baking sheet (to catch any potential butter drips) and bake for 10 minutes. This helps to set the crust and prevents it from becoming soggy.
-
In a large mixing bowl, using an electric mixer, beat the room temperature cream cheese and sugar until the mixture is completely smooth and creamy, with no lumps. Add the egg yolks one at a time, beating on medium speed after each addition until fully blended. Reduce speed to medium or fold by hand if preferred, then incorporate HALF of the sour cream and 1 teaspoon of the vanilla extract.
-
In a separate, clean bowl, beat the egg whites until stiff peaks just begin to form. Be careful not to overbeat. Gently fold the beaten egg whites into the cheesecake batter in two additions until just combined, being careful not to deflate the air.
-
Carefully scrape the cheesecake batter over the pre-baked biscotti crust in the pan. Return the pan to the rimmed baking sheet and bake for 30 minutes.
-
While the cheesecake is baking, prepare the topping. In a small bowl, stir together the remaining 8 oz of sour cream with the remaining ½ teaspoon of vanilla extract and the tablespoon of sugar until smooth.
-
After the cheesecake has baked for 30 minutes, remove it from the oven. Quickly and gently spread the sour cream/sugar mixture evenly over the top of the hot cheesecake. Return the cheesecake to the oven. Immediately turn off the oven and allow the cheesecake to sit undisturbed in the cooling oven for a minimum of 2 hours. This gradual cooling process helps prevent cracking.
-
Remove the cheesecake from the oven and let it cool completely on a wire rack at room temperature. Once fully cooled, transfer it to the refrigerator and chill for several hours, or preferably overnight, to allow it to set completely. After chilling, carefully remove the springform pan side. Serve chilled. This cheesecake can also be beautifully frozen for later enjoyment.
biscotti, Cheesecake
Tried this recipe?Let us know how it was!
