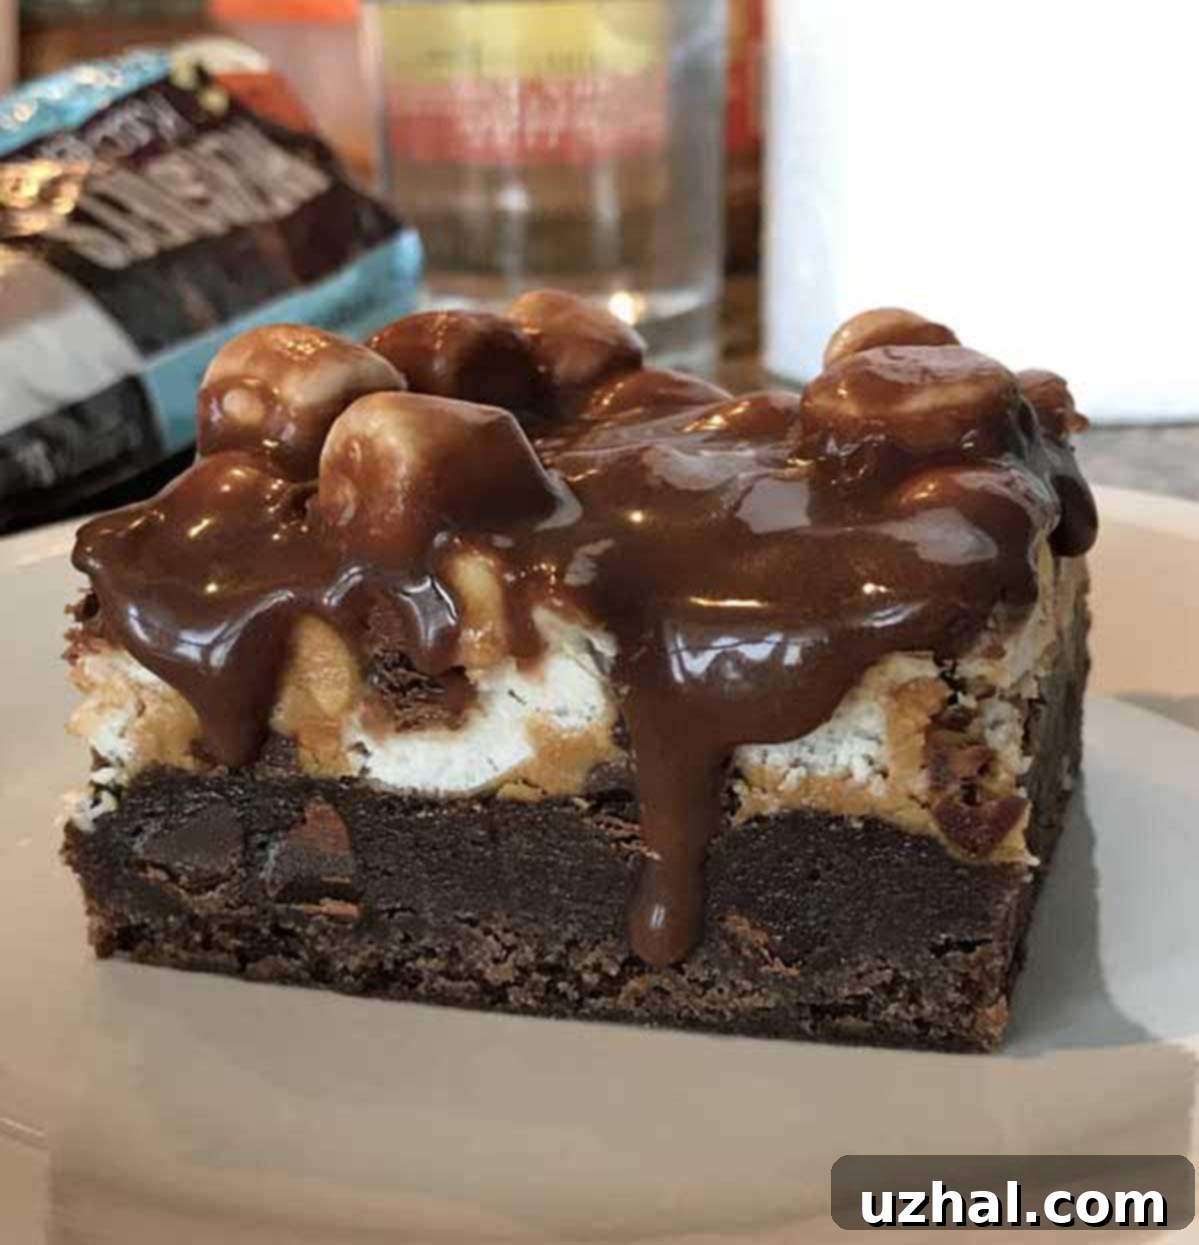
Decadent Small Batch Mississippi Mud Bars: The Ultimate 8-Inch Pan Recipe for Sweet Cravings
Craving an intensely satisfying, multi-layered chocolate dessert but don’t want to commit to a massive batch? Our recipe for **Small Batch Mississippi Mud Bars** is your perfect solution! Tailored specifically for an 8-inch square pan, this recipe delivers all the rich, decadent flavor of traditional Mississippi Mud Bars in a more manageable portion. It’s ideal for smaller households, intimate gatherings, or simply when you desire a luxurious treat without an overwhelming quantity of leftovers.
While you might typically encounter Mississippi Mud Bar recipes designed for larger baking dishes, we’ve found that an 8-inch square pan yields just the right amount of indulgence. This ensures every bar is savored, and the process remains quick and straightforward. If, however, you’re preparing for a larger crowd or a big party, you might consider a larger yield recipe. But for an everyday delight or a special treat for a few, this small batch version is absolutely divine and incredibly easy to master.
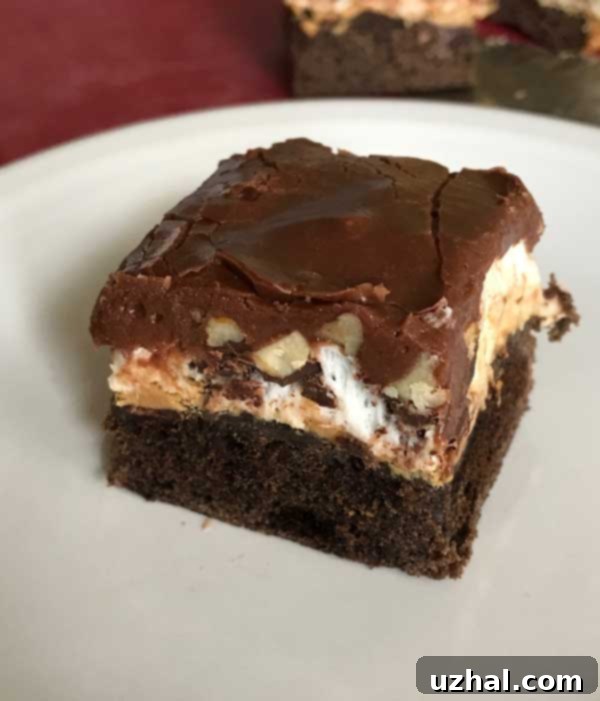
Unveiling the Layers of Our Decadent Mississippi Mud Bars
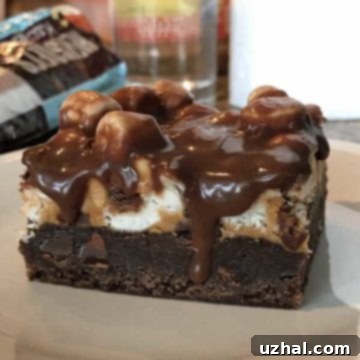
What sets these **Small Batch Mississippi Mud Bars** apart is their exquisite balance of richness and sweetness. Unlike some overly saccharine mud bar variations, our recipe strikes a perfect chord, ensuring a deeply satisfying flavor without being cloying. Each bar is a symphony of textures and tastes, meticulously crafted into four distinct, delightful layers:
- The Brownie Base: We start with a foundation of a dense, yet remarkably cakey brownie. This isn’t your average thin brownie layer; it’s substantial, deeply chocolatey, and provides the perfect sturdy base to support the decadent toppings. Its texture is designed to be moist and flavorful, offering a rich chocolatey anchor for the layers to come.
- Creamy Peanut Butter Swirl: A luscious layer of softened peanut butter is spread generously over the warm brownie. This adds a delightful salty-sweet counterpoint, introducing a nutty depth that complements the chocolate beautifully and prevents the dessert from being one-dimensional.
- Pillowy Marshmallows and Crunchy Nuts: Next comes a fluffy blanket of miniature marshmallows, which gently melt and puff in the oven, creating a gooey, irresistible topping. To elevate the texture, we sprinkle chopped toasted pecan pieces (or extra chocolate chips/peanuts) over the marshmallows. This provides a crucial crunch that contrasts wonderfully with the softness of the other layers.
- Smooth, Glossy Chocolate Frosting: Finally, the entire confection is crowned with a poured-on chocolate icing. This frosting is not just for show; it’s designed to be smooth, glossy, and sets beautifully, encasing all the delicious layers in a final veil of intense chocolate flavor. It’s the perfect capstone to an already incredible dessert.
Together, these layers create a harmonious blend that makes every bite of these homemade **Mississippi Mud Bars** an unforgettable experience. The combination of dense brownie, creamy peanut butter, gooey marshmallow, crunchy nuts, and a rich chocolate frosting ensures a treat that’s both comforting and supremely luxurious.
Achieving Perfect Slices: Tips for Serving Your Mississippi Mud Bars
When it comes to serving these delectable **Mississippi Mud Bars**, you have two main approaches, each with its own charm. For those who embrace the joyous mess of a truly indulgent dessert, serving them directly from the pan is perfectly acceptable. If your family loves to dig into gooey, melt-in-your-mouth brownies where the layers are soft and pliable, then simply bake, allow them to cool completely, and let everyone enjoy the delightful experience of scooping out a generous portion. This rustic method is fantastic for a casual family treat.
However, if you’re aiming for a more polished presentation – perhaps for a dinner party, a potluck, or if you plan to plate these delightful bars alongside ice cream or a dollop of whipped cream – then we highly recommend a specific technique to achieve beautifully clean, sharp edges. The secret lies in the freezer.
Our expert tip for perfectly portioned and presentable mud bars involves baking, allowing the bars to cool completely, and then freezing them until firm. Once solid, you can effortlessly cut them into neat squares. This method minimizes crumbling, prevents the layers from smudging, and ensures a pristine appearance. After cutting, simply bring the individual bars back to room temperature for optimal enjoyment, or serve them slightly chilled for a different texture experience. The image below shows the bars just before they are placed in the freezer, ready for their transformation into perfectly sliceable treats.
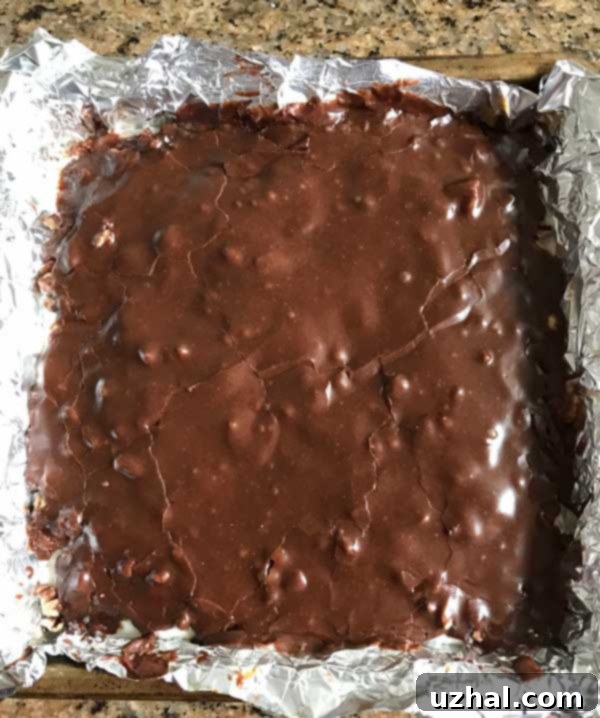
This meticulous freezing and cutting method is precisely how we achieve those desirable, clean-edged slices of **Small Batch Mississippi Mud Bars**. An added bonus? Trimming the edges during the cutting process means you get to enjoy those delightful, slightly imperfect (but equally delicious!) scraps – a little chef’s treat! The photograph below illustrates the cutting process, showcasing the beautiful layers and clean lines possible with this technique.
Given the incredible richness of these mud bars, a small serving goes a long way. While an 8-inch pan could technically yield 16 smaller squares, you’ll likely find that after trimming for presentation and selecting the most appealing portions, you’ll end up with about 8 to 12 generously sized, perfectly delicious servings. Each square is a substantial treat, packed with flavor and texture, making them a satisfying dessert for any occasion.
A Note on the Frosting: Evaporated Milk for Perfection
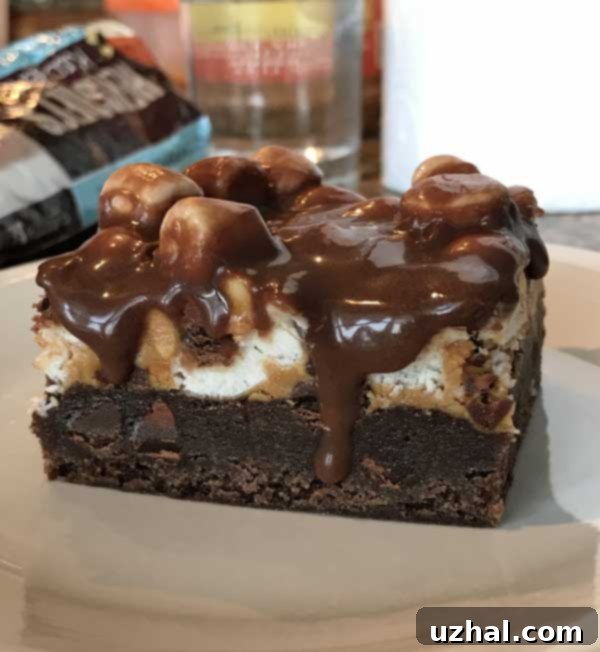
For the best results with your poured chocolate frosting, it’s crucial to use evaporated milk. We cannot stress this enough! While it might be tempting to substitute with whole milk or another dairy alternative, doing so can significantly alter the consistency of your icing. As observed in a previous test (and shown in the final image), using whole milk can result in a runny, less set frosting that doesn’t quite achieve that desired glossy, firm finish. Evaporated milk provides the necessary richness and viscosity to create a smooth, pourable icing that sets beautifully, ensuring your mud bars have that signature perfect top layer.
- Mississippi Mud Brownies
- Chocolate Bourbon Mud Cake
- Frozen Chocolate Mud Pie Dessert
- Rocky Mountain Bars
- Chocolate Mud Bars from Everyday Baking
Recipe
Small Batch Mississippi Mud Bars
Anna
Pin Recipe
Ingredients
- ½ cup unsalted butter, softened (114 grams)
- 4 tablespoons unsweetened cocoa powder (20 grams)
- ¾ cup granulated sugar (150 grams)
- ¾ teaspoon vanilla extract
- 2 large eggs
- ¼ teaspoon salt if using salted butter, use only a pinch
- ¾ cup unbleached all-purpose flour (95 grams)
- ⅓ cup semisweet or bittersweet chocolate chips
Mud Layer
- ½ cup peanut butter
- 1 ½ teaspoons vegetable oil or coconut oil
- 1-2 cups miniature marshmallows
- ½ cup chopped toasted pecan pieces or use more chocolate chips or peanuts
Chocolate Frosting
- 1 ⅓ cups stirred confectioners’ sugar (130 gram)s
- ⅛ teaspoon salt
- 3 tablespoons unsalted butter (42 grams)
- 3 tablespoons natural unsweetened cocoa powder (15 grams)
- 3 tablespoons evaporated milk plus more if needed
- ¾ teaspoon vanilla extract
Instructions
-
Preheat your oven to 350 degrees F (175°C). Prepare an 8-inch square baking pan by lining it completely with nonstick foil or parchment paper, ensuring an overhang on all sides to easily lift the bars out later. This step is crucial for effortless removal.
-
In a large saucepan, gently melt the unsalted butter over medium-low heat. Once melted, add the unsweetened cocoa powder and whisk continuously until the mixture is smooth and free of lumps. Remove the pan from the heat and stir in the granulated sugar and vanilla extract until well combined. Incorporate the large eggs one at a time, mixing thoroughly after each addition. Finally, stir in the salt, followed by the unbleached all-purpose flour, mixing just until the flour is fully blended and no dry streaks remain. Be careful not to overmix.
-
Evenly spread the rich brownie batter across the bottom of your prepared 8-inch pan. Sprinkle the semisweet or bittersweet chocolate chips over the batter. Bake for approximately 22 minutes, or until a wooden skewer inserted into the center comes out with moist crumbs attached, indicating a fudgy texture.
-
While the brownie layer is baking, prepare the mud layer. In a microwave-safe measuring cup or small bowl, combine the peanut butter and vegetable or coconut oil. Approximately one minute before your brownie layer is expected to finish baking, microwave the peanut butter mixture on high for about 20 seconds. This will soften it slightly, making it easier to spread smoothly.
-
Once the brownie is out of the oven, immediately pour and gently spread the softened peanut butter mixture evenly over the warm brownie layer. Then, generously sprinkle the miniature marshmallows on top, followed by the chopped toasted pecan pieces (or additional chocolate chips/peanuts if preferred). Return the pan to the oven and bake for an additional 3 minutes, or just until the marshmallows are puffed and lightly golden. Remove from the oven.
-
To prepare the luscious chocolate frosting, accurately weigh out the confectioners’ sugar. Sift the confectioners’ sugar into a large mixing bowl to prevent lumps, then add the salt. Ensure you have the bowl of sifted sugar and your hand-held electric mixer readily available, as the next steps will require quick action.
-
In a small saucepan, melt the 3 tablespoons of unsalted butter over medium heat, just until it begins to liquify. Stir in the natural unsweetened cocoa powder and the evaporated milk. Continue heating and stirring until the mixture just barely begins to boil. Immediately scrape this hot chocolate mixture into the large bowl with the confectioners’ sugar and salt, adding the vanilla extract as well. Using your hand-held electric mixer, beat the frosting ingredients until completely smooth and glossy. Work quickly at this stage, as the frosting will begin to set. Promptly pour the warm, smooth frosting evenly over the marshmallow layer, then gently tilt the pan in all directions to encourage the chocolate mixture to spread and fully cover the marshmallows from edge to edge.
-
Allow the finished **Small Batch Mississippi Mud Bars** to cool completely at room temperature. This will take several hours, and patience is key for the layers to properly set. Once cooled, cover the pan loosely with plastic wrap and transfer it to the freezer until the entire cake is firm, typically for 2-3 hours. Carefully lift the firm mud bar cake out of the pan using the foil or parchment overhang. Remove the foil/parchment paper and wrap the entire cake tightly in fresh plastic wrap, then an additional layer of foil if desired, to prevent freezer burn. Store frozen until approximately one hour before you plan to serve. When ready to serve, place the frozen cake on a sturdy cutting board. Using a sharp Chef’s Knife (wiping the blade with a warm, damp cloth between cuts helps achieve cleaner slices), cut the cake into your desired neat squares. Arrange the plated squares and allow them to come to room temperature for the ultimate soft, gooey, and rich experience. Enjoy every single layer!
Customizing Your Mississippi Mud Bars
While this classic recipe for **Small Batch Mississippi Mud Bars** is perfect as is, feel free to get creative with your toppings! You can experiment with different types of nuts like walnuts or slivered almonds. For an extra layer of flavor, consider adding a sprinkle of flaky sea salt over the chocolate frosting immediately after pouring it – the salt will beautifully enhance the chocolate notes. You could also try different types of chocolate chips in the brownie layer or even a drizzle of caramel over the finished bars for an added touch of luxury. The possibilities are endless when it comes to making this dessert truly your own.
Why You’ll Love This Small Batch Recipe
This recipe isn’t just about deliciousness; it’s about convenience and satisfaction without excess. The smaller portion size means less waste, quicker baking times, and the perfect amount of a rich, homemade treat. Whether you’re a seasoned baker or just starting, these **Small Batch Mississippi Mud Bars** offer an achievable way to create a truly impressive and incredibly tasty dessert. So go ahead, treat yourself and your loved ones to this delightful, multi-layered masterpiece.
