Spooky & Delicious: The Ultimate Creepy Chocolate Layer Cake for Halloween
Embrace the enchanting spirit of autumn and the playful frights of Halloween with a dessert that’s as captivating as it is delicious: the Creepy Chocolate Layer Cake. This isn’t just any chocolate cake; it’s a celebration of rich flavors and festive aesthetics, inspired by a classic “Tuxedo Cake” concept from Country Living’s iconic October cover cake. While the original might have been named for its elegant black-and-white contrast, our version takes a delightful detour into the spooky, transforming into a ghoulishly good treat perfect for any Halloween gathering.
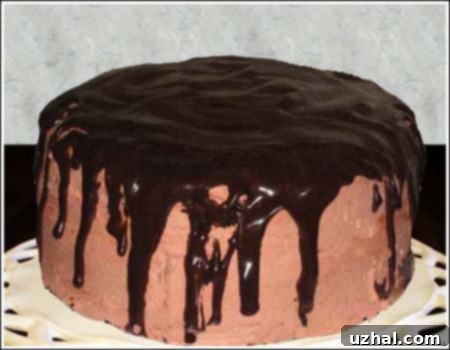
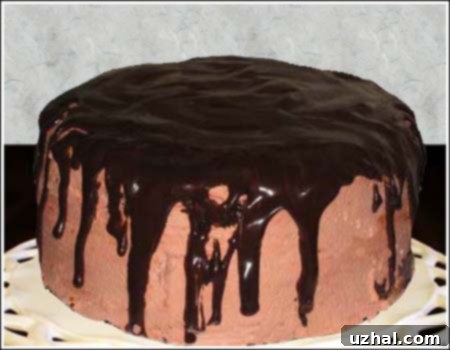
At its heart, this cake is a foundational double chocolate masterpiece, offering deep, satisfying cocoa notes in every bite. What elevates it to a Halloween-ready sensation is the vibrant, airy whipped cream frosting, which we’ve playfully tinted to a vivid orange – reminiscent of pumpkins, candy corn, and all things spooky season! The grand finale is a generous drizzle of luxurious chocolate glaze, cascading down the sides like melted darkness, creating a hauntingly beautiful contrast with the orange. While I’ve affectionately rebranded mine as the “Creepy Chocolate Layer Cake” (a nod to my decorating adventures), I have no doubt that with these detailed instructions and tips, your creation will be nothing short of spectacular.
Mastering the Art of Halloween Cake Presentation
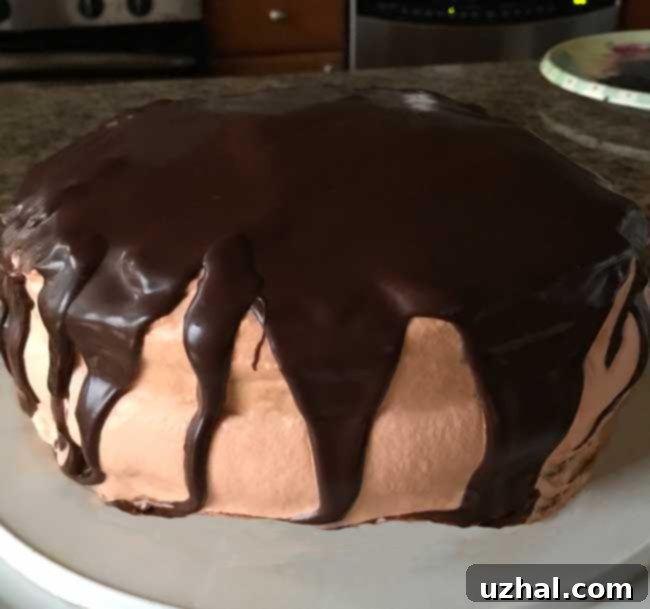
The visual appeal of a cake is almost as important as its taste, especially when it comes to festive occasions like Halloween. While my initial presentation might have been a quick setup on a simple cake carrier base, with a hasty attempt to clean up errant ganache drips (a common baking reality!), I’ve learned a lot along the way. Planning ahead for your cake’s display can transform it from a simple dessert into the centerpiece of your Halloween feast. Imagine this stunning Creepy Chocolate Layer Cake not just sitting pretty, but truly shining on a specially selected Halloween platter, perhaps adorned with an eerie spiderweb design or playful ghost motifs. To further enhance its spooky charm, consider arranging a perimeter of classic Halloween candies like vibrant candy corn or even small chocolate bats around the base. The contrast of the orange and dark chocolate against festive decor will undoubtedly impress your guests.
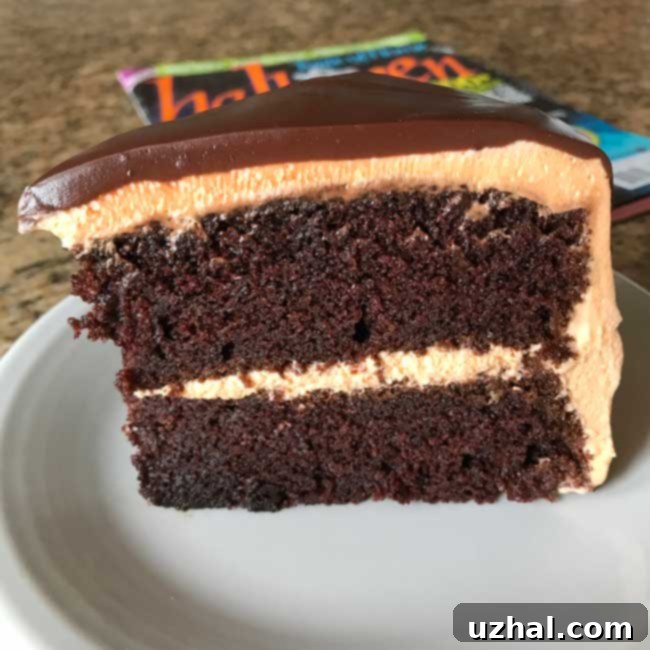
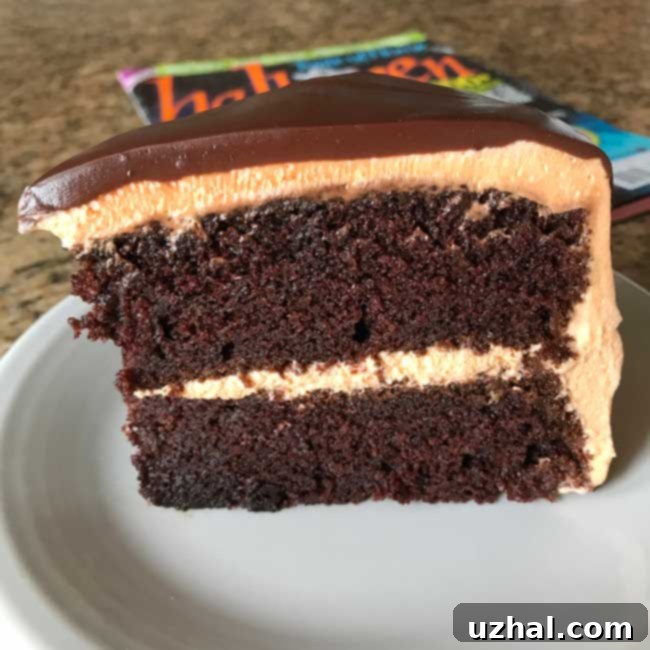
But beyond the external flourishes, the true beauty of this cake often reveals itself in the slice. Each cross-section showcases the distinct layers: the rich, dark chocolate cake, the bright pop of orange whipped cream, and the glossy sheen of the chocolate glaze. This layered effect is inherently dramatic and satisfying, promising a delightful combination of textures and flavors in every forkful. Don’t be discouraged if your initial drizzle isn’t perfectly symmetrical; the slightly “creepy” aesthetic of a less-than-perfect ganache can actually add to the Halloween theme! A perfectly sliced piece allows everyone to appreciate the distinct elements, from the moist cake to the fluffy frosting and the decadent topping, making the eating experience just as visually pleasing as it is delicious.
Achieving the Perfect Orange Tint for Your Halloween Dessert
One of the most exciting aspects of creating a Halloween-themed cake is playing with colors. For this Creepy Chocolate Layer Cake, achieving just the right shade of vibrant orange for the whipped cream frosting is key to its festive appeal. In my latest baking endeavor, I opted for Wilton gel food coloring, which was conveniently available in the Halloween baking aisle at my local Target. Gel food colorings are fantastic because they deliver intense color without significantly altering the consistency of your frosting, unlike liquid dyes which can thin it out. While I initially sought a deeper orange paste from a specialty craft store like Michael’s for a truly intense pumpkin hue, the Wilton gels provided a beautifully vibrant shade that I was very pleased with, proving that accessible options can still deliver impressive results.
When coloring whipped cream, a little goes a long way. Always start with a tiny amount on the tip of a toothpick and gradually add more, mixing thoroughly after each addition, until you reach your desired shade. Remember, the color often deepens slightly as it sets, so it’s better to err on the side of caution. If you don’t have orange specifically, don’t despair! You can easily create a custom orange by mixing red and yellow food coloring. Begin with a small drop of red, then slowly add yellow until you achieve a warm, pumpkin-like orange. This careful attention to color ensures your cake truly pops and captures the essence of Halloween. After all, a perfectly tinted frosting can make all the difference, transforming a simple dessert into a show-stopping seasonal treat that’s sure to delight both trick-or-treaters and party guests.
Essential Recipe Notes for Your Creepy Chocolate Layer Cake
Crafting the perfect Creepy Chocolate Layer Cake is a joyful journey, and these detailed notes are here to guide you, offering insights and tips gathered from experience. Whether you’re a seasoned baker or just starting out, these pointers will help ensure your cake is a resounding success, offering a delicious and visually stunning treat for any Halloween celebration.
- Flexible Frosting Options: While the orange whipped cream and decadent chocolate glaze truly elevate this recipe to a Halloween showstopper, the chocolate layer cake itself is remarkably delicious and stands strong on its own. If you’re short on time, prefer a less rich dessert, or are aiming for simplicity, feel free to skip the frosting and topping. The cake layers are incredibly moist, rich, and flavorful enough to be enjoyed plain, perhaps with a dusting of powdered sugar, a sprinkle of cocoa, or a simple scoop of vanilla ice cream. This base cake component is also quite forgiving, requiring no electric mixer for its preparation, making it an excellent choice for a quick chocolate fix any time of year.
- Whipping Up the Perfect Cream: For a cake of this size, approximately 2 cups of chilled heavy whipping cream combined with ½ cup of powdered sugar should yield a generous amount of beautifully whipped cream. This quantity is typically sufficient to create a luscious, even layer between the cake tiers and adequately cover the entire exterior, with possibly a little extra for any last-minute adjustments or a celebratory dollop on individual servings. To achieve the best possible volume and stability, always start with very cold cream and use a chilled mixing bowl and whisk. This helps the cream whip up faster and maintain its airy, cloud-like peaks more effectively.
- Crafting the Ideal Chocolate Glaze: The rich, glossy chocolate glaze is crucial for that “tuxedo” effect and the signature spooky drizzle. Using 4 ounces of high-quality semisweet or bittersweet chocolate (like Ghirardelli, which I’ve used with great success) will provide just the right amount of glaze to elegantly cover the top of your cake and artfully drip down the sides. For a truly luxurious and perhaps even creamier finish with nuanced flavor, I’m eager to experiment with using Dove Promises chocolate for the glaze in future attempts. Remember, the quality of your chocolate makes a significant difference in the final taste, texture, and sheen of the ganache, so invest in a good brand if possible.
- Lyle’s Golden Syrup Alternatives: Lyle’s Golden Syrup, with its unique buttery caramel notes, adds a wonderful depth of flavor and a beautiful, smooth shine to the chocolate glaze. It’s becoming increasingly available in most grocery stores, often found in the baking aisle near other liquid sweeteners or honey. However, if you find yourself unable to locate it, regular corn syrup makes an excellent and readily available substitute. While the flavor profile will be slightly different (corn syrup is more neutral), it will still provide the necessary body, gloss, and pourable consistency for a beautiful, professional-looking glaze.
Why This Creepy Chocolate Layer Cake is Your Ultimate Halloween Treat
This Creepy Chocolate Layer Cake isn’t just a dessert; it’s an experience designed to capture the magic and mystery of Halloween. It brings together several elements that make it perfect for the season, whether you’re hosting a grand, costume-filled party or enjoying a cozy, spooky movie night in. The deep, dark chocolate layers provide a mysterious and inviting base, perfectly embodying the spirit of the season with their rich, comforting flavor. The vibrant orange whipped cream adds a playful, festive contrast, ensuring that every slice is as visually appealing as it is delicious. And the rich, shimmering chocolate ganache, artfully drizzled over the top, provides that final touch of decadence and dramatic flair, creating an irresistible treat.
Beyond its striking appearance, the cake’s flavors are a harmonious blend of classic comfort and holiday cheer. The chocolate is intense but beautifully balanced, complemented perfectly by the light, sweet cream. It’s a cake that appeals to all ages and palates, making it a crowd-pleasing choice for any Halloween event. Plus, the satisfaction of creating such an impressive dessert from scratch is a reward in itself. This recipe offers a wonderful opportunity to get creative in the kitchen, experimenting with decoration and truly making it your own spooky masterpiece that will be remembered long after the last bite.
Tips for Decorating Your Spooky Masterpiece
While the recipe provides the foundation for an incredible cake, the real magic of a Halloween dessert often lies in its decoration. Beyond the simple perimeter of candy corn mentioned earlier, consider these creative ideas to truly make your Creepy Chocolate Layer Cake shine as the star of your Halloween table:
- Edible Decorations: Elevate your cake with themed edible elements. Think small sugar spiders strategically placed on the glaze, delicate ghost meringues popping out from the whipped cream, or even chocolate-dipped pretzel “witch fingers” arranged around the base. These small details can make a huge impact.
- Themed Sprinkles: A simple yet effective way to add flair is with Halloween-themed sprinkles. Look for mixtures featuring bats, pumpkins, spooky eyes, or even classic black and orange jimmies. They add an extra layer of festivity and delightful texture to each bite.
- Chocolate Shavings or Curls: For a more sophisticated yet still seasonal look, sprinkle dark chocolate shavings or elegant chocolate curls on top of the ganache or along the edges of the cake. This adds a touch of gourmet appeal while enhancing the rich chocolate flavor.
- Stencils for Spooky Designs: Before the glaze fully sets, or even on top of the set glaze, you can use a stencil to create a spiderweb or pumpkin silhouette. Simply place a stencil over the cake and dust lightly with cocoa powder (for a lighter contrast) or powdered sugar (for a more pronounced, ghostly effect).
- Dramatic Dry Ice Effect: For a truly theatrical and dramatic presentation, carefully place small pieces of dry ice in a larger bowl filled with warm water beneath your cake stand. The resulting eerie, swirling mist will create a mystical ambiance. Always ensure guests are aware of the dry ice and instruct them to avoid direct contact, handling it only with gloves.
Remember, the goal is to have fun and let your creativity flow. There’s no right or wrong way to decorate for Halloween; the more imaginative, the better!
Storage and Make-Ahead Tips for Your Halloween Cake
To ensure your Creepy Chocolate Layer Cake remains fresh, moist, and absolutely delicious for your Halloween festivities, proper storage is paramount. Because this cake features a luscious whipped cream frosting, it’s best stored in the refrigerator. An airtight cake dome or a large, securely sealed container will prevent the cake from drying out, absorbing any unwanted refrigerator odors, and keep the frosting perfectly firm. When properly stored, your cake will maintain its delightful taste and texture for up to 3-4 days, allowing you to enjoy it throughout the Halloween weekend.
For those who love to plan ahead and minimize stress on the day of your celebration, you can certainly bake the chocolate cake layers a day in advance. Once they are completely cooled to room temperature, wrap each layer tightly in plastic wrap to prevent moisture loss and store them at room temperature. The chocolate ganache can also be prepared a day ahead of time and stored in an airtight container in the refrigerator. When you’re ready to assemble, gently reheat the chilled ganache over a double boiler or in the microwave on low power, stirring frequently, until it returns to a smooth, pourable consistency. The whipped cream frosting, however, is best made fresh just before assembly for optimal texture, volume, and airiness, ensuring that light, fluffy quality that makes this cake so irresistible.
- Mini Halloween Oreo Cheesecakes
- Chocolate Peanut Butter Squares
- Happy Halloween!
- Candy Corn Oreos Halloween Cookie Bark
- Halloween Candy Recipes
Recipe
Creepy Chocolate Layer Cake
Cookie Madness
Pin Recipe
Ingredients
Cake Layers
- ¾ cup unsweetened cocoa powder
- ¾ cup scalding hot coffee (enhances chocolate flavor)
- 1 cup buttermilk (at room temperature)
- 1 cup canola oil (or other neutral vegetable oil)
- 4 large eggs (at room temperature)
- 1 teaspoon vanilla extract
- 2 cups granulated sugar
- 2 cups all-purpose flour (approximately 9 oz by weight for accuracy)
- ½ teaspoon salt
- 2 teaspoons baking soda
Vibrant Orange Whipped Cream Icing:
- 2 cups chilled heavy whipping cream
- ½ cup powdered sugar
- 1 ½ teaspoon vanilla extract
- Orange gel food coloring (Wilton or similar brand recommended)
Decadent Chocolate Glaze Topping:
- 4 ounces bittersweet or semisweet chocolate (high-quality, finely chopped)
- ½ cup heavy whipping cream
- ¼ cup Lyle’s Golden Syrup (or corn syrup as a substitute)
- 2 teaspoons vanilla extract
Instructions
-
Preheat your oven to 350 degrees F (175 degrees C). Prepare two 9-inch round cake pans by greasing them thoroughly and dusting with flour (or cocoa powder for a darker cake and easier release).
-
In a heatproof bowl or small saucepan, combine the cocoa powder with the scalding hot coffee. Stir meticulously until the mixture is completely smooth and free of any lumps. Set aside to cool slightly.
-
In a large mixing bowl, whisk together the buttermilk, canola oil, large eggs, and vanilla extract until well combined and uniform in color.
-
In a separate, medium-sized bowl, thoroughly combine all the dry ingredients: granulated sugar, all-purpose flour, salt, and baking soda. Whisk them together to ensure even distribution.
-
Gradually add the dry ingredients mixture to the wet buttermilk/oil mixture. Stir gently using a spoon or spatula just until combined. Next, pour in the cocoa/coffee mixture. Continue stirring just enough to get rid of any remaining lumps, but be careful not to over-beat the batter, which can lead to a dry cake.
-
Divide the prepared batter evenly between your two greased and floured cake pans. Bake in the preheated oven for approximately 25-30 minutes, or until a wooden pick inserted into the center of the cakes comes out clean. If you are using a slightly lower oven temperature or different pans, the baking time may vary (e.g., up to 37 minutes). Allow the cakes to cool in their pans for 10 minutes before carefully inverting them onto wire racks to cool completely. Ensure cakes are fully cooled before proceeding with frosting.
-
For the Frosting: In a large, chilled bowl, whip the heavy cream on high speed using an electric mixer until soft peaks begin to form. Gradually add the powdered sugar and continue whipping until the mixture is thoroughly combined and holds firm peaks. Now, it’s time for the Halloween magic! Add orange gel food coloring (start with a tiny amount on a toothpick and add more as needed) until you achieve a vibrant orange hue. Frost the cooled cake layers generously with this colorful whipped cream, stacking them carefully to create an impressive multi-layered dessert. Place the frosted cake in the refrigerator to chill for at least an hour. This step is crucial for the whipped cream to firm up, making it easier to handle and preventing the chocolate topping from melting it.
-
For the Glaze: Place the finely chopped bittersweet or semisweet chocolate in a medium-sized heatproof bowl or a 2-cup glass measuring cup. In a small saucepan over medium heat (or in the microwave in short bursts), gently heat the ½ cup of heavy whipping cream until it is very hot and just beginning to steam, but not boiling. Pour the hot cream directly over the chopped chocolate and let it sit undisturbed for about 5 minutes to allow the chocolate to melt. Then, stir gently with a whisk or spatula until the chocolate is completely melted and the mixture is smooth and glossy. Stir in the Lyle’s Golden Syrup (or corn syrup) and vanilla extract. Allow the glaze to cool for approximately 10-15 minutes, stirring occasionally, until it has thickened slightly but is still pourable – it should resemble a thick syrup. Do not let it cool too long, or it will become too stiff to pour effectively.
-
Once the cake is chilled and the glaze is at the right consistency, carefully pour the chocolate glaze over the center of the chilled cake. Use an offset spatula or the back of a spoon to gently guide the glaze towards the edges, allowing it to slowly and artfully drizzle down the sides. For a truly “creepy” effect, some uneven drips are perfectly desirable and add to the homemade charm!
-
Return the completed cake to the refrigerator. Chill for at least 1 hour, or until the chocolate glaze has fully set and the whipped cream frosting is firm. This ensures clean slices and a delightful eating experience. Serve chilled and enjoy your ghoulishly good Halloween treat!
