Whimsical & Delicious: How to Bake Adorable Horse-Shaped Cookies
Baking is often an adventure, a journey that can take unexpected and delightful turns. What starts as one idea can beautifully evolve into something entirely new and even more captivating. This is precisely how our charming horse-shaped cookies came to be! Originally, the plan was to bake Kiss the Blarney Stone Cookies, but somewhere in the creative process, a spark ignited, and those simple cookie shapes began to transform. A little imagination, a dash of spontaneity, and suddenly, we had a galloping herd of adorable, edible horses.
These aren’t just any cookies; they’re a testament to the fun of creative improvisation in the kitchen. And honestly, we think these horse cookies are even more captivating!
The Inspiration: From Blarney Stones to Galloping Hooves
The genesis of these delightful treats lies in a moment of playful boredom during a baking session. While crafting what were meant to be simple “Blarney Stone” shapes, the creative urge took over. Instead of perfectly round or oblong stones, the dough pieces, with a few strategic adjustments, started resembling the elegant heads of horses. It’s a wonderful reminder that sometimes the best recipes and ideas come from unexpected detours. This transformation proves that with a little creativity, a basic cookie dough can become a canvas for endless possibilities, making baking not just about following instructions, but about discovering new joys.
Crafting Your Equine Delights: The Perfect Sugar Cookie Base
To ensure your horse cookies are not only adorable but also delicious, we start with a reliable sugar cookie dough recipe. This base is firm enough to hold its shape during baking, yet soft and tender to eat. While the original inspiration came from another recipe, we’ve outlined a standard sugar cookie recipe here to make this guide complete and easy to follow. You’ll want a dough that is not too sticky and holds its form well for intricate shaping.
Ingredients for Our Go-To Sugar Cookie Dough:
- 1 cup (226g) unsalted butter, softened
- 1 ½ cups (300g) granulated sugar
- 1 large egg
- 1 teaspoon vanilla extract
- 2 ½ cups (320g) all-purpose flour
- 1 teaspoon baking powder
- ½ teaspoon salt
Instructions for Preparing the Dough:
- Cream Butter and Sugar: In a large mixing bowl, using an electric mixer, cream together the softened butter and granulated sugar until light and fluffy, about 2-3 minutes.
- Add Wet Ingredients: Beat in the egg and vanilla extract until well combined. Scrape down the sides of the bowl as needed.
- Combine Dry Ingredients: In a separate bowl, whisk together the flour, baking powder, and salt.
- Gradually Add Dry to Wet: Slowly add the dry ingredients to the wet ingredients, mixing on low speed until just combined. Be careful not to overmix, as this can result in tough cookies. The dough should come together but still be soft.
- Chill the Dough: Divide the dough into two equal portions. Flatten each portion into a disk, wrap tightly in plastic wrap, and refrigerate for at least 30 minutes, or up to 2 hours. Chilling is crucial for easy handling and to prevent the cookies from spreading too much during baking.
Step-by-Step Guide to Shaping Your Horse Cookies
This is where the magic truly happens! The process of shaping these horse heads is surprisingly simple and incredibly fun. Forget complex cookie cutters; this method uses simple cuts and presses to bring your equine visions to life.

Shaping Instructions:
- Prepare Your Dough: Once chilled, unwrap your dough and, on a lightly floured surface, roll it out to about ¼-inch thickness. You want it thick enough to hold shape but not overly bulky.
- Create the Base Shapes: Using a knife or a straight-edged pastry cutter, cut your rolled-out dough into rectangular or slightly oval “slices.” These will form the main body of the horse’s head and neck. Aim for slices roughly 2-3 inches long and 1.5-2 inches wide.
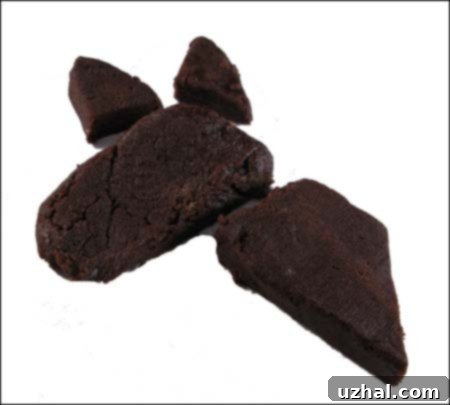
- Form the Head and Neck: Lay two of these dough slices adjacent to each other on your prepared baking sheet (lined with parchment paper). One slice will form the lower neck and chest, while the other will be the head and upper neck. Gently press the sides together where they meet to ensure they adhere.
- Sculpt the Snout: Take the slice intended for the head (typically the one on the right, if you’re orienting your horses to face left). Gently trim off its right corner with a knife. This cut creates a more defined angle for the horse’s snout and forehead. Don’t discard the trimmed corner!
- Craft the Ears: Take that trimmed corner piece of dough. Using your knife, cut it into two small, roughly triangular shapes. These will become the horse’s ears.
- Attach the Ears: Carefully press these two little triangles onto the top of the horse’s head, where the ears should naturally be. A tiny dab of water can help them adhere if your dough isn’t sticky enough. Gently pinch and smooth the edges to integrate them seamlessly.
- Refine the Shape: Use your fingers to gently smooth out any rough edges or blend the joined pieces. You can subtly curve the neck or define the snout further.
- Repeat: Continue shaping the rest of your cookies, placing them about 1 inch apart on the baking sheet.
Baking Your Equine Masterpieces
Once your horse cookies are beautifully shaped, it’s time to bake them to golden perfection. Proper baking ensures they are firm enough for decorating but still delightfully tender to bite into.
- Preheat Oven: Preheat your oven to 375°F (190°C).
- Bake: Bake the cookies for 8-10 minutes, or until the edges are lightly golden and the centers are just set. Baking time may vary depending on the size and thickness of your cookies.
- Cool: Let the cookies cool on the baking sheet for 5 minutes before carefully transferring them to a wire rack to cool completely. It’s crucial that the cookies are entirely cool before you begin decorating, otherwise, your icing will melt and run.
The Art of Decoration: Bringing Your Horses to Life
This is where your horse cookies truly come to life, transforming from simple baked goods into characters with personality. The key elements are the eyes, mane, and bridle, all brought to you by a simple yet effective homemade icing.
The Eye: A Window to the Soul
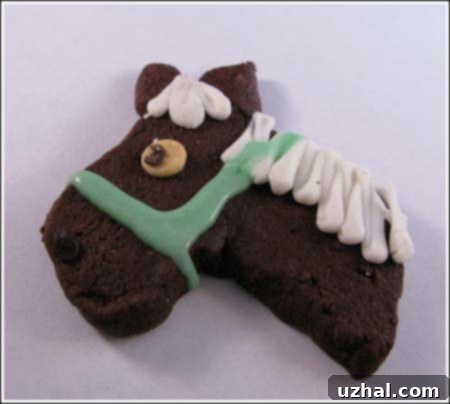
The eye is a small detail that makes a huge impact. For this, we use an inverted white chocolate chip as the base. Simply press a white chocolate chip, upside down, onto the cooled cookie where the eye should be. The flat, wide side will serve as the white of the eye. Then, use a small dot of brown icing in the center of the white chocolate chip to create the pupil. This method gives the eye a lovely dimension and shine.
Our Simple & Versatile Cookie Icing Formula:
This easy icing recipe is perfect for piping details and can be doubled if you’re making a large batch of cookies.
- 1 tablespoon melted butter
- 1 cup powdered sugar (confectioners’ sugar)
- ¼ teaspoon vanilla extract
- 1-2 tablespoons milk (start with 1, add more as needed)
Instructions for Preparing and Applying Icing:
- Mix Ingredients: In a small bowl, combine the melted butter, powdered sugar, and vanilla extract. Stir thoroughly until a thick, smooth paste forms.
- Adjust Consistency: Gradually add milk, a teaspoon at a time, stirring well after each addition, until you reach a smooth, pipeable consistency. For fine details like manes and bridles, you want it thick enough to hold its shape but fluid enough to pipe easily. For flooding areas (if you desired to color the horse’s head), you would thin it a bit more.
- Coloring: Divide the icing into separate bowls if you plan to use different colors. Add a few drops of food coloring (gel colors work best for vibrant hues without thinning the icing too much) to each portion and mix until you achieve your desired shade. For the horse’s mane and bridle, natural colors like brown, black, or even a soft gray work beautifully.
- Prepare for Piping: Spoon the colored icing into small plastic baggies (like sandwich bags or snack bags). Push the icing to one corner of the bag.
- Pipe Details: Snip a tiny piece off the very bottom corner of each baggie. This creates a makeshift piping bag. Now, carefully pipe out the details: draw expressive manes, elegant bridles, and any other decorative elements you wish to add. Let your creativity run wild!
- Allow to Set: Let the iced cookies sit at room temperature for at least 1-2 hours, or until the icing has hardened completely. This prevents smudging when handling or storing.
Beyond Horses: Creative Cookie Variations
The beauty of this shaping technique is its versatility! You can easily modify these basic horse shapes to create an array of other delightful animal cookies. With a few minor adjustments, your baking sheet can become a mini-menagerie:
- Donkeys: To make donkeys, simply elongate the ears slightly and make them a bit narrower. You might also add a small tuft of icing hair at the very top of the head.
- Schnauzers: For the beloved schnauzer, focus on shaping a more prominent, square-ish snout. The key to their look lies in adding lots of textured icing for their distinctive beard and bushy eyebrows. The ears would be smaller and folded down, or short and pointed if you prefer a cropped look.
- Great Danes: If you’re a fan of larger breeds, the Great Dane can be achieved by making a larger overall head. Emphasize a longer, more elegant neck and keep the ears either naturally folded or pointed upwards for a cropped appearance, using icing to define the lines.
- Other Animals: Think about other animals that have similar head structures. A cow with horns and spots, a giraffe with ossicones, or even a whimsical unicorn with a piped horn and colorful mane are all within reach using this adaptable method.
Experiment with different icing colors and details to truly bring each animal to life. These creative variations make these cookies perfect for themed parties, pet lover gatherings, or just a fun afternoon baking activity with children.
Tips for Perfect Animal Cookies Every Time
- Don’t Overmix Dough: Overmixing develops gluten, leading to tougher cookies. Mix until just combined.
- Chill Thoroughly: Properly chilled dough is essential for preventing spread and ensuring your intricate shapes hold.
- Flour Lightly: When rolling out dough, use just enough flour to prevent sticking. Too much flour can dry out the dough.
- Even Thickness: Aim for uniform dough thickness so all cookies bake evenly.
- Cool Completely: Always ensure cookies are completely cooled before decorating to prevent icing from melting or sliding off.
- Store Properly: Once decorated and the icing is set, store your horse cookies in an airtight container at room temperature for up to a week, or freeze them for longer storage.
Unleash Your Inner Baker and Create Joyful Treats!
These adorable horse-shaped cookies are more than just a sweet treat; they’re a celebration of creativity and the simple joys of homemade baking. Whether you’re making them for a special occasion, a child’s birthday, or just to brighten an ordinary day, their whimsical charm is sure to bring smiles. They’re surprisingly easy to make and offer endless possibilities for personalization. So, roll up your sleeves, gather your ingredients, and embark on your own delightful baking adventure. We encourage you to try shaping these charming equine friends – or even experiment with your own animal creations!
Happy baking, and may your cookies gallop straight into everyone’s hearts!
