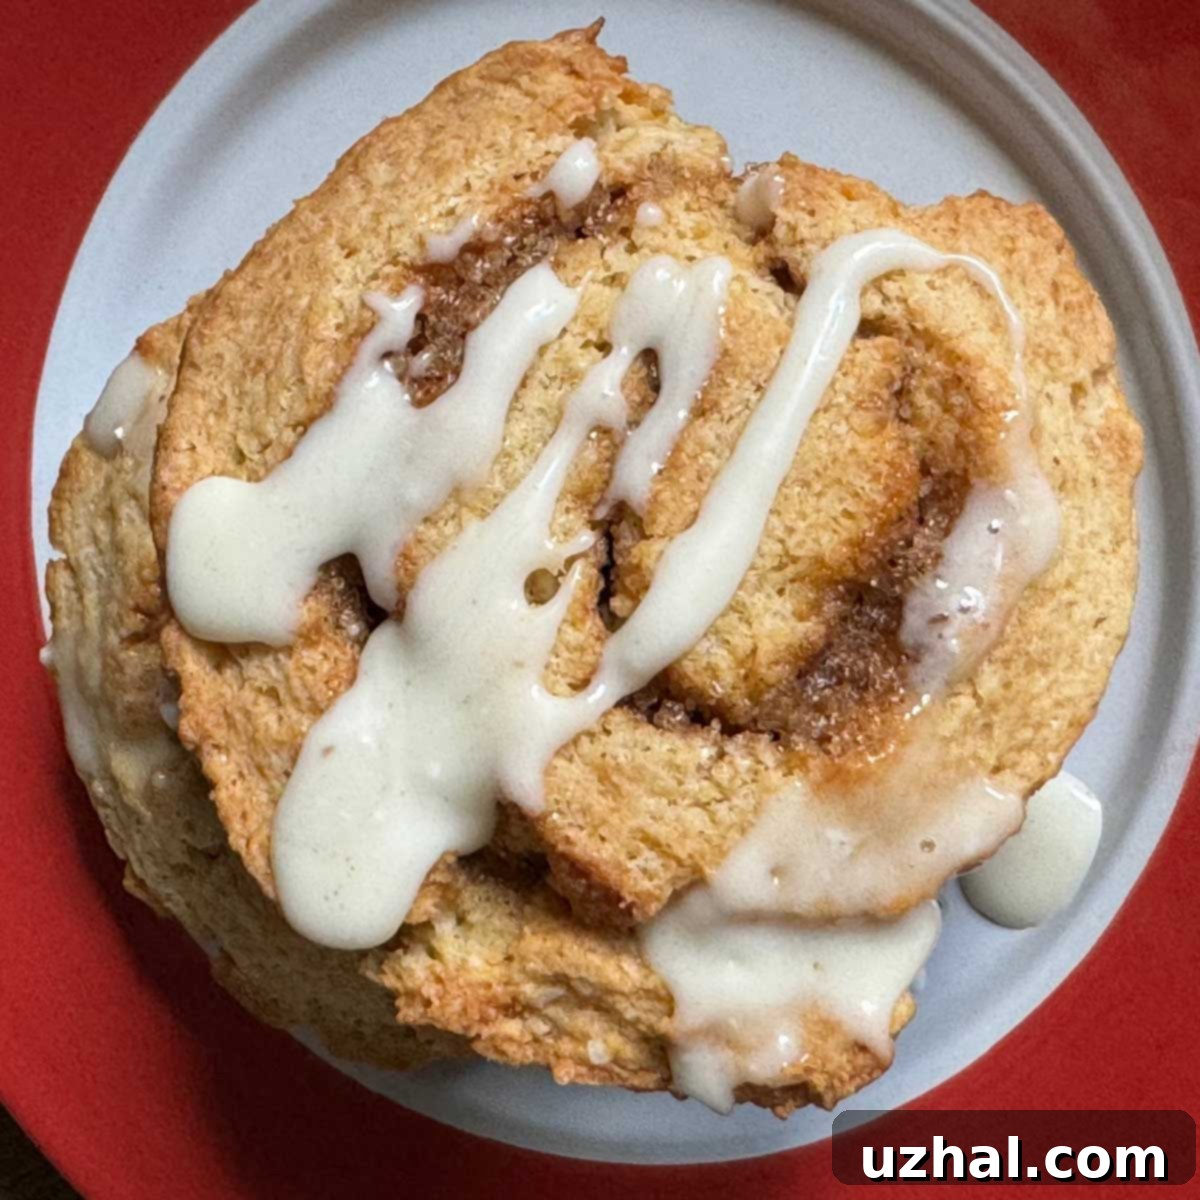
Alice’s Tea Cup Cinnascones: The Ultimate Scone & Cinnamon Roll Hybrid Recipe
Years ago, a visit to the whimsical Alice’s Tea Cup restaurant in New York City introduced me to a culinary marvel: Cinnascones. These aren’t just any pastries; they are an ingenious creation, a delightful cross between the tender, flaky texture of a scone and the warm, spiced sweetness of a cinnamon roll. Crafted by their talented Chef Oliver, Cinnascones offer the best of both worlds, making them an unforgettable treat. The moment I tasted them, I knew I had to get my hands on their cookbook to recreate this magic at home. The process involves rolling or pressing scone dough into a rectangle, spreading it generously with a rich brown sugar and cinnamon paste, rolling it into a tight spiral, and then cutting and baking it just like you would a classic cinnamon roll.
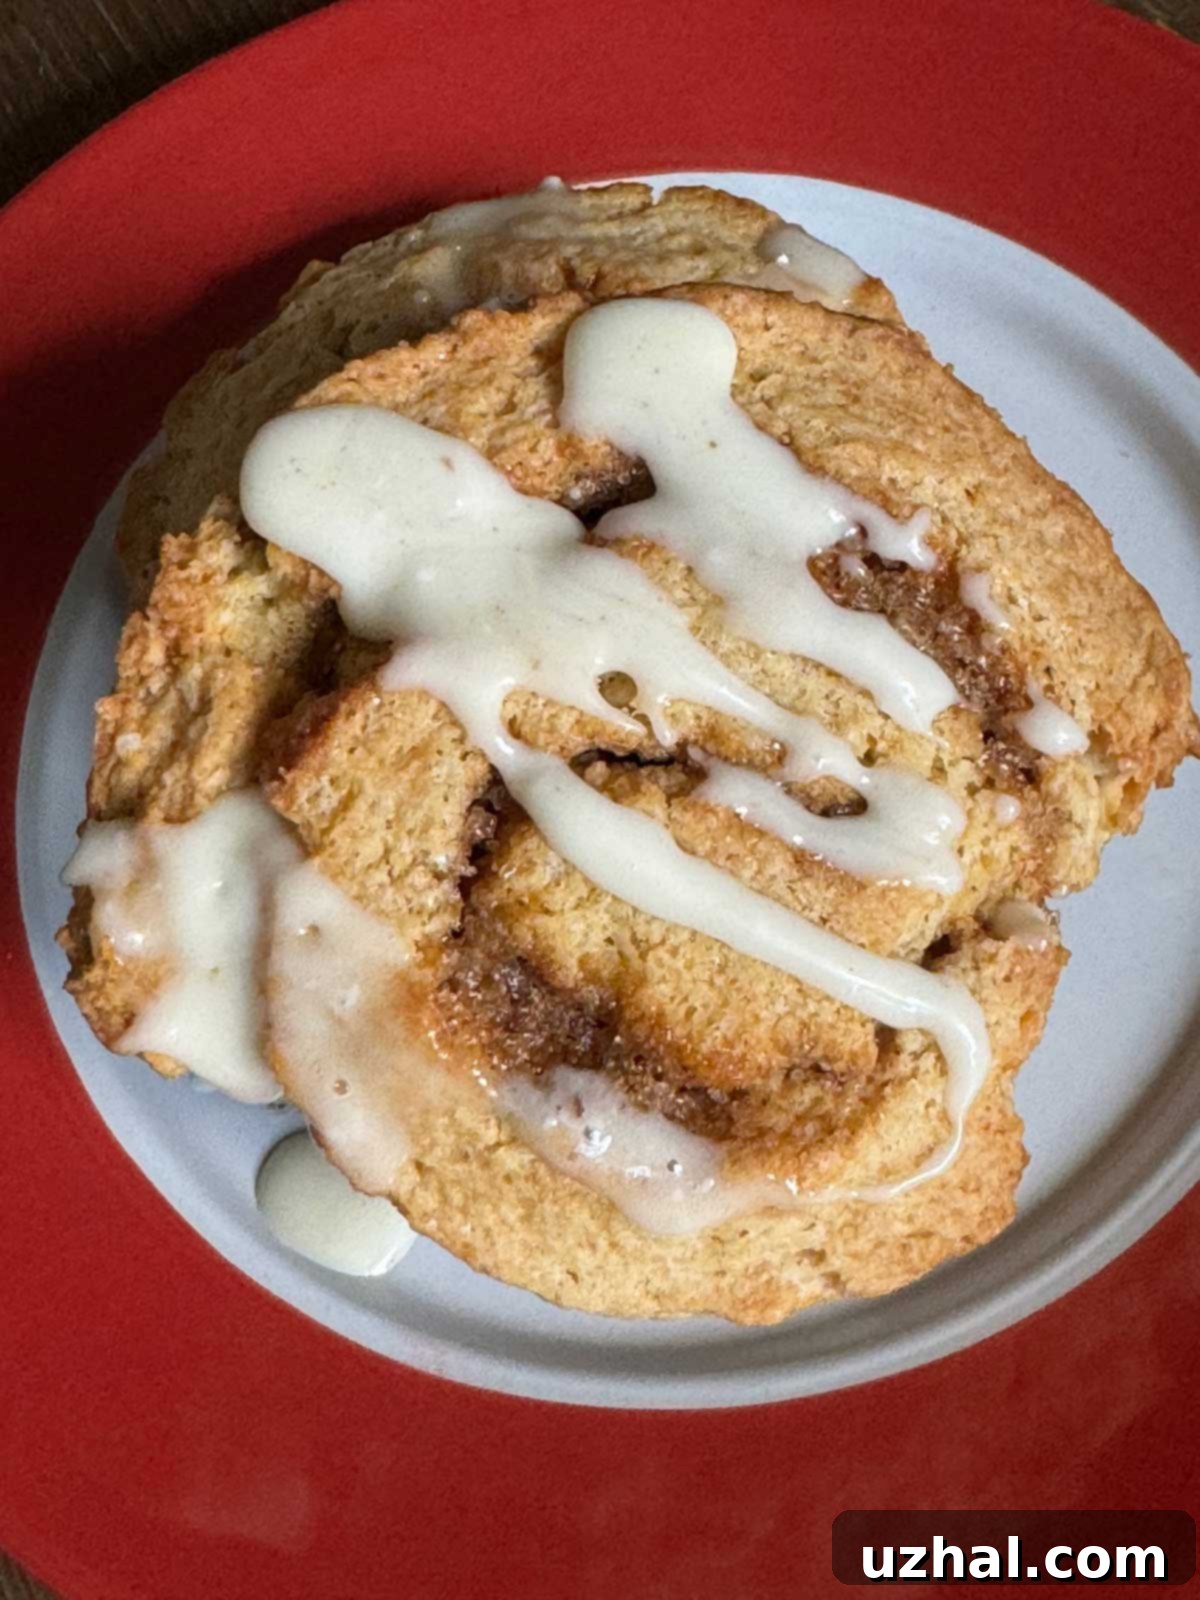
The Irresistible Allure of Cinnascones: A Culinary Fusion
What makes Cinnascones so special? It’s their unique ability to bridge the gap between two beloved pastries. Traditional scones are celebrated for their simple elegance, a light crumb, and a delightful flakiness, often served with clotted cream and jam. Cinnamon rolls, on the other hand, are indulgent spirals of soft, yeasted dough, generously filled with butter, brown sugar, and cinnamon, then usually slathered with a sweet glaze. Chef Oliver’s Cinnascones ingeniously combine the tender, biscuit-like crumb and quick-bread nature of a scone with the irresistible spiced swirl and decadent icing of a cinnamon roll. This means you get the convenience of a scone’s quicker preparation time without sacrificing the intricate flavor and visual appeal of a cinnamon roll. It’s a perfect solution for those seeking a unique breakfast or brunch item that truly stands out.
Mastering the Scone Dough: Tips for Perfect Texture
Achieving the right consistency for your scone dough is paramount to the success of your Cinnascones. It’s a journey that often requires a bit of practice and an understanding of the key ingredients and techniques. One of the primary considerations is the liquid component.
Buttermilk and Butter: The Keys to a Tender Crumb
The original Alice’s Tea Cup recipe suggests ½ cup of buttermilk. My experience has taught me that the exact amount needed can fluctuate based on environmental factors like humidity and the specific brand of flour. The key is to add the buttermilk gradually. Start with half, then slowly incorporate the rest, using only as much as necessary for the dough to come together. You want a dough that is cohesive but still a little shaggy, not overly sticky or dry.
A food processor can be an invaluable tool for this step, as it quickly blends the ingredients without overworking the dough or allowing the butter to warm up too much. If you’re making the Cinnascones without a food processor, you’ll need to be mindful of your hand temperature. The goal is to keep the butter cold. Using a pastry blender or the “claw hands” technique (lightly rubbing the butter into the flour with your fingertips) works well. It’s crucial that the butter remains cold, as this is what creates those delightful pockets of steam during baking, leading to a wonderfully flaky texture. While butter does need to soften slightly to meld with the flour, ensure it doesn’t become too warm or oily before baking, which would result in a denser, less airy scone.
Flavor Beyond Compare: The Cinnascone’s Aromatic Profile
The flavor of these Cinnascones is anything but subtle. They are generously infused with aromatic spices, making every bite a fragrant delight. The thoughtful inclusion of cinnamon in both the dough and the filling ensures a deep, rich, and consistent flavor throughout the pastry.
Spice and Extract Choices for Enhanced Taste
In addition to the double layer of cinnamon, the dough is also graced with ground nutmeg, adding a warm, complex note that complements the cinnamon beautifully. The recipe also offers a choice between vanilla or almond extract. While both are excellent, offering distinct aromatic qualities, our preference often leans towards vanilla. Vanilla extract provides a classic, universally appealing warmth that enhances the spices without competing with them. Almond extract, on the other hand, imparts a slightly nutty, more intense aroma that some bakers adore. Feel free to choose the one that best suits your palate or even experiment with a combination of both!
And then there’s the icing. While it might seem like a simple finishing touch, the icing for Cinnascones is absolutely integral to their overall sweetness and flavor balance. It adds a lovely creamy texture, a burst of sweetness, and helps to keep the pastry moist. Trust me, skipping the icing would be a missed opportunity to experience the Cinnascones in their full glory.
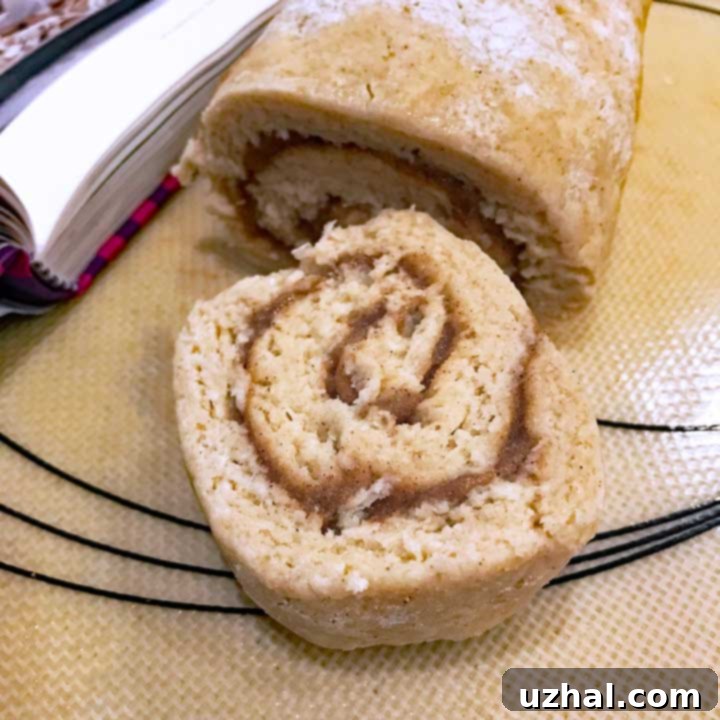
The Art of Shaping: Creating the Signature Spiral
The visual appeal of Cinnascones, with their distinct spiral, is just as delightful as their taste. Achieving this signature shape requires a careful yet simple process.
Rolling, Filling, and Chilling for Success
Once your scone dough is perfectly mixed, turn it out onto a lightly floured pastry mat or work surface. Using a floured rolling pin, gently roll the dough into a rectangular shape, aiming for roughly 10×11 inches and about ½ inch thick. Consistency in thickness is important here for even baking. Next, take your prepared brown sugar and cinnamon paste and spread it evenly across the entire surface of the dough rectangle, leaving a narrow border (about ½ inch) free along one of the longer (11-inch) sides. This border helps to seal the roll effectively.
Starting from the long side opposite the unfilled border, carefully and tightly roll the dough into a long, uniform cylinder. The tighter the roll, the more distinct your spirals will be. If, during this rolling process, the dough begins to feel too soft or difficult to handle, don’t hesitate to place the entire rolled cylinder into the freezer for about 15 minutes. This quick chill will firm up the butter and make slicing much cleaner and easier, preventing the layers from smushing together.
Slicing and Preparing for the Oven
Using a very sharp knife (or even a piece of unflavored dental floss for exceptionally clean cuts), slice the cylinder into 10 equally thick disks, each approximately 1 inch thick. Arrange these disks on their sides on your parchment-lined baking sheet, ensuring they are spaced about two inches apart to allow for proper expansion during baking. For a slightly wider, more scone-like base, gently press the top of each disk with the palm of your hand to flatten it to about ½ inch thick. Alternatively, you can leave them thicker if you prefer a taller, more robust scone.
Baking Perfection: The Two-Stage Temperature Method
The baking process for Cinnascones is a critical step that ensures they achieve a beautifully golden exterior and a tender, fully cooked interior. The Alice’s Tea Cup recipe employs a clever two-stage temperature method that makes all the difference.
The Initial High Heat for Oven Spring
Before placing your Cinnascones into the oven, preheat it to a hot 400 degrees Fahrenheit (200°C). This initial high temperature is vital for what bakers call “oven spring.” The intense heat causes the cold butter within the dough to rapidly melt and release steam, which then helps the Cinnascones rise quickly and dramatically. This rapid expansion creates those coveted flaky layers and a light, airy texture characteristic of well-made scones. As soon as you place the baking sheet with your prepared Cinnascones into the oven, promptly close the door to trap that initial heat.
The Gradual Reduction for Even Cooking
However, maintaining such a high temperature for the entire baking duration would likely result in overly browned exteriors and potentially undercooked centers. This is where the second stage of the baking method comes in. Immediately after putting the Cinnascones into the hot oven, reduce the temperature to 350 degrees Fahrenheit (175°C). This lower, more moderate heat allows the pastries to continue baking through slowly and evenly. This gradual baking ensures the interior is thoroughly cooked and tender, while the exterior develops a perfect golden hue without burning. Forgetting to reduce the heat is a common mistake that can lead to Cinnascones that are darker than desired on the outside and perhaps not quite done in the middle.
Before baking, remember to brush the tops of your Cinnascones generously with heavy cream. This step not only helps achieve a beautiful, rich golden-brown crust but also contributes to a slightly softer top. Bake for approximately 20 to 25 minutes, keeping an eye on them around the 15-minute mark. They should emerge from the oven looking beautifully golden, firm to the touch, and wonderfully fragrant.
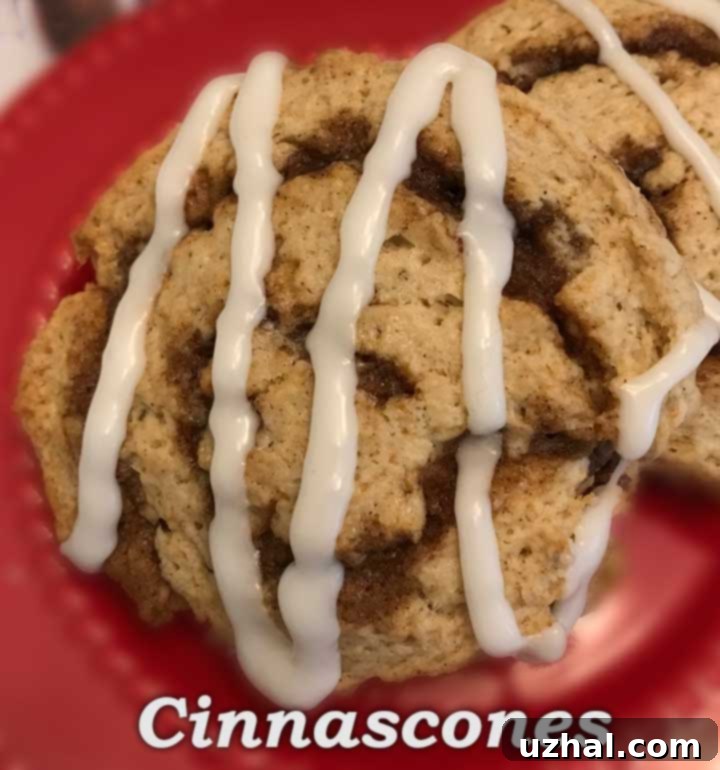
Serving Your Homemade Alice’s Tea Cup Cinnascones
Once your Cinnascones have finished baking and are fragrant and golden, remove them from the oven. Let them cool slightly on the baking sheet for a few minutes before transferring them to a wire rack. While they are still warm, prepare the icing. In a small bowl, whisk together confectioners’ sugar, whole milk (or a touch of heavy cream for extra richness), and your choice of vanilla or almond extract until you achieve a smooth, pourable glaze. Drizzle this generous icing over the warm Cinnascones. The warmth of the pastries will allow the icing to slightly melt and seep into their nooks and crannies, creating an even more irresistible treat.
These delightful hybrid pastries are truly at their best when enjoyed warm, ideally fresh from the oven. They make a spectacular addition to any breakfast or brunch spread, serving as a standout item that will impress your guests. Pair them with a freshly brewed cup of coffee, a robust black tea, or even a light herbal infusion. While they are best enjoyed on the day they are made, any leftovers can be stored in an airtight container at room temperature for a day or two, though they rarely last that long! A quick warm-up in the microwave or a toaster oven can revive their tenderness and aroma. Prepare to fall in love with these unique and utterly delicious Alice’s Tea Cup Cinnascones!
- Alice’s Tea Cup Pumpkin Scones
- Tea & Honey Cake
- 50 Good Cookies
- Alice’s Tea Cup Banana Butterscotch Scones
- New Bittersweet Brownies
Recipe: Alice’s Tea Cup Cinnascones

Alice’s Tea Cup Cinnascones
Anna
Pin Recipe
Ingredients
Filling
- 4 tablespoons salted or unsalted butter (56 grams, softened)
- ½ cup packed brown sugar (100 grams)
- 1 ½ teaspoons ground cinnamon
- 1 pinch salt (only if using unsalted butter for filling)
Dough
- 3 ½ cups all-purpose flour (420 grams)
- ½ cup granulated sugar (100 grams)
- ¾ teaspoon baking soda
- 1 ¾ teaspoons baking powder
- ¼ teaspoon salt (if using salted butter; use ¾ teaspoon if using unsalted)
- 1 ½ teaspoons ground cinnamon
- ¾ teaspoon ground nutmeg
- 10 tablespoons cold butter (140 grams, salted or unsalted, grated or cut into small cubes)
- ½ cup buttermilk (plus more as needed, cold)
- ¾ teaspoon vanilla or almond extract
- ¼ cup heavy cream (for brushing scones)
Icing
- 1 cup confectioners’ sugar
- 2 ½ tablespoons whole milk (or a little heavy cream)
- ½ teaspoon vanilla or almond extract
Instructions
-
Preheat your oven to 400°F (200°C). Line a baking sheet with parchment paper and set aside.
-
Prepare the Filling: In a microwave-safe bowl, gently soften 4 tablespoons of butter (do not melt completely). Add the brown sugar and 1½ teaspoons of ground cinnamon. Stir well until it forms a smooth paste. If using unsalted butter, add a pinch of salt to the filling. Set aside.
-
Prepare the Dough Dry Ingredients: In a large mixing bowl or the bowl of a food processor, combine the all-purpose flour, granulated sugar, baking soda, baking powder, salt, 1½ teaspoons of ground cinnamon, and ground nutmeg. Whisk or pulse to ensure all dry ingredients are thoroughly mixed.
-
Incorporate the Cold Butter: If using a food processor, add the cold butter cubes and pulse until the mixture resembles coarse meal with some pea-sized pieces of butter remaining. If mixing by hand, grate the cold butter into the dry mixture or cut it into small pieces with a pastry blender or your fingertips. Work quickly, tossing the butter with the flour to coat it and ensure even distribution, keeping the butter as cold as possible.
-
Add Wet Ingredients: Make a well in the center of the dry ingredients. Gradually pour in half of the cold buttermilk and the vanilla or almond extract. Using a heavy-duty scraper or your hands (the “claw hands” method), gently mix. Continue adding the remaining buttermilk gradually, just until the dough comes together. Be careful not to overmix; the dough should be cohesive but still slightly shaggy, not wet. The butter should remain somewhat intact to create flakiness.
-
Roll the Dough: Turn the dough out onto a lightly floured pastry mat or clean surface. Using a floured rolling pin, roll the dough into a rectangle approximately ½ inch thick and around 10×11 inches in size.
-
Spread the Filling: Evenly spread the prepared cinnamon-brown sugar paste over the entire surface of the dough rectangle, leaving a small border (about ½ inch) along one of the 11-inch sides.
-
Roll into a Spiral: Starting from the 10-inch side opposite the empty border, carefully and tightly roll the dough into a long spiral cylinder. Try to keep the roll as even as possible. If the dough becomes too soft and difficult to handle, place the entire rolled cylinder into the freezer for about 15 minutes to firm it up.
-
Slice and Shape: Using a sharp knife, slice the rolled dough into 10 disks, each approximately 1 inch thick. Place these disks on their side on the parchment-lined baking sheet, spaced about 2 inches apart. Gently press the top of each disk with the palm of your hand to flatten it to about ½ inch thick. You can also leave them thicker if you prefer a taller, more robust scone.
-
Brush with Cream: Using a pastry brush, liberally brush the tops of the Cinnascones with heavy cream. This helps them achieve a beautiful golden crust.
-
Bake: Place the baking sheet with the Cinnascones into the preheated 400°F (200°C) oven and immediately close the door.
-
Reduce Heat: Immediately reduce the oven temperature to 350°F (175°C) and continue baking for 20 to 25 minutes. Check for doneness around the 15-minute mark. The Cinnascones should be beautifully golden brown and cooked through.
-
Prepare the Icing: While the Cinnascones are baking, prepare the icing. In a small bowl, whisk together the confectioners’ sugar, whole milk (or cream), and vanilla or almond extract until completely smooth.
-
Serve: Once baked, remove the Cinnascones from the oven and let them cool on the baking sheet for a few minutes before transferring them to a wire rack. Drizzle generously with the prepared icing while still warm. Serve immediately and enjoy!
