Easy & Delicious Applesauce Loaf Cake with Rich Caramel Icing: Oven & Instant Pot Recipe
There’s an undeniable charm and comforting warmth that comes with a perfectly baked applesauce cake. This particular recipe elevates that experience, delivering a dark, wonderfully soft, and tightly crumbed cake that’s conveniently baked in a loaf pan. What truly sets it apart is the addition of a luxurious, homemade caramel icing that is genuinely foolproof to prepare, guaranteeing a delightful finish every time. For those seeking efficiency without compromising on flavor, I’ve also adapted this recipe into an amazing Instant Pot applesauce cake, with clear, easy-to-follow instructions included later in this guide. Prepare to fill your home with an aroma that signals pure autumnal bliss and indulge in a timeless classic that caters to both traditional and modern baking methods!
The Enduring Appeal of Applesauce Cake
Applesauce cake holds a special place in the hearts of many, often conjuring images of grandma’s kitchen or cozy fall afternoons. It’s not just a delicious dessert; it’s a smart way to infuse baked goods with natural moisture and a delicate sweetness, thanks to the applesauce. Unlike many other cakes that can dry out quickly, applesauce acts as a natural tenderizer, resulting in a cake that remains wonderfully moist and tender for days. The fine, even crumb of this applesauce loaf cake practically melts in your mouth, making each bite a truly satisfying experience. Enhanced with a thoughtful blend of warm spices such as cinnamon, ginger, and allspice, this cake doesn’t just taste good; it smells divine, creating an inviting atmosphere that beckons everyone to the kitchen.
Why the Loaf Pan is Your Best Friend for Baking
While the original inspiration for this recipe was a Bundt cake, adapting it for a loaf pan proved to be a stroke of genius. Baking this applesauce cake in a loaf pan offers unparalleled convenience and versatility. Loaf cakes are inherently easier to slice into neat, individual portions, making them ideal for serving at a casual brunch or a more formal dessert spread. Their rectangular shape is also perfectly suited for storage and freezing, allowing you to enjoy fresh-tasting cake whenever a craving strikes. Furthermore, the contained nature of a loaf pan makes the frosting process much simpler, particularly with our pourable caramel icing, ensuring every side is evenly coated with minimal mess. This practical approach makes the baking and enjoying experience much more accessible for every home baker.
The Simple Art of Crafting Homemade Unsweetened Applesauce
The secret to the profound flavor and perfect moistness in this applesauce cake lies in the quality of the applesauce itself. Opting for unsweetened applesauce is key, as it allows the natural sweetness of the apples and the added sugars in the recipe to shine without becoming overly cloying. While store-bought unsweetened applesauce is perfectly fine, making your own homemade version is surprisingly easy and incredibly rewarding. It provides complete control over the ingredients, ensuring no unwanted additives or excessive sugars. The process involves little more than boiling chopped apples with a touch of water and lemon juice until tender, then mashing them to your desired consistency. For a smooth cake, I highly recommend peeling and coring your apples before cooking to avoid any skin pieces in the final product. The small amount of effort yields a fresh, vibrant applesauce that will truly elevate your cake.
Unlocking the Secret to a Foolproof Caramel Icing
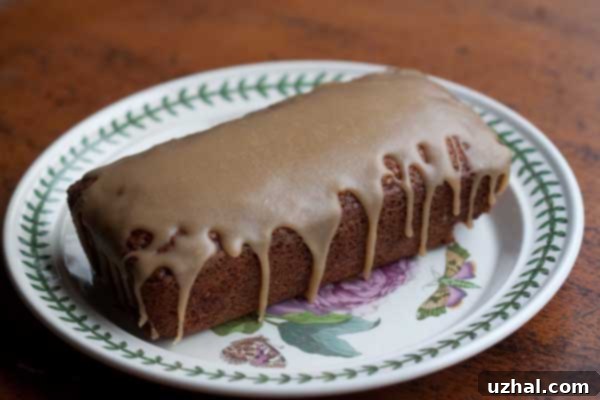
Many home bakers shy away from making caramel, often due to concerns about scorching or crystallization. However, the caramel icing featured in this applesauce loaf cake recipe is ingeniously simple and genuinely foolproof. It’s designed to be effortlessly prepared on the stovetop, transforming a few basic ingredients into a rich, buttery, and utterly decadent glaze. This incredible caramel not only adds a layer of sophisticated sweetness but also perfectly complements the warm, spiced notes of the applesauce cake, creating a harmonious flavor profile that is simply irresistible. The consistency is just right for pouring, creating beautiful drips down the sides of the loaf, making your cake look as impressive as it tastes. You’ll be delighted to discover how easy it is to achieve such a luxurious finish, proving that even the most elegant touches can be straightforward.
Optimal Storage and Freezing for Freshness
One of the many benefits of this applesauce cake is its excellent keeping qualities, especially if you plan to enjoy it over several days or want to prepare it in advance. The un-iced applesauce loaf cake can be stored at room temperature in an airtight container for up to 3 days, maintaining its wonderful moisture. For longer storage, it freezes exceptionally well. Simply allow the baked cake to cool completely, then wrap it tightly in plastic wrap, followed by a layer of aluminum foil, or place it in a freezer-safe bag. It can be frozen for up to 3 months. When you’re ready to enjoy it, thaw the cake at room temperature, then prepare and apply the foolproof caramel icing just before serving. This method ensures the icing is fresh and perfectly gooey, offering that delightful contrast in texture and temperature.
Instant Pot Applesauce Cake: A Modern Twist for Busy Bakers
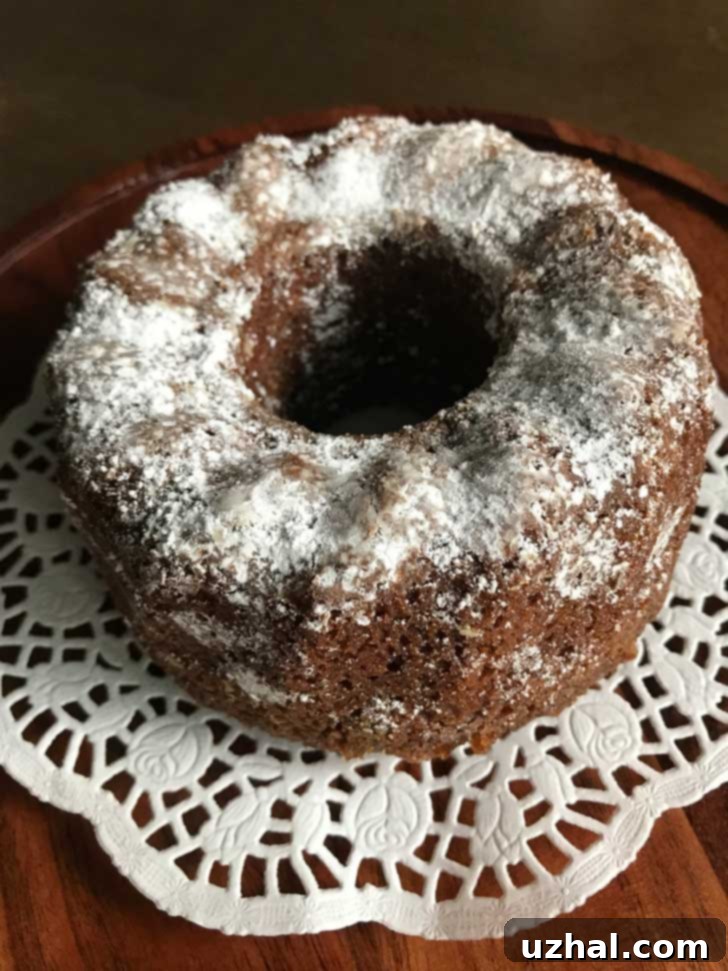
For those who appreciate the speed and convenience of modern kitchen appliances, this applesauce cake recipe is wonderfully adaptable for the Instant Pot. I’ve recently embraced this method using a small fluted pan designed for pressure cooking, and the results are consistently outstanding. The Instant Pot creates an exceptionally moist cake, almost akin to a steamed pudding in its tender texture, yet it still retains that comforting, dense crumb. The process is remarkably straightforward: prepare the cake batter as you would for the oven, pour it into your Instant Pot-sized pan, place it on a trivet with 1 ½ cups of boiling water (a quick microwave session gets the water ready faster!), seal your pot, and let the pressure cooker work its magic for 33 minutes. You’ll be amazed at how quickly you can achieve a perfectly baked cake. Remember, it might appear a little wobbly or overly moist when first removed from the pot, but rest assured, it will firm up beautifully as it cools down to room temperature.

Perfect Serving Suggestions for Your Delicious Creation
While this applesauce loaf cake, adorned with its luscious caramel icing, is a star in its own right, a few simple additions can elevate the serving experience. Imagine a slice alongside a dollop of freshly whipped cream, a scoop of creamy vanilla bean ice cream, or even a sprinkle of toasted pecans or walnuts for a delightful textural contrast. It serves as an ideal companion to a steaming cup of coffee or a comforting mug of spiced chai tea on a cool day. For an added touch of elegance or a festive autumn vibe, consider garnishing your slices with a few thin, fanned apple slices or a light dusting of extra cinnamon. Regardless of how you choose to present it, this moist and flavorful applesauce cake is guaranteed to be a crowd-pleaser and a memorable treat for any occasion.
Whether you opt for the traditional oven baking method or the innovative Instant Pot approach, you’re now equipped to create an exceptionally moist, spiced, and utterly delicious applesauce loaf cake. The combination of its tender crumb and the rich, foolproof caramel icing makes this a dessert you’ll undoubtedly want to revisit and share time and time again. Happy baking!
- Vegan Oatmeal Peanut Butter Chocolate Chip Cookies
- Easy Applesauce Streusel Cake
- Small Batch Vegan Peanut Butter Cookies
- Old Fashioned Applesauce Cookies
- Maple Apple Walnut Cookies
Recipe: Applesauce Loaf Cake with Caramel Icing

Applesauce Loaf Cake with Caramel Icing
Anna
Pin Recipe
Ingredients
For the Applesauce Loaf Cake
- 1 cup all-purpose flour (130 grams, accurately measured)
- ¾ teaspoon baking soda
- ¼ teaspoon salt (plus a pinch, for flavor balance)
- ⅛ teaspoon ground black pepper (adds a subtle, surprising warmth)
- 1 teaspoon ground cinnamon
- ½ teaspoon ground ginger
- ⅛ teaspoon ground allspice
- 1 large egg (preferably at room temperature)
- ½ cup granulated sugar
- ¼ cup light brown sugar (packed firmly)
- ¾ cup unsweetened applesauce** (see notes below for homemade options)
- ⅓ cup vegetable oil (or other neutral-flavored oil like canola)
- ½ teaspoon vanilla extract
For the Foolproof Caramel Icing
- 2 tablespoons unsalted butter (cut into small chunks)
- ¼ cup packed light brown sugar
- 2 tablespoons plus 2 teaspoons heavy cream (or heavy whipping cream)
- ⅛ teaspoon kosher salt (enhances all the sweet flavors)
- ⅓ to ½ cup sifted confectioners’ sugar (powdered sugar, adjust for desired consistency)
- Dash of vanilla extract (optional, but highly recommended for extra depth)
Instructions
For the Applesauce Loaf Cake (Traditional Oven Method)
-
1. Prepare Pan & Preheat Oven: Preheat your oven to 350°F (175°C). Generously grease and flour an 8×4 inch loaf pan. This crucial step prevents the cake from sticking and ensures a clean release.
-
2. Combine Dry Ingredients: In a medium bowl, sift together the all-purpose flour, baking soda, salt, ground black pepper, cinnamon, ground ginger, and ground allspice. Sifting helps eliminate lumps and ensures the leavening agents and spices are evenly distributed, contributing to a light and tender crumb. Set this bowl aside.
-
3. Whisk Wet Ingredients: In a large mixing bowl, whisk the large egg with both the granulated sugar and light brown sugar until the mixture appears light, fluffy, and thoroughly combined. This process incorporates essential air for the cake’s texture. Next, whisk in the unsweetened applesauce, vegetable oil, and vanilla extract until the mixture is smooth and fully incorporated.
-
4. Gently Combine Wet & Dry: Add the dry ingredient mixture to the wet ingredients. Gently fold them together using a spatula or wooden spoon until just combined and no streaks of flour remain. Be careful not to overmix the batter; overmixing can overdevelop the gluten, resulting in a tough, dense cake. A few small lumps are perfectly acceptable.
-
5. Bake the Cake: Pour the prepared batter evenly into your greased and floured loaf pan. Bake for 38 to 42 minutes, or until a cake tester (such as a toothpick or thin skewer) inserted into the center of the cake comes out clean. If it comes out with moist crumbs, continue baking for an additional 2-5 minutes, then test again.
-
6. Cool Completely: Allow the baked applesauce cake to cool in the loaf pan on a wire rack for at least 10 minutes. This resting period helps the cake to set and makes it easier to remove from the pan without breaking. After 10 minutes, carefully invert the cake onto the wire rack and let it cool completely to room temperature. It is essential for the cake to be entirely cool before applying the caramel icing to prevent it from melting and running off.
For the Foolproof Caramel Icing
-
1. Prepare for Icing: While your cake is cooling, place a piece of foil or parchment paper underneath your wire rack. This will efficiently catch any drips of caramel icing, making cleanup quick and easy.
-
2. Make the Caramel Base: In a small, heavy-bottomed saucepan, combine the butter chunks, packed light brown sugar, heavy cream, and kosher salt. Place the saucepan over medium heat. Bring the mixture to a rolling boil, stirring constantly with a whisk or spoon to ensure the sugar fully dissolves and the butter melts smoothly.
-
3. Boil and Slightly Cool: Once boiling, continue to boil the mixture for exactly one minute, stirring continuously to prevent scorching. Immediately remove the saucepan from the heat after one minute. Allow the mixture to cool for just a couple of minutes off the heat. This slight cooling period helps the caramel thicken slightly before you incorporate the confectioners’ sugar.
-
4. Achieve Desired Consistency: Gradually whisk or stir in the sifted confectioners’ sugar, starting with ⅓ cup, until you achieve a smooth, pourable consistency for your glaze. If the icing appears too thick, add a tiny bit more heavy cream (½ teaspoon at a time). If it’s too thin, add more confectioners’ sugar (½ tablespoon at a time). Stir in the dash of vanilla extract at this stage if you choose to use it, as it adds wonderful depth of flavor.
-
5. Ice and Serve: Immediately pour the warm caramel glaze evenly over the completely cooled applesauce cake, allowing it to artfully drip down the sides for a beautiful, rustic presentation. Let the glaze set for at least 15-20 minutes (or until it’s firm to the touch) before slicing and serving. This ensures the icing has a lovely, slightly firm yet gooey texture that enhances every bite.
For the Instant Pot Applesauce Cake (Alternative Method)
-
1. Prepare Batter & Pan: Follow the cake batter preparation instructions (Steps 1-3 above for the oven method) as written. Pour the prepared batter into an Instant Pot-sized fluted pan (a small Bundt pan) or any oven-safe, pressure cooker-safe pan that fits comfortably inside your Instant Pot. Grease and flour this pan for easy release.
-
2. Set Up Instant Pot: Place the metal trivet (that came with your Instant Pot) into the bottom of the Instant Pot liner. Add 1 ½ cups of boiling water to the pot. (A quick trick is to microwave the water until boiling to save time). Carefully place your cake pan containing the batter on top of the trivet.
-
3. Pressure Cook: Securely close the Instant Pot lid and ensure the sealing valve is set to the “Sealing” position. Select the “Manual” or “Pressure Cook” setting and set the cooking time for 33 minutes on High Pressure.
-
4. Natural Release: Once the cooking cycle is complete, allow a Natural Pressure Release (NPR) for 15 minutes. This means you do nothing and let the pressure release on its own for 15 minutes. After this time, carefully quick release any remaining pressure by turning the valve to “Venting.”
-
5. Cool & Finish: Carefully remove the cake pan from the Instant Pot. The Instant Pot applesauce cake may appear a little shaky and perhaps too moist when you first take it out, but do not worry! It will settle and firm up beautifully as it cools. Allow it to cool completely on a wire rack before attempting to remove it from the pan and before applying the caramel icing.
Notes
**Homemade Unsweetened Applesauce: To prepare your own unsweetened applesauce, begin by roughly chopping about 1 pound of apples (approximately 2 large apples). For a smoother cake texture, it is highly recommended to peel and core them beforehand. You can use any apple variety you like, though sweeter types like Fuji or Gala will result in a naturally sweeter sauce. Place the chopped apples in a pot with 2 tablespoons of water and about ½ teaspoon of lemon juice (the lemon juice brightens the flavor and helps prevent browning). Simmer uncovered over medium-low heat for roughly 25 minutes, or until the apples are incredibly soft and easily mashed with a fork or spoon—no special equipment required! Stir occasionally to prevent sticking. If the applesauce seems too watery, simply let it continue to simmer uncovered until some of the excess moisture steams off, or gently blot with a paper towel once cooled. Ensure the applesauce is completely cool before incorporating it into your cake batter.
Storage for Freshness: The un-iced applesauce loaf cake can be stored at room temperature in an airtight container for up to 3 days, maintaining its delightful moisture. Once iced, store the cake in an airtight container at room temperature for up to 2 days, or in the refrigerator for up to 5 days. For the best texture and flavor, allow refrigerated cake to come to room temperature before serving.
Freezing Instructions: This cake freezes beautifully! To freeze, ensure the cake is completely cool and un-iced. Wrap it tightly first in plastic wrap, then in a layer of heavy-duty aluminum foil, or place it in a freezer-safe bag. It can be frozen for up to 3 months. To serve, thaw the cake overnight in the refrigerator or for a few hours at room temperature. Once thawed, proceed with making and applying the caramel icing.
