Homemade Sports Bars: Easy & Customizable Energy Bites for Every Lifestyle
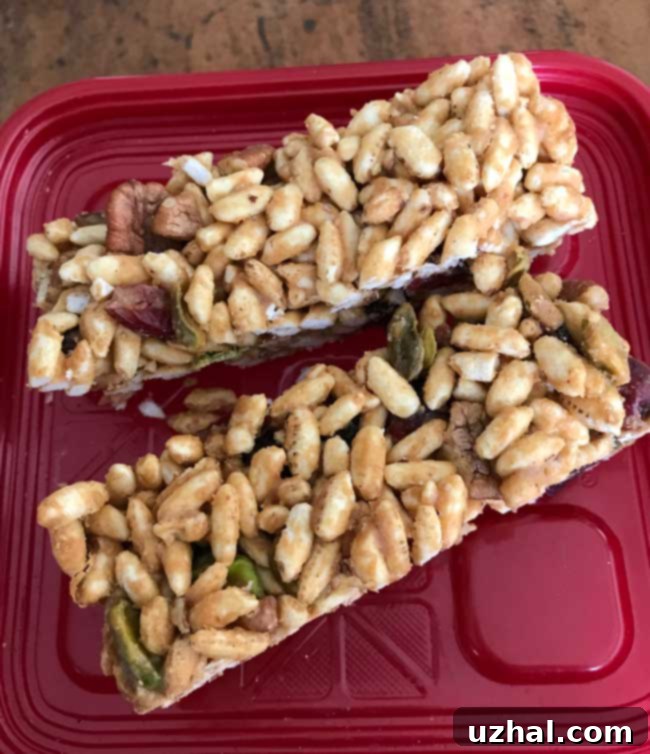
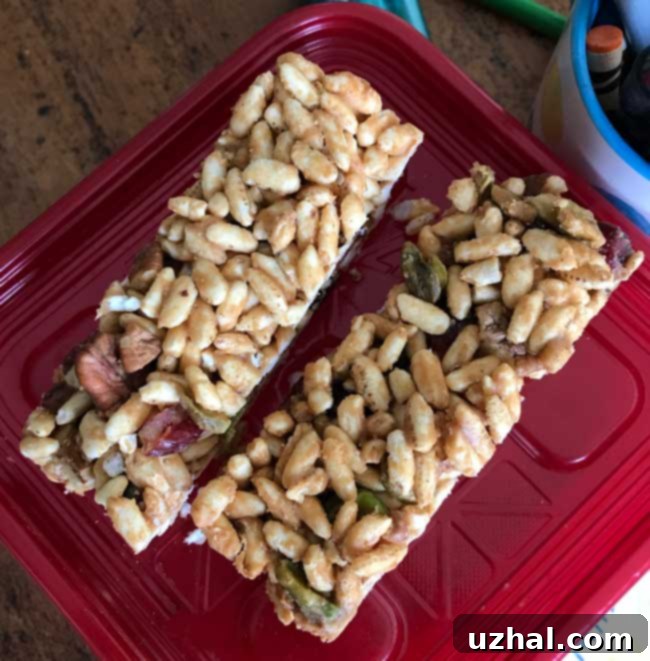
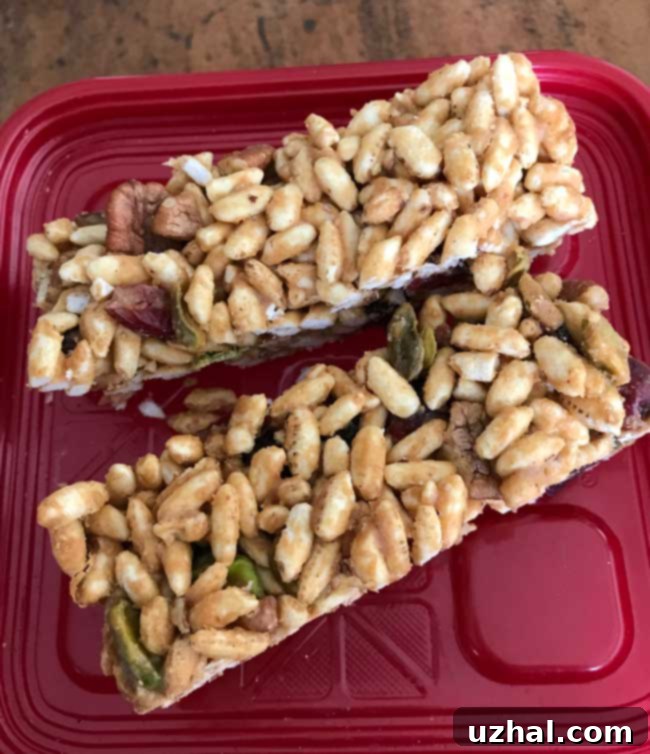
In the quest for convenient, wholesome snacks, homemade options often outshine their store-bought counterparts. The “Sports Bars” recipe, which originally graced the pages of Bon Appetit back in January 2002, quickly became a staple in my kitchen for its simplicity and incredible versatility. Over the years, I’ve experimented with countless variations, but the core appeal remains: a delicious, satisfying bar that’s easy to make and packed with customizable goodness. My go-to version today typically features a delightful mix of puffed rice, creamy peanut butter, sweet honey, tangy dried cranberries, and whatever other nuts I happen to have on hand.

Why Homemade Sports Bars are a Game Changer
Store-bought energy or “sports” bars often come with a hefty price tag and a long list of ingredients that are hard to pronounce. Crafting your own at home provides numerous benefits:
- Full Control Over Ingredients: You decide what goes in. No artificial flavors, preservatives, or excessive sugars. This is especially beneficial for managing dietary restrictions or allergies.
- Cost-Effective: Making bars in bulk is significantly cheaper than buying individual packaged bars.
- Customization to Your Taste: Whether you prefer more nuts, different dried fruits, or a specific type of sweetener, you can tailor the recipe to perfectly match your preferences.
- Freshness and Flavor: Freshly made bars simply taste better. The textures are more appealing, and the flavors are more vibrant.
- Nutrient Density: Pack your bars with high-quality ingredients that provide sustained energy and essential nutrients.
The Heart of the Bar: Puffed Cereal Choices
The foundation of these delightful bars is puffed rice cereal. While you might be tempted to reach for popular brands like Rice Krispies, genuine puffed rice cereal (often found in the bulk section or natural foods aisle) is truly ideal. Its light, airy texture provides the perfect crispy base without becoming soggy. It absorbs the binder beautifully, ensuring a satisfying crunch in every bite.
Alternatively, puffed wheat is another excellent choice and offers a slightly nuttier flavor profile. It performs similarly to puffed rice, holding its shape and texture well. If you’re feeling adventurous, you could even experiment with other plain puffed cereals. Remember those classic sugary cereals from childhood, like Sugar Smacks? Well, think of puffed cereal as the unsweetened, wholesome version. Interestingly, Sugar Smacks still exist, rebranded as Honey Smacks, but for these bars, we’re aiming for the pure, unadulterated puff!
The key here is to use plain, unsweetened puffed cereal. This allows the natural flavors of the other ingredients, particularly the sweetener, to shine through and gives you complete control over the bar’s sweetness level.
Sweetener Secrets: Honey and Beyond
The original Bon Appetit recipe called for a blend of honey and corn syrup as the binding agent. However, through repeated experimentation, I’ve discovered that using all honey works not just as well, but arguably better. Honey provides a rich, complex sweetness and a lovely chewiness to the bars without being overwhelmingly honey-flavored. It acts as an excellent natural binder, helping all the dry ingredients stick together beautifully.
For those who aren’t keen on honey, or if you’re looking to make these bars vegan, there are fantastic alternatives. Maple syrup is a superb substitute, offering a distinct flavor that pairs wonderfully with peanut butter and nuts. You could also try a combination of maple syrup and rice syrup, which is a common vegan binder in many commercial energy bars. Agave nectar is another option, though it’s less viscous than honey or maple syrup, so you might need to adjust quantities slightly to achieve the desired consistency. The goal is to create a sticky, boilable syrup that will effectively coat and bind your dry ingredients.

The Flavor and Texture Boosters: Nuts, Fruits, and More
Beyond the cereal and binder, the real fun begins with your choice of mix-ins. The beauty of this Sports Bar recipe lies in its adaptability. My current favorite combination includes dried cranberries for a tart counterpoint and the crunch of pecans. But don’t stop there!
- Nuts: Toasted pecans are fantastic, but feel free to use almonds, walnuts, cashews, or even a mix of your favorite chopped nuts. Toasted nuts always enhance the flavor and aroma significantly.
- Dried Fruits: Dried cranberries add a lovely chew and tang. Other great options include chopped apricots, raisins, dried cherries, blueberries, or even finely diced dates for extra sweetness and stickiness.
- Seeds: Boost the nutritional profile with chia seeds, flax seeds, hemp seeds, or sunflower seeds. They add healthy fats and a subtle crunch.
- Sweet Additions: Mini chocolate chips (dark, milk, or white), shredded coconut (toasted or untoasted), or a sprinkle of cinnamon or nutmeg can elevate the flavor. The optional banana chips in the recipe add a unique sweetness and crunch that I highly recommend trying!
- Protein Boost: For an extra kick, a scoop of your favorite protein powder can be incorporated, though you might need to add a touch more liquid binder to maintain the desired consistency.
Crafting Your Bars: Tips for Success
The process of making these Sports Bars is straightforward, but a few key steps ensure the best results:
- Preparation is Key: Always preheat your oven and line your loaf pan (or baking dish) with foil, then spray it with nonstick spray. Nonstick foil works even better! This critical step makes it incredibly easy to remove the finished bars from the pan without sticking.
- Thorough Mixing: Once your hot peanut butter and honey mixture is poured over the dry ingredients, work quickly and mix thoroughly. You want every piece of cereal and every mix-in to be coated with the sticky binder. This ensures the bars hold together and have consistent flavor.
- Press Down Tightly: This is arguably the most crucial step for bars that hold their shape. After transferring the mixture to the prepared pan, press it down VERY tightly. Use the back of a spoon, a spatula, or even another piece of foil to exert firm, even pressure. The tighter you press, the less crumbly your bars will be.
- Baking for Stability: While often considered a “no-bake” style bar, a short stint in the oven (8-10 minutes) helps to set the honey-peanut butter binder, creating a more cohesive and less sticky bar. It also slightly toasts the cereals and nuts, enhancing their flavor.
- The Patience or Freezer Rule: One thing to keep in mind is that these Sports Bars start out very crumbly when warm. They absolutely need to set completely before cutting. This takes either patience (letting them cool at room temperature for several hours) or the freezer. I highly recommend the freezer method for quick gratification! After letting them cool for a few minutes on the counter, I usually pop the entire pan into the freezer for about 30 minutes. This firms them up beautifully, making them easy to slice cleanly.
Storage and Enjoyment
Once cooled and cut, these Sports Bars are ready to enjoy. Store them in an airtight container at room temperature for up to a week, or in the refrigerator for up to two weeks. For longer storage, they can be individually wrapped and frozen for up to a month. They make an excellent grab-and-go breakfast, a quick snack during the day, or a satisfying pre/post-workout treat.
- Honey Pecan Bars Without Eggs
- Honey Cookies for the Holidays
- Chewy Honey Oatmeal Cookies
- Chocolate Honey Cake with Ganache
- Honey Maple Chocolate Chip Cookies
Recipe

Homemade Sports Bars
Cookie Madness (adapted from Bon Appetit)
Pin Recipe
Ingredients
- 1 ½ cups puffed wheat or puffed rice cereal (unsweetened)
- ¼ cup pecans — chopped and lightly toasted
- ¼ cup dried cranberries or other dried fruit like chopped apricots or cherries
- ¼ cup banana chips optional, or other nuts/seeds like almonds or sunflower seeds
- ¼ cup peanut butter unsweetened, natural is best
- ¼ cup honey or maple syrup for a vegan option
Instructions
-
Preheat your oven to 350°F (175°C). Prepare a 9×5-inch loaf pan by lining it with foil, ensuring some overhang on the sides for easy lifting. Spray the foil generously with nonstick cooking spray, or simply use nonstick foil.
-
In a large mixing bowl, combine the puffed cereal, chopped toasted pecans, dried cranberries, and banana chips (or your chosen alternative nuts/seeds). Stir gently to ensure all ingredients are evenly distributed.
-
In a heavy small saucepan, combine the unsweetened peanut butter and honey (or maple syrup). Bring the mixture to a boil over medium heat, whisking constantly. Continue to whisk until the mixture bubbles vigorously and thickens slightly, about 1-2 minutes. This step is crucial for the binder to properly set.
-
Immediately pour the hot peanut butter and honey mixture over the cereal blend in the large bowl. Stir quickly and thoroughly with a sturdy spatula or wooden spoon until all the dry ingredients are completely coated and sticky.
-
Transfer the coated mixture into your prepared loaf pan. Press the mixture down very tightly and evenly into the pan. Use the back of a spoon, a piece of parchment paper, or even your hands (lightly greased) to compact it as much as possible. Bake for approximately 8-10 minutes, which helps to set the bars and adds a subtle toastiness.
-
Allow the bars to cool completely in the pan before attempting to lift or cut them. This is key for them to hold together! If you’re in a hurry, let the pan cool for about 10-15 minutes on the counter, then transfer it to the freezer for at least 30 minutes to firm up quickly. Once thoroughly cooled and firm, use the foil overhang to lift the entire block out of the pan and cut into desired bar sizes.
Whether you’re an athlete needing a quick energy boost, a busy parent looking for a healthy snack for the kids, or simply someone who appreciates a delicious homemade treat, these customizable Sports Bars are sure to become a favorite. Their ease of preparation, combined with the endless possibilities for personalization, makes them a recipe you’ll revisit time and again. So, skip the expensive store-bought versions and whip up a batch of these wholesome, satisfying bars today!
