White Russian Tiramisu: The Ultimate No-Bake Coffee Liqueur Dessert Experience
There are some recipes that just stick with you, weaving themselves into the fabric of your culinary memory. For me, the White Russian Tiramisu is one such gem. This delightful no-bake dessert, originally a treasured find from a vintage Cooking Light magazine, was a frequent guest at gatherings back in my Texas days. It’s a tragedy how easily beloved recipes can get lost in the shuffle of moving or changing kitchens, and this layered ladyfingers icebox cake was almost one of them. Fortunately, its unique charm and surprisingly simple preparation meant it was too good to be forgotten entirely. Combining the beloved flavors of a classic Tiramisu with the sophisticated kick of a White Russian cocktail, this dessert offers an unparalleled experience that’s both comforting and exciting.

The Irresistible Allure of White Russian Tiramisu: A Fusion of Classics
What sets this tiramisu apart is its ingenious twist. Traditional tiramisu is a marvel of coffee-soaked ladyfingers and rich mascarpone cream, often enhanced with a touch of rum or Marsala wine. Our White Russian Tiramisu recipe takes this concept and elevates it by infusing the coffee soak with Kahlúa, a prominent ingredient in the iconic White Russian cocktail. This addition introduces a distinctive, smooth coffee liqueur flavor that complements the strong brewed coffee beautifully and adds an adult sophistication to the dessert. It’s an unexpectedly harmonious marriage that results in a dessert that’s both familiar and excitingly new.
Beyond its unique flavor profile, its practicality is a major draw. As an easy no-bake dessert, it eliminates the stress of oven timings and baking mishaps. The entire process is about layering and chilling, making it a perfect make-ahead option for dinner parties or simply a delightful treat to have ready in the refrigerator. And unlike many other chilled desserts that demand lengthy setting times, this White Russian Tiramisu is typically ready to serve after just two hours, though a longer chill only enhances its flavors and texture.
Crafting Your White Russian Tiramisu: A Step-by-Step Guide to Perfection
Making this Kahlúa-infused tiramisu is surprisingly straightforward, relying on simple techniques to build complex flavors and textures. The process can be broken down into a few key stages:
1. The Coffee & Kahlúa Infusion
The foundation of any great tiramisu lies in its coffee soak. For this recipe, you’ll combine freshly brewed strong coffee with a generous splash of Kahlúa. The quality of your coffee matters here; opt for a robust brew, perhaps espresso or a dark roast, to ensure the coffee flavor doesn’t get lost amidst the other ingredients. The Kahlúa adds its signature coffee liqueur sweetness and a hint of vanilla, creating a perfectly balanced dipping liquid for the ladyfingers. Ensure the mixture is cool before dipping to prevent soggy ladyfingers.
2. Preparing the Ladyfinger Layers
Once your coffee-Kahlúa blend is ready, it’s time to briefly dip the ladyfingers. The key word here is “briefly.” Ladyfingers are highly absorbent, and over-dipping will result in a mushy dessert. A quick dip – just a second or two on each side – is usually sufficient. Arrange these delicately moistened ladyfingers in a single layer at the bottom of your chosen dish. For a rectangular pan, you might need to break some to fit snugly, creating an even base.
3. Crafting the Creamy Cheese Mixture
The luscious cream layer is what truly brings the White Russian Tiramisu to life. This recipe calls for a blend of softened cream cheese (or a mix of mascarpone and fat-free cream cheese for a lighter touch, as discussed below), brown sugar, granulated sugar, and an additional hint of Kahlúa. Beating these ingredients until smooth and creamy is crucial for a luxurious texture. The sugars provide sweetness, while the Kahlúa further enhances the coffee liqueur theme. Ensure your cream cheese is at room temperature for the smoothest, lump-free mixture.
4. Assembling the Layers and the Finishing Touch
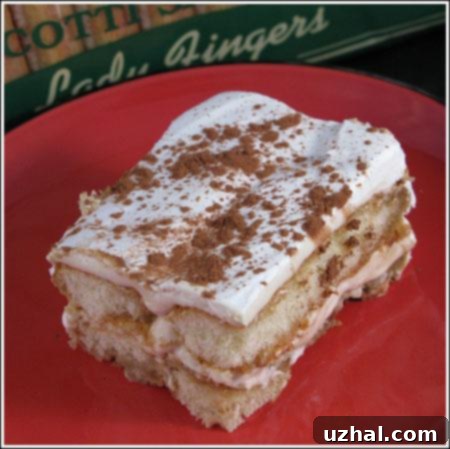
With your components ready, it’s time to assemble. Spread half of the creamy cheese mixture evenly over the first layer of ladyfingers. A light dusting of unsweetened cocoa powder adds a touch of bitterness and depth, which perfectly contrasts the sweet cream. Repeat this process: another layer of dipped ladyfingers, followed by the remaining cream cheese mixture, and another sprinkle of cocoa. The final, delightful step – an addition I personally love – is to cover the entire dessert with sweetened whipped cream or a light whipped topping. This adds an airy lightness and a beautiful finish, ready for a final garnish of cocoa powder.
Ladyfingers: Soft vs. Hard – Your Guide to the Perfect Base
The choice of ladyfingers can significantly impact the texture of your homemade tiramisu. Traditionally, soft, spongy ladyfingers (savoiardi) are used, which quickly absorb the coffee mixture and become tender. However, they can be surprisingly elusive in many grocery stores. My experience, particularly in places like Texas and Raleigh, has shown that finding soft ladyfingers can be quite a quest. Instead, I’ve almost exclusively used the harder, crispier variety, often found in the cookie or international foods aisle.
If you opt for the more readily available hard ladyfingers, rest assured they work wonderfully in this icebox cake recipe. The main difference is that they do not need to be split in half, which simplifies the process even further. A single package of hard ladyfingers is typically sufficient. Just give them a quick, brief dip in the coffee mixture, allowing them to soften slightly without becoming waterlogged, and then arrange them in your dish. Their slightly firmer texture after chilling can provide a delightful contrast to the creamy layers, adding a pleasant structural integrity to the dessert.
Should you struggle to find either type of ladyfinger, don’t despair! While not traditional, you can get creative with alternatives like sponge cake, slices of pound cake, or even graham crackers, though these will slightly alter the classic tiramisu texture. Just ensure whatever you use is absorbent enough to soak up the delicious coffee-Kahlúa mixture.
The Creamy Heart: Mascarpone, Cream Cheese, and Sweetness
The cream cheese mixture is the luxurious soul of this Kahlúa dessert. The original Cooking Light recipe suggested a combination of mascarpone cheese and fat-free cream cheese, a seemingly peculiar pairing aimed at reducing fat while retaining a rich texture. Mascarpone, an Italian cream cheese, is known for its incredible richness and mild, slightly sweet flavor. Fat-free cream cheese, on the other hand, can sometimes be tart and less luxurious.
If you happen to have both mascarpone and fat-free cream cheese on hand, definitely follow the original suggestion. The mascarpone effectively mellows out any potential tartness from the fat-free cream cheese, creating a beautifully balanced and indulgent cream that’s still a bit lighter than a purely mascarpone-based filling. However, in modern cooking, most home bakers simply opt for regular cream cheese or a ⅓ less fat version. I’ve found that both regular and light cream cheese work exceptionally well, delivering a wonderfully creamy texture and delightful flavor without the need for a specific fat-free blend.
Whichever cheese you choose, ensure it’s softened to room temperature before beating. This is crucial for achieving a smooth, lump-free cream. Combine it with both brown sugar and granulated sugar. The brown sugar adds a subtle molasses note and moisture, while the granulated sugar provides classic sweetness. A final touch of Kahlúa stirred into the cream reinforces the dessert’s signature flavor profile, creating layers of aromatic coffee liqueur goodness throughout.
Tips for Tiramisu Success and Creative Variations
Achieving the perfect White Russian Tiramisu is all about attention to a few details:
- Don’t Over-dip: As mentioned, ladyfingers are sponges. A quick dip is enough to infuse flavor without making them soggy.
- Room Temperature Cheese: This is paramount for a smooth, creamy filling without any lumps.
- Even Layers: Take a moment to spread the cream cheese mixture evenly for a visually appealing and balanced dessert.
- Chill Time is Key: While 2 hours is the minimum, allowing the tiramisu to chill longer, even overnight, lets the flavors meld beautifully and the ladyfingers fully soften to a cake-like consistency.
- Garnish Generously: Don’t skip the final dusting of cocoa powder. It adds visual appeal and a lovely bittersweet contrast.
Feeling adventurous? Here are some variations to consider:
- Liqueur Swap: If Kahlúa isn’t your preference, try other coffee liqueurs, Irish cream, or even a touch of dark rum for a different profile. For a non-alcoholic version, use coffee extract and omit the Kahlúa.
- Coffee Intensity: Adjust the strength of your brewed coffee. For a bolder flavor, use espresso.
- Chocolate Shavings: Instead of just cocoa powder, garnish with curls of dark chocolate for added texture and richness.
- Mini Tiramisus: Assemble individual portions in small ramekins or glasses for an elegant presentation.
Serving and Storing Your Delicious Creation
Once properly chilled, your White Russian Tiramisu is ready to be unveiled. Slice into generous portions, ensuring each piece showcases the beautiful layers of ladyfingers and creamy filling. A final dusting of cocoa powder or a few chocolate shavings just before serving adds that professional touch. This dessert is rich and satisfying, making it an ideal ending to a hearty meal or a delightful centerpiece for any celebration.
Store any leftovers covered tightly in the refrigerator. It will keep well for 3-4 days, and often, the flavors deepen and improve on the second day. Tiramisu is an excellent make-ahead dessert, allowing you to prepare it a day in advance, leaving you more time to enjoy your guests or relax.
- Explore More Delights:
- Pumpkin Tiramisu
- Classic Tiramisu
- Lemon Berry Icebox Dessert
- Russian Black Bread
- Tiramisu Brownies
The White Russian Tiramisu Recipe

White Russian Tiramisu
Anna
Pin Recipe
Ingredients
- ½ cup mascarpone cheese (or just use Philadelphia cream cheese)
- 8 oz fat free or ⅓ less fat cream cheese, softened
- ⅓ cup packed light brown sugar
- ¼ cup granulated sugar
- 1 ½ cups brewed strong coffee, cooled
- ¼ cup Kahlua
- 24 soft ladyfingers (or one package of hard ladyfingers)
- 2 cups sweetened whipped cream or light whipped topping
- 2 teaspoons unsweetened cocoa powder, divided
Instructions
-
In a large mixing bowl, beat both mascarpone and cream cheese with the brown sugar and granulated sugar until the mixture is light and creamy. Incorporate 2 tablespoons of Kahlúa into the cheese mixture and set aside.
-
In a long, shallow dish, combine the cooled brewed coffee and the remaining Kahlúa. If you are using soft ladyfingers, gently split them in half lengthwise. Quickly dip each ladyfinger half (or whole hard ladyfinger) into the coffee mixture, ensuring it’s briefly soaked but not saturated. Arrange the dipped ladyfingers in a single layer at the bottom of an 8 or 9-inch square pan, overlapping slightly if necessary.
-
Spread half of the prepared cream cheese mixture evenly over the layer of ladyfingers. Sprinkle 1 teaspoon of unsweetened cocoa powder over the cream cheese layer. Repeat this process: add another layer of dipped ladyfingers, followed by the remaining cream cheese mixture, and a final sprinkle of 1 teaspoon of cocoa powder.
-
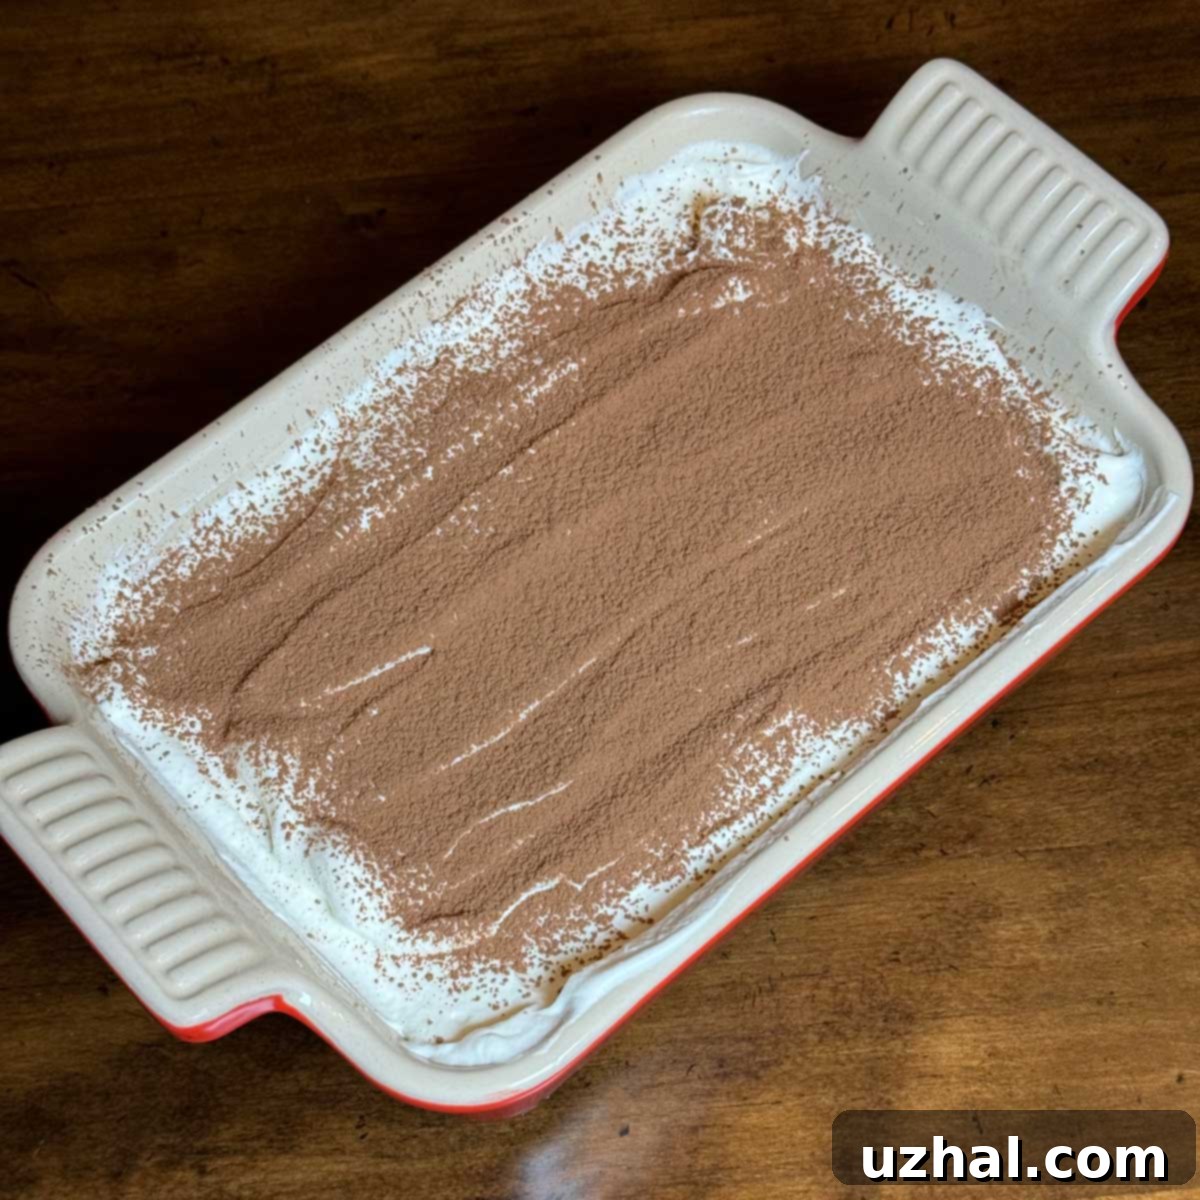
Gently spread the sweetened whipped cream or whipped topping over the very top layer of the tiramisu. For an extra touch, garnish with an additional light dusting of cocoa powder or chocolate shavings. Cover the dish tightly with plastic wrap and refrigerate for at least 2 hours (or ideally, 4 hours to overnight) to allow the flavors to meld and the dessert to set properly before serving.
This White Russian Tiramisu is more than just a dessert; it’s a nostalgic journey for me and a delightful discovery for anyone who tries it. Its elegant presentation belies its simple preparation, making it an ideal choice for both novice bakers and seasoned dessert enthusiasts. Give this recipe a try and let this exquisite coffee liqueur-infused icebox cake become a new favorite in your culinary collection!
