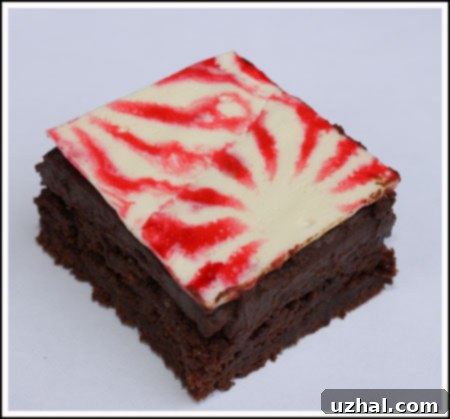
Dazzling Melted Peppermint Brownies: The Ultimate Festive Dessert for Your Holiday Table
As the holiday season approaches, our thoughts often turn to festive treats that not only taste incredible but also look spectacular. Among the array of classic Christmas desserts, Melted Peppermint Brownies stand out as a truly unique and beautiful addition to any Christmas cookie tray or dessert spread. This inspired recipe, originally from Sunset Magazine, offers a delightful combination of rich, fudgy brownies, a decadent chocolate ganache, and surprisingly easy-to-make melted peppermint tiles that glimmer like stained glass.
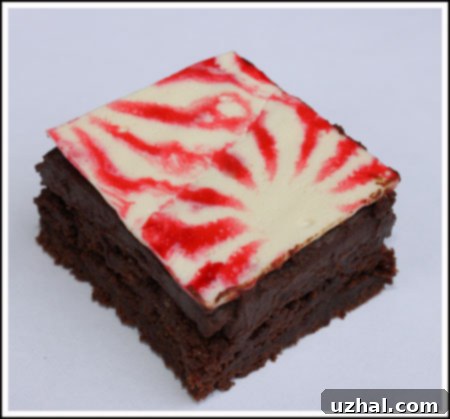
These aren’t just any brownies; they’re an experience. Each bite delivers a perfect harmony of deep chocolate and refreshing mint, elevated by the satisfying texture of the brownie and the smooth ganache. While their appearance might suggest a complex baking project, you’ll be delighted to find that the process is straightforward, breaking down into distinct, manageable steps. If you’re looking for a dessert that marries elegance with a touch of homemade charm, you’ve found your next holiday baking obsession.
The Foundation: Crafting Your Perfect Brownie Base and Silky Ganache
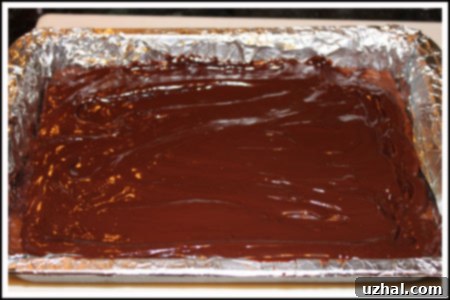
Every great dessert starts with a solid foundation, and for Melted Peppermint Brownies, that means a perfect batch of brownies topped with a luscious chocolate ganache. This initial stage is quite simple and offers flexibility, allowing you to tailor it to your preferences or time constraints. Even if mint isn’t your favorite flavor, you could stop here and still have an amazing brownie, perhaps sprinkling it with something else like chopped nuts or sprinkles.
Choosing Your Brownie Base: From Scratch or Box Mix?
For the brownie layer, you have options. A high-quality box mix can save time without sacrificing flavor, especially if you opt for one known for its fudgy texture. Alternatively, baking your brownies from scratch allows for complete control over ingredients and texture. Whichever path you choose, aim for a brownie that is dense, moist, and wonderfully chocolatey. A fudgy brownie will provide the best contrast to the crisp peppermint tiles and rich ganache. Ensure your brownies are completely cooled before proceeding to the ganache step; this prevents the ganache from melting into the brownie.
The Decadent Chocolate Ganache Layer
The chocolate ganache is the glue that holds this masterpiece together, literally and figuratively. It adds an extra layer of chocolatey richness and provides a smooth, stable surface for the peppermint tiles. Making ganache is surprisingly easy: simply heat heavy cream until it simmers, then pour it over finely chopped chocolate (good quality dark or semi-sweet chocolate works best). Let it sit for a few minutes, then whisk until smooth and glossy. Once it cools slightly and thickens to a spreadable consistency, pour it over your cooled brownies and spread evenly. Allow it to set partially, either at room temperature or briefly in the refrigerator, until it’s firm enough to hold the peppermint tiles without them sinking.
The Crafty Part: Transforming Peppermints into Shimmering Tiles
Now comes the most visually striking and surprisingly fun part of this recipe: creating the melted peppermint tiles. This step is where the magic truly happens, transforming simple peppermints into beautiful, translucent pieces that resemble stained glass.
Arranging Your Mints: Precision or Creative Spacing?
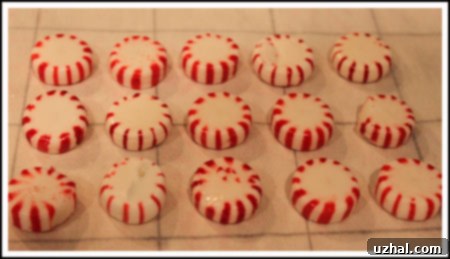
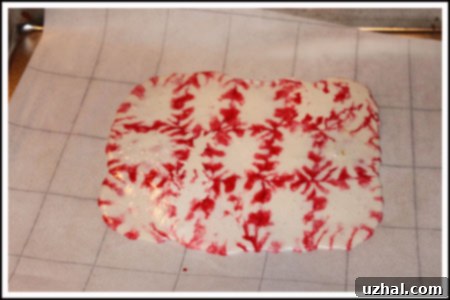
You’ll start by lining a baking sheet with parchment paper. Some recipes suggest drawing grid lines on the parchment to guide your placement, but as I discovered, sometimes a less rigid approach works just as well, if not better. I found better results by simply spacing the individual peppermint candies about ¼ to ½ inch apart from each other. The goal is for them to melt together into a single, cohesive sheet without running into a messy blob. Don’t worry if your spacing isn’t perfectly uniform; a little variation can add to the charm of the final tiles. This step taps into a creative, almost artistic, side of baking.
Melting Magic in the Oven: The Transformation
Once your peppermints are arranged, place them in an oven preheated to 300°F (150°C). The melting process usually takes about 5-8 minutes, but keep a close eye on them. You’re looking for the peppermints to soften and merge together into a flat, translucent sheet. They should look melted but not burnt or overly bubbly. My experience showed that even if they seem a bit close, the results can be fantastic – sometimes breaking a few rules leads to delightful surprises! The aroma of warm peppermint filling your kitchen is an added bonus.
Transforming Melted Mints into Dazzling Tiles
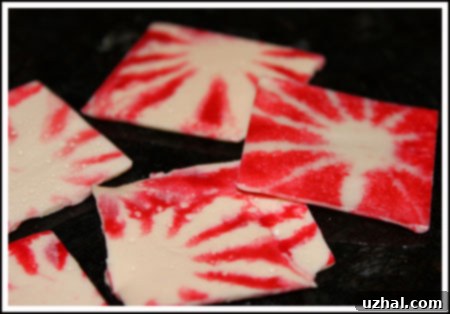
This is where your melted peppermint sheet gets its distinctive “tile” form. While the melted mints are still warm and pliable (but not too hot to handle), use a pizza cutter to score and cut them into your desired tile shapes. Rectangles or squares are most common and easiest to work with. Don’t wait too long, or they will become brittle and difficult to cut cleanly. You’ll likely make more tiles than you need for a single batch of brownies, which is actually a great thing! This allows you to select the prettiest, most uniform tiles for your brownie topping, while any “scraps” or less-than-perfect pieces can be saved for other uses (like crushing over ice cream or hot chocolate) or simply enjoyed as a standalone treat. This selection process ensures your finished brownies look professionally decorated.
The Grand Finale: Assembling Your Masterpiece
With your brownies baked, ganache spread, and peppermint tiles crafted, it’s time to bring all the elements together for the stunning final presentation. This step requires a bit of patience and a steady hand, but the results are truly rewarding.
Layering the Peppermint Tiles with Care
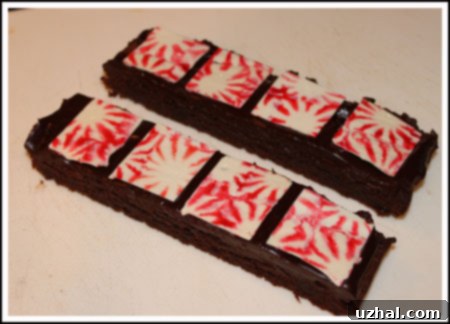
Carefully arrange the nicest of your peppermint tiles on top of the ganache-covered brownies. You can create a mosaic pattern, line them up in neat rows, or experiment with a staggered design. Aim to cover the entire surface, or at least the majority of it, with your chosen tiles. I found that I could comfortably arrange about 20 tiles on my batch of brownies, leaving plenty of beautiful, shimmering scrap peppermint that certainly didn’t go to waste. The vibrant red and white of the peppermint against the dark chocolate ganache creates a striking visual contrast that is undeniably festive.
The Chilling and Trimming Process: Achieving Perfection
Once the tiles are arranged, place the brownies in the refrigerator for at least 30 minutes. This chilling period is crucial for two reasons: it allows the ganache to firm up completely, ensuring the tiles are securely set, and it makes the brownies much easier to cut cleanly. When you’re ready to slice, use a sharp chef’s knife. To achieve impeccably clean edges, gently trim around the perimeter of the brownie slab, cleaning the blade with a warm, damp cloth after each cut. This technique prevents the ganache and peppermint from sticking to the knife and creating messy edges, ensuring every slice is as perfect as the last. Then, slice the brownies into individual portions, wiping the knife clean between each cut for the best presentation.
Tips for Success and Creative Variations
To ensure your Melted Peppermint Brownies turn out perfectly every time, here are a few pro tips and ideas for variations:
Pro Tips for Perfect Peppermint Brownies:
- Quality Ingredients Matter: Use good quality chocolate for your ganache and fresh peppermints for the best flavor and melting consistency.
- Don’t Overheat Mints: Keep a close watch on the peppermints in the oven. They melt quickly, and overheating can cause them to burn or become discolored.
- Cut Tiles While Warm: The window for cutting the melted peppermint is brief. Cut them as soon as they’re cool enough to handle but still pliable.
- Chill Thoroughly: Patience is key. A well-chilled brownie is easier to cut and will have perfectly set layers.
- Clean Your Knife: Wiping your knife clean between cuts for both the perimeter trim and individual slices will give you the sharpest, most professional-looking pieces.
Beyond Peppermint: Exciting Flavor Twists:
- Alternative Hard Candies: While peppermint is classic, consider experimenting with other hard candies like butterscotch, cherry, or even lemon drops for different flavor profiles and colors.
- Sprinkle Magic: If you’re short on time, you can always sprinkle crushed candy canes over the ganache instead of making melted tiles.
- Brownie Base Variations: Try a blonde brownie (vanilla-based) for a lighter chocolate contrast, or add mini chocolate chips to your brownie batter for extra richness.
Serving and Storing Your Festive Creation
These brownies are best served at room temperature or slightly chilled, allowing the flavors to fully develop and the ganache to be perfectly tender. Store any leftovers in an airtight container in the refrigerator for up to 5-7 days. For longer storage, you can freeze individual slices, well-wrapped, for up to 2-3 months. Thaw in the refrigerator overnight or at room temperature for a few hours before serving.
Conclusion: A Holiday Dessert That Shines Bright
Melted Peppermint Brownies are more than just a dessert; they’re a statement. Their vibrant colors, combined with the classic holiday flavors of chocolate and mint, make them an unforgettable addition to any festive gathering. Whether you’re baking for a holiday party, a family get-together, or simply to treat yourself, these brownies are guaranteed to bring smiles and compliments. So go ahead, embrace your inner baker, and create these dazzling treats that truly shine on your holiday table. You’ll feel like you’ve won an award for your culinary prowess!
For those eager to dive into the detailed steps and exact measurements, here’s a link to the original recipe that inspired this delightful creation.
