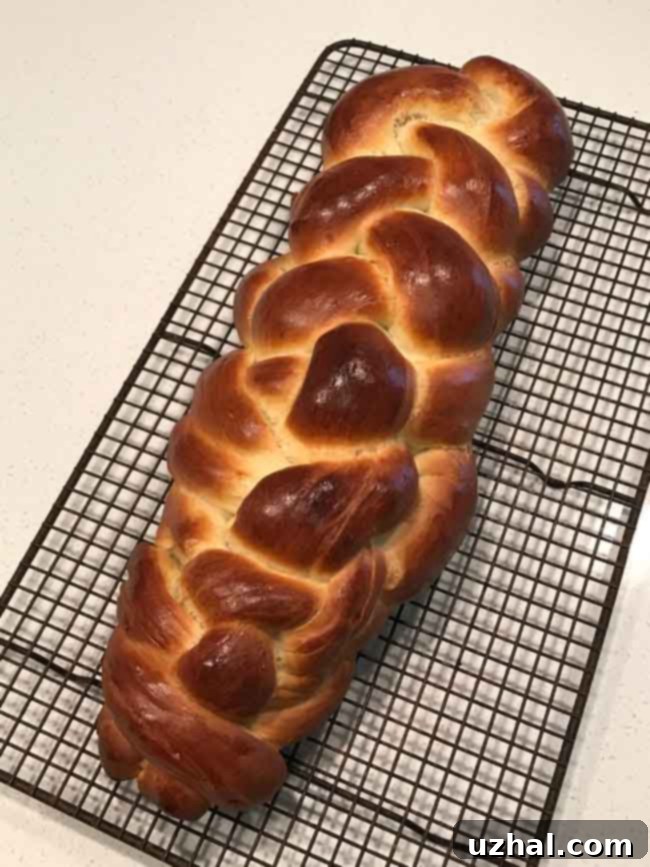
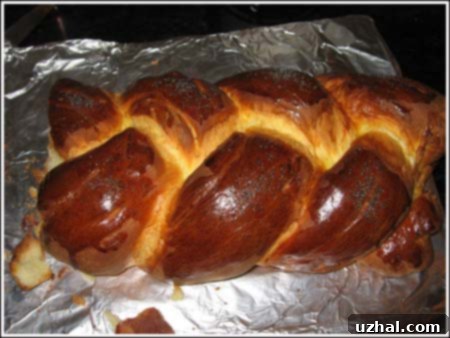
Mastering Rich Challah: Your Ultimate Recipe for Flaky, Golden Braided Egg Bread
Baking Challah has always been a deeply rewarding experience for me, and this particular recipe for “Rich Challah” holds a special place in my culinary journey. It dates back to my early days of delving into the art of bread making, a time of eager experimentation and joyful discovery. What truly sets this recipe apart is its generous ⅓ cup of oil, which is key to achieving its distinctively flaky, tender, and incredibly moist texture. This richness makes it stand out from many other Challah recipes, offering a more luxurious crumb that is simply irresistible.
While my partner, Fuzz, has since taken over much of our Challah baking, often favoring our delightful Challah for Bread Pudding recipe, this original “Rich Challah” remains a cherished classic. Its unique qualities make it a strong contender for the title of “favorite Challah” in our household, and we’ve often mused about conducting a side-by-side bake-off to truly compare their distinct characteristics. Perhaps that delicious culinary showdown will happen soon!
The Enduring Appeal of Homemade Challah
Challah is more than just bread; it’s a beautiful, intricate loaf with a fascinating texture and an undeniably delicious flavor that makes it one of my all-time favorite breads. Its golden, braided appearance is always impressive, making it a centerpiece on any table. Unfortunately, finding truly exceptional Challah in local bakeries can be a challenge. The joy and satisfaction of slicing into a warm, freshly baked loaf, knowing it was made with care in my own kitchen, is unparalleled. This is precisely why I embarked on my Challah-baking journey – to bring that perfect loaf to life right at home.

My path to mastering Challah hasn’t been without its bumps. I vividly recall a particular batch that turned into a complete disaster, primarily due to a miscalculation in the flour quantity. It was a disheartening experience that led to a temporary hiatus from Challah baking. I redirected my focus to other culinary adventures, but the call of that golden, braided beauty was too strong to ignore. Reinvigorated, I returned to my quest, and yesterday, I revisited Challah with renewed determination. I am thrilled to report that I believe I’ve finally perfected a truly exceptional recipe with this “Rich Challah,” a testament to persistence in the kitchen.
Crafting the Perfect Rich Challah: A Detailed Guide
This “Rich Challah” recipe originates from Recipezaar (now known as Food.com), and it’s remarkably straightforward, especially if you have the convenience of a stand mixer. While a stand mixer significantly simplifies the kneading process, don’t be deterred if you don’t own one. You can absolutely achieve fantastic results by kneading the dough by hand – it just requires a bit more arm work and patience. However, the therapeutic act of hand-kneading can be incredibly satisfying, connecting you more intimately with the bread-making process.

Essential Tips for Challah Baking Success
Before you dive into baking, I highly recommend glancing at the original recipe and, more importantly, reading through comments from other bakers. Feedback often provides invaluable insights. For instance, some bakers encountered issues with the recommended flour amount. In my experience, using bread flour, precisely 4 cups (which translates to 18 ounces or 1 pound 2 ounces when accurately weighed), yielded a perfect dough consistency. Initially, the dough might appear a bit dry, but trust the process – it will rise beautifully and develop into a supple, workable texture.
Another crucial adjustment I’ve made relates to oven temperature. The original recipe suggests preheating the oven to 400 degrees Fahrenheit from the very first step. This is a common pet peeve of mine in many recipes; you typically won’t be baking the Challah for another 2 ½ to 3 hours after you start assembling it! There’s no need to waste energy by turning on your oven so prematurely. I’ve found that a slightly lower temperature produces better results and prevents premature browning. **After extensive testing, I now recommend baking Rich Challah at 375 degrees Fahrenheit (190°C).** This temperature helps prevent the crust from becoming too dark too quickly, allowing the bread to bake evenly to a beautiful golden brown while ensuring the interior is perfectly cooked.
Furthermore, to enhance the overall flavor profile of this rich bread, I’ve increased the salt content. The updated recipe now calls for **1 ½ teaspoons of salt**, which beautifully balances the sweetness and richness, bringing out the true depth of flavor in the Challah. While you can reduce it to 1 teaspoon if you prefer a less salty profile, I find the 1 ½ teaspoons to be just right for a perfectly seasoned loaf.
Exploring Challah Variations and Braiding Techniques
It’s worth noting that while this “Rich Challah” recipe is exceptional, I also frequently bake our Easy Challah recipe. That version, linked in the first paragraph, uses quick-rising yeast and a slightly reduced oil content, making it a fantastic go-to for quick family meals and especially for creating delicious Challah Bread Pudding. This “Rich Challah” recipe, in contrast, utilizes 3 teaspoons of regular active dry yeast (roughly equivalent to just over one standard packet), contributing to its unique rise and texture.
Beyond ingredient adjustments, my Challah journey has also led me to explore different braiding techniques. Since first sharing this recipe, I’ve fallen in love with making Challah using six strands of dough instead of the traditional three. The six-strand method, once you get the hang of it, is not only visually stunning but also surprisingly fun and meditative. It creates a more intricate and impressive loaf, perfect for special occasions or when you simply want to elevate your baking. If you’re trying it for the first time, I highly recommend consulting a visual guide. This comprehensive braiding tutorial offers excellent step-by-step instructions that will help you master this beautiful technique with ease.
Preparing this Challah is a process that builds anticipation. From dissolving the yeast and watching it bloom to the rhythmic kneading of the dough, each step is a part of the baking ritual. The double rise ensures a light and airy texture, while the final braid transforms simple dough into a work of art. The aroma that fills your kitchen as it bakes is truly intoxicating, promising a reward that is well worth the effort and patience.
Recipe: Rich Challah (Braided Egg Bread)

Rich Challah (Braided Egg Bread)
Anna
Pin Recipe
Ingredients
- 1 teaspoon sugar
- ½ cup warm water
- 3 teaspoons yeast (regular active dry yeast)
- 4 cups bread flour (18 oz or 1 pound 2 oz, accurately weighed for best results)
- 4 tablespoons sugar
- 1 ½ teaspoons salt (for enhanced flavor, can reduce to 1 teaspoon if preferred)
- ⅓ cup canola oil
- 2 large eggs
- ¼ cup warm water
- 1 egg yolk — beaten with
- 1 teaspoon water (for egg wash)
- sesame seeds or poppy seeds (for topping, optional)
Instructions
-
In the bowl of your stand mixer (or a large mixing bowl if kneading by hand), dissolve 1 teaspoon of sugar in ½ cup of warm water. Ensure the water is warm (about 105-115°F or 40-46°C) to activate the yeast effectively.
-
Sprinkle the 3 teaspoons of active dry yeast over the water and sugar mixture. Give it a gentle stir, then let it stand undisturbed for about 10 minutes. This process is crucial to ensure your yeast is active; you should see a foamy layer forming on top, indicating it’s alive and ready to work.
-
Once the yeast is foamy, add the remaining 6 ingredients to the mixing bowl: 4 cups bread flour, 4 tablespoons sugar, 1 ½ teaspoons salt, ⅓ cup canola oil, 2 large eggs, and ¼ cup warm water. Attach the dough hook to your stand mixer and mix on medium-low speed for 6 minutes until the dough comes together and is well-kneaded. If kneading by hand, knead vigorously for 10-12 minutes until smooth and elastic.
-
The dough should feel slightly sticky but should also be manageable. Lightly oil a large bowl, place the dough in it, turning once to coat. Cover the bowl tightly with plastic wrap or a clean kitchen towel. Let the dough rise in a warm, draft-free place until it has doubled in bulk, which usually takes about 1 hour. Once doubled, gently punch down the dough to release the air. Recover and let it rise again until doubled in bulk, another 1 hour. This double-rise enhances flavor and texture significantly.
-
After the second rise, punch down the dough once more. Divide the dough into three equal parts (or six, if you’re attempting the 6-strand braid). Roll each part into a long, uniform strand, ensuring they are roughly the same thickness. Lay these strands out on a lightly greased or parchment-lined baking sheet. Braid them carefully, whether using the classic 3-strand method or the more intricate 6-strand braid, ensuring the braid is even and tight enough to hold its shape. Tuck the ends neatly underneath the loaf to create a smooth, finished appearance. Cover the braided Challah loosely with a clean towel and let it rise for a final 40 minutes, or until it has noticeably doubled in size and looks puffy.
-
While the Challah is undergoing its final rise, preheat your oven to 375 degrees Fahrenheit (190°C). Prepare your egg wash by beating 1 egg yolk with 1 teaspoon of water. Just before baking, gently brush the entire surface of the risen Challah with this egg wash. This will give it a beautiful golden sheen and help the seeds adhere. If desired, sprinkle generously with sesame seeds or poppy seeds for added texture and flavor. Bake in the preheated oven for approximately 30-35 minutes, or until the Challah is a deep, rich golden brown. Start checking after 20 minutes; if it’s browning too quickly, you can loosely tent it with aluminum foil to prevent over-darkening while allowing the interior to finish baking.
-
To confirm doneness, gently tap the bottom of the Challah. A hollow sound indicates that it is fully baked through and ready to be removed from the oven. Transfer the Challah immediately to a wire rack to cool completely before slicing. Enjoy this beautiful, rich, and flaky bread fresh out of the oven, or let it cool for easier slicing!
Serving Suggestions and Enjoying Your Homemade Challah
Once your beautiful Rich Challah has cooled slightly on a wire rack, it’s ready to be enjoyed. The aroma alone is enough to make your mouth water! This bread is incredibly versatile and delicious, making it perfect for various occasions. Enjoy it simply sliced and fresh, perhaps with a pat of butter, or alongside a hearty meal. It makes for an extraordinary breakfast toast, or a base for the most luxurious sandwiches you can imagine, thanks to its rich flavor and substantial texture. Its slightly sweet and rich profile also pairs wonderfully with savory dishes, such as roasted chicken or a vibrant salad.
And speaking of versatility, don’t forget that any leftover Challah (if there is such a thing!) transforms wonderfully into other delightful dishes. This particular Rich Challah, with its unique flaky texture and richness, is an excellent candidate for making our aforementioned Challah Bread Pudding – a dessert that truly elevates stale bread to new heights. Its inherent richness makes for an exceptionally decadent and comforting pudding, perfect for a special treat or a cozy evening.
Why This Rich Challah Recipe Will Become Your Favorite
Baking Challah might seem daunting at first glance, but with this detailed recipe and these helpful tips, you’ll find the process both manageable and incredibly rewarding. The beauty of homemade Challah lies not only in its exquisite taste and texture but also in the profound satisfaction of creating something truly special from scratch. This “Rich Challah” recipe delivers on all fronts: it’s flavorful, flaky, moist, and visually stunning, making it a proud achievement for any baker. Whether you’re a seasoned artisan or just starting your journey into the wonderful world of yeast breads, this recipe provides a clear, encouraging path to success.
So gather your ingredients, activate that yeast with confidence, and prepare to embark on a delightful baking adventure. The result – a warm, golden, perfectly braided loaf of Rich Challah – will be a testament to your efforts and a treat for all your senses. Don’t be afraid to experiment with your braiding, adjust the salt slightly to your personal taste, and most importantly, remember to enjoy every step of the process. The kitchen is a place for creativity and joy, and this Challah recipe embodies just that. Happy baking!
