The Ultimate Homemade Chocolate Babka Recipe: Rich, Swirly & Utterly Delicious
There’s something truly magical about baking a classic, and for me, that classic is Chocolate Babka. This isn’t just any recipe; it’s the one I return to time and again, a proven winner that consistently yields a loaf that’s not only visually stunning but also perfectly balanced in its richness. It’s a rewarding baking project that fills your home with an irresistible aroma and delivers a dessert that’s deeply comforting and utterly delicious. Whether you’re an experienced baker or new to yeast doughs, this guide will walk you through creating a babka that’s easy to achieve, incredibly satisfying, and destined to become a household favorite.
The Secret to an Exquisite Chocolate Babka Filling
What truly sets this chocolate babka apart from many other recipes is its unique filling. While traditional methods often call for sprinkling chopped chocolate over the dough before rolling, this recipe employs a more indulgent approach. Here, you melt high-quality chocolate chips (like Ghirardelli bittersweet) with a touch of butter and sugar to create a luxurious, spreadable mixture. This technique, inspired by a brilliant idea from Epicurious, has become my go-to for a reason: it produces a deeply flavorful, rich, and incredibly moist chocolate layer that permeates every bite.
The melted chocolate filling ensures an even distribution of chocolate throughout the babka, preventing the common issue of dry spots or uneven chocolate clumps. When baked, it creates pockets of gooey, intensely chocolatey goodness that truly make each slice memorable. Yes, assembling it can be a tad messy, but the results are absolutely worth a little extra effort. A crucial tip for easier assembly is to ensure you have some dedicated space in your freezer or refrigerator to quickly chill and firm up the chocolate spread once it’s on the dough, making the rolling and twisting process significantly smoother.
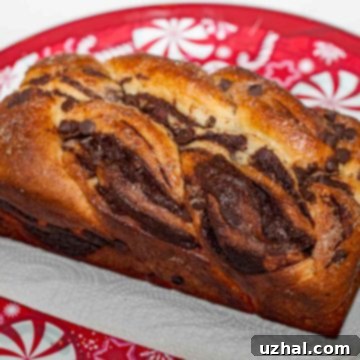
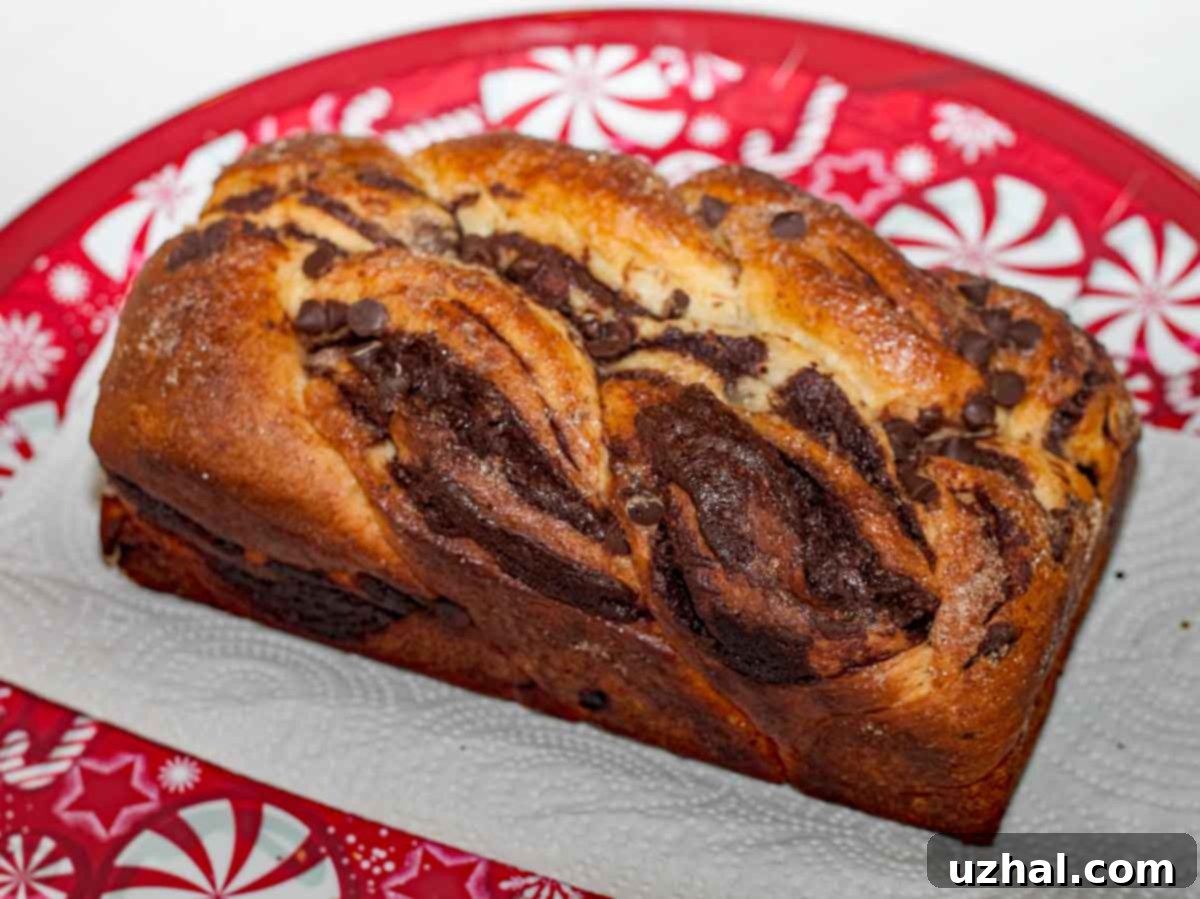
Take a moment to admire these chocolate babka photos, capturing the delicious journey through the years:
Customizing Your Babka: From Grand Loaves to Mini Treats
One of the beauties of this chocolate babka recipe is its versatility when it comes to loaf sizes. I once made a large batch for a Chicago Food swap, opting for charming mini loaves (approximately 3×5 inches). This smaller format proved incredibly popular and practical. Mini babkas are ideal for individual servings, perfect for gifting, and incredibly easy to wrap and freeze for later enjoyment. They offer a delightful portion-controlled treat without compromising on flavor or that signature swirled aesthetic.
However, if you prefer a more substantial presentation, this recipe can also be adapted to create one generous 8 ½ by 4 ½ inch loaf. The choice is entirely yours, depending on your occasion or preference. The updated recipe specifically yields either one regular-sized loaf or two of these convenient 3×5 inch mini loaves. Should you desire a truly impressive, extra-large babka or multiple smaller ones, simply double the recipe. This flexibility ensures that whether you’re baking for a crowd, a cozy gathering, or just stocking your freezer, you can tailor your babka output perfectly.
Mastering the Art of the Chocolate Babka Twist: A Step-by-Step Guide
The signature look of a babka, with its beautiful marbled layers of dough and chocolate, comes from a specific folding and twisting technique. While photography might not be my strongest suit, I’ve put together a small visual guide to help you through this crucial part of the process. Even imperfect photos can be incredibly helpful for understanding the mechanics!
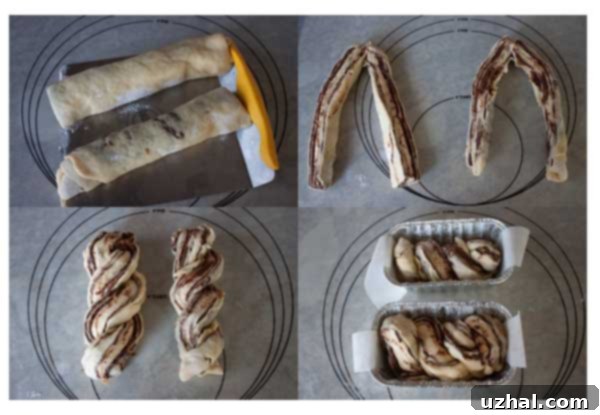
The images below illustrate the technique using half of the total dough, which is enough for two mini loaves or one standard 8 ½ by 4 ½ inch loaf. The process begins with your chocolate-filled dough rolled into a cylinder, resembling a long jellyroll. This cylinder is then cut in half lengthwise, exposing those gorgeous layers of chocolate and dough.
In the first photo of the collage, you see the rolled cylinder of dough, which has then been neatly cut into two logs. The second photo shows these logs after they’ve been split vertically, their chocolate-laden interiors now exposed and ready for twisting. The third photo demonstrates how these split logs are carefully twisted together, intertwining the chocolate and dough to create that classic babka swirl. Finally, the fourth photo reveals the twisted dough gently squished and arranged into loaf pans, ensuring a snug fit for optimal baking. This method creates stunning visual appeal and ensures that every bite is packed with both tender bread and decadent chocolate.

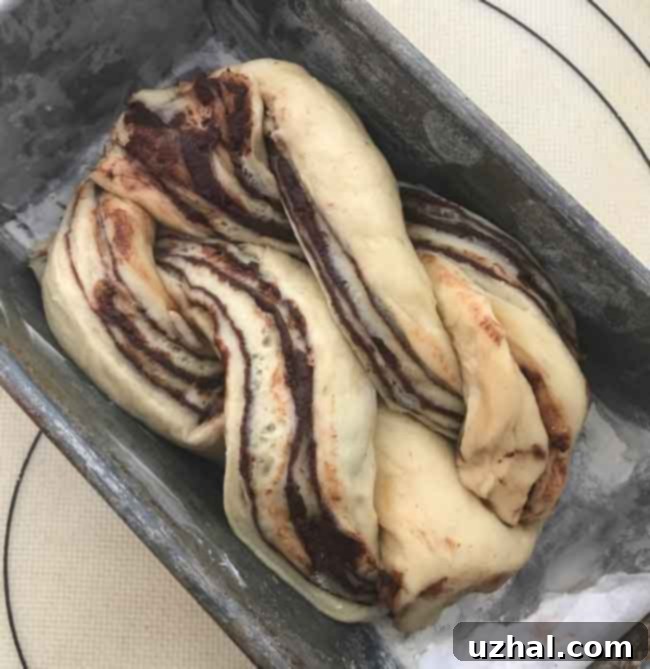
For those making a larger loaf, here’s an updated photo demonstrating how the twists should look when placed side-by-side into an 8 ½ by 4 ½ inch pan. Instead of placing just one twist per pan as you would for mini loaves, you’ll use two twists side-by-side, carefully nestling them to fill the pan. This creates a larger, more impressive babka with even more luscious swirls. Remember, the freezer step is essential for firming up the chocolate, making the dough much easier to handle and achieve those clean, defined layers during the twisting process.
Update: The recipe has been refined to yield one standard 8 ½ by 4 ½ inch loaf or two smaller 3×5 inch loaves. Feel free to double the recipe if you’re aiming for a truly massive babka or a batch of delightful mini babkas for sharing or freezing.

The Rich History and Enduring Allure of Babka
Before we dive into the detailed recipe, it’s worth appreciating the heritage of this beloved pastry. Babka, which means “grandmother” or “old woman” in several Slavic languages, originated in the Jewish communities of Eastern Europe, particularly Poland and Ukraine. Traditionally made from leftover challah dough and often filled with cinnamon, fruit jams, or poppy seeds, it was a way to make use of ingredients and create a rich, sweet bread that could be enjoyed on the Sabbath.
Over time, as Jewish immigrants brought their culinary traditions to new lands, babka evolved. The chocolate babka, as many of us know and love it today, gained significant popularity in North American bakeries, especially in New York. Its distinctive swirled appearance, rich brioche-like dough, and indulgent fillings quickly captured hearts. It’s a pastry that evokes warmth, family, and tradition, making it more than just a dessert—it’s a piece of culinary history that continues to bring joy to generations.
Tips for Babka Baking Success
Achieving a perfect chocolate babka is incredibly rewarding, and a few key tips can make all the difference:
- Yeast Activation: While this recipe calls for fast-rising yeast, which can often be mixed directly with dry ingredients, ensure your milk is at the specified temperature (125°F) to give the yeast a strong start. If using active dry yeast, remember that your rising times will likely be longer. Always check the expiration date on your yeast for optimal results.
- Dough Consistency: The babka dough is meant to be soft and slightly sticky, enriched with butter and eggs. Don’t be tempted to add too much extra flour during kneading, as this can result in a dry, tough bread. The dough hook of a stand mixer is invaluable here, developing gluten while keeping your hands less sticky.
- The Melted Chocolate Filling: The quality of your chocolate directly impacts the flavor of your babka. Investing in good quality bittersweet chocolate chips (around 60% cacao) will yield a deep, complex chocolate flavor that isn’t overly sweet. Melting the chocolate with butter ensures a spreadable, rich consistency that adheres beautifully to the dough and creates those delightful, gooey pockets when baked.
- Chilling is Key: The step of freezing the chocolate-filled dough log is crucial. This firms up the chocolate and the dough, making it much easier to handle, cut, and twist without the filling oozing out excessively. Don’t skip this step – it’s your secret weapon for those clean, defined swirls.
- Don’t Overbake: Overbaking can dry out your babka. Use a thermometer to check for doneness; 205°F (96°C) in the center is ideal. The top should be a deep golden brown, and the internal chocolate should be molten.
- Storage and Reheating: Babka is best enjoyed fresh, but it stores wonderfully. Wrap cooled babka tightly in plastic wrap and store at room temperature for up to 3 days, or in the refrigerator for up to a week. For longer storage, slice the babka, wrap individual slices, and freeze for up to 3 months. To enjoy, thaw and gently reheat slices in a microwave or oven until warm and soft.
- Creative Variations: While chocolate is divine, don’t hesitate to experiment! Other popular babka fillings include cinnamon-sugar, Nutella, poppy seed paste, or even fruit and cheese combinations. The dough recipe provides a fantastic base for endless possibilities.
Armed with these tips, you’re now ready to embark on your babka-baking adventure!
Recipe

Chocolate Babka
Anna
Pin Recipe
Ingredients
- 1 ¾ cups bread flour plus additional for dusting (240 grams)
- ¼ cup sugar (50 grams)
- 1 ⅛ teaspoons fast rising yeast or 1 ½ teaspoons active dry
- ½ teaspoon salt
- 6 tablespoons very warm milk 125F
- 1 large egg room temperature
- ½ egg yolk
- 5 tablespoons unsalted butter softened (70 grams)
Egg Wash
- ½ egg yolk reserved from earlier
- 1 tablespoon whole milk
Chocolate Filling
- 2 ½ tablespoons unsalted butter (35 grams)
- ⅔ cup Ghirardelli bittersweet chocolate chips (120 grams)
- 2 tablespoons granulated sugar (25 grams)
Instructions
-
Combine the flour, sugar, yeast, and salt in the bowl of a stand mixer fitted with the paddle attachment.
-
Add the warm milk and stir until well mixed. Then, incorporate the whole egg and the reserved half yolk, continuing to mix until fully blended. This initial mixing can be done by hand or with the stand mixer’s paddle attachment. Gradually add the softened butter, one or two chunks at a time, and continue mixing, periodically scraping down the sides of the bowl. Don’t worry if the butter isn’t perfectly integrated yet; the dough hook will finish the job!
-
Switch to the dough hook attachment on your stand mixer and knead the dough for approximately 5 minutes. The dough will be sticky and may not completely pull away from the sides of the bowl as it kneads. To ensure proper consistency, stop the mixer occasionally and use a scraper to push the dough off the sides and into the center. It will remain a sticky dough, but you should notice it developing a good snap and elasticity.
-
Scrape the sticky dough into a bowl that has been thoroughly greased with oil, then roll the dough around to coat it completely. Cover the bowl tightly with plastic wrap and allow it to rise in a warm spot until it has doubled in bulk (this typically takes about 40 minutes to an hour with fast-rising yeast, but longer for active dry). The dough should feel smooth and slightly oily. While the dough is proofing, it’s a good time to prepare your egg wash mixture and measure out your chocolate filling ingredients.
-
Once the dough has risen beautifully, lay out a large pastry mat. You generally shouldn’t need to flour the mat, as the dough’s inherent oiliness should prevent it from sticking. However, if you find the dough unexpectedly sticky, a light dusting of flour can be used.
-
Gently press, roll, or pat the dough into a 16×11 inch rectangle. Position the 16-inch side closest to you, along the bottom edge. If the dough has the correct, pliable texture, you might even be able to achieve this shape easily just by patting it with your hands, without needing a rolling pin.
-
Time to prepare the decadent filling. In a microwave-safe bowl (a 2-cup Pyrex works perfectly), melt the chocolate chips and butter together on high, stirring diligently every 30 seconds until the mixture is completely smooth and melted. Once melted, stir in the granulated sugar until fully combined.
-
Before spreading the chocolate mixture, lightly brush a small amount of your prepared egg yolk/milk mixture along the 16-inch edge of the dough rectangle that’s furthest from you. This will act as a “glue” to seal the roll later.
-
Now, spread the warm, melted chocolate mixture as evenly as possible over the entire surface of the dough rectangle, leaving a small margin along the edges you brushed.
-
Starting from the 16-inch side closest to you, gently loosen the edge of the dough with a bench scraper or a thin spatula. Begin to roll the dough upward into a tight, 16-inch jellyroll shape. As you roll, continue using the bench scraper or spatula to help loosen the dough from the mat and push it upward, ensuring a tight roll. Once fully rolled, firmly pinch the edges to seal the seam. You should now have a somewhat messy, but beautiful, 16-inch (approximate) jellyroll.
-
Carefully transfer this chocolate-filled jellyroll onto a piece of parchment paper, then place it into the freezer. Don’t stress too much if the log gets a little disheveled during the transfer; just get it into the freezer. This crucial step is to quickly set the chocolate filling, making the log much firmer and significantly easier to work with for the next stage.
-
While your dough log is chilling in the freezer, prepare your loaf pans. Grease two 5×3 inch mini loaf pans, or one standard 8 ½ by 4 ½ inch loaf pan, and line them with strips of parchment paper, leaving an overhang on the long sides to easily lift the babka out after baking.
-
Remove the log from the freezer and place it back on your pastry mat. At this point, it will be slightly firm and cold but still pliable. Use your hands to gently reshape and “neaten” it into a consistent 16-inch cylinder. Cut the log in half crosswise, yielding two 8-inch pieces. Take one of these pieces and carefully cut it lengthwise down the middle, exposing the beautiful chocolate layers. Turn the two split pieces onto their backs, with the cut sides facing upward. Pinch the very tops of these split pieces together, then begin to twist them, bringing one strand over the other, alternating each time, until you’ve formed a beautiful, intertwined twist. Repeat this process with the remaining half of the jellyroll to create a second twist.
-
If you are baking one 8 ½ by 4 ½ inch loaf, lay your two completed twists side by side, lengthwise, into the prepared pan. If you are opting for two mini loaves, cut each of your long twists cross-wise into two smaller, stubbier twists. Arrange these four smaller twists into your two mini loaf pans, gently squishing them to fit snugly.
-
Preheat your oven to 350 degrees F (175 degrees C). Brush the tops of your babkas with the remaining egg wash for a beautiful golden crust, and if desired, sprinkle with sparkling sugar for extra crunch and shine. Bake for approximately 40-45 minutes, or until a thermometer inserted into the thickest part of the loaf reads 205 degrees F (96 degrees C).
-
Allow the babka to cool completely on a wire rack (or cool and then freeze for later enjoyment). Once cooled, slice and reheat slightly for that fresh-from-the-oven experience.
Notes
- Yeast Type: If you choose to use active dry yeast instead of fast-rising yeast, you do not need to dissolve it in warm milk first. You can simply combine it directly with the flour mixture, just as you would with rapid rise yeast. However, be aware that the dough’s rising time will generally be longer when using active dry yeast.
- Chocolate Filling Selection: For the most luxurious chocolate filling, I’ve experimented with various types of chocolate and consistently found that melted Ghirardelli 60% Bittersweet Chocolate Chips yield the best results. When melted, chopped chocolate can sometimes spread a bit too much and result in a slightly greasier texture. The melted chip mixture, on the other hand, provides a richer, more contained filling that minimizes oozing during baking, ensuring beautiful, distinct chocolate swirls.
- Filling Alternatives: While some babka recipes suggest brushing the dough with melted butter and sprinkling finely chopped chocolate and sugar, I’ve grown to appreciate the superior, even distribution and deep flavor achieved with this melted chocolate filling technique. It delivers a consistently rich and memorable chocolate experience throughout the entire loaf.
