Effortless Elegance: Baking the Perfect No-Mixer Chocolate Chip Cream Cake
Prepare to discover your new favorite dessert – a cream cake that redefines ease and indulgence. What truly sets this recipe apart, and why it’s become an instant obsession, is its incredible simplicity: no electric mixer required. You might instinctively imagine that a cake made without the vigorous aeration of a stand mixer would result in a dense, heavy texture, perhaps akin to a muffin or a quick bread. However, this recipe defies expectations. Instead, it yields a magnificent, high-rising loaf cake with a beautifully rounded top and an exceptionally tight, fine-crumbed texture that rivals the sophisticated density of a classic pound cake. This delightful surprise makes it perfect for both novice bakers and seasoned pros looking for a fuss-free yet impressive treat.
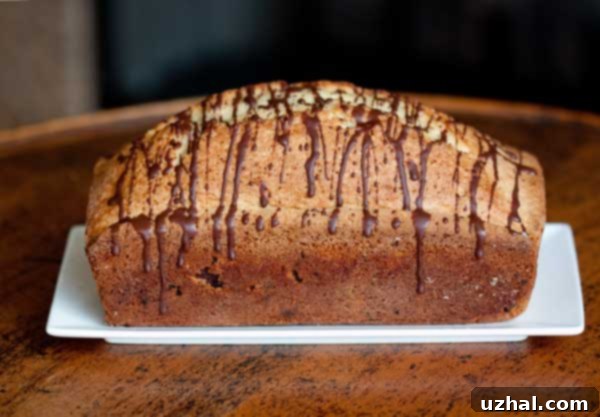
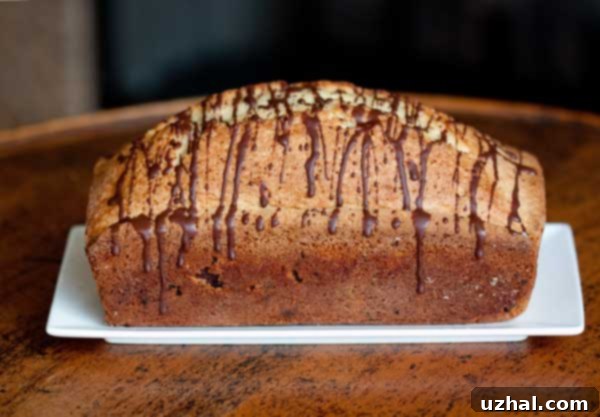
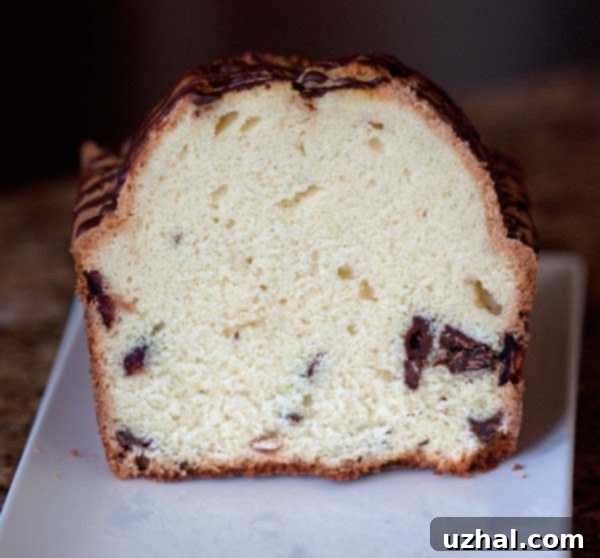
Indeed, this past week has seen me captivated by the art of baking high-rising loaf cakes, and this cream cake recipe has been at the heart of my culinary experiments. I’ve baked it numerous times, meticulously observing how various add-ins influence its structure, rise, and overall appeal. My initial attempt, captured in the first picture, featured approximately half a cup of generous chocolate chunks. While undeniably delicious, they behaved as expected: their weight unfortunately caused them to sink towards the bottom of the loaf. This observation sparked further investigation into finding the ideal chocolate inclusion for that perfect, evenly distributed bite.
The Great Chocolate Debate: Mini Chips vs. Chocolate Chunks for Even Distribution
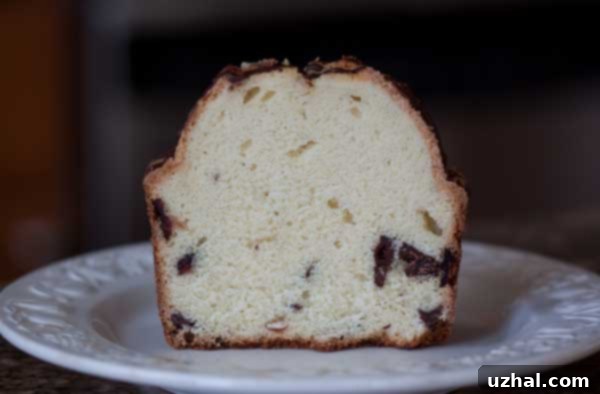
My experiments continued beyond the initial chocolate chunks. I tried regular-sized chocolate chips, even tossing them lightly with flour in an attempt to prevent sinking – a common baking trick. Alas, even with this precaution, their weight still proved too much, and they too descended during baking. This challenge led me to a critical revelation: the solution lay in the size of the chocolate. Enter the mini chocolate chips. These tiny morsels, with their significantly lighter weight and greater surface area relative to their mass, managed to stay remarkably evenly distributed throughout the cake batter as it baked. Every slice offered a consistent scattering of chocolate, ensuring a delightful cocoa burst in every bite.
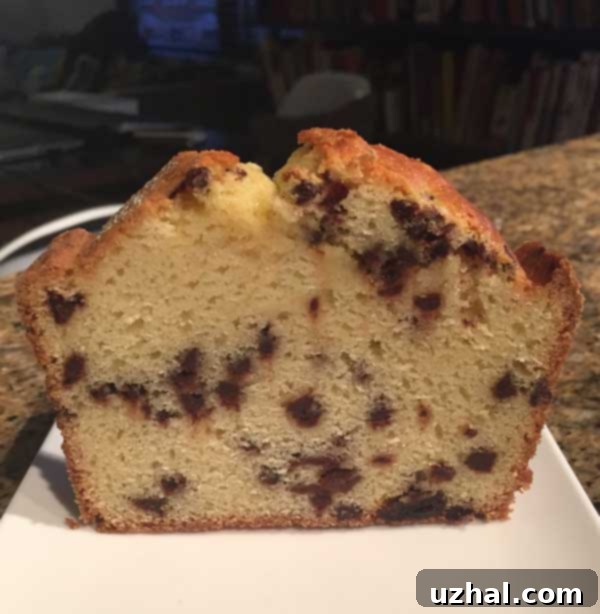
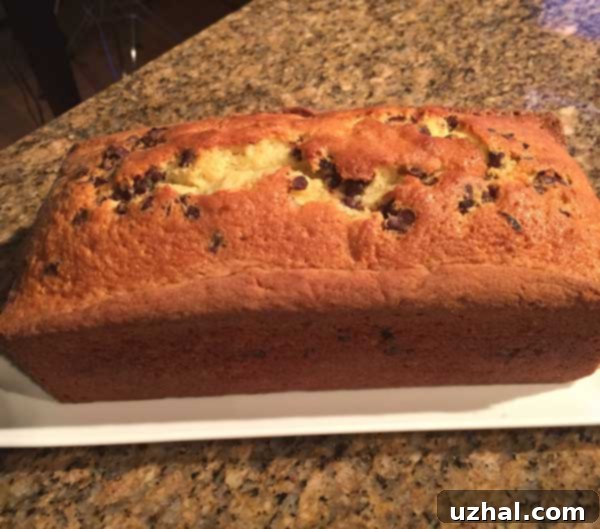
The only slight “problem,” from my perfectionist baker’s perspective, was that in my enthusiasm to ensure every crumb was chocolate-laden, I used so many mini chips that the cake didn’t quite achieve the towering height of its chunk-free counterparts. However, this minor aesthetic compromise was purely my own internal critique. Everyone else, without exception, adored the slightly shorter, undeniably denser cake, precisely because it was so generously packed with chocolate. This goes to show that sometimes, a minor deviation from the “perfect rise” can lead to an even more beloved outcome, especially when it involves more chocolate!
Unleash Your Creativity: Flavor Variations for Your No-Mixer Cream Cake
This cake isn’t just a joy to eat; it’s genuinely fun to bake and presents so beautifully, making it an ideal centerpiece for any gathering or a delightful treat for a quiet afternoon. Its inherent simplicity and the robust structure of the batter make it incredibly forgiving and adaptable, inviting endless possibilities for customization. While the classic chocolate chip version is undeniably a hit, the foundation of this no-mixer cream cake recipe lends itself perfectly to a variety of flavor transformations. I’ve been jotting down a few ideas, and once tested and perfected, I’ll be sure to add them to the notes section of the recipe. But for now, here are some inspiring concepts to get your creative juices flowing:
- Citrus Burst: Swap the orange zest for lemon or lime zest to infuse a bright, zesty aroma and flavor. A corresponding citrus glaze made with powdered sugar and fresh juice would elevate it further.
- Nutty Indulgence: Incorporate toasted chopped nuts like walnuts, pecans, or almonds. For best results in preventing sinking, finely chop them and consider a light dusting of flour.
- Spiced Warmth: Add a teaspoon of ground cinnamon, nutmeg, or a pumpkin spice blend for a cozy, autumnal twist. This pairs wonderfully with a brown sugar glaze.
- Fruity Delight: Gently fold in dried cranberries, chopped dried apricots, or finely diced candied ginger. Ensure they are not too heavy or wet to maintain the cake’s delicate balance.
- Almond Bliss: Enhance the almond extract (if using) and add a handful of slivered almonds to the batter. An almond-flavored glaze would complete this sophisticated variation.
- Coffee Kick: Dissolve a teaspoon of instant espresso powder in a tablespoon of the heavy cream before adding it to the batter for a subtle coffee flavor that beautifully complements chocolate.
The beauty of this recipe lies not only in its ease but also in its versatility. It’s a foundational cake that encourages experimentation, allowing you to tailor it to your personal preferences or the seasonal flavors you love most. So, feel free to play with your favorite extracts, zests, and mix-ins to create your own signature version of this stunning loaf cake.
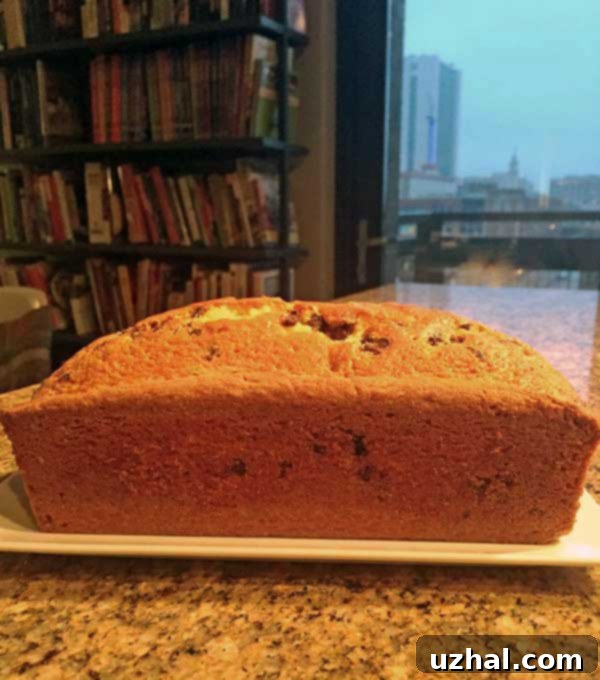
This truly is a remarkable recipe – simple to assemble, beautiful to behold, and utterly delicious to devour. Its pound cake-like density and fine crumb make it exceptionally moist and satisfying. The fact that it requires no special equipment, just a bowl and a whisk, makes it even more appealing. Whether you’re craving a quick treat or aiming to impress with minimal effort, this no-mixer chocolate chip cream cake is your answer. Now, let’s get baking!
- Mini Banana Muffins
- Mini Pumpkin Muffins
- Mini Loaf Pan or Bar Cookies
- Mini Chocolate Loaf Cakes
- Mini Black Bottom Cupcakes
Recipe
Mini Chip Chocolate Cream Cake
Cookie Madness
Pin Recipe
Ingredients
- 1 ¾ cups cake flour (200 grams or 7 ounces by weight. Cake flour is key for that fine, tender crumb!)
- ½ teaspoon Rumford double acting baking powder (Ensures a good, even rise without an electric mixer.)
- ¼ teaspoon salt (Balances the sweetness and enhances flavors.)
- 1 ⅓ cups granulated sugar (260 grams, I prefer C&H Baker’s Sugar for its finer texture, which dissolves beautifully.)
- 4 large eggs (200 grams, absolutely essential to be at room temperature for proper emulsification and a smoother batter.)
- 1 tablespoon orange zest (Adds a bright, aromatic lift that complements the chocolate beautifully.)
- 1 teaspoon vanilla extract or a combination of vanilla and almond (Pure vanilla extract offers warmth, while a hint of almond adds sophistication.)
- ½ cup heavy cream (Also crucial to be at room temperature for a smooth, well-combined batter.)
- 5 ½ tablespoons unsalted butter (Melted gently and cooled completely to room temperature – this is vital, or it will cook your eggs! 80 grams.)
- ⅔ cup miniature chocolate chips (These are the secret to even distribution; no need to toss them in flour!)
Instructions
-
Prepare your pan and oven: Preheat your oven to a steady 350 degrees F (175 C). Prepare an 8 ½ by 4 ½ inch loaf pan by thoroughly greasing and flouring it. For easy removal, line the bottom with a strip of parchment paper, allowing it to overhang on the long sides for “handles.” This ensures your beautifully baked cake comes out effortlessly.
-
Crucial Room Temperature Check: BEFORE YOU BEGIN MIXING ANY INGREDIENTS, ensure your butter is gently melted and completely cooled to room temperature, and all other dairy and eggs are also at room temperature. This step is non-negotiable for a smooth, emulsified batter and optimal cake texture. Cold ingredients can cause the batter to curdle and prevent the cake from rising properly.
-
Combine Dry Ingredients: In a medium bowl, sift together the cake flour and baking powder. Sifting is important here to ensure there are no lumps and to introduce a little air. Then, add the salt and whisk everything together thoroughly for about 30 seconds to ensure even distribution of the leavening agent. Set this dry mixture aside.
-
Whisk Wet Ingredients: In a large mixing bowl (remember, no electric mixer!), combine the granulated sugar and the room temperature eggs. Whisk vigorously by hand for at least 1 minute, or until the mixture is visibly lighter in color, slightly foamy, and well blended. This hand-whisking incorporates air and helps dissolve the sugar, contributing to the cake’s fine crumb.
-
Integrate Dry and Wet Mixtures: Now, add about one-third of your sifted flour mixture over the whisked eggs and sugar. Whisk gently until just combined, being careful not to overmix. Repeat this process two more times, incorporating another third of the flour mixture with each addition, until all the dry ingredients are fully blended into the batter. Next, stir in your chosen flavorings (orange zest, vanilla extract/almond extract), the room temperature heavy cream, and finally, the COOLED, melted butter. Mix until just smooth. Lastly, gently fold in the miniature chocolate chips until they are evenly distributed. Avoid overmixing once the flour is added.
-
Bake to Perfection: Carefully pour the prepared batter into your greased and floured loaf pan. Place the pan on the center rack of your preheated oven and bake for approximately 60 minutes. The cake is done when the center proudly crowns and shows visible cracks, and a wooden toothpick inserted into the thickest part comes out clean or with a few moist crumbs attached. For absolute precision, use a meat thermometer; the internal temperature should register between 205 and 210 degrees F (96-99 C). Once baked, let the cake cool in the pan on a wire rack for about 20 minutes. After about 10 minutes, carefully run a knife around the edges to loosen the sides. Then, use the parchment paper overhang to lift the cake gently out of the pan and transfer it to the wire rack to cool completely for several hours. This gradual cooling prevents the cake from becoming dense.
-
Storage: Once the cake is entirely cool, wrap it tightly in aluminum foil or plastic wrap. This helps maintain its moisture and freshness. Stored properly at room temperature, this delicious cream cake should remain wonderfully moist and flavorful for 3 to 4 days.
Notes
Room Temperature Ingredients: This point cannot be stressed enough. Eggs and heavy cream that are at room temperature emulsify much more effectively with the other ingredients, creating a smoother, more uniform batter and ultimately a better-textured cake. To quickly bring eggs to room temperature, place them in a bowl of warm (not hot) water for 5-10 minutes.
Cooling Melted Butter: Ensure the melted butter is *completely* cooled before adding it to the egg mixture. If it’s even slightly warm, it can begin to cook the eggs, leading to a lumpy batter and a compromised texture.
Flavor Variations (Tested & Approved – coming soon!): As mentioned earlier, this recipe is incredibly versatile. I’m currently experimenting with a lemon zest & poppy seed variation, and a cinnamon swirl version. Stay tuned for updates in this section with precise measurements and instructions for these exciting twists once they’ve passed my rigorous taste tests! In the meantime, feel free to explore adding your favorite extracts or spices.
Overmixing: Since this is a no-mixer cake, it’s particularly important to avoid overmixing the batter, especially after adding the flour. Overmixing develops gluten, which can lead to a tough, dry cake. Mix only until the ingredients are just combined and no streaks of flour remain.
