Irresistible No-Bake Peanut Butter Butterfinger Balls with Corn Flakes: Your New Favorite Crunchy Chocolate Treat
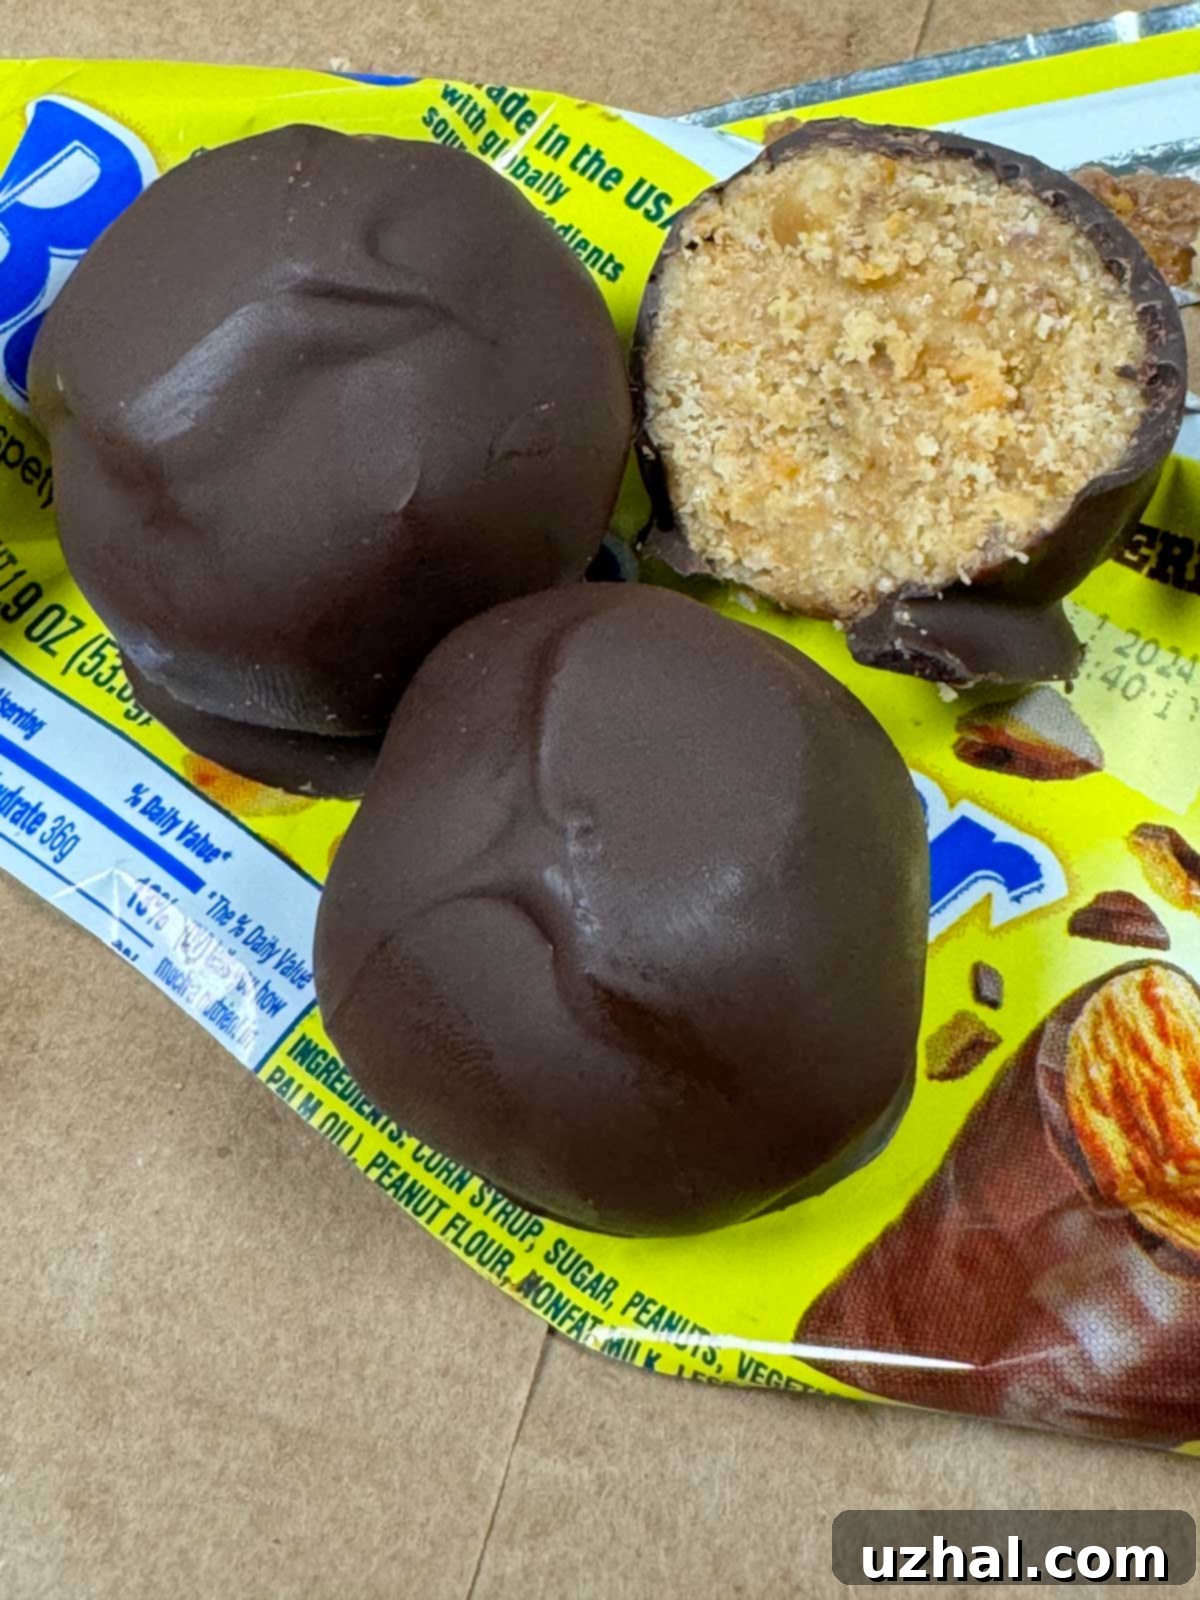
Are you on the hunt for a show-stopping dessert that requires zero oven time? Look no further than these incredible No-Bake Peanut Butter Butterfinger Balls with Corn Flakes. While they share a delightful resemblance to the classic Buckeye candies, these treats offer a distinct and irresistible twist: a satisfying crunch and a perfectly balanced sweetness that’s a touch less intense than their famous Ohio-born cousins. For years, I’ve experimented with various cereals, from the subtle crisp of Rice Krispies to the more pronounced texture of Corn Flakes, and I’ve unequivocally concluded that the Corn Flakes version reigns supreme. The unique crispness of Corn Flakes not only amplifies the “Butterfinger” experience within each bite but also adds an addictive textural layer that truly sets this recipe apart. Get ready to discover your new go-to no-bake dessert that promises both simplicity and an explosion of flavor!
Jump to Recipe

The Foundation of Flavor: Choosing the Right Peanut Butter
The key to crafting truly exceptional No-Bake Peanut Butter Butterfinger Balls lies in selecting the perfect peanut butter. While I’m a huge advocate for natural, unsweetened varieties like Teddie for my morning toast or a protein-packed smoothie, this particular recipe calls for a specific type to achieve its ideal texture and flavor profile. For these no-bake treats, you’ll want to reach for a common, sweetened peanut butter, such as Peter Pan or Jif. Here’s a closer look at why this choice is so crucial:
- Achieving Perfect Texture: Sweetened peanut butter typically has a more uniform and consistent texture, thanks to the addition of stabilizers, oils, and sugars. This results in a less crumbly and dry mixture, which is essential for forming perfectly spherical balls that hold their shape. Natural peanut butter, with its tendency for oil separation, can create a granular mixture that’s more difficult to work with and prone to falling apart.
- Balanced Sweetness: The pre-existing sweetness in these peanut butters seamlessly complements the confectioners’ sugar and the chocolate coating. This creates a harmonious flavor profile, ensuring that the distinct taste of Butterfinger and the subtle crisp of Corn Flakes shine through without being overpowered by excessive sweetness.
- Effortless Handling: The smoother consistency of sweetened peanut butter makes the entire mixing and molding process significantly easier and less time-consuming. You’ll find the dough much more pliable and cooperative, allowing you to quickly form dozens of perfectly shaped candies.
When it comes to choosing between creamy or crunchy sweetened peanut butter, the decision rests entirely on your preference. Creamy peanut butter will provide a consistently smooth interior, allowing the crushed Butterfinger and Corn Flakes to be the sole sources of crunch. Opting for crunchy peanut butter will introduce an additional layer of nutty texture, enhancing the overall chewiness. Both options promise delicious results, so choose what best suits your taste!
Streamlining the Process: The Advantage of Food Prep Gloves
Making these delectable peanut butter balls is a wonderfully hands-on experience, and there’s no better tool than your own hands for shaping them into perfectly uniform spheres. However, working directly with a sticky, rich peanut butter mixture can quickly become, well, messy. That’s why I strongly endorse the use of food prep or food-safe gloves. This small, inexpensive addition will fundamentally improve your candy-making process, making it much cleaner, more hygienic, and ultimately, more enjoyable.
- Minimizing Mess: Gloves act as an effective barrier, preventing the sticky peanut butter mixture from adhering to your skin and getting lodged under your fingernails. This means significantly less cleanup after you’re done shaping, allowing you to focus on the fun part of making treats.
- Effortless Shaping: The smooth surface of the gloves actually aids in rolling the mixture into beautifully smooth, firm balls. Even if you use a small cookie scoop to portion out the mixture (a technique I frequently employ for consistency), a quick roll between your gloved palms ensures each ball is perfectly spherical and compact. This firm rolling is crucial not just for visual appeal, but also to help the balls maintain their structural integrity during the chocolate dipping phase.
- Enhanced Hygiene: Utilizing food-safe gloves adds an important layer of cleanliness to your food preparation, which is always a best practice, especially when creating hand-held confections like these.
Before you dive into mixing, take a moment to put on a pair of these handy gloves. You’ll be pleasantly surprised at how much smoother and more efficient the shaping process becomes, allowing you to produce a batch of perfectly crafted, delicious treats with ease.
The Grand Finale: Mastering the Chocolate Dipping Technique
Once your peanut butter balls are expertly shaped and briefly chilled to firm up, it’s time for the most visually captivating stage of the process: applying the luscious chocolate coating. While you certainly have the flexibility to simply dip or drizzle, my go-to method ensures a beautiful, even, and consistent chocolate shell with minimal effort and a truly professional-looking finish. This technique creates a perfectly smooth encapsulation that’s as appealing to the eye as it is to the palate.
- Essential Preparation: Start by lining a small tray or a sturdy cutting board (ensure it fits comfortably in your refrigerator) with a clean sheet of parchment paper. Have a second parchment-lined tray or a large plate ready nearby for the initial dipping stage.
- Melting Your Chocolate: Gently melt your preferred chocolate – whether it’s milk, semi-sweet, or dark – in a microwave-safe bowl (heating in short 30-second bursts, stirring thoroughly after each) or over a double boiler until it’s completely smooth and glossy. Crucially, avoid overheating, as this can cause the chocolate to seize or melt your carefully chilled peanut butter centers prematurely.
- The “Chocolate Puddle” Method: On your second parchment-lined tray, spoon out several small, separate circles of melted chocolate. These will serve as the perfectly sized bases for your peanut butter balls. Carefully take one chilled peanut butter ball and gently place it in the center of a chocolate puddle.
- Spoon and Cover: Using a clean spoon, generously drizzle and spoon additional melted chocolate over the top of the peanut butter ball. Allow the chocolate to cascade down the sides, naturally merging with the chocolate puddle below, thus completely encasing the ball. This ingenious method minimizes direct handling of the ball, reducing the risk of it losing its shape or leaving fingerprints.
- Careful Transfer: Once fully coated, swiftly use two forks (one to carefully lift the ball, the other to gently guide it) to transfer the freshly dipped chocolate ball from its puddle onto your first, clean parchment-lined tray. Any excess chocolate will drip away, leaving a smooth, flawless finish. Repeat this process with the remaining balls, working efficiently.
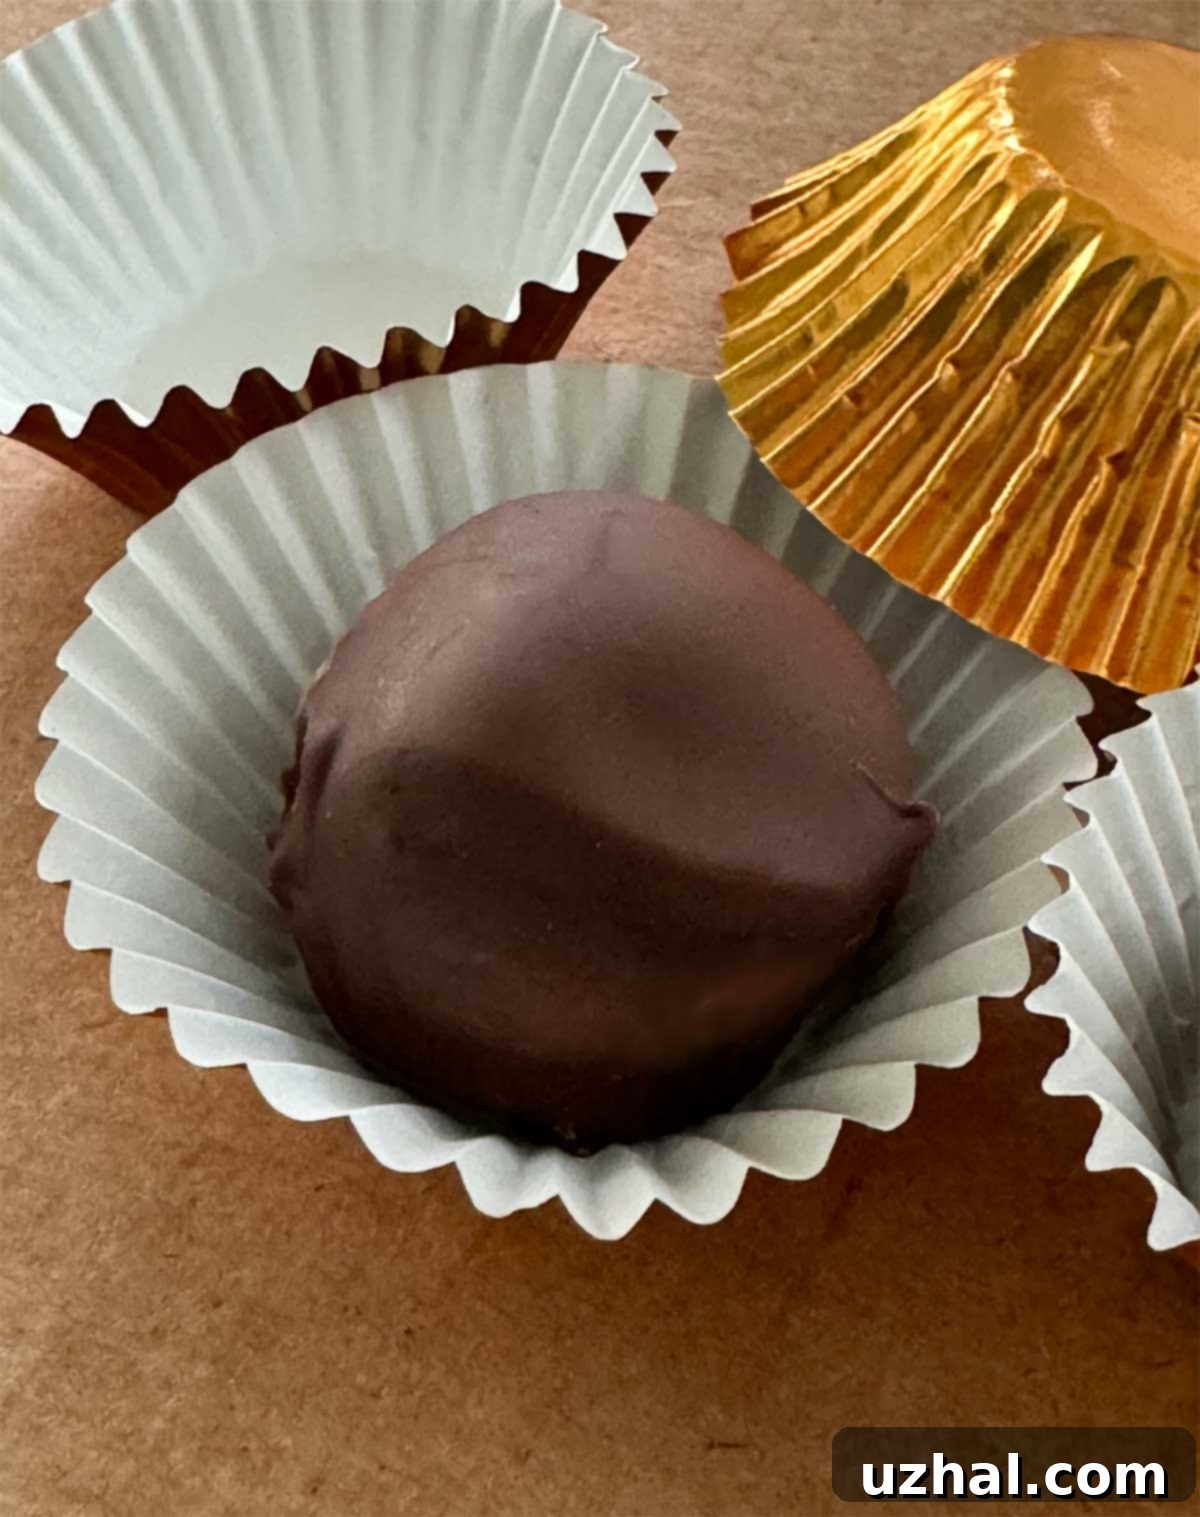
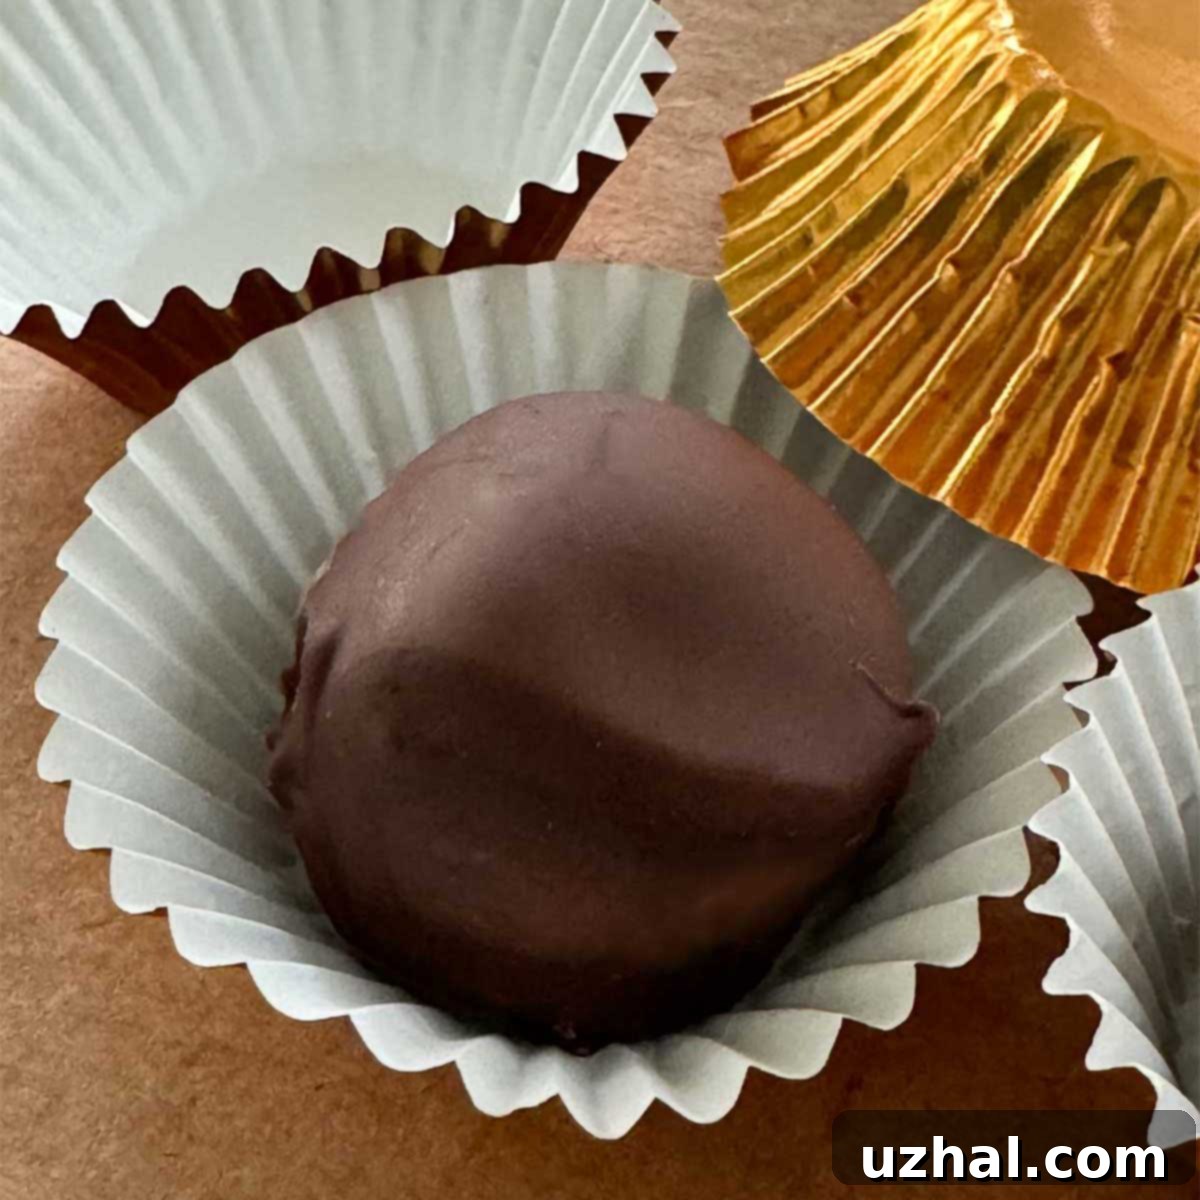
- Chill to Perfection: As you finish dipping a batch of balls, promptly place the tray into the refrigerator. This allows the chocolate to set quickly and firmly, resulting in a beautiful, crisp coating. Once completely set (typically within 5-10 minutes), your stunning chocolate-covered treats are ready! For an extra touch of elegance, arrange them in miniature foil candy holders before serving.
Of course, feel free to adapt this to any chocolate dipping method you’re comfortable with—a simple fork or toothpick can also do the trick. However, I find this “puddle and spoon” technique unparalleled for achieving a consistently uniform and visually appealing coating. Always remember, while the chocolate shell is utterly delightful, the true star of this confection is the crunchy, flavor-packed peanut butter Butterfinger filling nestled within. Regardless of your chosen coating method, these treats are guaranteed to be a sensational success!

If you’re already a dedicated enthusiast of Buckeye-style candies, you’ve likely mastered the art of creating no-bake peanut butter delights. But even for the most seasoned home confectioners, this specific rendition offers a fresh and exciting experience. The inspired combination of finely crushed Butterfinger bars and the unique crispness of Corn Flakes elevates this recipe far beyond typical peanut butter balls. It introduces a textural contrast and a flavor depth that is truly distinctive. This isn’t just another sweet treat; it’s a delightful culinary adventure, offering the beloved comfort of peanut butter and chocolate, but with an exhilarating, unexpected crunch that will keep you coming back for more.
This recipe transcends being merely a dessert; it’s an invitation to create joy. It’s the ideal addition to festive holiday platters, a guaranteed crowd-pleaser for any party spread, or simply a deeply satisfying snack to indulge your sweet cravings. The inherent ease of preparation makes it wonderfully accessible for culinary novices, while its sophisticated balance of flavors and textures will undoubtedly impress even the most discerning palates. I wholeheartedly encourage you to try this Corn Flakes and Butterfinger version; I am confident that it will swiftly earn a cherished spot in your personal collection of favorite recipes.
Why No-Bake Desserts Are a Game Changer
No-bake desserts, like these delightful Peanut Butter Butterfinger Balls, offer an incredible array of advantages, making them an indispensable part of any home baker’s repertoire. They are particularly brilliant when you desire a quick, indulgent treat without the commitment and fuss of traditional baking:
- Effortless and Time-Saving Preparation: The primary appeal of no-bake recipes is their sheer simplicity. There’s no need to preheat an oven, meticulously monitor baking times, or wait for items to cool down. You simply mix, shape, and chill! This makes them perfect for those hectic weeknights, spontaneous gatherings, or when you need a delicious dessert in a flash.
- Perfect for Little Helpers: Without the hazards of a hot oven, these treats are fantastic for involving children in the kitchen. Kids absolutely love helping with crushing cereals and candy bars, mixing ingredients, and especially rolling the balls (with those essential gloves on, of course!). It’s a fun, safe, and rewarding activity for the whole family.
- A Lifesaver in Warm Weather: During the hotter months of the year, the last thing anyone wants to do is switch on the oven and further heat up their kitchen. No-bake desserts are the ideal solution, allowing you to enjoy homemade, refreshing sweets without sacrificing comfort or contributing to rising indoor temperatures.
- Consistently Excellent Results: With fewer variables like exact oven temperatures and nuanced baking techniques, no-bake recipes tend to be far more forgiving. This often translates to more consistent and reliably delicious outcomes, which can be a wonderful confidence booster for both novice and experienced cooks.
- Versatility and Adaptability: Many no-bake recipes, including this one, are incredibly versatile. They often allow for easy substitutions and additions, letting you customize flavors and textures to suit your mood or available ingredients.
Creative Variations and Customizations to Try
While this recipe for No-Bake Peanut Butter Butterfinger Balls with Corn Flakes is absolutely perfect in its original form, it also serves as a phenomenal foundation for culinary creativity. Don’t hesitate to unleash your inner chef and explore some of these exciting and delicious variations to tailor them to your unique taste or the occasion:
- Alternative Candy Bar Mix-ins: If Butterfinger isn’t your favorite, or if you’re just looking for a different flavor profile, consider crushing other popular candy bars. Heath bars will add a delightful toffee crunch, Snickers can introduce a chewy nougat and caramel element, while chopped Reese’s Peanut Butter Cups will double down on the peanut butter and chocolate goodness.
- Cereal or Cracker Swaps: While Corn Flakes are my top recommendation for their distinctive texture in this recipe, feel free to experiment. Finely crushed Graham crackers can add a slightly different sweet crunch, crushed pretzels will introduce an irresistible salty-sweet dynamic, or for a more classic approach, Rice Krispies are always a good, albeit milder, option.
- Diverse Chocolate Coatings: The type of chocolate you use for dipping can dramatically alter the final taste. Opt for rich dark chocolate for a more intense, less sweet contrast to the peanut butter filling. Creamy white chocolate offers a sweeter, milder alternative, and a mix of chocolates (perhaps marbled) can create a visually stunning effect. You could also use candy melts in various colors for festive occasions.
- Elevated Decorations: Before your chocolate coating fully sets, transform your peanut butter balls with a variety of decorations. Sprinkle them with colorful edible sprinkles for birthdays or holidays, finely chopped nuts for added texture and flavor, a contrasting chocolate drizzle, or even a dusting of cocoa powder for a sophisticated finish.
- Adding Extracts: A dash of peppermint extract for a festive twist, almond extract for a subtle nuttiness, or even a hint of espresso powder to deepen the chocolate flavor can elevate these treats.
Storage and Make-Ahead Tips for Convenience
One of the many fantastic qualities of these No-Bake Peanut Butter Butterfinger Balls is their suitability for making ahead. This makes them an absolute lifesaver for busy holiday seasons, upcoming parties, or simply when you want to have a delicious snack ready to go. Proper storage is key to maintaining their freshness, texture, and delightful taste:
- Refrigeration is Best: For optimal freshness and to keep the chocolate firm, store your finished peanut butter balls in an airtight container in the refrigerator. They will remain wonderfully fresh and delicious for up to 1-2 weeks. To prevent them from sticking together, it’s a good practice to layer them between sheets of parchment or wax paper.
- Freezing for Extended Storage: If you’re looking to prepare a large batch or want to enjoy these treats far into the future, freezing is an excellent option. Arrange the chocolate-covered balls in a single layer on a parchment-lined baking sheet and freeze them until they are completely solid (this prevents them from sticking together once bagged). Once frozen solid, transfer them to a freezer-safe airtight container or a heavy-duty freezer bag, again, using parchment paper between layers if stacking. They can be safely stored in the freezer for up to 1-2 months.
- Thawing and Serving from Freezer: When you’re ready to enjoy frozen balls, you can either thaw them in the refrigerator for a few hours until they soften slightly, or surprisingly, many people enjoy them straight from the freezer for an even firmer, chewier, and intensely cold treat.
- Room Temperature Display: While these treats can certainly be left out at room temperature for a few hours for serving at a party, it’s generally best to keep them chilled. This helps maintain their firm texture and prevents the chocolate coating from softening or melting, especially in warmer environments.
By following these simple storage guidelines, you can ensure that every single No-Bake Peanut Butter Butterfinger Ball tastes as fresh and delightful as the first, making them a truly convenient and satisfying dessert option.
Frequently Asked Questions (FAQs) About No-Bake Peanut Butter Balls
- Q: Can I use natural peanut butter for this recipe?
- A: While natural peanut butter is fantastic for many applications, for these specific no-bake balls, a mainstream, sweetened peanut butter (such as Jif, Skippy, or Peter Pan) is highly recommended. Natural peanut butter tends to be more oily and often separates, which can lead to a drier, more crumbly mixture that doesn’t bind as well and is harder to shape. The consistent texture of sweetened peanut butter is crucial for a smooth, moldable dough that holds its form.
- Q: What if I don’t have Corn Flakes?
- A: Corn Flakes are my top choice due to their unique, satisfying crunch that perfectly mimics and enhances the Butterfinger flavor profile. However, if they aren’t available, Rice Krispies can be used as a substitute, though the final texture will be slightly less substantial. For an interesting salty-sweet kick, you could also try finely crushed pretzels!
- Q: How do I prevent the chocolate from cracking after it sets?
- A: Chocolate cracking can sometimes occur due to a couple of factors: if the chocolate coating is too thick, or if there’s a very drastic temperature change. To minimize cracking, ensure your melted chocolate isn’t excessively hot when you’re dipping, and make sure your peanut butter balls are well-chilled but not frozen solid before dipping. Using good quality chocolate that melts smoothly also helps. For a truly professional, crack-resistant finish, you could temper your chocolate, but for a simple no-bake recipe, focusing on even coating and a gradual setting in the refrigerator is usually sufficient.
- Q: Are these peanut butter balls gluten-free?
- A: To ensure this recipe is gluten-free, it’s essential to verify the GF certification of all your ingredients. While peanut butter and confectioners’ sugar are typically gluten-free, always double-check the labels for your Corn Flakes (some brands are GF, others are not) and Butterfinger bars (original Butterfinger bars are generally considered gluten-free in the US, but always verify current packaging). Similarly, confirm your chosen chocolate is certified gluten-free.
- Q: Can I skip the chocolate coating entirely?
- A: Absolutely! The peanut butter balls are incredibly delicious on their own, even without the chocolate coating. If you’re looking for a simpler, less sweet, or quicker treat, feel free to enjoy the peanut butter mixture as is. The chocolate definitely adds a delightful textural contrast and makes them more visually appealing, but it’s not strictly necessary for a fantastic flavor experience.
Conclusion: A Treat That Ticks All the Boxes
These No-Bake Peanut Butter Butterfinger Balls with Corn Flakes are truly a testament to how simple ingredients can come together to create something extraordinarily delicious. They beautifully take the beloved concept of chocolate-covered peanut butter treats and elevate it with an added dimension of crunch and the unmistakable, addictive flavor of Butterfinger. Easy to prepare, incredibly flavorful, and perfectly suited for any occasion, they offer a refreshing and satisfying alternative to traditional baked desserts. Whether you’re whipping up a batch for a lively party, assembling thoughtful homemade gifts, or simply craving a moment of sweet indulgence, this recipe is destined to become a cherished and frequently revisited part of your culinary repertoire. So gather your ingredients, don your food prep gloves, and get ready to create a batch of these irresistible, crunchy, and utterly delightful treats!
- More Sweet Treats You Might Love:
- Chocolate Bourbon Truffles
- Oh No, Not Another Double Chocolate Cookie!
- Chewy Butterfinger Bar Cookies
- Butterfinger Meringues
- Brownie Bottom Butterfinger Ice Cream Pie
The Official Recipe: No-Bake Peanut Butter Butterfinger Balls with Corn Flakes

No-Bake Peanut Butter Butterfinger Balls with Corn Flakes
By Anna
Pin Recipe
20 minutes
1 minute
5 minutes
Dessert
American
36 balls
Ingredients
- 1 cup peanut butter (260 grams – preferably sweetened, like Peter Pan or Jif for best texture)
- 1 teaspoon vanilla extract
- 1 ⅓ cups confectioners’ sugar (160 grams – also known as powdered sugar)
- 4 tablespoons salted butter, softened (almost melted) (56 grams)
- 1 cup Corn Flakes, crushed (100 grams – crush into small, irregular pieces for best crunch)
- 2 regular Butterfinger bars (1.9 oz each), crushed (crush finely but leave some larger shards for texture)
- Plenty of chocolate for melting and dipping (approximately 10-12 oz of good quality milk, semi-sweet, or dark chocolate chips/bars)
Instructions
-
Step 1: Combine the Base Ingredients. In a large, sturdy mixing bowl, combine the chosen peanut butter, vanilla extract, confectioners’ sugar, and the softened (almost melted) salted butter. Use a robust spoon, spatula, or a stand mixer fitted with a paddle attachment to stir and beat the ingredients until they are thoroughly blended and form a thick, cohesive, and easily moldable dough. Ensure there are no streaks of unmixed sugar or butter.
-
Step 2: Add the Crunch. Once the base mixture is smooth, gently fold in the crushed Corn Flakes and the crushed Butterfinger bars. Mix just until they are evenly distributed throughout the peanut butter mixture. Avoid overmixing, which can break down the Corn Flakes too much.
-
Step 3: Portion and Shape the Balls. Line a baking sheet with parchment paper. To achieve uniformly sized candies, use a small cookie scoop (typically 1-tablespoon capacity) to portion out the peanut butter mixture. Put on your food-safe gloves (this step is highly recommended!). Take each scooped portion and roll it between your palms, applying firm and consistent pressure, to mold it into a neat, smooth, and tightly packed sphere. Place the shaped balls onto your prepared parchment-lined baking sheet.
-
Step 4: Chill While Melting Chocolate. Once all the peanut butter balls are shaped, place the baking sheet into the refrigerator for approximately 10-15 minutes, or into the freezer for 5-7 minutes. This brief chilling period is crucial as it helps the balls firm up, making them much easier to dip in chocolate without losing their shape or melting prematurely. While the balls are chilling, begin melting your chocolate for dipping using a microwave (in 30-second increments, stirring well after each) or a double boiler until completely smooth and glossy.
-
Step 5: Master the Chocolate Dipping. Prepare a second clean baking sheet lined with fresh parchment paper. On this second sheet, spoon out several small, separate circles of your melted chocolate – these will serve as the base for dipping. Take a chilled peanut butter ball and gently place it into the center of one of these chocolate circles. Using a clean spoon, generously spoon more melted chocolate over the top of the ball, allowing it to naturally drip down the sides and merge with the chocolate base. This method ensures full coverage while minimizing direct handling of the ball. Carefully, using two forks (one to lift, one to steady), transfer the freshly coated chocolate ball from its puddle onto the first, clean parchment-lined tray. Repeat this process with the remaining balls, working efficiently to keep the chocolate warm.
-
Step 6: Set and Serve. As you dip each batch of balls, immediately return the tray to the refrigerator to allow the chocolate to set quickly and firmly. This typically takes about 5-10 minutes. Once the chocolate is completely set and firm to the touch, your beautiful No-Bake Peanut Butter Butterfinger Balls are ready! For an elegant presentation, carefully place them into miniature foil candy liners or arrange them on a festive platter. Serve chilled and revel in the irresistible combination of flavors and textures!
Buckeyes, Butterfinger, Chocolate Peanut Butter, No-Bake, Dessert, Candy, Corn Flakes, Easy Recipe, Homemade Treats
Tried this recipe?Let us know how it was!
