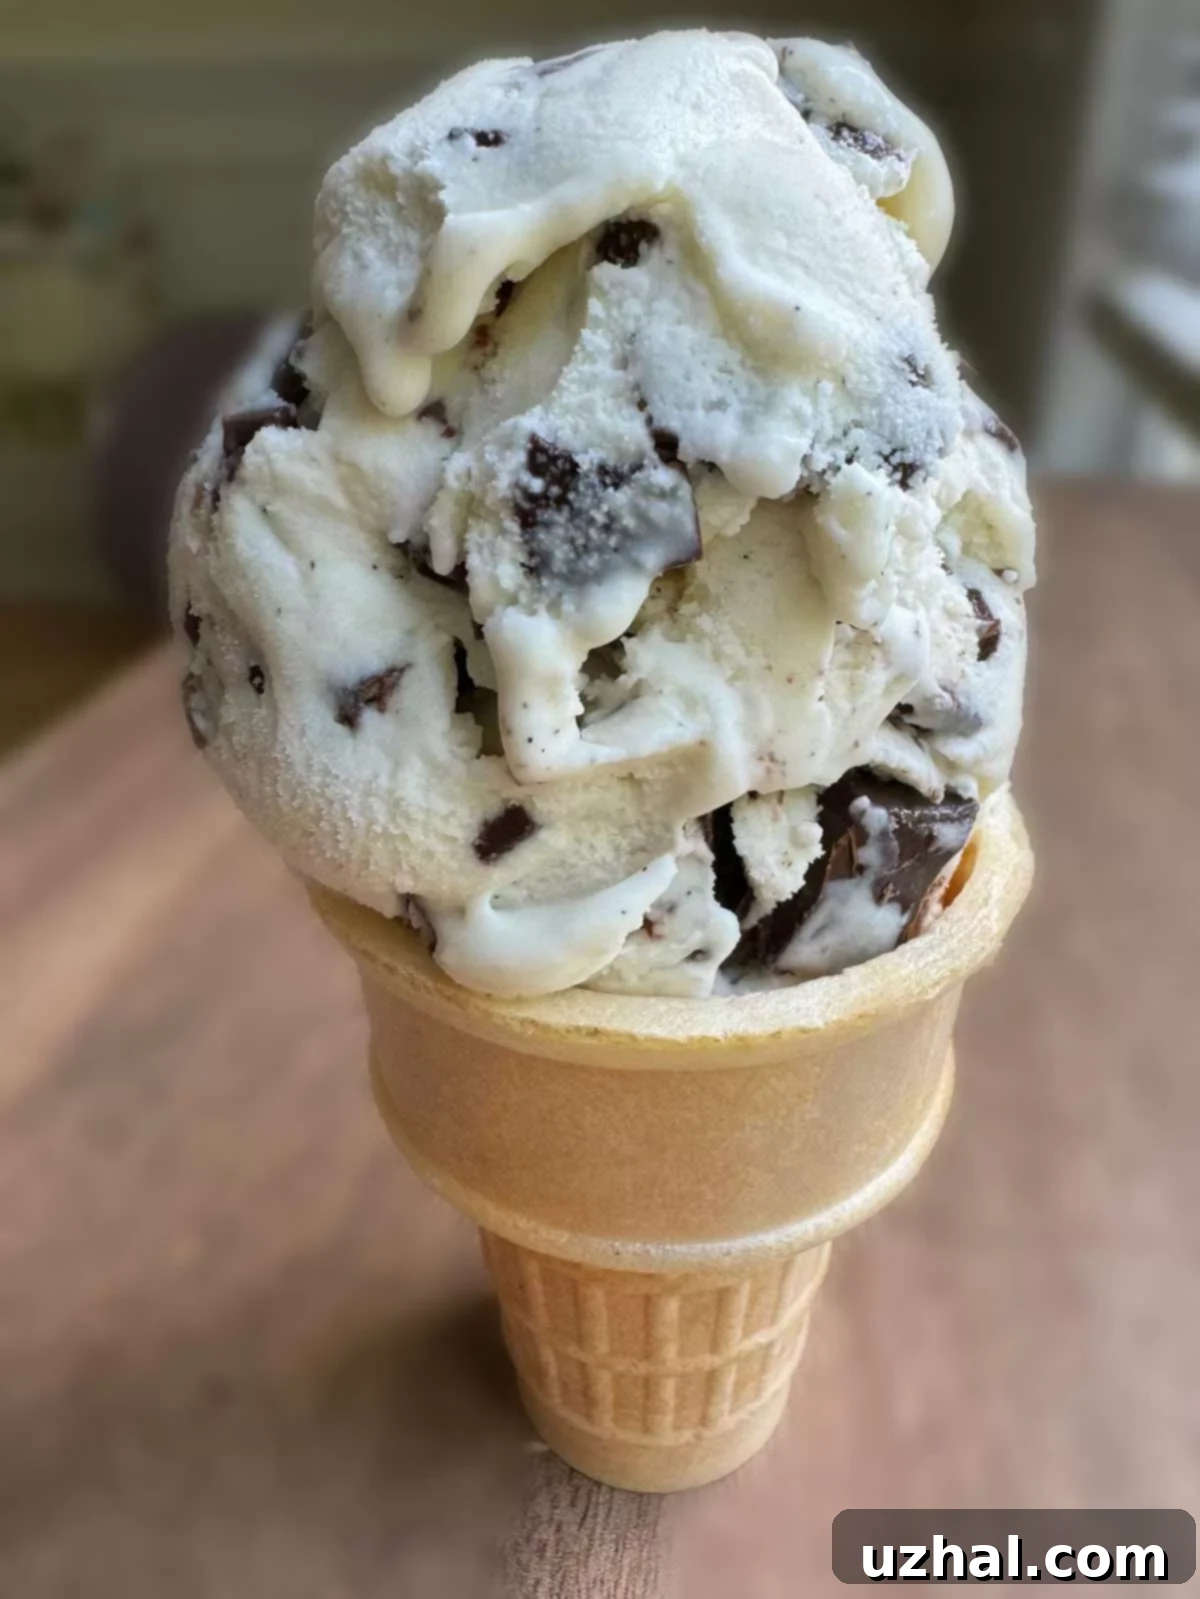
Baskin Robbins Style Bliss: Easy Homemade Egg-Free Chocolate Chip Ice Cream Recipe
There’s nothing quite like a scoop of perfectly creamy, generously chipped chocolate chip ice cream to transport you back to simpler times. Recently, a fascinating article in the New York Times sparked a conversation about the shifting tides of ice cream preferences, noting a decline in the popularity of the classic chocolate chip flavor. For me, that article didn’t signal decline; it ignited a profound craving for the very specific, beloved chocolate chip ice cream we used to enjoy from Baskin Robbins. It was a flavor profile I hadn’t actively sought out in years, yet the memory of its smooth texture and delightful chocolate bits lingered.
Driven by nostalgia and a desire to recreate that iconic taste, I embarked on a culinary quest. My mission was twofold: to capture the essence of that old-school Baskin Robbins chocolate chip ice cream and to test out a promising new egg-free vanilla ice cream base. The result? A revelation! This recipe isn’t just good; it’s so incredibly delicious and satisfying that it has become a staple in my kitchen, having been made no less than five times since its inception. One of its greatest charms is its speed – gone are the days of laboring over a custard base, only to endure an agonizing overnight wait for it to cool before the joyful churning can even begin. This recipe brings you straight to creamy, dreamy ice cream bliss with minimal fuss.

Effortless Perfection: No Cooking Required for This Creamy Ice Cream
Say goodbye to the stovetop and the tedious process of tempering eggs! This extraordinary recipe redefines ease in homemade ice cream. The absence of eggs means you are liberated from the traditional, time-consuming custard-making process. No more worrying about scrambling eggs, constant stirring, or the critical step of cooling the mixture in an ice bath before it can chill in the refrigerator overnight. Instead, this recipe invites you to a streamlined experience: simply combine all the ingredients in a bowl, give them a good whisk, and you’re ready to churn. This straightforward approach not only saves significant time but also reduces the chances of error, making delicious homemade ice cream accessible to everyone, regardless of their culinary experience. The key, however, lies in a precise mixing technique to ensure the proper dissolution of our “magic” ingredients, which ingeniously replicate the texture and stability typically provided by eggs.
Unlocking Creaminess: The Three Magic Ingredients
The secret to this ice cream’s incredible texture and stability, even without eggs, lies in a trio of carefully selected ingredients. These work in harmony to prevent ice crystal formation, add body, and enhance the overall creaminess, ensuring every spoonful is pure delight.
- Xanthan Gum: Your Secret Weapon for Smoothness
Don’t let the name intimidate you! Xanthan gum is a natural thickener and stabilizer, widely available in most grocery stores or online. In this recipe, a mere tiny pinch performs wonders, acting as an emulsifier and preventing those unwelcome large ice crystals that can make homemade ice cream grainy. It essentially gives the ice cream a smooth, almost velvety mouthfeel, mimicking the role of egg yolks without the fuss. It’s also a fantastic ingredient to have on hand for thickening smoothies or sauces. To use it effectively, it’s crucial to mix it thoroughly with your dry ingredients first before introducing liquids, ensuring it dissolves smoothly and prevents any clumping. - Karo Light Corn Syrup or Lyle’s Golden Syrup: The Texture Enhancer
These golden liquid sweeteners do more than just add sweetness; they are critical for achieving that desirable smooth, scoopable ice cream texture. Both corn syrup and golden syrup are inverted sugars, meaning they interfere with the formation of large ice crystals, keeping your ice cream wonderfully pliable and soft, even after extended freezing. I often alternate between Karo Light Corn Syrup for a neutral sweetness, or Lyle’s Golden Syrup when I desire a subtle, appealing hint of caramel flavor. For a pure chocolate chip experience, I tend towards Karo or a mix with less Lyle’s to avoid overpowering the vanilla and chocolate notes. - Bob’s Red Mill Non-Fat Dry Milk Powder: The Flavor & Body Builder
This ingredient is a true game-changer for egg-free ice cream. Non-fat dry milk powder significantly improves both the texture and the flavor profile. It increases the milk solids content of the ice cream base without adding extra water, which contributes to a denser, richer, and creamier body. What’s more, by foregoing eggs, you get a remarkably clean and pronounced milky flavor that truly shines through. The brand choice here is important: I unequivocally recommend Bob’s Red Mill. Not all dry milk powders are created equal in taste, and Bob’s Red Mill consistently delivers that extra depth of milky richness that elevates this ice cream to perfection. - Nielsen Massey Vanilla Paste: The Aromatic Essence
While technically not a “magic ingredient” in the same structural sense as the others, a high-quality vanilla is paramount for the ultimate flavor experience. Nielsen Massey Vanilla Paste is my absolute favorite, offering intense vanilla flavor with visible flecks of vanilla bean, contributing to both taste and visual appeal. It’s an investment worth making for any serious baker or ice cream enthusiast. However, if it’s not readily available, a good quality vanilla extract or another brand of vanilla paste will still yield excellent results.
The Art of Chocolate: Perfect Chips or Chunks for Your Ice Cream
The chocolate component in chocolate chip ice cream is just as crucial as the base itself. Not all chocolate chips are created equal when it comes to frozen desserts. Regular-sized chocolate chips often become unpleasantly hard and rock-like when frozen, detracting from the otherwise smooth ice cream experience. Tiny miniature chips are a much better option, as their smaller size allows them to soften slightly more. However, for the absolute best melt-in-your-mouth experience, homemade chocolate chunks are the undisputed champion.
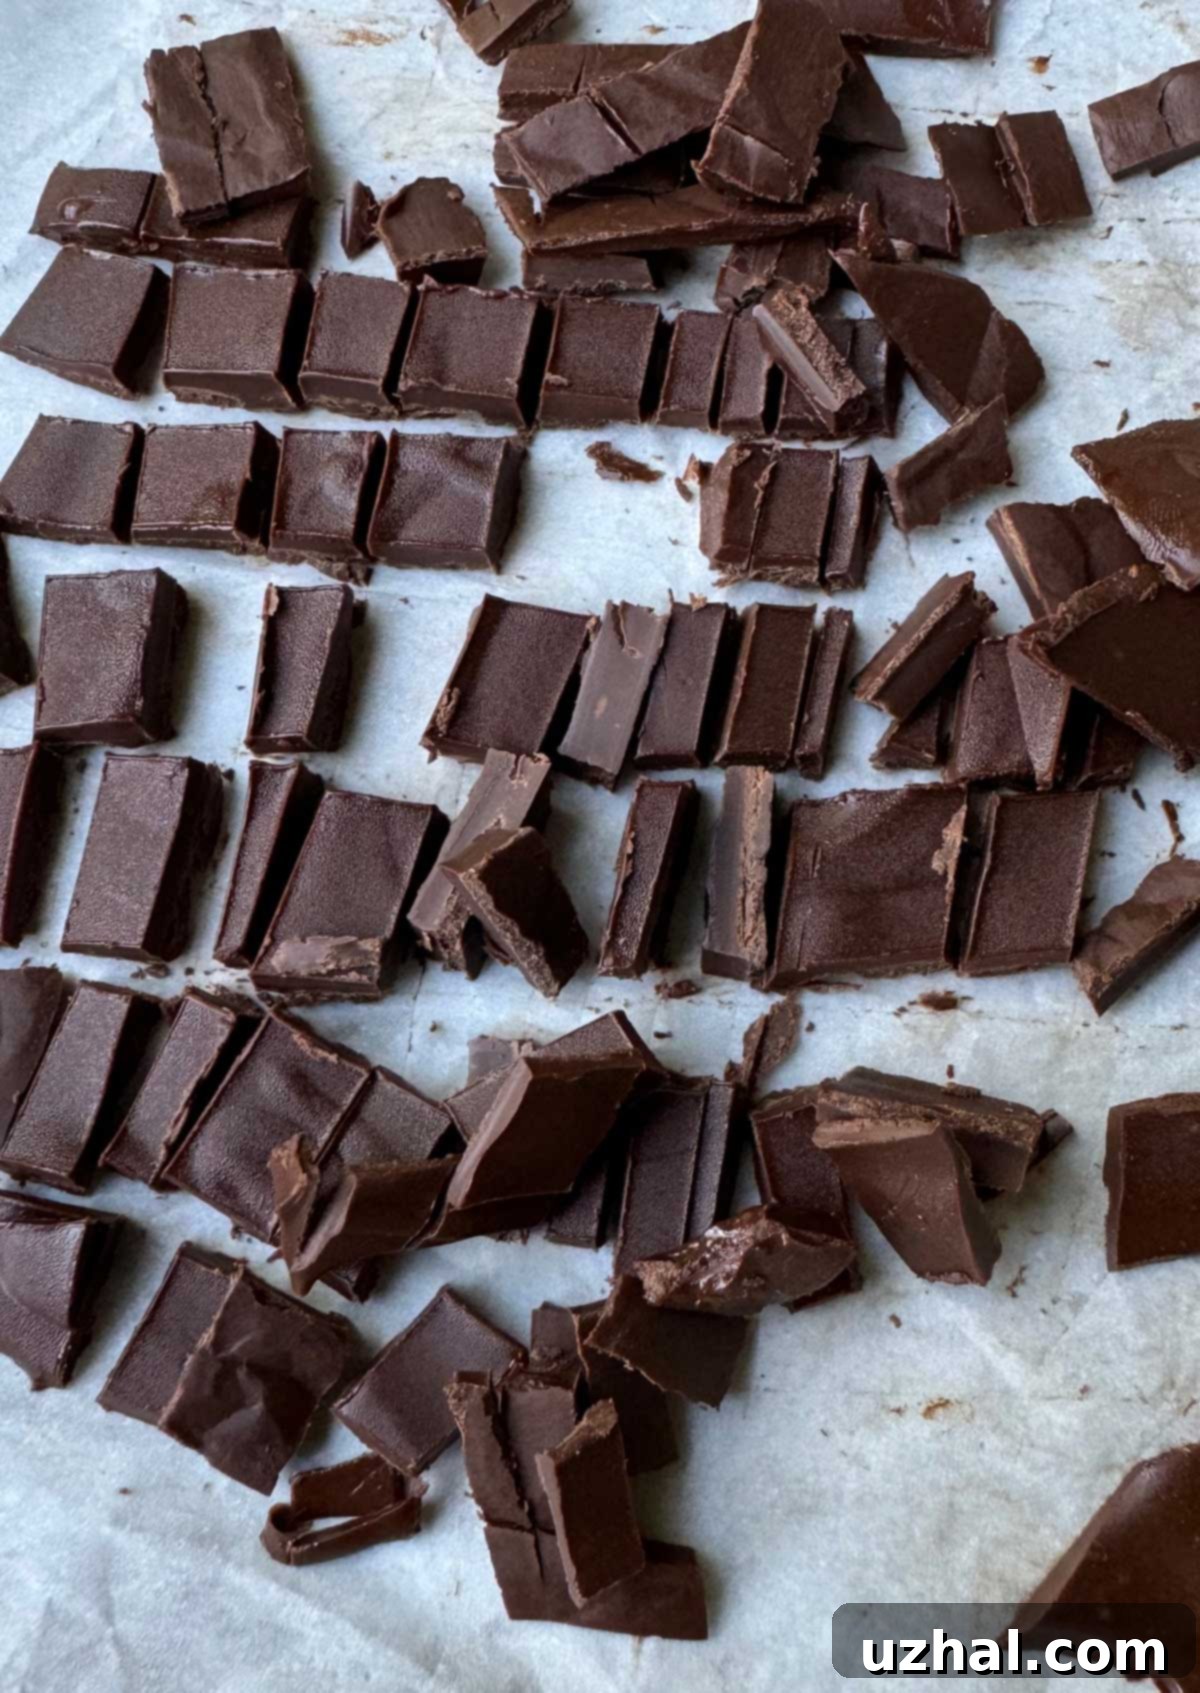
Creating your own chocolate chunks is surprisingly simple and incredibly rewarding. The trick is to combine your favorite chocolate with a touch of coconut oil. This addition lowers the melting point of the chocolate, ensuring it remains softer and more yielding even at freezing temperatures. To make them, gently melt chocolate chips or a chopped chocolate bar with a small amount of coconut oil. Once melted and smooth, spread this mixture thinly onto a piece of parchment paper. Pop it into the freezer just until it’s set but still slightly pliable – this is key. At this soft-set stage, you can easily score it into your desired chunk size before freezing it completely hard. Once fully frozen, simply break or chop it into irregular, delightful pieces. For that nostalgic Baskin Robbins flavor, I’ve found that Hershey’s Extra Dark chocolate, whether in bar or chip form, most closely replicates the taste of those old-school chocolate chips. The ideal ratio is about ⅔ cup of chocolate chips (approximately 114 grams) to 2 to 2 ½ teaspoons (8-10 grams) of coconut oil.

The Advantage of Slow Melting: Perfect for Ice Cream Creations
One of the unexpected bonuses of this particular ice cream recipe is its remarkable resistance to melting. Thanks to the carefully balanced ratio of solids (from the milk powder and sugar) and fats (from the heavy cream and coconut oil in the chocolate chunks), this ice cream holds its shape beautifully for longer periods. This attribute makes it absolutely ideal for various dessert applications. Picture perfect ice cream sandwiches that don’t drip everywhere the moment you take a bite, or elegantly composed sundaes that maintain their form while you enjoy them. It’s also fantastic for a cone on a warm day, giving you more time to savor the experience without the rush against gravity.
A Refreshing Twist: Mint Chocolate Chunk Version
For the mint enthusiasts in your life, transforming this vanilla base into a vibrant mint chocolate chunk ice cream is incredibly simple and utterly delightful. Just add 1 teaspoon of pure peppermint extract (ensure it’s peppermint, not spearmint, for that classic cool flavor) to the base before churning. Then, fold in some finely chopped Andes mints or, even better, use the dark chocolate chunks described above for a rich contrast. If you’re feeling adventurous, a splash of green food coloring or a touch of Crème de Menthe can enhance both the flavor and visual appeal without much effort. Should you wish to make a split batch – half vanilla and half mint – simply prepare the full base, and before adding the vanilla extract, measure out 14.4 ounces (by weight) of the mixture. Flavor this half batch with ½ teaspoon of peppermint extract and slightly less vanilla (about ½ to ¾ teaspoon) to avoid overwhelming the mint, then proceed with churning each batch separately.
Pro Tips for Your Best Homemade Ice Cream
- Chill Everything Thoroughly: For the creamiest results, ensure your ice cream base is as cold as possible before churning. Ideally, chill it in the refrigerator for at least 4 hours, or even overnight. A very cold base churns faster and produces smaller ice crystals.
- Pre-Chill Your Churner Bowl: Always make sure your ice cream maker’s freezer bowl is frozen solid, usually after 12-24 hours in a deep freezer. A poorly frozen bowl will result in soft, runny ice cream.
- Don’t Overfill: Only fill your ice cream maker to the recommended capacity. The mixture will expand as it churns and incorporates air.
- Storage: Transfer your freshly churned ice cream to an airtight container and freeze for at least 4-6 hours (preferably overnight) for it to fully firm up to a scoopable consistency. For best results, place a piece of parchment paper directly on the surface of the ice cream to prevent freezer burn.
- Adjust Sweetness: Taste your base before churning and adjust the sugar if you prefer. Keep in mind that sweetness dulls when frozen, so the base should taste slightly sweeter than you want the final ice cream.
- Ice Cream Filled Chocolate Loaf Cake
- Gluten-Free Chocolate Chip Cookies
- Honey Cookies for the Holidays
- Coconut Milk Ice Cream
- Gluten-Free Oatmeal Cookies
Recipe: Easy Egg-Free Chocolate Chip Ice Cream

Easy Chocolate Chip Ice Cream
Anna
Pin Recipe
10 minutes
1 minute
4 hours 25 minutes
36 minutes
Dessert
American
6
Ingredients
- ½ cup granulated sugar (100 grams)
- 4 ½ tablespoons nonfat dry milk powder (40 grams, Bob’s Red Mill recommended)
- ¼ teaspoon xanthan gum
- ⅛ teaspoon fine sea salt
- 1 cup whole milk, very cold
- ¼ cup light corn syrup (or Lyle’s golden syrup for a hint of caramel) (70 grams)
- 2 teaspoons vanilla extract or Nielsen Massey vanilla bean paste
- 2 cups heavy cream, very cold (450 grams)
Homemade Melt-in-Your-Mouth Chocolate Chunks
- ⅔ cup Hershey’s Special Dark Chocolate Chips (or chopped dark chocolate bar)
- 2 ½ teaspoons coconut oil
Instructions
-
In a large mixing bowl, combine the dry ingredients: sugar, nonfat dry milk powder, xanthan gum, and salt. Whisk them together thoroughly to ensure the xanthan gum is evenly distributed and will dissolve properly.
-
Pour in the 1 cup of very cold whole milk. Whisk vigorously for about 2 minutes, making sure to scrape down the sides of the bowl to incorporate any xanthan gum that may have stuck. The goal is to fully hydrate the xanthan gum and completely dissolve the milk powder and sugar. The mixture might thicken slightly.
-
Now, whisk in the light corn syrup (or golden syrup), vanilla extract/paste, and the cold heavy cream until everything is well combined and smooth.
-
Pour the prepared ice cream base into your pre-chilled ice cream maker and churn according to the manufacturer’s instructions. This usually takes about 20-30 minutes, depending on your machine. During the last 5 minutes of churning, add your homemade chocolate chips or chunks.
-
Once churned to a soft-serve consistency, scrape the ice cream into an airtight freezer-safe container. Press a piece of parchment paper directly onto the surface of the ice cream to prevent ice crystals from forming, then seal the container. Freeze for at least 4-6 hours, or preferably overnight, until firm enough to scoop.
Instructions for Homemade Melt-in-Your-Mouth Chocolate Chunks
-
In a microwave-safe bowl, combine ⅔ cup (114 grams) of dark chocolate chips or finely chopped dark chocolate with 2 ½ teaspoons of coconut oil. Microwave on high for 30 seconds. Stir well, then continue heating in 15-30 second intervals, stirring after each, until the chocolate is completely melted and smooth. Be careful not to overheat.
-
Spread the melted chocolate mixture thinly and evenly onto a small plate or tray lined with parchment paper. Place it in the freezer for about 10-15 minutes, or just until it’s set but still slightly soft and pliable. Use a knife or bench scraper to score it into your desired chunk size while it’s soft. Return it to the freezer until completely hard. Once firm, break or cut into irregular, bite-sized chocolate chunks. Keep frozen until ready to add to the ice cream.
Notes
For a blender method: If you prefer a slightly airier ice cream, after mixing the dry ingredients, add the milk and whisk for 1 minute. Then add the remaining liquid ingredients (corn syrup, vanilla, heavy cream) and blend everything in a high-speed blender for 2 minutes. The mixture will thicken significantly and become quite frothy. This method incorporates more air, resulting in a lighter texture.
Mint Variation: To make mint chocolate chunk ice cream, add 1 teaspoon of peppermint extract (not mint) to the base before churning. You can also add a few drops of green food coloring if desired. Fold in chopped Andes mints or the homemade dark chocolate chunks. If making a half batch mint, measure out 14.4 oz of the base before adding vanilla, then flavor that portion with ½ tsp peppermint and slightly less vanilla.
Storage: Always store homemade ice cream in an airtight container with a piece of parchment paper pressed against the surface to minimize freezer burn and keep it fresh for up to 2 weeks.
No-Egg, Vanilla Ice Cream, Chocolate Chip Ice Cream, Homemade, Easy, Xanthan Gum
Tried this recipe?Let us know how it was! Share your experience and tips in the comments below!
This egg-free chocolate chip ice cream recipe isn’t just a dessert; it’s a journey back to cherished memories, recreated with modern simplicity. With its no-cook method, special ingredients, and customizable chocolate chunks, you’ll be able to whip up a batch of creamy, dreamy ice cream that rivals any store-bought version, satisfying those nostalgic cravings with every smooth, delicious bite. Don’t wait for another New York Times article to tell you to enjoy this classic – make it today and experience the pure bliss of homemade perfection!
