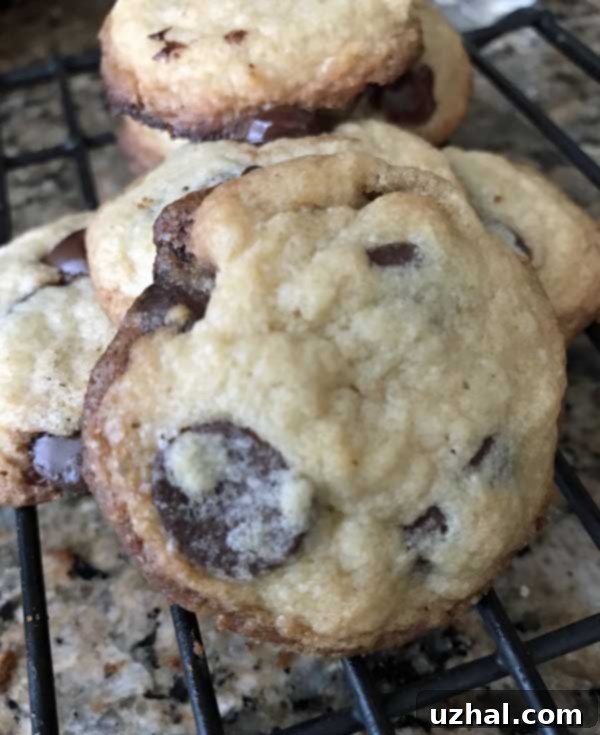
Rosie’s Bakery Crunchy Chocolate Chip Cookies: The Ultimate Guide to Perfectly Crispy Homemade Treats
There’s nothing quite like a homemade chocolate chip cookie – the aroma filling your kitchen, the anticipation of that first bite. But for many, the elusive perfect “crunch” remains a mystery. This recipe, adapted from the beloved Rosie’s Bakery Cookbook, promises to deliver just that: a cookie that’s wonderfully thick and satisfyingly crisp. Rosie’s Bakery, a renowned Boston institution, has long been famous for its delectable desserts, and their chocolate chip cookie is no exception. Get ready to bake a batch that will become your new go-to for irresistible crunchy delights.
Discovering the Charm of Rosie’s Bakery Cookbook

The Rosie’s Bakery Cookbook is more than just a collection of recipes; it’s a testament to timeless baking. Featuring 250 recipes inspired by the famous Boston bakery’s offerings, this book is a treasure trove for dessert enthusiasts. While it might be a little dated in some aspects, its charm endures, thanks in part to its unique and often unconventional measurements. These quirks encourage a more intuitive approach to baking, reminding us that sometimes, a recipe’s character lies in its distinctive details. For those who appreciate classic American desserts with a hint of nostalgia, this cookbook is an absolute must-have. If you’re curious to explore more of Rosie’s baking philosophy and read what others think, you can find a link to the book here.
Crafting the Perfect Crunchy Chocolate Chip Cookie: Essential Baking Tips
These cookies are designed to be “thickish” and deliver a delightful crunch with every bite. Achieving this specific texture requires attention to detail, especially regarding oven temperature and ingredient ratios. Based on extensive experience with this recipe, here are some crucial tips to ensure your cookies turn out perfectly crisp:
- Oven Temperature is Key: The original recipe calls for a high initial temperature of 400°F (200°C). This high heat helps the edges of the cookies set quickly and brown beautifully, contributing to their crunch. However, maintaining this temperature throughout can lead to overbrowning or even burning. My strongest advice is to start at 400°F, but be prepared to check your cookies at the 10-minute mark. If you know your oven tends to run hot, or if you notice rapid browning, immediately reduce the temperature to 375°F (190°C) after placing the cookies in the oven. This slight adjustment ensures even cooking and prevents the centers from becoming too soft while still achieving that desired crisp exterior. In my oven, 10 minutes at 400°F was often enough, so adjust based on your oven’s unique temperament.
- Embrace the Convection Oven: If you’re fortunate enough to have a convection oven, it can be a game-changer for these cookies. Convection baking circulates hot air, leading to more even browning and a superior crunchy texture. However, convection ovens typically run hotter than conventional ones, so if you use this setting, definitely turn the heat down to 375°F (190°C) from the start to avoid burning.
- Chocolate Chips: Don’t Be Shy! The original recipe’s call for ¾ cup of chocolate chips might seem surprisingly modest to true chocolate chip cookie aficionados. Honestly? It felt like a joke! For a truly satisfying cookie that’s generously studded with chocolate, I highly recommend increasing the amount. Feel free to add at least a full cup, or even more, to your preference. The quality of your chocolate chips also makes a difference – opt for good quality semi-sweet chips that melt beautifully.
- Walnuts: An Optional, Yet Recommended Addition: While toasted walnuts are listed as optional, I encourage you to include them. Toasting the walnuts beforehand (a few minutes in a dry pan or oven) really brings out their nutty flavor, which complements the chocolate and adds another layer of delightful crunch. They truly elevate the cookie experience.

Secrets to Unbeatable Cookie Crunch and Consistency
Achieving consistent results in baking, especially when aiming for a specific texture like crunch, often comes down to precision and understanding a few key principles. Since first sharing this recipe, I’ve incorporated gram weights for the ingredients to ensure maximum accuracy – a crucial step when dealing with the somewhat “unconventional” measurements mentioned earlier. This update guarantees that every batch you make will be as perfect as the last.
- The Power of Small Cookies: The secret to a cookie that’s crunchy all the way through lies largely in its size. The recipe is designed for fairly small cookies, typically around 2 teaspoons (approximately 15 grams) of dough per cookie. While you can make larger crunchy chocolate chip cookies, be aware that they might develop a slightly chewier center. Smaller cookies allow for more even heat distribution and complete dehydration, resulting in that desirable all-over crispness.
- Precision with Gram Weights: Baking is often a science, and using gram weights for ingredients like flour, butter, and sugar significantly reduces variability. Volume measurements (cups and spoons) can differ widely depending on how ingredients are packed, leading to inconsistent dough. Grams provide an exact, repeatable measurement, ensuring your cookies have the correct ingredient balance for optimal crunch and flavor every time.
- The Magic of Chilling Your Dough: For an even better cookie experience, consider chilling your dough. Instead of baking immediately, portion out about 48 scoops of dough (as suggested by the recipe), chill them thoroughly, and then transfer them to a freezer-safe zipper bag. Baking chilled dough has several benefits: it prevents the cookies from spreading too much, concentrates the flavors, and helps create a more complex texture with a slightly crispier edge and sometimes a chewier interior, even for a “crunchy” cookie. You can bake them straight from the freezer, simply adding a minute or two to the baking time. This also means you can have freshly baked, warm, crunchy cookies on demand!
- Storage for Lasting Crunch: To maintain that wonderful crunch, proper storage is essential. Once completely cooled, store your cookies in a heavy-duty freezer bag in the freezer. This method helps preserve their texture by preventing them from absorbing moisture from the air, which can quickly turn a crunchy cookie soft. They’ll thaw quickly at room temperature, ready to be enjoyed.
Explore More Delights from Cookie Madness
If you’ve enjoyed this dive into Rosie’s Bakery’s crunchy chocolate chip cookies, you might be interested in exploring other beloved recipes from our collection. Here are a few reader favorites that promise to bring more joy to your kitchen:
- Morning Cinny Buns
- Chocolate Peanut Butter Volcanoes
- Top 10 Cookies Summer 2007
- Crunchy Oatmeal Blueberry Pecan Cookies
- Magnolia Bakery Cookbook Yellow Cake
The Rosie’s Bakery Crunchy Chocolate Chip Cookie Recipe
Below is the detailed recipe for these exceptional crunchy chocolate chip cookies, adapted to provide the best possible outcome for your home baking. Follow these steps carefully for a batch of cookies that are sure to impress.

Rosie’s Bakery Crunchy Chocolate Chip Cookies
Anna
Pin Recipe
Ingredients
- 1 ¾ cups all-purpose flour (220 grams)
- ¼ teaspoon baking soda
- ¼ teaspoon baking powder
- ½ teaspoon salt
- 13 tablespoons unsalted butter at room temperature (185 grams)
- ½ cup plus 2 ½ tablespoons lightly packed brown sugar (130 grams)
- 5 tablespoons granulated sugar (65 grams)
- 1 ½ teaspoons pure vanilla extract
- 1 large egg 50 grams
- ½ large egg yolk 9 grams
- 4 ounces ¾ cup semisweet chocolate chips
Instructions
-
Preheat oven to 400 and line two baking sheets with parchment paper or foil.
-
Sift or just thoroughly mix together the flour, baking soda, baking powder, and salt.
-
In a mixing bowl, using an electric mixer, beat the softened butter, both sugars, and the vanilla until creamy. Add the egg and half a yolk and beat on medium speed until they are blended, about 30 seconds. Scrape the bowl.
-
By hand or using the lowest speed of the mixer, stir in the flour mixture. When fully blended, add chocolate chips.
-
Drop the dough by heaping teaspoons about 2 inches apart on baking sheets.
-
Put the cookies in the oven and immediately reduce heat to 375 degrees F. Bake for 10 minutes or until cookies appear set — edges should be browned and centers will be set.
-
Let cool on baking sheets for about 5 minutes, then remove and let cool completely.
-
To keep the cookies crunchy, keep them in a heavy duty freeze bag in the freezer.
Notes
Master Your Baking Skills: Beyond the Basic Recipe
Baking is a journey of continuous learning and delightful discoveries. While this Rosie’s Bakery recipe offers a fantastic foundation for crunchy chocolate chip cookies, understanding the nuances can help you master any cookie recipe. Always remember that factors like your oven’s calibration, the humidity in your kitchen, and even the type of baking sheet you use can influence the final outcome. Don’t be afraid to experiment slightly, adjusting baking times by a minute or two, or chilling your dough longer to find what works best for your specific conditions.
Troubleshooting is part of the fun! If your cookies spread too much, your butter might have been too warm, or your leavening agents could be old. If they’re not crunchy enough, they might need a little more time in the oven or a slightly higher initial temperature next time. The pursuit of the perfect cookie is a delicious endeavor, and each batch brings you closer to understanding your ingredients and equipment better.

We hope this enhanced guide to Rosie’s Bakery Crunchy Chocolate Chip Cookies has inspired you to preheat your oven and whip up a batch. The combination of classic flavors, unique texture, and the rich history of a beloved bakery makes this recipe truly special. Enjoy the process, savor the aroma, and delight in the unforgettable crunch of these homemade treats!
