Indulge in Irresistibly Gooey S’mores Bars: The Ultimate Homemade Dessert Recipe
Ah, s’mores! That quintessential campfire treat, evoking memories of warm summer nights, crackling flames, and sticky fingers. But what if you could capture that magical combination of toasted marshmallow, melted chocolate, and crisp graham cracker in a convenient, year-round bar? Enter the **Gooey S’mores Bars**, a delightful dessert that brings the campfire experience right into your kitchen.
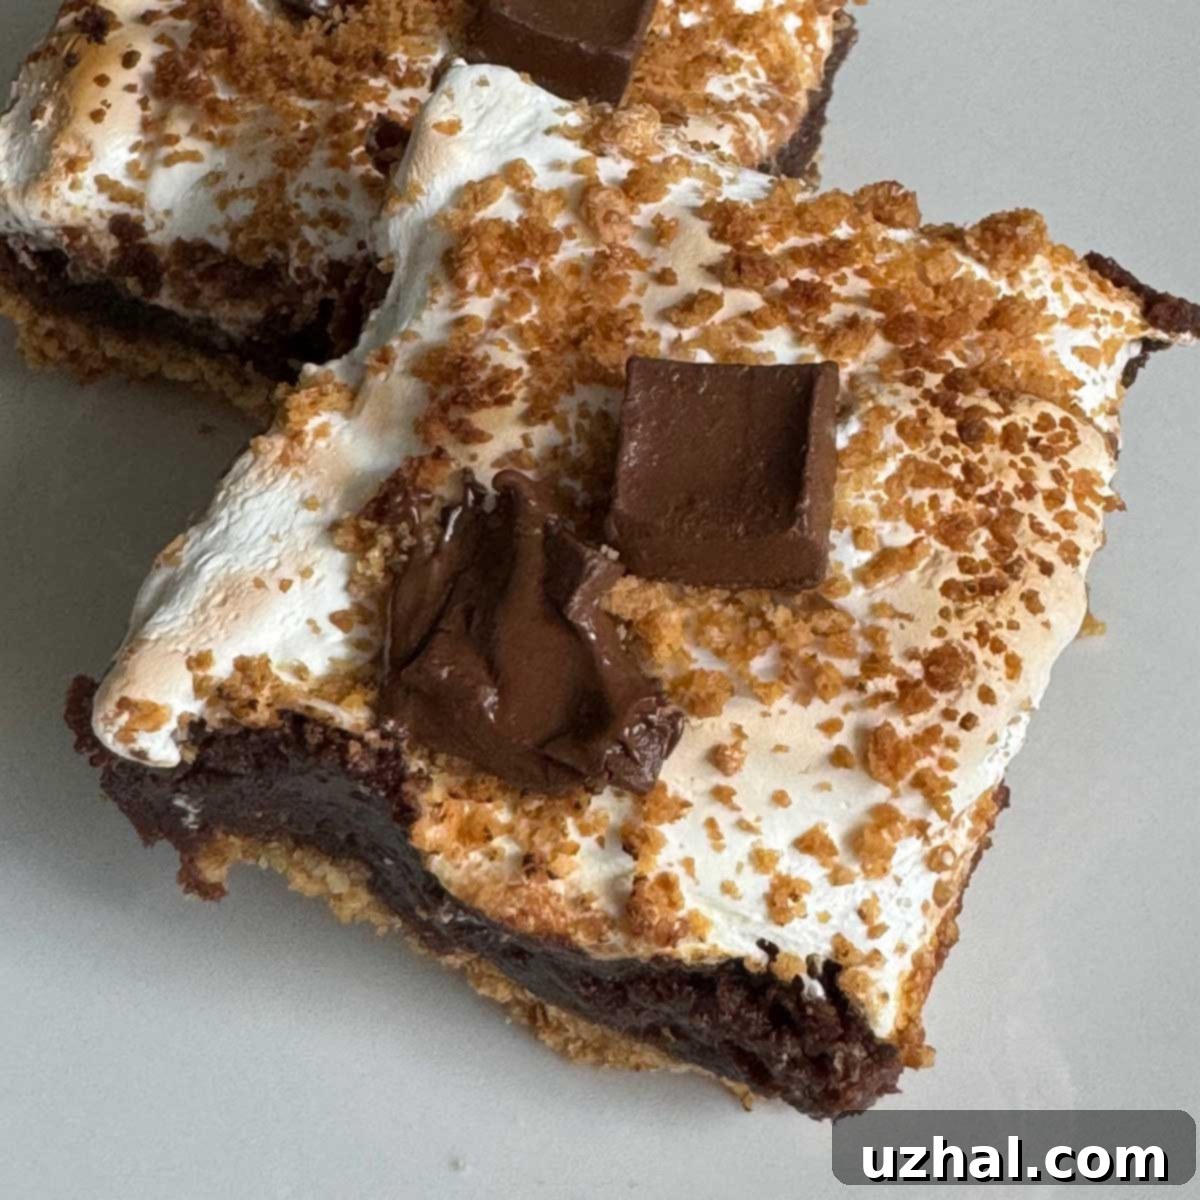
This particular recipe has a special place in my heart, originating from a cherished Family Circle collection. My journey with these bars began back in 2006, and even then, I couldn’t resist putting my own spin on the classic. I remember piling on extra marshmallows with the marshmallow crème, opting for the satisfying snap of broken Hershey’s Bars instead of the kisses, and intentionally underbaking the center by about five minutes to achieve that perfect, gooey consistency. The results were always a hit, though my early photography skills, as you’ll see at the bottom of this page, left a bit to be desired!
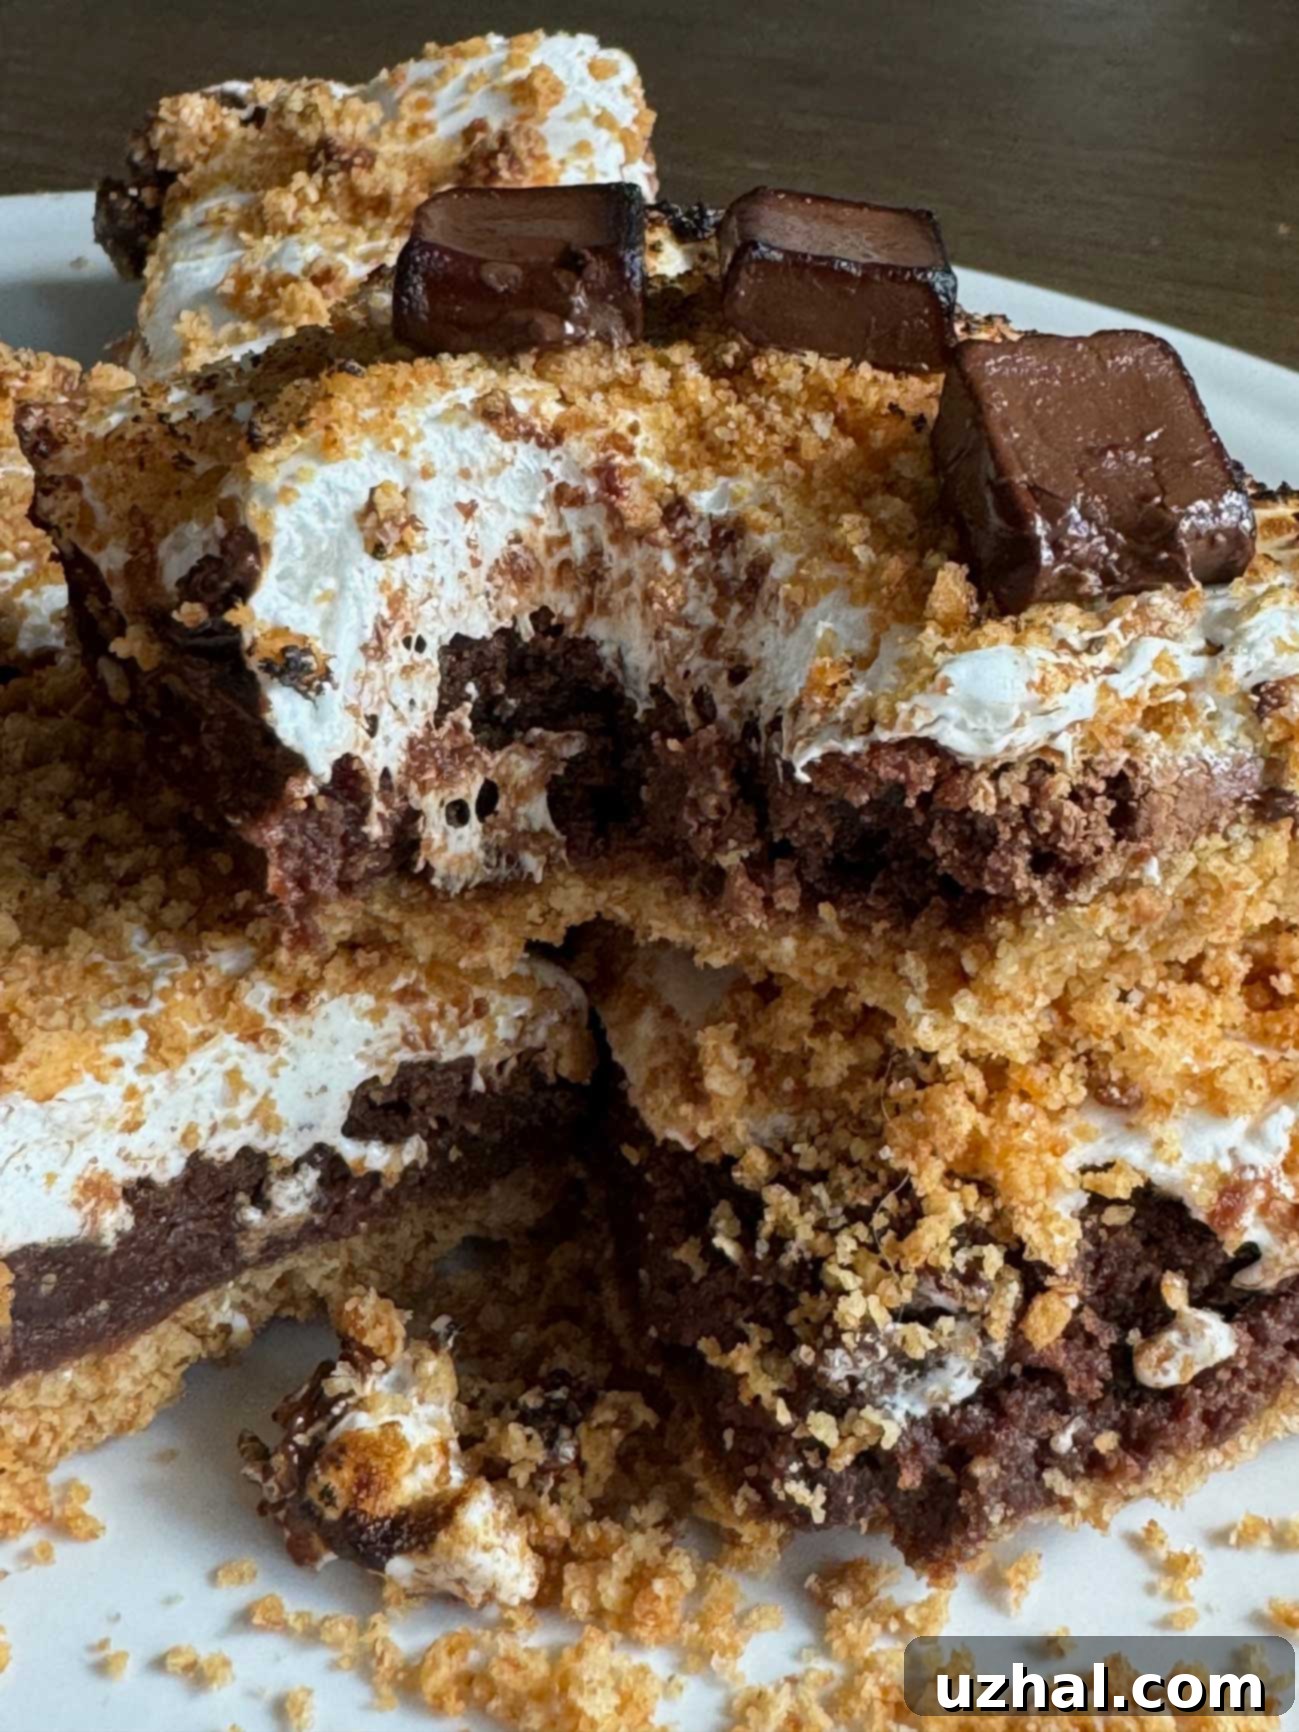
Since then, I’ve refined my technique and captured a much better image of these delectable treats. Take a look at this newer, more appetizing photo that truly showcases the gooey goodness you’re about to create.

While we loved this original recipe, I later stumbled upon Hershey’s S’mores Bars recipe, which offered a different take. That version features a simple graham cracker bar cookie crust topped with Hershey’s chocolate pieces. These Gooey S’mores Bars, however, are distinct and offer a more complex texture and flavor profile. They boast a richer, sweeter, and slightly crumbly graham cracker crust, a luscious fudge brownie layer, and are crowned with a magnificent topping of creamy marshmallow and melted chocolate. It’s this multi-layered approach that truly elevates them beyond a simple bar cookie.
The Anatomy of a Perfect S’mores Bar
To truly appreciate these Gooey S’mores Bars, it helps to understand the synergy of their three main components: the crust, the brownie, and the topping. Each layer plays a vital role in creating the ultimate S’mores experience.
The Graham Cracker Crust: The Foundation of Flavor
A good crust is the backbone of any bar dessert, and for S’mores Bars, it’s non-negotiable. This recipe calls for a simple yet effective blend of graham cracker crumbs, a touch of sugar for sweetness, a pinch of salt to balance the flavors, and melted unsalted butter to bind it all together. The key here is to press the mixture firmly into your baking pan. A well-compacted crust won’t crumble excessively when cut and provides a sturdy base for the rich layers above. Chilling the crust after pressing helps it set even further, ensuring a crisp texture that contrasts beautifully with the soft brownie and marshmallow layers.
The Fudge Brownie Layer: Richness and Depth
The brownie layer is what sets this recipe apart. Unlike many S’mores bar recipes that rely solely on graham crackers and marshmallow, ours incorporates a decadent fudge brownie. Using bittersweet or dark chocolate ensures a deep, rich cocoa flavor that isn’t overly sweet, providing a wonderful counterpoint to the sugary marshmallow. The combination of butter, eggs, sugar, vanilla, and flour creates a brownie that’s moist, dense, and intensely chocolatey. The secret to a perfect brownie is often in its baking: avoid overbaking! A slightly underbaked brownie will yield that desirable gooey, fudgy texture that melts in your mouth, perfectly complementing the s’mores theme.
The Marshmallow and Chocolate Topping: The S’mores Signature
This is where the magic truly happens, transforming a chocolate bar into a S’mores masterpiece. A generous layer of marshmallow cream, often thinned slightly with milk, creates that iconic gooey, stretchy marshmallow texture. The milk helps spread the marshmallow cream evenly, ensuring every bite gets a taste of that sweet, fluffy cloud. And what are S’mores without chocolate? Mini chocolate kisses or milk chocolate chips are sprinkled generously, melting into pools of chocolatey bliss when gently warmed. Finally, crumbled graham crackers on top add an extra layer of texture and reinforce the classic s’mores flavor, creating a delightful crunch against the soft topping.
Less Gooey Version: For Easier Handling and Elegant Presentation
As much as we adore the traditional gooeyness of s’mores, sometimes you need a bar that’s a bit more manageable – easier to transport, cleaner to eat, and perhaps a touch more elegant for certain occasions. This is where the “less gooey” version comes in. My initial preference for the Hershey’s recipe stemmed from its cleaner handling, but I’ve since found a way to achieve a similar advantage with these Gooey S’mores Bars without sacrificing flavor or appeal. The key lies in the timing of the marshmallow and chocolate application, along with a crucial chilling step.
Instead of immediately baking the marshmallow and chocolate onto the brownie, the trick is to first spread the marshmallow creme on the baked and cooled brownies. Then, you chill the entire pan until the bars are firm. This firming process allows for clean, precise cuts into squares without the marshmallow dragging or sticking excessively. Once cut, the individual bars are then topped with chocolate and can be gently warmed with a pastry torch or briefly placed under a broiler just before serving. This technique gives you that beautiful, lightly toasted marshmallow and melted chocolate finish, but on a pre-cut, stable bar. It’s the best of both worlds: all the s’mores flavor with improved portability and presentation. For a closer look at the luscious texture, check out this video short:
Tips for S’mores Bar Success
Achieving the perfect Gooey S’mores Bar is simple with a few helpful tips:
- Quality Ingredients Matter: While s’mores are inherently rustic, using good quality chocolate for your brownie layer will make a noticeable difference in flavor.
- Don’t Skip Pan Preparation: Lining your pan with parchment paper is crucial for easy removal and clean cuts. If using foil, ensure it’s well-greased.
- Mind the Baking Time: Brownies are notorious for going from fudgy to dry very quickly. Keep an eye on the oven and remove the brownies when the center is just set but still slightly soft when gently pressed. Remember, residual heat will continue to cook them as they cool.
- Chill for Clean Cuts: Whether you’re making the extra gooey version or the less gooey one, chilling the bars before cutting is your best friend. Cold bars are much easier to slice neatly, preventing sticky messes and ensuring uniform portions.
- Customizing Your Topping: Feel free to experiment with your chocolate choice. While mini kisses or milk chocolate chips are classic, dark chocolate chips or even chopped candy bars can add a unique twist.
Creative Variations and Customizations
While the classic Gooey S’mores Bar is perfection on its own, there’s always room for a little creativity in the kitchen. Here are some ideas to make this recipe your own:
- Chocolate Choices: Instead of milk chocolate kisses, try semi-sweet chocolate chunks for a deeper flavor, or even white chocolate chips for a different aesthetic and sweetness profile.
- Add-ins for the Brownie: Stir in a handful of chocolate chips, chopped nuts (like pecans or walnuts), or even a tablespoon of espresso powder to enhance the chocolate flavor in the brownie layer.
- Spiced S’mores: A pinch of cinnamon or a tiny dash of cayenne pepper in the brownie batter can add a surprising and delightful warmth.
- Salted Caramel Drizzle: Once cooled, a light drizzle of homemade or store-bought salted caramel sauce over the marshmallow and chocolate topping would be absolutely divine.
- Different Cracker Base: While graham crackers are traditional, you could experiment with crushed shortbread cookies or even chocolate wafers for a different crust flavor.
Storage and Make-Ahead Tips
These bars are fantastic for parties or as a make-ahead treat. Store them in an airtight container at room temperature for up to 3 days, or in the refrigerator for up to a week. If you prefer the ‘less gooey’ version, storing them in the fridge will keep them firm and easy to handle. For longer storage, S’mores bars can be frozen for up to 2-3 months. Wrap individual bars tightly in plastic wrap and then place them in a freezer-safe bag or container. Thaw at room temperature or gently warm in the oven before serving for that fresh-baked feel.
Related Dessert Ideas You’ll Love
If you’re a fan of gooey, decadent bars and S’mores-inspired treats, you might also enjoy some of these other fantastic recipes:
- Spice Cake Gooey Butter Bars
- Gooey Butter Cake Bar Cookies
- Rocky Road Loaf Pan Brownies
- S’mores Cookies
- Small Batch S’mores Chocolate Chip Cookies
Before we dive into the full recipe, here’s a peek at that “embarrassing” original photo from 2006. It reminds me of how far we’ve come, both in baking and photography!
Recipe

Gooey S’mores Bars
Anna
Pin Recipe
Ingredients
Crust:
- 2 ¼ cups graham cracker crumbs
- 3 tablespoons sugar
- ¼ teaspoon salt
- 6 tablespoons unsalted butter
Brownie:
- 6 ounces bittersweet or dark chocolate chopped
- ¾ cup unsalted butter
- 3 large eggs
- 1 ¼ cups sugar
- 1 teaspoon salt
- 2 teaspoons vanilla
- 1 cup all-purpose flour
Topping:
- 1 jar marshmallow cream about 1 ½ cups — (7.5 ounces)
- 2 tablespoons milk
- 1 cup mini chocolate kisses or about ⅔ cup milk chocolate chips
- 3 whole graham cracker boards (6 squares)
Instructions
-
Preheat your oven to 350 degrees F (175 degrees C). Prepare a 9×13 inch baking pan by lining it with parchment paper, leaving an overhang on the sides to easily lift the bars out later. If parchment paper isn’t available, you can use aluminum foil and grease it thoroughly. This step is crucial for preventing sticking.
-
To prepare the crust, combine the graham cracker crumbs, sugar, salt, and melted unsalted butter in a medium mixing bowl. Stir the mixture until all the crumbs are evenly moistened with butter. Transfer this crumb mixture to your prepared baking pan and press it down firmly and evenly over the bottom. For best results, use the bottom of a glass or a flat measuring cup to really compact the crust. Place the pan in the refrigerator to chill and set while you prepare the brownie batter.
-
For the brownie layer, combine the chopped bittersweet or dark chocolate and the ¾ cup unsalted butter in a microwave-safe glass bowl. Heat on high power in 30-second intervals, stirring well after each interval, until the chocolate and butter are completely melted and smooth. Be careful not to overheat the chocolate.
-
In a large separate bowl, use a hand-held electric mixer on medium-high speed to beat together the large eggs and 1 ¼ cups sugar until the mixture is light in color and well blended. Reduce the mixer speed to medium and gradually pour the melted chocolate and butter mixture into the egg mixture. Continue beating until the entire mixture is smooth and uniform. Remember to scrape down the sides of the bowl with a spatula occasionally to ensure everything is incorporated.
-
Stir in the 1 teaspoon salt and 2 teaspoons vanilla extract. Then, gradually stir in the 1 cup of all-purpose flour until just combined – be careful not to overmix, as this can lead to tough brownies. Scrape the brownie mixture over the chilled graham cracker crust in the baking pan. Use a rubber spatula to smooth the top surface of the brownie batter evenly.
-
Bake for 30 minutes, or until the top of the brownie is set and smooth, and the center feels just firm when gently pressed with your fingertip. A slight wobble in the center is perfectly fine for fudgy brownies. At this stage, you have two options: either let the brownie cool completely, or proceed to spread the marshmallow cream on top while the brownie is still slightly warm, depending on your desired level of gooiness.
-
In a small bowl, whisk together the marshmallow cream and the 2 tablespoons of milk until the mixture is smooth and easily spreadable. This helps achieve a consistent topping.
-
Pour the marshmallow topping mixture evenly over the warm (or cooled, if opting for the less gooey method) brownie layer in the pan. Use a spatula to spread it smoothly or gently tilt the pan to ensure the entire brownie surface is covered.
-
Evenly sprinkle the mini chocolate kisses (or milk chocolate chips) over the marshmallow topping. Break the 3 whole graham cracker boards (which typically contain 6 squares) into smaller, rustic crumbles and scatter them all over the top.
-
Return the pan to the 350°F (175°C) oven for an additional 3 minutes. This short burst of heat will make the chocolate kisses glossy and slightly melted, and the marshmallow topping will become beautifully set and slightly toasted. Remove from oven and let cool completely in the pan on a wire rack before cutting into individual bars. Cooling fully is essential for clean cuts.
Less Gooey Version (Instructions for Cleaner Slices)
-
For a less messy but equally delicious bar, follow the main recipe through step 7 (spreading the marshmallow cream). Instead of immediately adding chocolate and graham crackers and baking again, simply allow the bars to cool completely to room temperature. Then, chill the entire pan in the refrigerator for at least 2-3 hours, or until the bars are very firm. This chilling process makes them much easier to handle and cut.
-
Once firm, carefully trim the edges of the slab to create neat lines, then slice into desired squares or rectangles. Only *after* cutting, sprinkle crushed graham crackers over the top of each individual bar. For the chocolate element, you can melt some Hershey’s chocolate bars or chips and drizzle them over, or gently torch the marshmallow topping with a kitchen torch until lightly golden. Alternatively, place the cut bars on a baking sheet and briefly (30-60 seconds) under a preheated broiler, watching carefully to avoid burning the marshmallow. Serve at room temperature or warm them slightly in the oven for a freshly-made feel.
Experience the Magic of Homemade S’mores Bars
Whether you’re craving that classic campfire flavor or simply looking for a crowd-pleasing dessert that’s both fun and indulgent, these Gooey S’mores Bars are an absolute winner. The combination of a crunchy graham cracker crust, a rich, fudgy brownie, and a sweet, toasted marshmallow topping creates a symphony of textures and flavors that will transport you straight to a cozy evening under the stars. With our detailed instructions and tips for both the traditional gooey version and a cleaner, more transportable option, you’re all set to bake up a batch of these irresistible treats.
Don’t be shy to experiment with your favorite chocolates or add-ins; this recipe is incredibly versatile. So, gather your ingredients, preheat your oven, and prepare to delight your taste buds and those of your loved ones. These S’mores Bars aren’t just a dessert; they’re an experience waiting to be savored. Happy baking!
