Delicious Six-Inch Pineapple Upside-Down Cake Recipe for Two | Perfect Small Batch Dessert
There’s something uniquely charming about a perfectly portioned dessert. It feels special, intimate, and just right for sharing with a loved one or enjoying a couple of slices without the temptation of a full-sized cake. Our newest addition to the small batch baking collection is this delightful Six-Inch Pineapple Upside-Down Cake, a recipe expertly scaled down for two. Originally from a 2010 Cook’s Illustrated Cooking for Two special edition magazine, this recipe has been tried, tested, and tweaked to ensure a consistently delicious result in a compact form. Whether you bake it in six-inch cake pans for a classic round presentation or opt for a small loaf pan for a different shape, this cake promises a taste of sunshine in every bite, making it an ideal choice for a cozy dessert or a special occasion.

The Rise of 6-Inch Cake Pans and Small Batch Baking
Back in 2010, when this recipe first caught my eye and earned a coveted bookmark, finding dedicated six-inch cake pans wasn’t as straightforward as it is today. While they were certainly available, they weren’t as prominently featured in every baking aisle. Fast forward to now, and the landscape of home baking has shifted considerably. With the immense popularity of appliances like the Instant Pot, which often encourages smaller cooking and baking projects, coupled with a general increase in interest in small batch baking for efficiency and portion control, 6-inch pans have become a kitchen staple. This makes it easier than ever to whip up a delicious treat without having too much leftover.
The convenience of baking a smaller dessert means less waste, fewer tempting leftovers, and a perfect treat for smaller households or intimate special occasions without going overboard. I personally love the Fat Daddio pans for their quality. They are sturdy, bake evenly, and release cakes beautifully, which is crucial for an upside-down cake. While they are the only brand of this size I’ve extensively used, I can confidently recommend them for their consistent performance and durability. The growing accessibility of these 6-inch pans (or “six-inch” for those who prefer the spelled-out version) makes experimenting with scaled-down recipes like this pineapple upside-down cake more appealing and practical than ever, ushering in a new era of mindful baking.

Avoiding the “Porcupine Cake” Dilemma: Pineapple Perfection
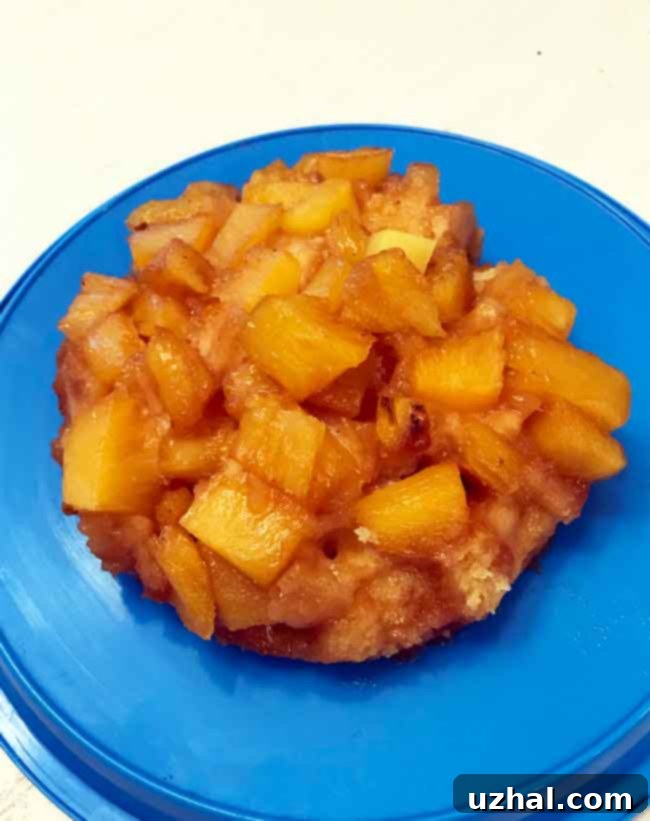
Now, let’s talk about the star of the show: the pineapple! This particular recipe, as originally published by Cook’s Illustrated, takes a slightly different approach than your typical pineapple upside-down cake. Instead of the classic pineapple rings, it calls for substantial chunks of pineapple. And when I say “substantial,” I mean it! My first attempt with this recipe resulted in what I affectionately dubbed a “porcupine cake.” I hadn’t paid enough attention to Cook’s Illustrated’s specified “½ inch” chunk size, and my overly enthusiastic large pieces led to a top-heavy cake that was almost more pineapple than cake. While undeniably edible and bursting with flavor, it was a little much, and frankly, a bit challenging to eat gracefully.
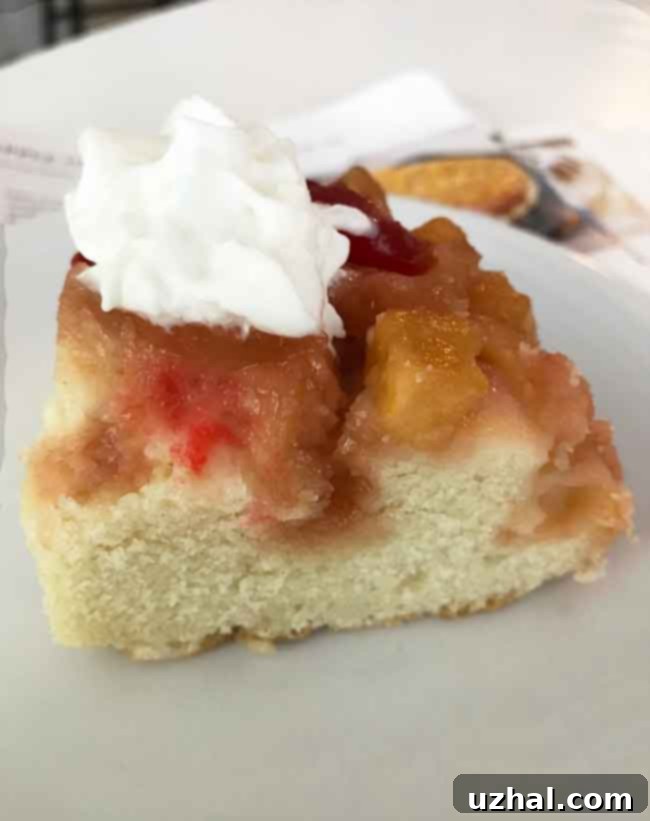
The original article suggested that using chunks instead of rings would provide more fruit in every bite, which is true to an extent. However, balance is key to ensure the cake’s structure and the overall eating experience. We also found ourselves missing the vibrant pop of color and tartness that maraschino cherries bring to a traditional pineapple upside-down cake. What is a pineapple upside-down cake without those iconic red jewels? So, for my second attempt at this six-inch pineapple upside-down cake, I made some crucial adjustments. I opted for a combination of smaller, uniform pineapple chunks (closer to that ½ inch recommendation!), a few well-placed pineapple rings for classic visual appeal, and, crucially, a generous scattering of maraschino cherries.
This experience taught me a valuable lesson: while recipes provide a fantastic foundation, don’t be afraid to adapt them to your preferences and what you have on hand. Whether you use fresh pineapple, canned pineapple, rings, or chunks, the beauty of this cake is its forgiving nature. The gist of it is, “anything goes” when it comes to your pineapple selection and arrangement, as long as you keep the chunk size manageable to ensure structural integrity and a balanced flavor profile. This flexibility means you can use what you have on hand, whether it’s leftover fresh pineapple or a trusty can from the pantry, without compromising on the cake’s delicious outcome. Just remember, consistency in chunk size will lead to more even baking and a better-looking cake.

Perfecting the Fruit Layer and Caramelized Topping
The new cake, with its more appropriately sized fruit and the delightful addition of cherries, was a resounding success. The smaller chunks integrated beautifully with the cake batter, providing that “more fruit in every bite” experience without overwhelming the cake itself. The vibrant colors of the pineapple and cherries, suspended in the golden caramelized brown sugar, made for a stunning presentation once inverted. This delicate balance of sweet, tart, and rich flavors is what makes pineapple upside-down cake such a beloved classic. I’m already looking forward to making it again, perfecting the art of the flip, and sharing this small batch marvel with friends.
One of the key elements of any great pineapple upside-down cake is that rich, buttery, caramelized topping. It’s what gives the cake its signature gloss and deep flavor. For this recipe, we start by melting butter directly in the pan, then stirring in brown sugar to create a sticky, sweet foundation. This mixture, combined with the natural juices from the pineapple as it bakes, transforms into an irresistible, syrupy glaze that coats the fruit and sinks slightly into the top of the cake, creating a truly decadent crust. The choice of light brown sugar contributes to a lighter, more delicate caramel, which pairs wonderfully with the bright, tropical fruit flavors. Achieving this perfect caramel base is crucial for both the taste and the iconic appearance of the cake once it’s inverted.

Baking Tips for a Flawless Six-Inch Upside-Down Cake
Achieving a flawless upside-down cake isn’t just about the ingredients; it’s also about technique. Here are a few essential tips to ensure your six-inch pineapple upside-down cake masterpiece turns out perfectly every time:
- Grease and Line Your Pan: Even with a good non-stick pan, a little extra preparation goes a long way. After melting the butter in the pan, you might consider lightly greasing the sides of the pan with extra butter or non-stick spray, just to be absolutely sure of a clean release.
- Room Temperature Ingredients: Ensure your butter, egg, and milk are at room temperature. This helps them combine more smoothly and emulsify better, creating a more uniform batter and a finer, tender crumb for your cake.
- Don’t Overmix: Once you add the flour mixture, mix just until combined. Overmixing develops gluten, leading to a tough, chewy cake. A few small lumps in the batter are perfectly fine and often indicate you haven’t overmixed.
- The Gentle Flip: The moment of truth! After cooling in the pan for 10 minutes, run a thin knife around the edges of the cake to loosen it from the pan. Place your serving plate firmly over the top of the cake pan, and in one swift, confident motion, invert the cake. Resist the urge to shake, tap, or pry the cake out immediately. Let gravity and the melted caramel work their magic. Patience here is key to preventing breakage and ensuring the fruit topping remains intact.
- Cooling Time: While it’s tempting to dive right in, allow the cake to cool fully on a wire rack after flipping. This allows the caramelized topping to set properly, preventing it from running all over the plate and ensuring a beautiful, neat presentation. It also helps the cake’s structure firm up.
- Don’t Overcrowd the Fruit: While you want a good amount of fruit, too much will prevent the batter from baking through evenly and adhering properly to the topping. Stick to the recommended ½-inch chunks or thin rings for best results.
Why This Small Batch Pineapple Upside-Down Cake Is a Must-Try
This six-inch pineapple upside-down cake truly is a gem. Its small size makes it manageable for any home baker, and the convenience of a recipe scaled for two (or a small family of four) means you don’t have to deal with excessive leftovers or the daunting task of a large baking project. It’s perfect for a romantic dinner, a small family gathering, or simply when you’re craving a classic comfort dessert without committing to a large production. The balance of a moist, tender cake with the sweet-tartness of caramelized pineapple and cherries creates a harmonious flavor profile that is both nostalgic and utterly delicious. Plus, the visual appeal of the golden-brown fruit topping makes it a showstopper despite its modest size, proving that great things truly do come in small packages.
Don’t let the simplicity of this recipe fool you; it delivers on flavor and elegance. Whether you’re an experienced baker or just starting your culinary journey, this recipe offers a rewarding experience and a truly delightful treat. It’s also an excellent way to practice your baking skills on a smaller scale. Give it a try, and you might find that small batch baking becomes your new favorite way to enjoy desserts! Any remaining slices of this cake freeze beautifully, making it an excellent make-ahead dessert option as well; just wrap tightly and thaw at room temperature when ready to enjoy.
Related Pineapple Desserts You Might Love
If you’re a fan of pineapple, you’ll definitely want to explore these other delicious recipes from our collection, offering diverse ways to enjoy this tropical fruit:
- Pineapple Bars
- Frozen Pineapple Cheesecake
- Coconut Cream Pineapple Pie
- Pineapple Cheesecake Squares
- Pineapple Sour Cream Pie
Recipe: Six Inch Pineapple Upside Down Cake

Six Inch Pineapple Upside Down Cake
Anna
Pin Recipe
Ingredients
- 1 cup chopped pineapple cut into ½ inch pieces
- 6 ct cherries, Maraschino, stems removed
- 6 tablespoons unsalted butter, divided use (84 grams)
- ⅓ cup packed light brown sugar (65 grams)
- ⅓ cup granulated sugar (65 grams)
- ½ teaspoon vanilla extract
- 1 large egg. room temperature
- ¾ cup all-purpose flour, room temperature (104 gram)
- ¾ teaspoon baking powder
- ¼ teaspoon salt
- 3 tablespoons milk whole (42 grams)
Instructions
-
Preheat oven to 350 degrees F (175°C). Put 2 tablespoons of the butter in a 6-inch round cake pan. Set it in the oven, set the timer for 3 minutes, and let the butter melt. Keep a close eye on it to prevent burning!
-
Remove pan with melted butter from the oven and carefully add the brown sugar. Stir until blended and smooth, then spread evenly across the bottom of the pan to form the caramelized base.
-
Cover the bottom of the pan over the brown sugar mixture with the prepared pineapple chunks and cherries, arranging them in a visually appealing pattern if desired.
-
In a separate bowl, with an electric mixer, beat the remaining 4 tablespoons of softened butter and the ⅓ cup of granulated sugar until light and creamy (about 2-3 minutes). Beat in the vanilla extract. Add the large egg and stir until just combined, then beat for an additional 30 seconds until fluffy.
-
In a small bowl, mix together the all-purpose flour, baking powder, and salt. Add half of this dry mixture to the wet batter and stir well until just combined. Stir in the milk. Then, add the remaining flour mixture and stir gently until the batter is smooth and no dry streaks remain. Be careful not to overmix.
-
Carefully scrape the cake batter into the pan, spreading it evenly so that it completely covers the fruit layer. Smooth the top with a spatula and gently tap the pan on the counter a couple of times to settle the batter and release any air pockets. Bake for about 45 to 50 minutes, or until a wooden skewer or toothpick inserted into the center of the cake comes out with clean crumbs. You can check earlier (around 40 minutes) if your oven tends to run hot.
-
Let the cake cool in the pan for 10 minutes on a wire rack. This is a crucial step to allow the caramel to set slightly and the cake to firm up. After 10 minutes, carefully run a thin knife around the sides of the pan to loosen the cake. Place a serving plate or cooling rack over the top of the cake pan, invert the cake in one swift motion, and let it sit for a few minutes (without lifting the pan) until the cake naturally releases itself from the pan. Do not shake or tap the pan aggressively (like I did on my first try!) as this can cause the delicate cake to break apart. It is very tender at this point. Carefully lift the pan and admire your beautiful upside-down cake!
