Ultimate Red Velvet Cake Roll Recipe: A Festive Dessert for Every Occasion
The Red Velvet Cake Roll, a delightful confection from the kitchens of Imperial Sugar, recently caught my eye as the perfect last-minute holiday dessert. While I don’t always click on email links, the timing was impeccable. We had a dinner invitation, and I was eager to bring something a bit more festive and memorable than a traditional chocolate cake. A Red Velvet Cake, reimagined in the elegant form of a jelly roll, immediately struck me as an ideal choice – visually stunning, deliciously enticing, and surprisingly approachable.
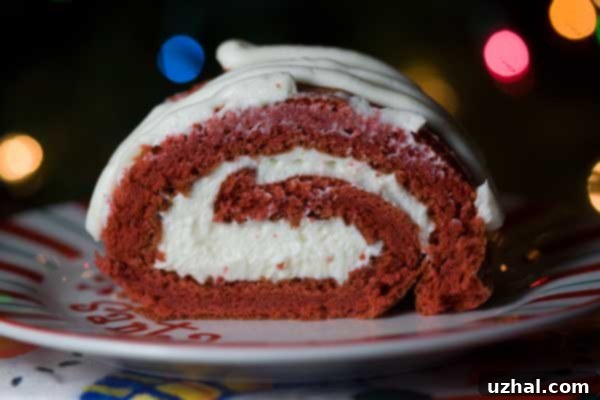
And indeed, it was a resounding success! The cake itself boasted an incredibly light and tender crumb, providing the perfect contrast to the rich, tangy cream cheese filling. What truly elevated this dessert was the addition of whipped cream to the filling, which lent an illusion of airiness and prevented it from feeling too heavy. It’s a wonderful balance of textures and flavors that captivates with every bite.
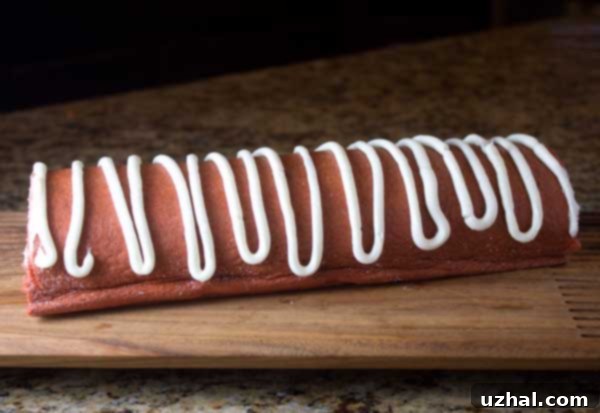
Below, you’ll see a less “staged” photo of the cake. It was actually quite a bit longer before I trimmed it to fit a specific serving platter. This highlights one of the many beauties of a cake roll: its adaptability. If you’re catering to a smaller gathering, you have the flexibility to cut the cake in half, serving one portion immediately and freezing the other for later enjoyment. This makes it an incredibly practical option for holiday meal planning or simply having a delicious treat on hand.
Why Choose a Red Velvet Cake Roll?
Beyond its festive aesthetic, the Red Velvet Cake Roll offers several advantages over a traditional layer cake. Its unique rolled form presents beautifully on any dessert table, making it a showstopper. It’s also surprisingly easy to portion and serve, with each slice revealing an elegant spiral of rich red cake and creamy white frosting. The delicate texture of the roll cake, often lighter than a standard cake, paired with a luscious filling, creates a dessert experience that is both sophisticated and comforting. It’s perfect for those who appreciate classic flavors with a touch of modern flair and presentation.
The original instructions provided by Imperial Sugar are incredibly thorough and detailed, making the process accessible even for novice bakers. You can find their comprehensive Red Velvet Cake Roll recipe here. While their recipe is excellent as a foundation, I’ve found a few minor adjustments enhance the experience and yield an even more perfect cake. It’s a relatively simple recipe at its core, especially since a stand mixer handles much of the heavy lifting, but these tweaks can make a real difference.
Key Adjustments for the Perfect Red Velvet Cake Roll
Here are my recommended adjustments to the Imperial Sugar Red Velvet Cake Roll recipe, designed to optimize for flavor, texture, and ease of baking:
-
Baking Temperature: A Gentle Heat for a Tender Crumb
The original recipe suggests baking at 420 degrees F, which can certainly achieve a quick bake. However, I’ve found that a slightly lower temperature of 400 degrees F works just as effectively, if not better, for a cake roll. Baking at 400F helps prevent the edges from drying out too quickly, promoting a more even bake and a consistently tender, moist crumb throughout the entire sheet of cake. While a higher temperature might speed things up, a slightly gentler heat reduces the risk of overbaking, which is crucial for a cake that needs to be flexible enough to roll without cracking.
-
Beyond the Clock: Trusting Visual Cues with a Time Range
Imperial Sugar’s recipe admirably provides visual cues for doneness, which are invaluable. However, for those of us who also appreciate a general timeframe, a ballpark range can be incredibly helpful. Every oven is different, and even subtle variations in pan size or batter thickness can affect baking time. In my oven, baking at 400F, the cake was perfectly done in approximately 18 minutes. Look for specific visual indicators: the cake should spring back when lightly touched in the center, and the edges should be just beginning to pull away from the sides of the pan. A light golden-brown color on the surface, beneath the red, is also a good sign.
-
Achieving Vibrant Color: The Power of Gel Food Coloring
For that iconic, deep red hue, the type of food coloring you use truly matters. The original recipe wisely calls for thick, red gel food coloring instead of the more common bottled liquid red food coloring. This is a crucial distinction. Gel coloring is highly concentrated, meaning you only need a small amount (often just a teaspoon or two) to achieve a vibrant, rich red color without significantly altering the liquid content of your batter. Liquid food coloring, on the other hand, often requires an entire bottle or more to get the desired intensity, which can dilute the batter and affect the cake’s texture. Invest in a good quality gel food coloring for the best results.
-
The Perfect Pairing: Whipped Cream Cheese Icing
While a classic cream cheese icing is always delicious, I opted for a different recipe: my own Whipped Cream Cheese Icing. The primary reason for this choice is its significantly lighter and airier texture. Traditional cream cheese frosting can be quite dense, and while wonderful, it can sometimes overwhelm the delicate nature of a cake roll. By incorporating whipped cream into the frosting, you achieve a filling that is still rich and tangy, but with a dreamy, cloud-like consistency that perfectly complements the light sponge. This contrast in textures makes each bite even more enjoyable and contributes to the illusion of lightness I mentioned earlier.
-
Elevating Presentation: Simple Decorative Touches
Presentation is key, especially for a festive dessert. After spreading most of the whipped cream cheese icing evenly over the cake, I reserved about ½ cup for decorative purposes. Transferring this reserved icing to a decorating bag (or even a sturdy Ziploc bag with the corner snipped off) allows for easy and elegant embellishments. I made a fairly generous snip in the corner of my bag, resulting in slightly less refined but still charming lines of icing drizzled decoratively over the top of the roll. For a more delicate touch, a smaller snip or a specific piping tip could create finer details. This simple step adds a professional and inviting finish to your homemade dessert.
Tips for Success When Making Any Cake Roll
Baking a cake roll might seem intimidating, but with a few key techniques, it becomes a delightful and achievable baking project:
- Prepare Your Pan Thoroughly: Always line your jelly roll pan with parchment paper, extending it over the sides, and grease the paper well. This prevents sticking and makes lifting the baked cake much easier.
- Don’t Overbake: As mentioned, a moist, pliable cake is essential for rolling. Keep a close eye on your cake; it should be just set and spring back to the touch.
- Roll While Warm: This is perhaps the most critical step. As soon as the cake comes out of the oven, invert it onto a clean, sugar-dusted kitchen towel or another piece of parchment paper. Peel off the baking parchment. While still warm, gently roll the cake and towel (or paper) together from one short end. Let it cool completely in this rolled shape. This “trains” the cake to hold its form and prevents cracking when you add the filling.
- Even Filling Distribution: Spread your filling evenly, leaving a small border around the edges. This prevents excess filling from oozing out when rolled.
- Chill for Stability: After filling and re-rolling, chill the cake roll for at least 30 minutes to an hour. This helps the filling set and makes slicing much cleaner.
Serving and Storage Suggestions
A Red Velvet Cake Roll is best served at room temperature or slightly chilled, allowing the flavors and textures to truly shine. Slice it using a sharp, serrated knife for clean cuts. It pairs wonderfully with a cup of freshly brewed coffee, a warm mug of tea, or even a glass of sparkling wine for a truly celebratory feel. For an extra touch, consider garnishing individual slices with a dusting of confectioners’ sugar, fresh berries, or a few chocolate shavings.
To store, wrap the cake roll tightly in plastic wrap or place it in an airtight container. It will keep well in the refrigerator for up to 3-4 days. If you’ve made a larger roll or want to prepare ahead, it freezes beautifully. Simply wrap the entire chilled, unfrosted (or frosted, but without delicate decorations) roll tightly in plastic wrap, then a layer of aluminum foil. It can be frozen for up to 1 month. Thaw in the refrigerator overnight before serving.
Recipe for Whipped Cream Cheese Icing

Whipped Cream Cheese Icing
Cookie Madness
Pin Recipe
Ingredients
- ½ cup heavy cream cold
- 8 oz cream cheese softened
- 2 oz unsalted or salted butter softened
- 2 cups confectioners’ sugar
- 1 teaspoon vanilla
- 1 teaspoon lemon juice fresh
Instructions
-
In a large mixing bowl, using an electric mixer, beat the cold heavy cream on high speed until stiff peaks form. Be careful not to overbeat, as it can turn granular. Gently set aside in the refrigerator.
-
In a separate, clean bowl, combine the softened cream cheese, softened butter, confectioners’ sugar, vanilla extract, and fresh lemon juice. Beat with the electric mixer on medium speed until the mixture is completely smooth, creamy, and free of lumps. Scrape down the sides of the bowl as needed to ensure everything is well incorporated.
-
Gently fold the reserved whipped cream into the cream cheese mixture using a spatula. Be careful not to deflate the whipped cream. Mix until just combined and uniformly light and fluffy. This creates the light and airy texture desired for the cake roll filling.
Conclusion: A Deliciously Achievable Masterpiece
All in all, crafting this Red Velvet Cake Roll was a truly enjoyable experience, and the end result was met with rave reviews. While the idea of a cake roll might seem daunting to some, the process is surprisingly straightforward, especially when armed with good instructions and a few helpful adjustments. The stand mixer truly handles the bulk of the work, leaving you to focus on the satisfying steps of assembling and decorating. I encourage you to try this recipe, whether for a festive holiday gathering or simply to treat yourself to a delicious and elegant dessert. It’s a beautifully balanced cake that offers both visual appeal and exquisite taste, proving that a little effort can yield a truly magnificent creation. Perhaps in the future, I’ll experiment with an even simpler version, but for now, this one remains a firm favorite for its impressive outcome without excessive fuss.
