Delicious Franciscan Brown Bread: A Rustic Dutch Oven Recipe with Molasses & Rye
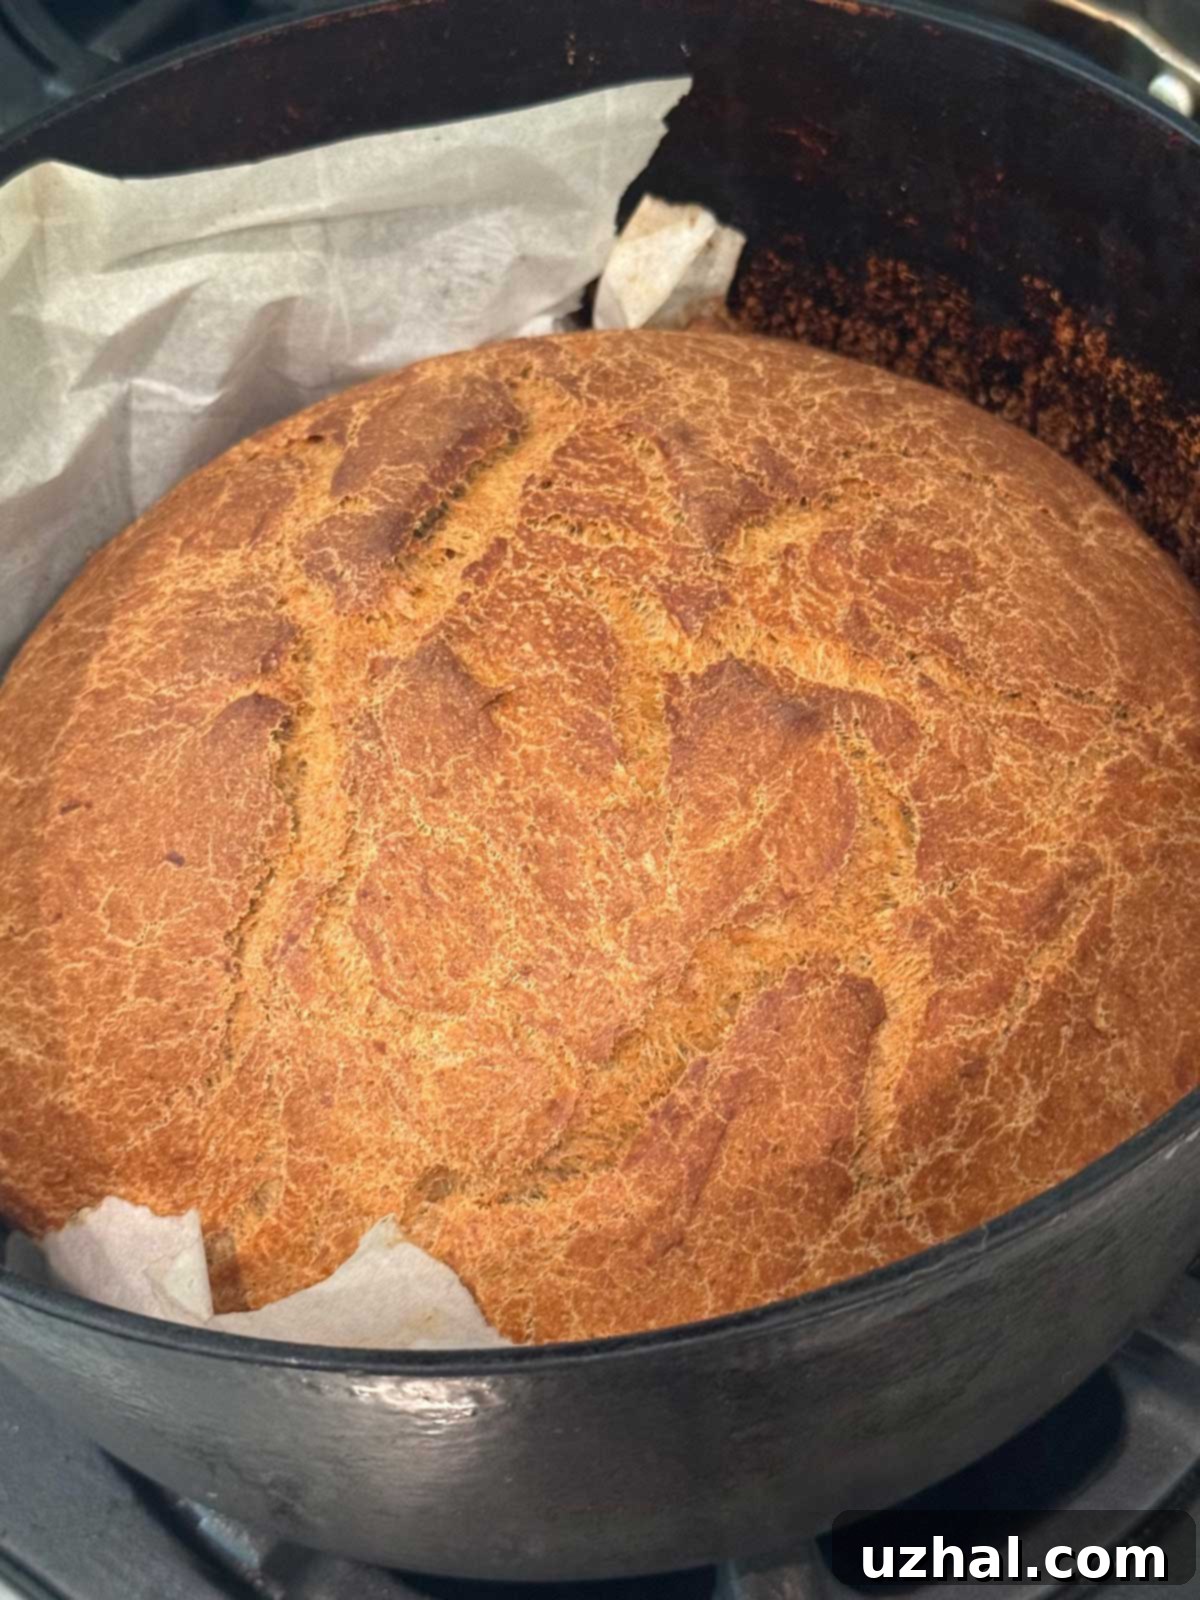
The discovery of this particular recipe was an unexpected joy, a delightful culinary treasure found within the pages of a unique cookbook. This collection, featuring recipes contributed by members of the Archdiocese of Chicago, first caught my attention as I embarked on a curious quest. The recent news of a new Pope had sparked my interest, leading me to wonder if His Holiness, Pope Leo, had graced its pages with a personal recipe. While that specific search yielded no results – a slight, but understandable, disappointment – another entry immediately caught my eye: a recipe for Franciscan Brown Bread. The name itself evoked a sense of history, simplicity, and wholesome goodness. I knew instantly that I had to try it, and what better way to honor its rustic charm than by baking it in a Dutch oven, a method renowned for producing perfectly crusty, evenly baked loaves with an incredible texture. The results were nothing short of spectacular, transforming simple ingredients into a deeply flavorful and comforting bread.

What is Franciscan Bread? Understanding Its Simple Roots
So, what exactly defines “Franciscan Bread”? It’s not a single, rigid recipe but rather a philosophical approach to bread-making, deeply rooted in the spiritual principles of the order founded by St. Francis of Assisi in the 13th century. The Franciscans are renowned for their vows of poverty, simplicity, and humility, and these core tenets naturally extended to their daily sustenance. Their bread was never intended to be an indulgence or a luxury, but rather a humble necessity, reflecting the availability of basic, local ingredients. Traditionally, this meant a straightforward combination of flour, water, salt, and a natural leavening agent like yeast or a sourdough starter. It was, by definition, a no-frills, honest bread – robust, nourishing, and deeply satisfying, designed to sustain the friars in their simple lives.
Over the centuries, as the Franciscan order spread across different cultures and regions, the concept of “Franciscan bread” evolved. While the spirit of authenticity and groundedness remained, the practicalities of local ingredients and culinary traditions meant that the definition broadened. Today, a Franciscan-style bread might be a very simple, unadorned loaf, or it could be a richer, more elaborate creation, or even something as unique as a beer bread. Ultimately, it refers to any wholesome, delicious bread that is prepared with care and an appreciation for the simple act of baking, often reflecting the nourishing spirit of the friars themselves. This particular recipe captures that wholesome essence, offering a flavorful and satisfying brown bread.

The Unique Charm of This Brown Bread Recipe
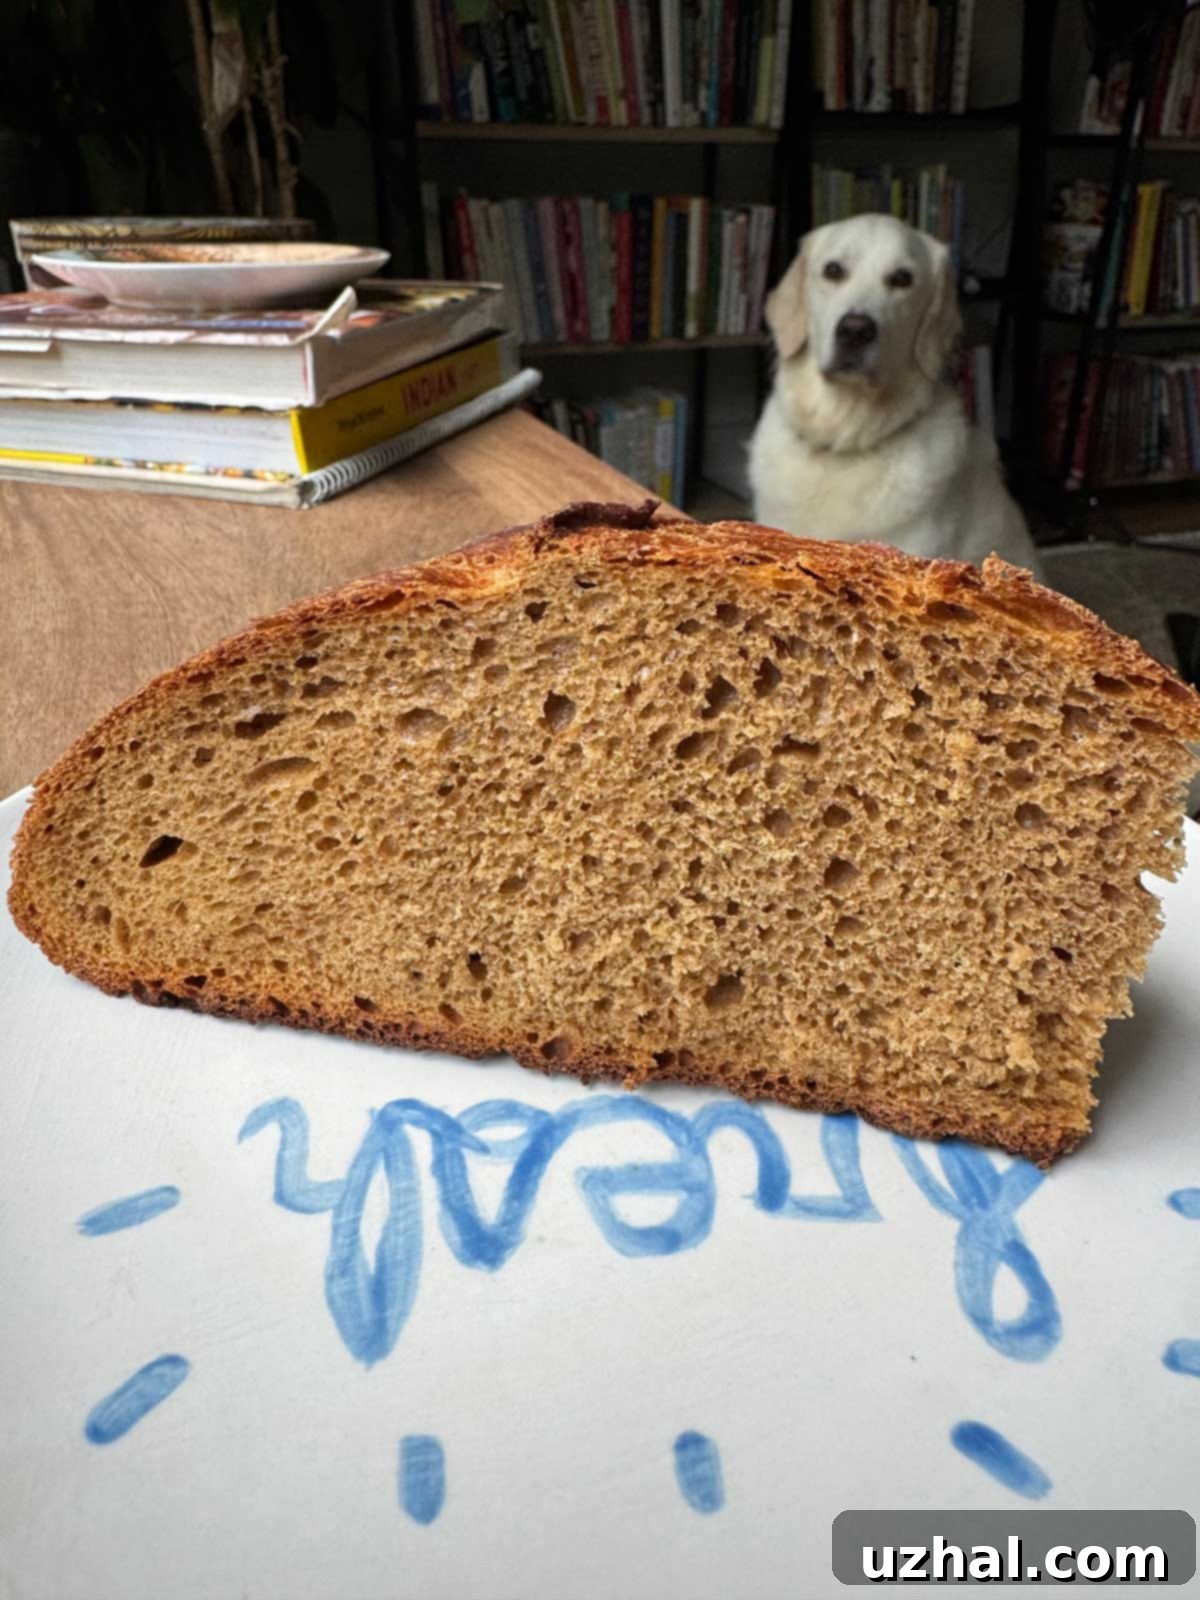
This specific Franciscan bread recipe earns its “brown” distinction from a thoughtful blend of whole grain flours and the rich, complex sweetness of molasses. Unlike many conventional white breads, this loaf offers a deeper, more nuanced flavor profile that truly comes alive, especially when you use a good quality molasses. On paper, the ingredient list might appear quite simple, yet the resulting bread boasts an incredibly rich, earthy, and satisfying taste that will surprise and delight you.
One of the most appealing aspects of this recipe for home bakers is its relative simplicity in execution – it only calls for a single rise. This significantly shortens the overall preparation time without compromising on flavor or the wonderfully soft yet sturdy texture. However, for those who appreciate the enhanced complexity that often comes with a slower fermentation, you certainly have the option to allow the dough a longer, chilled overnight rise. I’ve personally experimented with both methods. My initial batches were made by simply mixing, shaping, allowing one rise, and then baking directly in a preheated Dutch oven, yielding consistently delicious results. For future attempts, I plan to experiment with an overnight cold proof, eager to explore any further depth of flavor it might impart, though honestly, the bread is already bursting with character as is. This flexibility makes it a versatile recipe suitable for both novice and experienced bakers looking for a rewarding project.
Why Bake Bread in a Dutch Oven?
Baking bread in a Dutch oven has gained immense popularity among home bakers, and for very good reason. This method creates an optimal environment that mimics a professional bakery’s steam oven, which is absolutely crucial for achieving that coveted crackly, golden crust and a beautifully risen, open crumb. The heavy, lidded pot traps the steam naturally released from the dough during the initial baking phase. This trapped steam keeps the surface of the dough moist and flexible, allowing it to expand maximally – a process often referred to as “oven spring” – before the crust has a chance to set too quickly. Once the lid is removed, typically halfway through baking, the bread is exposed to direct heat, allowing the crust to crisp up and brown to perfection.
For this rustic Franciscan Brown Bread, the Dutch oven method significantly enhances its appeal, creating a loaf that is not only visually stunning but also boasts a superior texture and flavor profile. The even heat distribution and steam environment contribute to a deep, even color and a wonderfully chewy interior. If you’re new to Dutch oven bread baking, don’t worry – it’s remarkably simple and yields consistently impressive, artisan-quality results with minimal effort. It’s an easy way to elevate your homemade bread from good to truly exceptional.
Ingredient Notes: Understanding Your Components
Every ingredient plays a crucial role in the final flavor and texture of your Franciscan Brown Bread. Here’s a detailed look at each, with tips for selection and usage:
- Yeast: This recipe specifies active dry yeast. However, instant (quick-rise) yeast can also be used effectively, though you might observe a slightly faster rise time. The most important thing is to ensure your warm water is between 105-115°F (40-46°C) to properly activate the yeast without killing it. Water that is too hot will kill the yeast, while water that is too cold will prevent it from activating.
- Molasses: The choice of molasses significantly impacts the final flavor of this brown bread. A mild variety, such as Golden Barrel Baking Molasses, is highly recommended. It imparts a rich, subtly sweet, and complex note without overpowering the other ingredients, creating a balanced and delightful taste. Avoid blackstrap molasses, which can be too bitter and intense for this recipe. Beyond flavor, molasses also contributes to the bread’s characteristic rich brown color and helps keep the crumb incredibly moist and tender.
- Shortening: The original Archdiocese cookbook specifically called for shortening, and after thoroughly testing both shortening and unsalted butter, I found that shortening indeed creates a noticeably softer, more tender crumb. If you prefer a slightly denser texture and a distinct buttery flavor, butter is a perfectly acceptable substitute. For shortening, brands like Spectrum are excellent choices for their neutral flavor and consistent results, making them ideal for achieving the desired crumb structure.
- Whole Wheat Flour: The type of whole wheat flour you use can greatly affect the dough’s hydration level. Brands like Pillsbury’s whole wheat flour tend to absorb less water than ‘thirstier’ brands like King Arthur’s. If you opt for a high-absorption flour, be prepared to adjust the water content slightly or hold back on a bit of the bread flour during the kneading process to achieve the right dough consistency. Whole wheat flour contributes essential nutrients, a deeper color, and a robust, earthy flavor profile to the bread.
- Rye Flour: Rye flour adds a distinctive, slightly tangy flavor and a denser crumb structure, which is characteristic of many traditional European brown breads. Opt for a good quality organic rye flour if available, as it can make a noticeable difference in the overall taste and aroma. Rye flour is naturally lower in gluten than wheat flour, so it is carefully balanced here with bread flour to ensure proper structure and rise.
- Bread Flour: Bread flour, with its higher protein content (typically 12-14%), is crucial for developing strong gluten networks. These gluten networks give the bread its essential structure, elasticity, and desired chewiness. For this recipe, it’s advised to start with 3 cups, then incrementally add the remaining ½ cup and eventually the ¼ cup only as needed during the kneading process. The goal is a dough that is still slightly sticky but manageable and elastic. If you’re using a bread machine for kneading, you might find that less flour is required overall, often closer to the 3 ½ cups mark due to the machine’s efficient kneading action.
- Salt: Salt is much more than just a flavor enhancer; it plays a vital role in controlling yeast activity and strengthening the gluten structure of the dough. I found that 1 ½ teaspoons of Morton kosher salt provided a perfectly balanced flavor, enhancing the natural sweetness of the molasses and the earthiness of the whole grains without making the bread overly salty. Adjust slightly to your personal preference, but never omit salt entirely, as it’s critical for both taste and dough development.
Tips for Perfect Franciscan Brown Bread
Achieving a perfect loaf of Franciscan Brown Bread is incredibly rewarding. Here are some key tips to ensure your baking success:
- Measure Accurately: Especially with flours, using a kitchen scale for precise gram measurements (as provided in the recipe notes) will yield the most consistent and reliable results. Flour consistency can vary by humidity and how it’s scooped, so weighing is always best.
- Don’t Rush the Rise: While this recipe calls for a single rise, ensure it fully doubles in bulk. Environmental factors like room temperature can significantly affect rising time. A warm, draft-free spot (around 75-80°F or 24-27°C) is ideal for optimal yeast activity.
- Handle Gently: After the first rise, it’s important to handle the dough gently. Avoid over-punching or deflating the dough too much, as this preserves the delicate air bubbles crucial for a light and airy crumb structure.
- Preheat Thoroughly: If you are using the Dutch oven method, make sure both the pot and its lid are fully preheated in the oven. This initial burst of intense heat is key for achieving maximum “oven spring” and a beautifully crisp crust.
- Cool Completely: Resist the urge to slice into the warm bread immediately after baking. Cooling allows the internal structure to set properly and the steam to redistribute throughout the loaf, resulting in a much better texture, flavor, and easier slicing.
- Storage: Once completely cooled, store your homemade Franciscan Brown Bread in an airtight container, a bread box, or a clean cloth bag at room temperature for up to 3-4 days. For longer storage, you can slice the bread and freeze the slices, then toast them directly from the freezer as needed for a quick and fresh treat.
Serving Suggestions for Your Homemade Brown Bread
This rustic Franciscan Brown Bread is incredibly versatile and utterly delicious on its own, but here are a few ideas to elevate your experience and pair it with other delightful dishes:
- Classic Butter & Jam: A thick slice spread generously with good quality softened butter and your favorite fruit jam, jelly, or marmalade is a timeless treat, perfect for breakfast, brunch, or an afternoon snack.
- With Artisan Cheese: The subtle sweetness and complex, earthy flavor of this brown bread pair wonderfully with a variety of cheeses. Try it with a sharp cheddar, a creamy brie, a robust aged gouda, or a tangy goat cheese for a delightful contrast.
- Hearty Sandwiches: Its sturdy yet tender texture makes it an ideal base for hearty sandwiches. Fill it with savory options like thinly sliced roast beef, smoked turkey, a rich vegetarian spread, or even a classic grilled cheese.
- Soups & Stews: Serve warm slices alongside a comforting bowl of lentil soup, a rustic beef stew, a creamy tomato bisque, or a flavorful chili. The bread’s structure is perfect for soaking up rich broths and sauces.
- Toasted Delights: Toasting brings out even more of its nutty, molasses notes. Top toasted slices with creamy avocado and a sprinkle of flaky sea salt, or a perfectly poached egg for a delightful and nutritious brunch option.
- Sweet Spreads: Beyond jam, consider serving it with apple butter, honey, or even a drizzle of maple syrup for an extra touch of sweetness.
- Chicago Crunchy Cookies
- Frosted Molasses Cookies
- Excellent Spiced Molasses Cookies
- Sour Cream Coffee Cake Loaves
- Old Fashioned Molasses Butterscotch Cookies
Recipe

Franciscan Brown Bread
Anna
Pin Recipe
Ingredients
- 2 cups warm water (approx. 105-115°F or 40-46°C)
- 2 ¼ teaspoons active dry yeast (or instant yeast)
- 6 tablespoons mild molasses (120 grams, like Golden Barrel Baking Molasses)
- ¾ cup whole wheat flour (100 grams)
- ½ cup rye flour (65 grams)
- 3 ¾ cups bread flour, plus more as needed (divided use) (approx. 420 grams initial, plus 70 grams and about 30 grams for kneading)
- 2 ½ tablespoons shortening (like Spectrum) or unsalted butter
- 1 ½ teaspoons salt (Morton kosher salt recommended)
Instructions
-
In the bowl of a stand mixer, pour in the 2 cups (no more than that) of warm water. Add the active dry yeast and molasses, then gently stir. Let this mixture sit for about 5-10 minutes until the yeast activates and a foamy layer appears on the surface.
-
To the activated yeast mixture, add the whole wheat flour, rye flour, and shortening or butter. Give it a brief stir to combine. Then, add 3 cups (420 grams) of the bread flour, reserving the remaining ½ cup (70 grams) and ¼ cup (30 grams) to use incrementally during the kneading process.
-
Evenly sprinkle the salt over the dough mixture. Attach the paddle attachment (not the dough hook) to your stand mixer and beat on medium speed for about 2 minutes. This initial mixing helps to combine ingredients without overdeveloping gluten too early.
-
At this stage, the dough will be extremely soft and quite sticky. Use a sturdy bench scraper to scrape the dough away from the sides of the bowl, gathering it towards the center.
-
Lightly sprinkle part of the reserved ½ cup of bread flour onto a clean work surface or a silicone baking mat. Carefully transfer the sticky dough onto the floured surface and sprinkle the remaining portion of that ½ cup of flour over the dough. Begin kneading by hand, incorporating all of the ½ cup of flour into the dough. The dough should start to come together and hold its shape better, but it will likely still be quite sticky and you will probably need that last ¼ cup. Add that final ¼ cup of bread flour very gradually, a tablespoon at a time, kneading until the dough peels off the mat more easily, feels elastic, and forms a relatively smooth, cohesive ball. It will remain a bit tacky but should no longer be excessively sticky.
-
Lightly spray your fingers with cooking spray or apply a little neutral oil, then gently mold the dough into a large, smooth round. Meanwhile, prepare a large bowl by lining it with a generous piece of parchment paper, scrunching it up slightly to fit the bowl’s shape. Carefully transfer the round of bread dough into the parchment-lined bowl. Cover the bowl with greased plastic wrap (greasing prevents sticking) and let the dough rise in a warm, draft-free place for about 1 hour, or until it has visibly doubled in bulk.
-
While the dough is rising, preheat your oven to 450°F (232°C). If you are using the Dutch oven method, place your empty Dutch oven and its lid into the oven to preheat thoroughly for at least 30 minutes. If you are not using a Dutch oven, simply preheat your oven to 375°F (190°C).
-
Once the bread dough has fully risen, carefully lift the parchment paper with the bread round out of the bowl. Gently lower the entire parchment and dough into the preheated hot Dutch oven. Place the lid securely on top. Bake at 450°F (232°C) for 25 minutes. After this time, carefully remove the lid, reduce the oven temperature to 375°F (190°C), and continue baking with the lid off for about 20-25 more minutes, or until the crust is deeply golden brown and sounds hollow when tapped. Let the bread cool completely on a wire rack before slicing for the best texture and flavor.
Baking Without a Dutch Oven (Alternative Method)
-
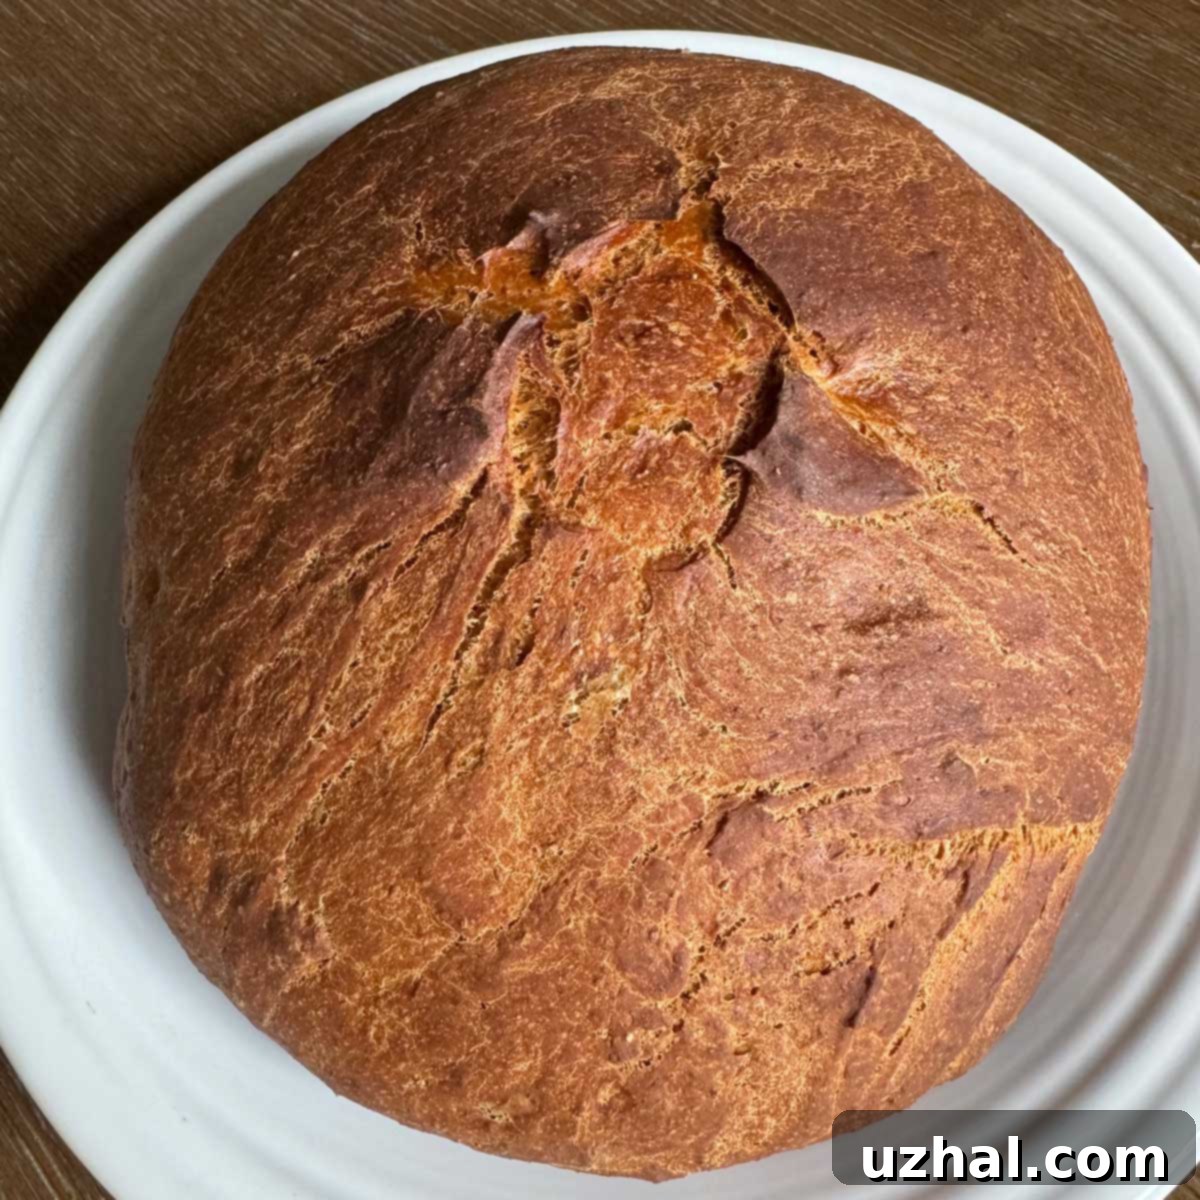
If you prefer to bake this bread without a Dutch oven, simply place the risen loaf directly onto a baking sheet (preferably lined with parchment paper). Bake for approximately 45 to 55 minutes at 375°F (190°C), or until golden brown and cooked through. You may need to shield the top of the loaf with aluminum foil during the last 15 minutes of baking if it starts to brown too quickly.
-
If you’d like to make two loaves from this recipe, follow the directions for mixing and rising as normal. After the dough has risen, gently turn it out onto a lightly floured mat. Use a greased chef’s knife or bench scraper to cut the dough in half down the middle. Without punching it down too much, gently shape each half into a round loaf. Place both rounds side-by-side on a baking sheet and bake at 375°F (190°C) for about 45 to 50 minutes, or until golden brown.
Enjoy Your Homemade Franciscan Brown Bread!
From a serendipitous discovery in a cherished cookbook to a warm, fragrant loaf cooling on your counter, this Franciscan Brown Bread recipe offers a truly rewarding baking experience. It’s a testament to the beauty of simple ingredients coming together to create something profoundly delicious and nourishing. Whether you bake it in a Dutch oven for an artisanal crust and superior oven spring, or on a baking sheet for a classic finish, this wholesome brown bread, with its delightful hints of molasses and rye, is sure to become a beloved staple in your home. Gather your ingredients, embrace the joy and therapeutic process of homemade bread, and prepare to savor every comforting slice of this rustic masterpiece. We hope you enjoy making and sharing this wonderful recipe as much as we do!
