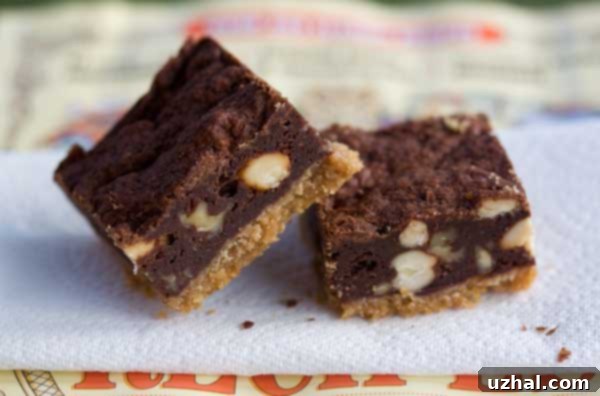
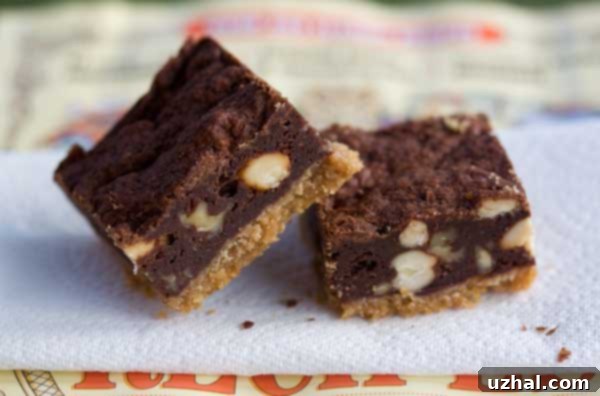
Decadent Chocolate Mud Bars: The Ultimate Recipe from Everyday Baking
Even with six pounds of Halloween candy overflowing in the house, the allure of a new baking project was simply too strong to resist. The moment I stumbled upon this recipe, it promised an indulgent experience that I knew I had to try. This particular gem hails from Everyday Baking, a fantastic new cookbook published by the esteemed Old Farmer’s Almanac, renowned for its timeless wisdom and practical advice.
If these incredible Mud Bars are any indication of the quality found within Everyday Baking, then this cookbook is undoubtedly a must-add to my Christmas wish list. Every recipe, including this one, has been meticulously developed and tested by Ken Haedrich, a highly respected cookbook author and magazine writer. His expertise shines through in every bite. I’ve always admired his contributions to publications like Family Fun, where he masterfully crafts recipes that are both accessible for kids and sophisticated enough to captivate adult palates – a delicate balance perfectly exemplified by these very bars.
Why These Mud Bars Stand Out
These Chocolate Mud Bars strike an exquisite balance. They feature intriguing elements that adults will appreciate, such as the satisfyingly crunchy graham cracker crust and the robust flavor of toasted nuts. Yet, they remain familiar and comforting enough that even the pickiest eaters (especially those who enjoy nuts!) will readily approve. The interplay of textures and flavors – the rich, fudgy chocolate filling contrasted with the crisp, buttery crust and the earthy crunch of nuts – creates an experience that is truly moreish.
For those who aren’t usually big fans of nuts in their desserts, I must offer a word of caution: nuts are a truly essential component in this recipe. They play a vital role in offsetting the intense sweetness of the chocolate filling, providing a crucial textural contrast and depth of flavor. Without them, the bars might lean too heavily towards being overly sweet. However, if you adore nuts, especially fresh walnuts or pecans (I personally used a delightful mix of walnuts and cashews for an extra layer of flavor), this recipe offers a wonderful opportunity to showcase their natural richness and crunch. While the original recipe doesn’t explicitly state it, I highly recommend toasting your nuts beforehand. This simple step amplifies their flavor significantly, adding another dimension to the bars.
Unleashing Your Inner Baker: Customization & Creativity
Speaking of Halloween candy still lingering around, while I aimed to prepare this recipe exactly as written for my first attempt, the thought of customization immediately sparked my culinary imagination. If you’re feeling adventurous and want to infuse these bars with an extra layer of indulgence, consider burying some Fun Size Snickers, chopped Milky Way bars, or any other nutty or cookie-like treat directly into the graham cracker crust before adding the filling. The bars would undoubtedly become sweeter, but the added textures and flavors could create a truly unique and memorable dessert.
I recall someone gifting my partner, Fuzz, a bag of Mini Chips Ahoy cookies, and I couldn’t help but wish I’d thought to toss them in with the nuts. Imagine the delightful chocolate chip surprise in every bite! After all, they are called “Mud Bars” – a name that perfectly invites a bit of playful, delicious experimentation. Don’t be afraid to make them your own; a sprinkle of mini marshmallows, a drizzle of caramel, or even a layer of peanut butter chips could elevate these already fantastic bars to new heights.
Beyond the optional candy additions, consider experimenting with different types of chocolate in the filling, from dark and intense to milder milk chocolate, depending on your preference. The graham cracker crust also provides a versatile base; crushed shortbread cookies or even pretzels could offer an interesting twist for those looking to explore different flavor profiles. The beauty of a well-tested recipe like this one is its adaptability, allowing you to personalize it while still ensuring a delicious outcome.
Tips for Perfect Mud Bars Every Time
Achieving bakery-quality Mud Bars at home is simpler than you might think with a few key considerations. Firstly, always use fresh, high-quality ingredients – especially your butter and chocolate, as they form the backbone of the flavor. When preparing the crust, ensure the melted butter is thoroughly combined with the dry ingredients and pressed firmly into the pan. This creates a sturdy foundation that won’t crumble when sliced. Secondly, pay close attention to the chocolate melting process for the filling; a double boiler ensures gentle, even melting, preventing the chocolate from seizing or burning. Allowing the chocolate mixture to cool to lukewarm before adding the eggs is crucial to prevent them from scrambling.
Finally, and perhaps most importantly, do not overbake these bars! The instruction to bake for “35 minutes only – no longer” is critical for achieving that perfect fudgy, chewy texture. Overbaking will result in dry, cake-like bars, losing their signature “muddy” quality. Once baked, patience is key. While it’s tempting to dive in immediately, refrigerating the bars for at least an hour (or even better, overnight as I did) allows them to set properly, making them much easier to slice neatly and enhancing both their flavor and texture. Serving them at room temperature after chilling will bring out the full depth of their chocolatey goodness.
Recipe: Chocolate Mud Bars from Everyday Baking

Chocolate Mud Bars from Everyday Baking
Recipe by Cookie Madness (Adapted from Ken Haedrich’s recipe in Everyday Baking)
Pin Recipe
Ingredients
FOR THE CRUST:
- 1 ¼ cups graham cracker crumbs
- 3 tablespoons packed light-brown sugar
- ¼ teaspoon cinnamon
- Pinch of salt
- 5 tablespoons unsalted butter melted
FOR THE FILLING:
- ½ cup unsalted butter (1 stick)
- 6 ounces semisweet chocolate coarsely chopped
- ¾ cup granulated sugar
- 2 large eggs at room temperature
- ½ teaspoon vanilla extract
- ¼ cup cake flour
- 1 cup coarsely chopped walnuts (or pecans/cashews, toasted for best flavor)
Instructions
-
Butter an 8-inch square baking pan thoroughly and set aside. This prevents sticking.
-
For the crust: In a medium bowl, combine the graham cracker crumbs, brown sugar, cinnamon, and a pinch of salt. Mix these dry ingredients well with your hands to ensure even distribution. Add the melted butter, stirring initially with a fork. Then, use your fingers to rub the ingredients together until thoroughly mixed and the crumbs are moistened. Press this mixture evenly and firmly into the bottom of the prepared pan, forming a level layer with a small lip extending approximately ¼ inch up the sides of the pan. (Do not prebake the crust; it will bake with the filling.)
-
For the filling: Combine the ½ cup (1 stick) of butter and the coarsely chopped semisweet chocolate in the top of a double boiler. Place this over gently simmering (not boiling) water. Stir occasionally until the butter and chocolate are completely melted and smooth. Remove the pan from the heat. Scrape the melted chocolate mixture into a medium bowl and allow it to cool to lukewarm. Preheat your oven to 325°F (160°C). Once the chocolate is lukewarm, whisk in the granulated sugar, large eggs, and vanilla extract until well combined and smooth. Stir in the cake flour, mixing until no lumps remain. Finally, fold in the coarsely chopped walnuts (or your preferred nuts). Scrape the rich batter evenly over the prepared crust in the pan and smooth the top with a spoon or offset spatula. Bake on the center oven rack for exactly 35 minutes – no longer, as overbaking will result in a drier texture. Cool the baked bars completely on a wire rack. For best results and easier slicing, refrigerate the bars for at least an hour, or ideally overnight, before cutting. Serve at room temperature. This recipe yields 16 delicious bars.
Notes
For optimal flavor development and easier, cleaner slicing, I chilled the bars overnight after baking. This greatly improved both the texture and overall taste.
A Dessert That Delights Everyone
These Chocolate Mud Bars truly are a marvel – simple enough for any home baker to master, yet sophisticated in flavor and texture. Whether you’re making them for a special gathering, a casual family treat, or simply to satisfy a chocolate craving, they are guaranteed to be a hit. The convenience of baking a large batch that can be easily sliced and stored makes them ideal for meal prep or feeding a crowd. So, put that Halloween candy aside for a moment, grab your apron, and prepare to indulge in these wonderfully fudgy and nutty bars that will undoubtedly become a staple in your dessert repertoire.
