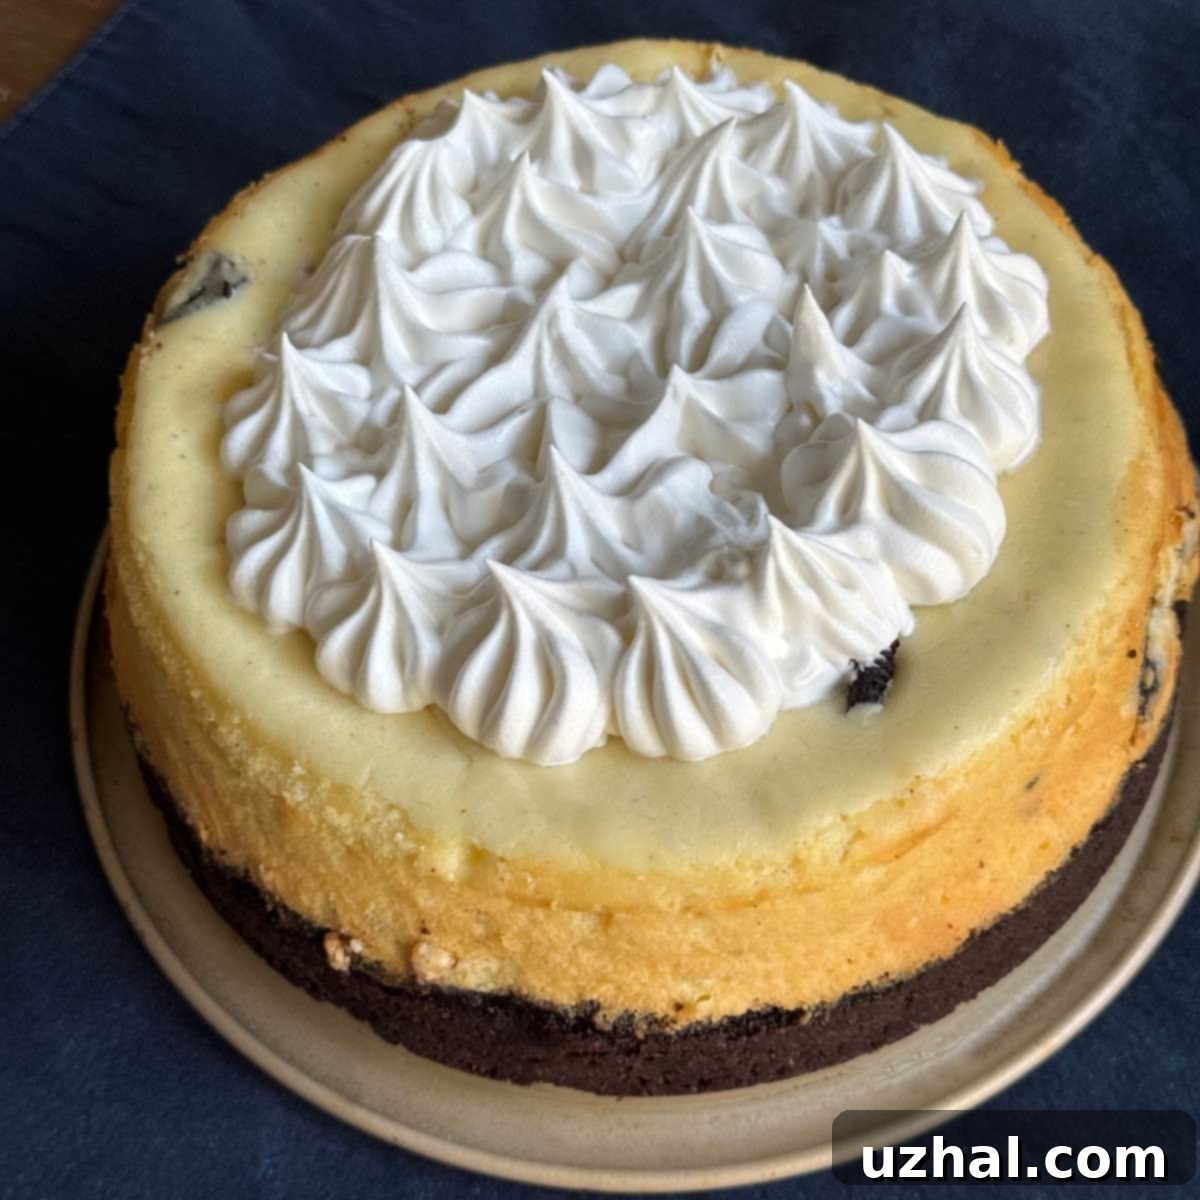
The Ultimate Fluffy Oreo Cheesecake Recipe: Indulge in Cruise Ship Perfection
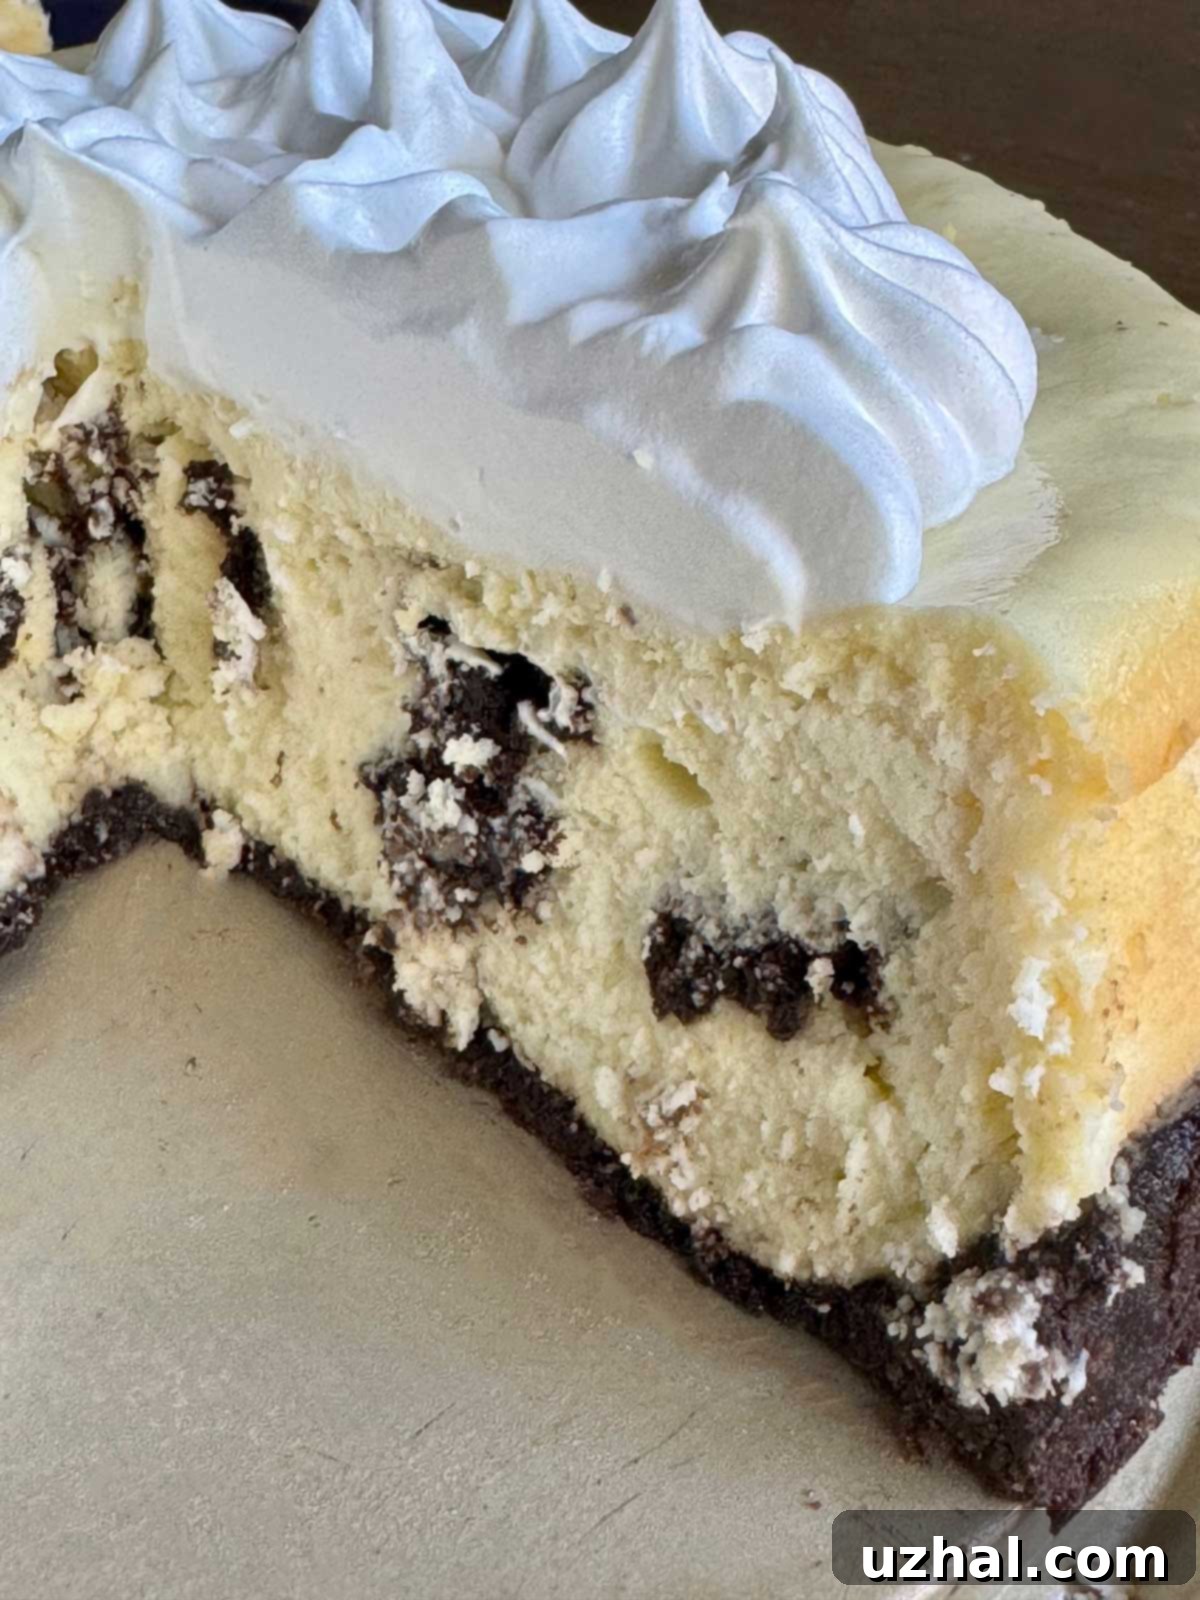
Prepare to be enchanted by an extraordinary dessert – the fluffy Oreo cheesecake, a recipe renowned for its heavenly creamy texture and delightful crunch. This isn’t just any cheesecake; it originates from a cherished collection of recipes served aboard luxurious Royal Caribbean cruise ships, promising a taste of vacation indulgence right in your home kitchen. What sets this cheesecake apart is its unique preparation: whipped egg whites are carefully folded into the batter, creating an unbelievably light, almost airy consistency that beautifully complements the rich cream cheese. Generous chunks of Oreo cookies are suspended throughout the velvety filling, ensuring a delightful surprise in every bite. And beneath it all? A thick, irresistible crust made from crushed sandwich cookies, providing the perfect foundation for this magnificent dessert.
Why This Oreo Cheesecake Stands Out: The Secret to Fluffiness
Many cheesecake recipes aim for dense and rich, but this Royal Caribbean inspired version takes a different path, focusing on an exquisite creaminess paired with an unparalleled fluffiness. The secret lies in the meticulous incorporation of whipped egg whites. Unlike traditional cheesecakes where eggs are simply beaten into the batter, here, the egg whites are whipped separately to soft peaks and then gently folded in. This technique introduces air into the mixture, resulting in a cheesecake that feels lighter on the palate, almost like a cloud, without sacrificing any of its decadent flavor. Coupled with large chunks of America’s favorite cookie, the contrast between the smooth, airy filling and the crunchy Oreos is simply divine. It’s a sophisticated twist on a classic, elevating a beloved dessert to a gourmet experience.
Mastering Your Oreo Cheesecake Size: From Standard to Smaller Batches
This grand recipe is originally designed for a standard 9-inch round cheesecake, calling for a generous 2 pounds of cream cheese. It yields a substantial dessert, perfect for gatherings, celebrations, or when you simply crave an abundant supply of this delightful treat. However, we understand that sometimes you might not need a full-sized cake, or perhaps you’re just looking for a smaller batch for a more intimate setting. The beauty of a well-crafted recipe is its adaptability. While the recipe card details the full 9-inch version, we’ve also thoroughly tested and provided guidance for scaling it down.
For those times when a full cheesecake might be too much, or if you prefer individual servings, consider halving the recipe and baking it in a smaller 6-inch or 8-inch round pan. This adjustment allows for the same incredible flavor and texture in a more manageable size. The process is straightforward, requiring slight modifications to ingredient quantities and baking times, which we will detail further to ensure your scaled-down cheesecake is just as perfect as its larger counterpart.
Baking a 7-Inch Oreo Cheesecake: Scaling Down for Smaller Indulgences
As mentioned, the recipe presented in the card is tailored for a luxurious 9-inch cheesecake. But fear not, for those who desire a smaller portion, we’ve successfully experimented with adapting this recipe for a 7-inch springform pan. This size is ideal for smaller households or when you want to enjoy a cheesecake without the commitment of a large one. The key to successfully scaling down lies in proportionate ingredient reduction and adjusted baking times.
For a 7-inch cheesecake, we recommend halving all the ingredients listed in the main recipe. A crucial detail for maintaining the signature fluffy texture is the handling of the egg whites: use only about three-quarters of the halved egg white quantity. This slight reduction helps manage the volume in a smaller pan while still achieving the desired lightness. The baking time for a 7-inch cheesecake is also reduced, typically requiring around 60 minutes in a 300°F oven, compared to the 75 minutes for the 9-inch version. Always monitor for doneness – the center should have a slight jiggle, indicating it’s perfectly set.
Below, you’ll find a visual guide illustrating the steps for preparing a 7-inch Oreo cheesecake, complete with a robust Oreo crust and that wonderfully airy filling.
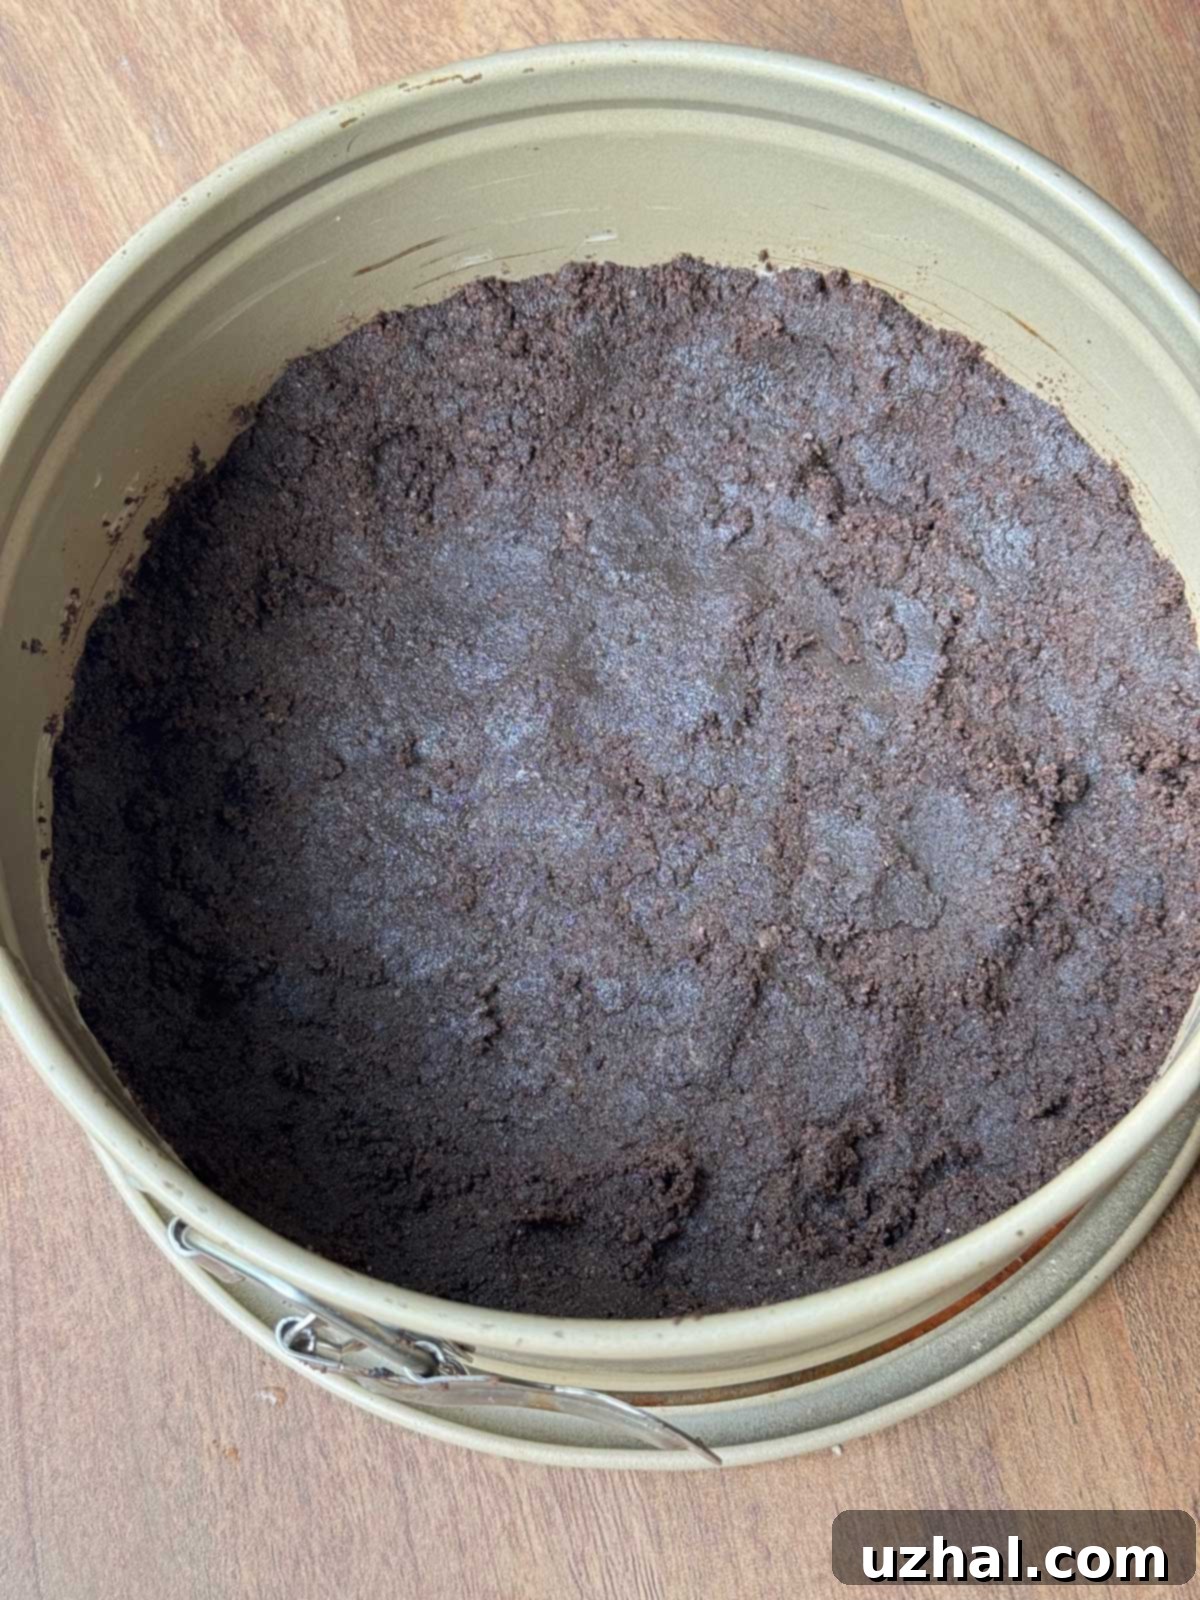
- Step 1: Prepare the Oreo crust by mixing crushed Oreos with melted butter. Press this mixture firmly into the bottom of your springform pan and bake for 10 minutes to set. This creates a sturdy, flavorful base.
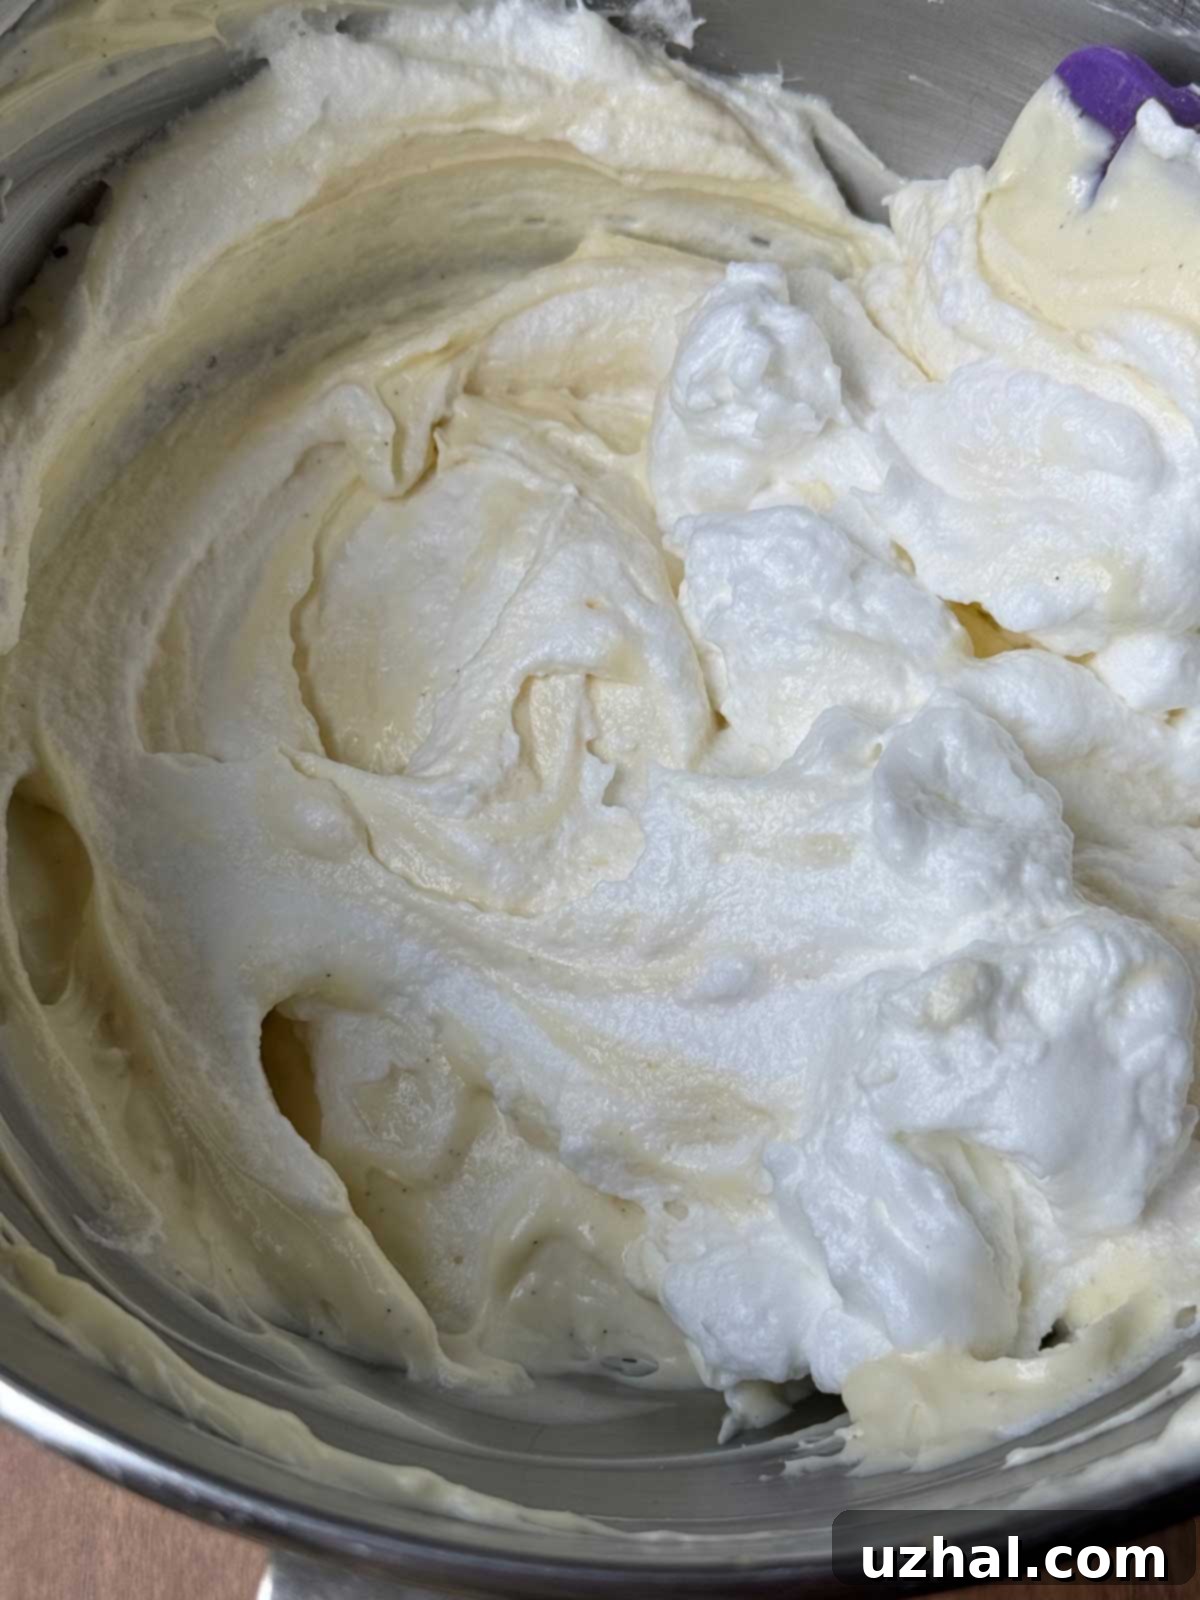
- Step 2: Craft the cheesecake batter, ensuring all ingredients are at room temperature for a smooth consistency. The crucial step here is gently folding in the whipped egg whites, which adds that distinctive volume and airy lightness.
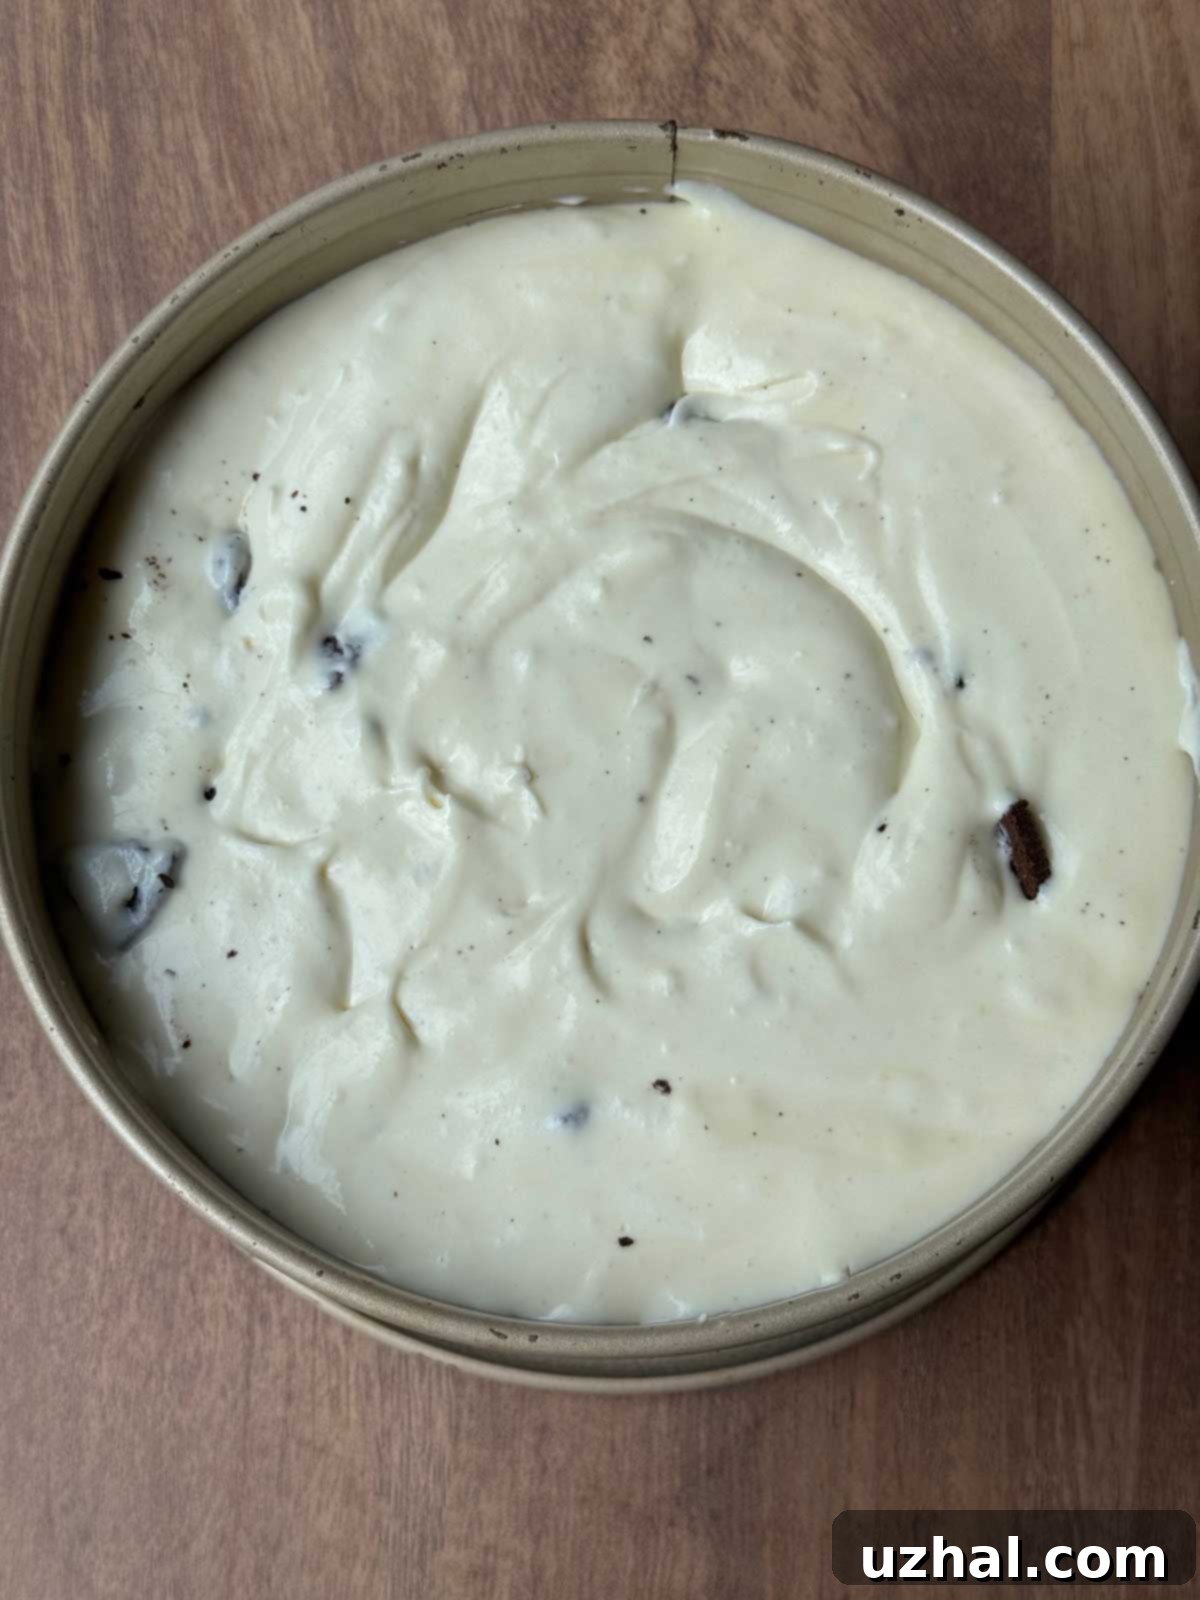
- Step 3: Pour the prepared batter over the cooled crust in the springform pan. Bake the cheesecake at 300°F for approximately 75 minutes for a 9-inch pan, or 60 minutes if using a 7-inch pan.
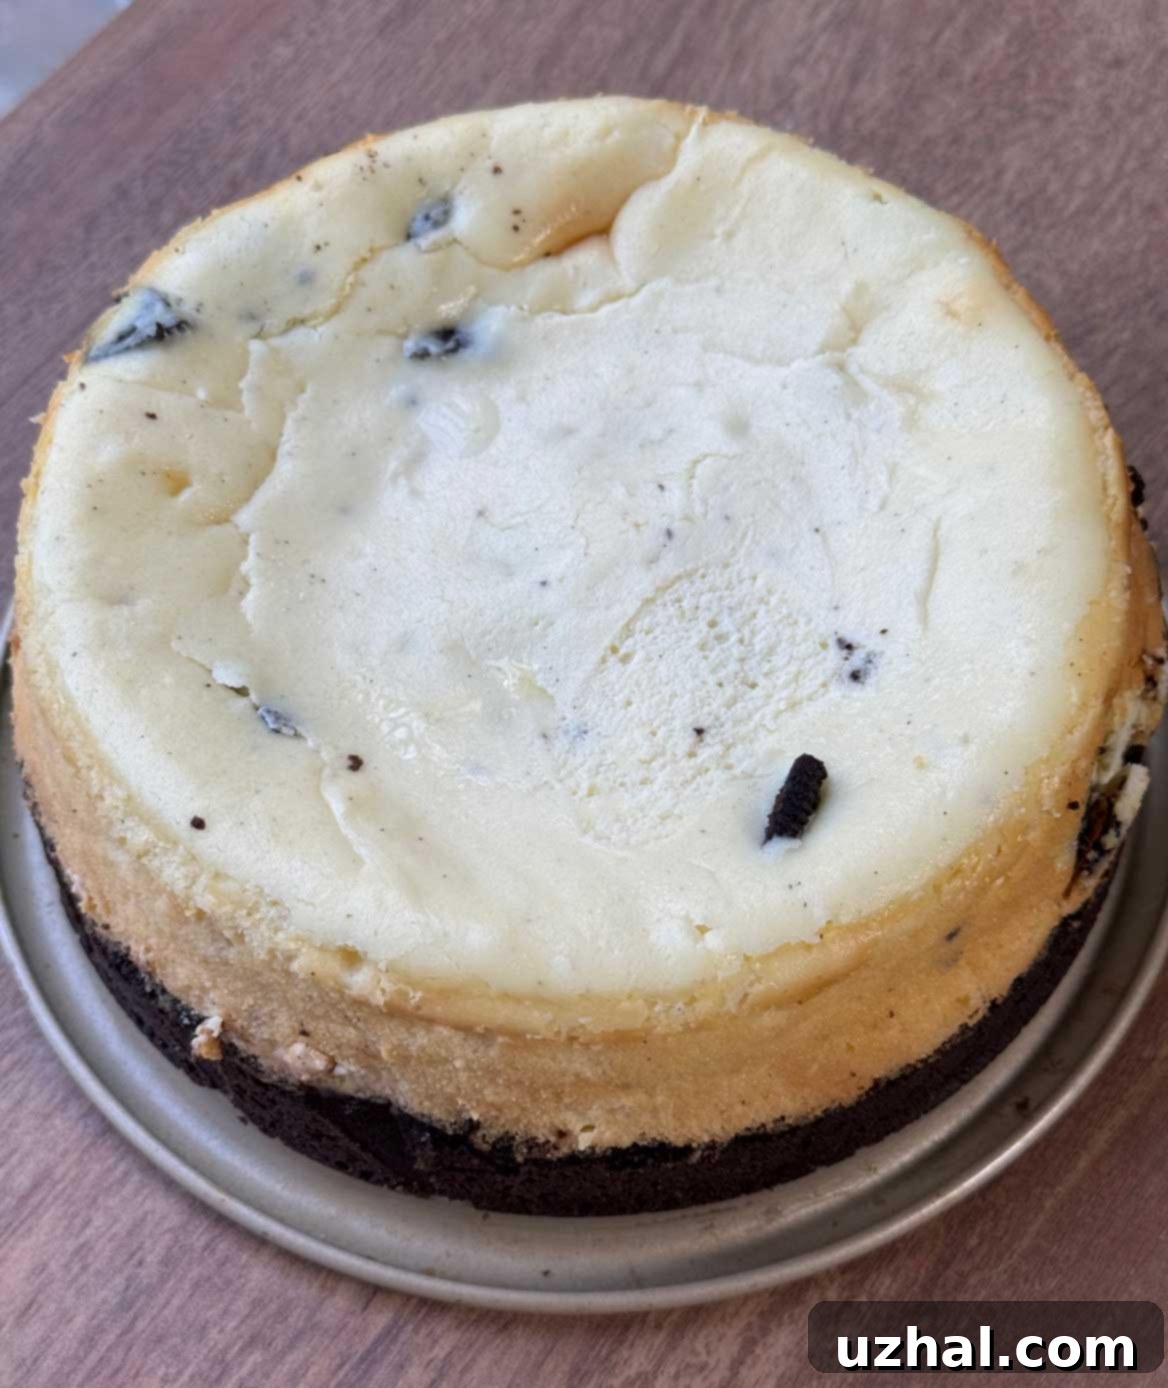
- Step 4: Once baking is complete, turn off the oven but leave the cheesecake inside with the door slightly ajar for 15 minutes. This slow cooling helps prevent cracks. Afterwards, cool completely at room temperature, then chill in the refrigerator overnight for the best texture and flavor.
Tips for Cheesecake Perfection: From Ingredients to Cooling
Choosing Your Ingredients Wisely
The success of any cheesecake, especially one with such a delicate texture, begins with the ingredients. Always opt for full-fat cream cheese for the richest flavor and creamiest consistency. Ensure that all your dairy products – cream cheese, eggs, and heavy cream – are at room temperature before you begin mixing. This is crucial for achieving a smooth, lump-free batter. Cold ingredients will cause the cream cheese to seize up, leading to a grainy texture. For the Oreos, regular sandwich cookies work best, but feel free to experiment with different flavors for unique twists. Using fresh eggs is also important, especially since whipped egg whites are a core component of this recipe.
Crafting the Perfect Oreo Crust
A great cheesecake starts with a phenomenal crust. For this recipe, a thick sandwich cookie crust provides the ideal contrast to the creamy filling. When crushing your Oreos, aim for fine crumbs. A food processor makes this task easy, but you can also place them in a zip-top bag and crush them with a rolling pin. Once crushed, mix them thoroughly with melted unsalted butter. The key is to press this mixture firmly and evenly into the bottom of your springform pan. Using the bottom of a glass or a flat measuring cup can help achieve a compact and uniform crust. Pre-baking the crust for 10 minutes at 350°F helps to set it, preventing a soggy bottom once the filling is added.
Mixing the Velvety, Fluffy Filling
The unique fluffiness of this cheesecake comes from the whipped egg whites. First, beat the softened cream cheese with the specified amount of sugar until it’s incredibly smooth and airy. Scrape down the sides of the bowl frequently to ensure everything is fully incorporated. Next, beat in the egg yolks on a low speed, followed by the room temperature heavy cream and vanilla extract. Finally, mix in the flour gently. In a separate, clean bowl, whip the egg whites until soft peaks form, then gradually add the remaining sugar. This creates a stable meringue-like texture. The final step is to carefully fold the whipped egg whites into the cream cheese mixture, then gently fold in your broken Oreo pieces. Be delicate to maintain the airiness of the egg whites and prevent them from deflating.
Baking Without Cracks: The Cooling Process
Cheesecakes are notorious for cracking during cooling, but with a few simple steps, you can minimize this risk. After baking for the recommended time (1 hour 15 minutes for 9-inch, 60 minutes for 7-inch) at 300°F, turn off your oven. Do not remove the cheesecake immediately. Instead, leave it in the oven with the door slightly ajar for at least 15 minutes (or even longer, up to an hour). This gradual cooling prevents a sudden temperature shock, which is a common cause of cracks. After this initial cooling, take the cheesecake out and let it cool completely at room temperature on a wire rack. Only once it’s fully cooled to room temperature should you transfer it to the refrigerator to chill overnight. Chilling overnight is essential for the cheesecake to firm up properly and for the flavors to fully develop.
Serving and Garnish Ideas
Once your Oreo cheesecake is perfectly chilled, it’s ready for its grand unveiling! Run a thin knife around the edge of the springform pan before releasing the sides for a clean finish. Garnish can be as simple or elaborate as you like. A dollop of sweetened whipped cream or whipped topping in the center is a classic choice, and you can pipe it elegantly for a more decorative look. For an extra touch of Oreo magic, sprinkle some additional crushed Oreo crumbs over the whipped cream or around the base of the cheesecake. A drizzle of chocolate syrup or a few whole mini Oreos can also add visual appeal and enhance the flavor experience. Slice with a warm, clean knife for the neatest portions.
Frequently Asked Questions About Oreo Cheesecake
- Can I use different types of Oreos?
- Absolutely! While the recipe calls for regular Oreos, feel free to experiment with Double Stuffed, Thins, or even flavored Oreos like mint or peanut butter for an exciting twist on the classic. Just ensure the total quantity of cookies remains consistent for the crust and filling.
- My cheesecake cracked, what went wrong?
- Cheesecakes often crack due to sudden temperature changes during cooling. To prevent this, always follow the slow cooling method: leave the cheesecake in the oven with the door ajar after baking, then cool completely at room temperature before refrigerating. Over-baking can also cause cracks, so remove the cheesecake when the center still has a slight jiggle.
- How long does this Oreo cheesecake last?
- When stored properly in an airtight container in the refrigerator, this cheesecake will stay fresh for 3-5 days. It can also be frozen for longer storage; wrap it tightly in plastic wrap and then foil, and it will keep for up to 1-2 months. Thaw in the refrigerator before serving.
- Do I need a water bath for this recipe?
- This specific recipe does not call for a water bath, which often simplifies the baking process. The inclusion of whipped egg whites helps maintain moisture and prevent dryness without it. However, if you are prone to cracks in cheesecakes, a water bath (bain-marie) is a classic technique that provides a moist, even heat, significantly reducing the chance of cracks. If you opt for a water bath, ensure your springform pan is securely wrapped in heavy-duty foil to prevent water from seeping in.
- Chocolate Chip Oreo Brownie Bars: A delicious fusion of cookies and brownies.
- Candy Corn Oreos Halloween Cookie Bark: Perfect for a spooky season treat.
- Chocolate Banana Oreo Brownies: An unexpected yet delightful flavor combination.
- Oreo Ice Cream Cake: A no-bake dessert for hot summer days.
Recipe

Oreo Cheesecake
Anna
Pin Recipe
Ingredients
- 35 regular Oreos (24 for crust and 11 for the batter)
- 5 tablespoons unsalted butter melted
- 3 large eggs
- 4 packages softened cream cheese (32 oz total)
- 1 cup granulated sugar, divided use (¾ cup and ¼ cup) (150 grams for cake and 50 grams to go in egg whites)
- ½ cup heavy cream, room temperature
- 1 teaspoon vanilla extract
- ⅓ cup all-purpose flour
- 1 cup sweetened whipped cream or whipped topping for garnish
Instructions
-
Preheat your oven to 350 degrees F (175 degrees C).
-
For the crust, finely crush or grind 24 of the Oreos to yield approximately 2 cups of crumbs. In a bowl, mix these crumbs thoroughly with the 5 tablespoons of melted unsalted butter. Press this mixture firmly and evenly into the bottom of a 9-inch round springform pan. Place the pan on a rimmed baking sheet (to catch any potential drips) and bake for 10 minutes. Remove from oven and let cool completely while you prepare the filling.
-
Meanwhile, carefully separate the 3 large eggs. Place the egg whites into a separate, clean mixing bowl. Keep the yolks in another bowl.
-
Reduce your oven temperature to 300 degrees F (150 degrees C).
-
In the bowl of a stand mixer fitted with the paddle attachment (or a large mixing bowl with a hand mixer), beat the 4 packages of softened cream cheese and ¾ cup of the granulated sugar (reserve the remaining ¼ cup for the egg whites). Beat until the mixture is completely smooth, light, and creamy, scraping down the sides of the bowl as needed. On the lowest speed of the mixer, beat in the egg yolks one at a time, making sure each is fully incorporated before adding the next. Continue to scrape down the sides of the bowl. Still on low speed, beat in the room temperature heavy cream and vanilla extract. Finally, add the all-purpose flour and beat on low speed just until it is mixed in and no lumps remain. Do not overmix.
-
In the second mixing bowl (with the egg whites), using the whisk attachment (ensure both bowl and whisk are impeccably clean and grease-free), beat the egg whites until soft peaks form. Gradually add the reserved ¼ cup of granulated sugar, continuing to beat until medium-firm peaks are achieved. Gently fold this whipped egg white mixture into the cream cheese batter in three additions, using a spatula. Be careful not to deflate the egg whites, preserving the airy texture.
-
Break the remaining 11 Oreos into small, bite-sized pieces and gently fold them into the cheesecake batter.
-
Pour the prepared cheesecake batter evenly into the springform pan, covering the cooled Oreo crust. Spread the batter gently to the edges of the pan. Bake at 300 degrees F (150 degrees C) for 1 hour and 15 minutes. The center should still have a slight jiggle, which indicates it’s set but still creamy. If using a 7-inch pan, bake for approximately 60 minutes.
-
After baking, turn off the oven and leave the cheesecake inside with the oven door propped open slightly (about 3-4 inches) for 15 minutes. This slow cooling prevents cracking. Remove the cheesecake from the oven and let it cool completely on a wire rack at room temperature (about 2 hours). Once at room temperature, chill the cheesecake in the refrigerator overnight (at least 8 hours) to allow it to firm up properly and for flavors to meld.
-
Before serving, pipe sweetened whipped cream or whipped topping in the center, or across the top of the cheesecake. You can also garnish with more Oreo crumbs, chocolate shavings, or decorate as desired. Slice with a warm, clean knife for the best presentation.
Notes
