The Ultimate Guide to Cook’s Illustrated Fluffy Yellow Cake: A Classic Recipe Perfected
Since its feature in the March 2008 issue, the Cook’s Illustrated Fluffy Yellow Layer Cake has cemented its place as a perennial favorite among home bakers and professional pastry chefs alike. Its reputation for delivering a consistently tender, moist, and wonderfully light crumb makes it a benchmark for what a classic yellow cake should be. While many excellent yellow cake recipes exist, this particular one stands out not only for its superior texture but also for its straightforward approach, making it surprisingly accessible even for those new to baking from scratch.
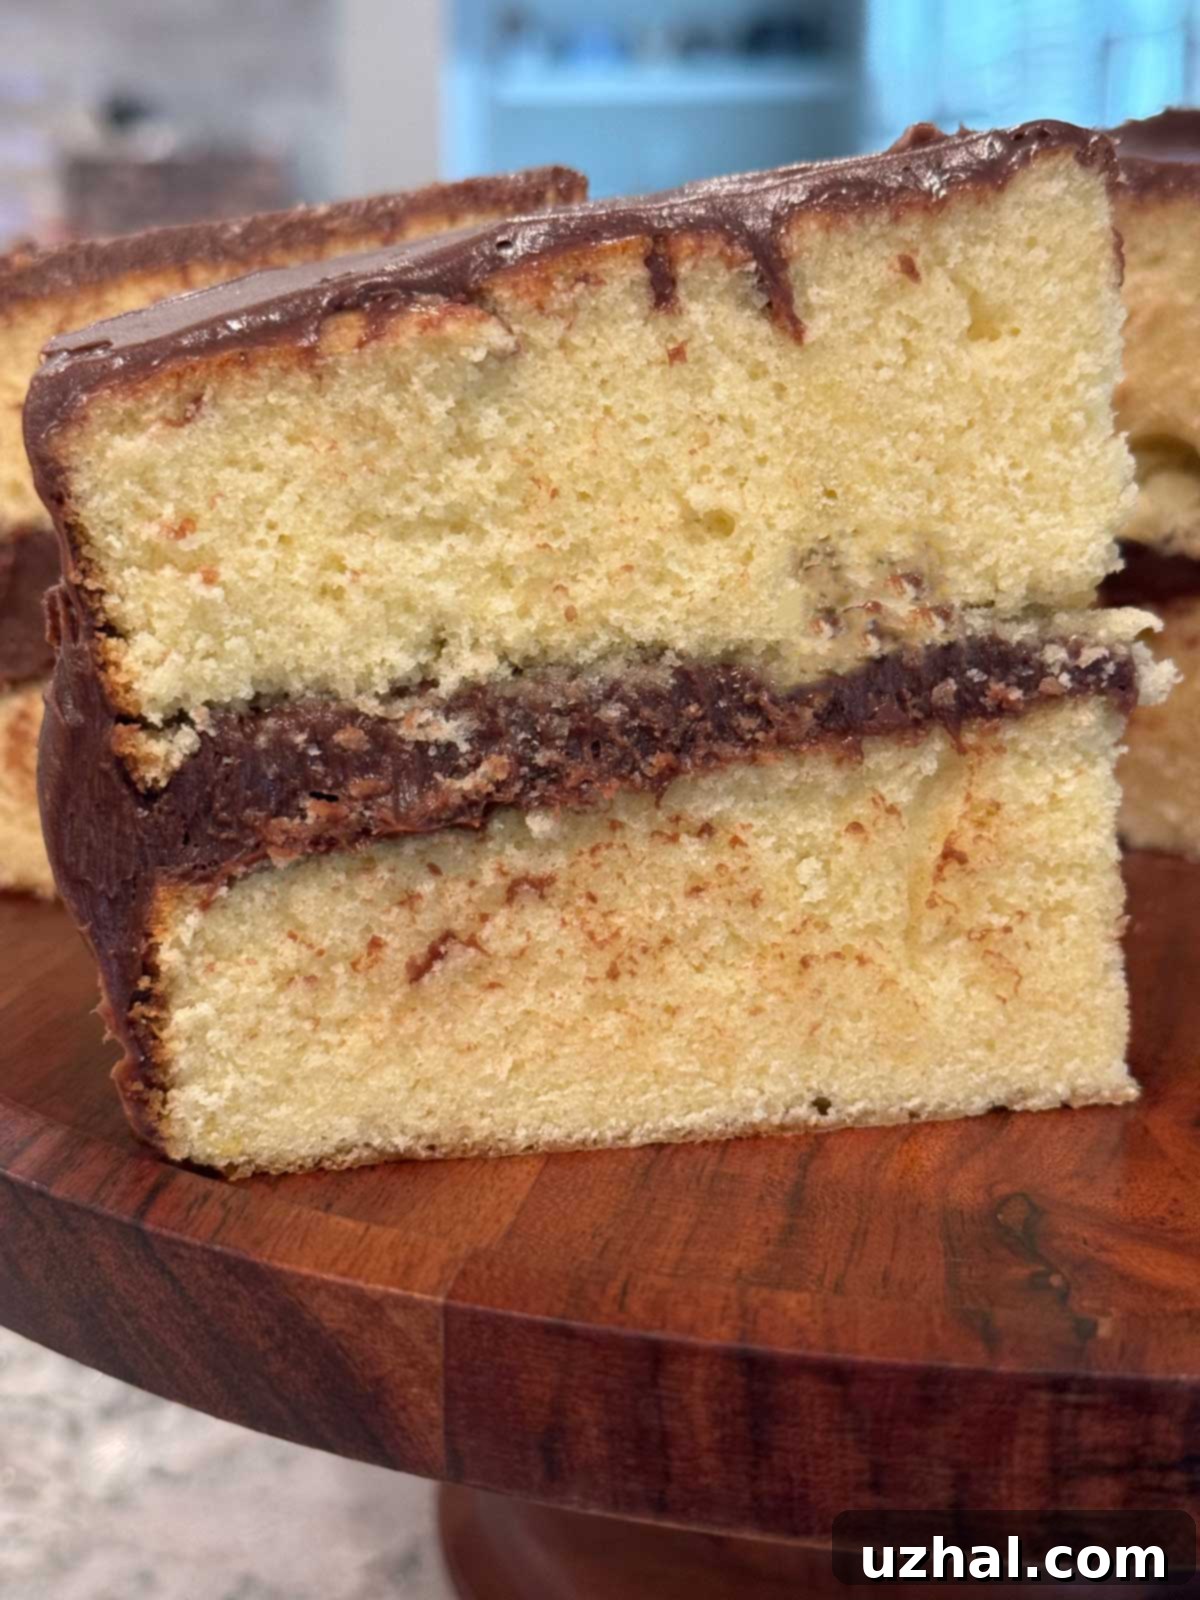
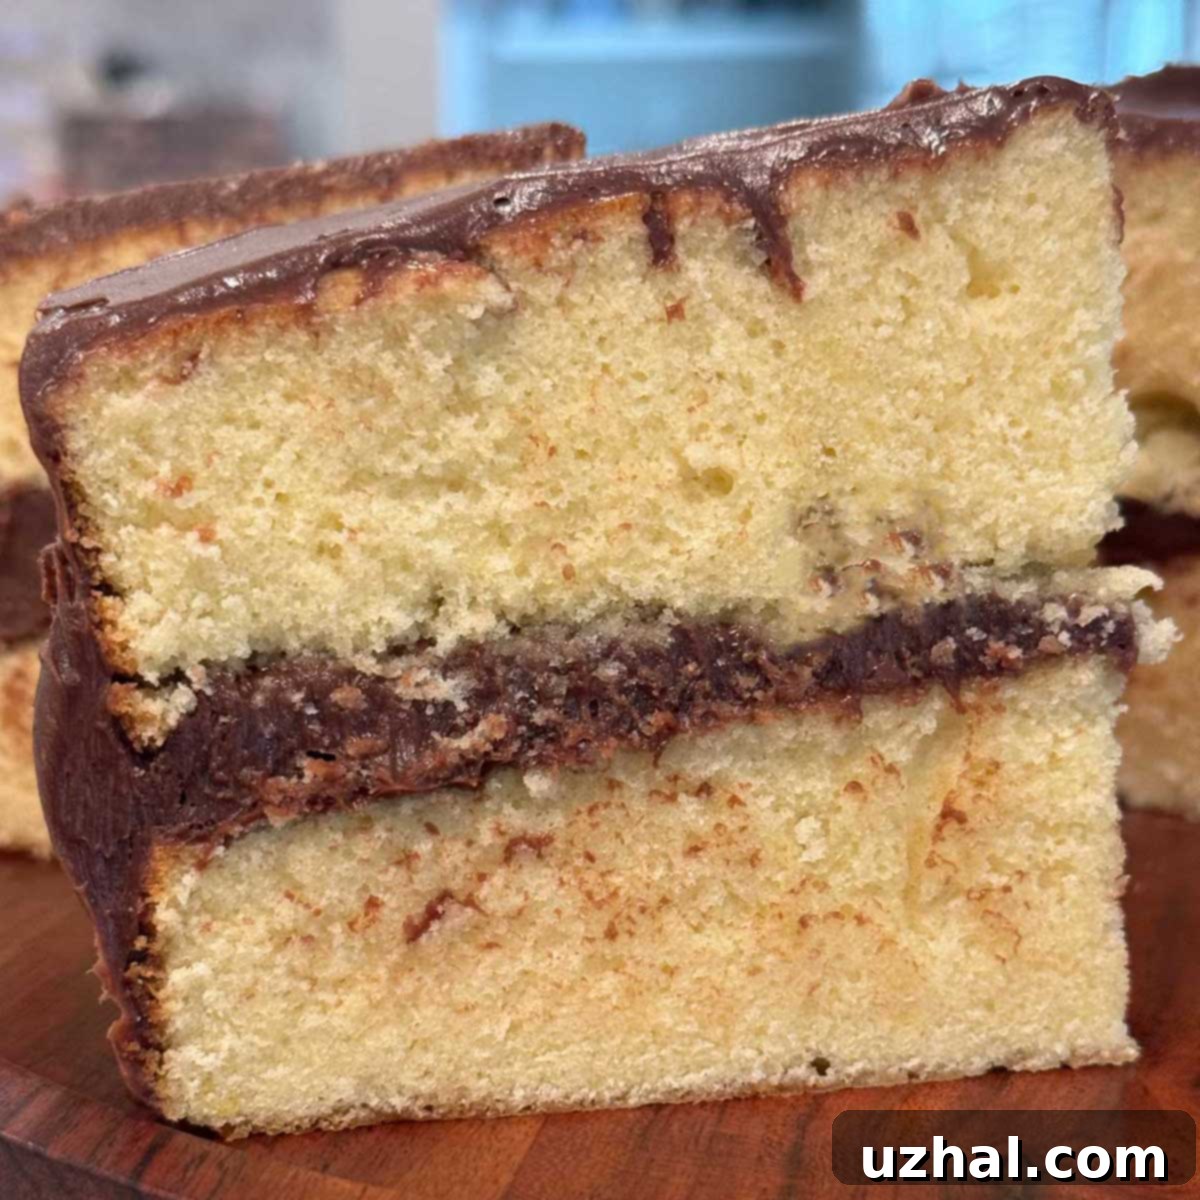
What truly distinguishes this recipe is its ingenious use of a technique known as reverse creaming, also referred to as the two-stage method. Unlike traditional creaming where butter and sugar are beaten together first, this method involves combining dry ingredients initially, then gradually incorporating the liquids, and finally folding in beaten egg whites. This process yields a cake with an incredibly fine, velvety crumb that virtually melts in your mouth – a hallmark of a truly exceptional yellow cake.

Unlocking Fluffiness: The Magic of Reverse Creaming
The reverse creaming method is a game-changer for cake texture. By coating the flour in fat (butter and oil) before adding much liquid, it minimizes gluten development. Less gluten means a more tender, less chewy cake. When the liquids are gradually introduced, they are absorbed more uniformly, preventing overmixing and ensuring a smooth, even batter. The final step of gently folding in perfectly beaten egg whites introduces air, contributing significantly to the cake’s characteristic fluffiness and ethereal lightness.
Over the years, I’ve refined my approach to this recipe, particularly regarding the handling of egg whites. In my earlier baking days, I would whip the egg whites in my stand mixer, transfer them to a separate bowl, and then proceed with the rest of the recipe in the same mixer bowl. Now, with the convenience of having multiple bowls for my stand mixer (or simply opting for a hand mixer for the whites), I find it more efficient to prepare the egg whites as the very last mixing step before folding. This streamlined version ensures the egg whites retain their volume and stability right up until they are incorporated into the batter, maximizing the cake’s lift and delicate texture.
One crucial observation I’ve made during countless bakes is that the Cook’s Illustrated Fluffy Yellow Cake almost invariably benefits from a slightly extended baking time than initially suggested. While the original recipe often cites 22 minutes, I consistently find that my cakes require up to 27 minutes in most ovens to achieve that perfect golden hue and internal doneness. Always trust your oven and the visual cues – a cake that’s set and just beginning to pull away from the edges of the pan is your best indicator.
Essential Tips for a Perfect Fluffy Yellow Cake
Achieving baking perfection often comes down to a few key details. Here are some indispensable tips to ensure your Cook’s Illustrated Fluffy Yellow Cake turns out flawlessly every time:
- Room Temperature Ingredients: This cannot be stressed enough! Ensure your buttermilk, eggs, and even butter (if cooling after melting) are at room temperature. This allows them to emulsify properly, creating a smooth, cohesive batter and a finer crumb. Cold ingredients can lead to a lumpy batter and a denser cake.
- Accurate Flour Measurement: Cake flour is essential for this recipe’s signature tender texture. To measure correctly, spoon the flour into your measuring cup and then level it off with a straight edge. For ultimate precision, use a kitchen scale (280 grams). Scooping directly from the bag can compact the flour, resulting in too much flour and a dry, dense cake.
- Don’t Overmix: After adding the wet ingredients to the dry, mix just until combined. A few streaks of dry flour are acceptable at first. Overmixing develops gluten, which toughens the cake. Once the egg whites are folded in, stop as soon as no white streaks remain.
- Proper Egg White Peaks: When beating egg whites, aim for stiff peaks that are not dry. They should hold their shape but still look slightly glossy and pliable. Overbeaten, dry egg whites are harder to fold in and can lead to a crumbly texture.
- Grease and Flour Pans Properly: Don’t skip lining the bottom of your pans with parchment paper after greasing, and then dusting with flour. This acts as insurance against sticking, ensuring your beautiful cakes release easily.
- Know Your Oven: As mentioned, baking times can vary. Begin checking at the 20-minute mark, but be prepared for it to take up to 27 minutes. A wooden skewer or toothpick inserted into the center should come out with moist crumbs, not wet batter.
- Tap Out Air Bubbles: Lightly tapping the filled cake pans against the counter a couple of times helps to dislodge any large air bubbles, preventing unsightly holes in your cake’s crumb.
The Role of Key Ingredients in Your Fluffy Yellow Cake
Each ingredient in this recipe plays a vital role in achieving its renowned texture and flavor:
- Cake Flour: Lower in protein than all-purpose flour, it minimizes gluten formation, contributing directly to the cake’s tender and delicate crumb.
- Baking Powder & Baking Soda: These leavening agents work in tandem to create the lift and aeration necessary for a fluffy texture. Baking soda specifically reacts with the acidic buttermilk.
- Buttermilk: Its acidity tenderizes the cake, activates the baking soda, and adds a subtle tangy flavor that enhances the overall richness.
- Melted Butter & Vegetable Oil: The combination provides a perfect balance of flavor (from butter) and moisture (from oil). Oil also helps keep the cake tender and moist for longer.
- Egg Yolks & Egg Whites: Yolks contribute richness, color, and structure, while beaten whites are essential for incorporating air, which is the secret to the cake’s incredible lightness and volume.
- Sugar: Beyond sweetness, sugar tenderizes the cake and helps retain moisture. Dividing the sugar, with a portion going into the egg whites, stabilizes them for better lift.
- Vanilla Extract: A classic flavor enhancer that brightens and complements the rich notes of butter and eggs.
- The Easiest Cake Mix Brownies
- Large Yellow Cupcakes
- Yellow Cake with Chocolate Sour Cream Frosting
- Last of the Yellow Cakes – Rich Yellow Cake
- Oatmeal Cinnamon Scones
Recipe

Cook’s Illustrated Fluffy Yellow Cake — Best Yet!
Anna
Pin Recipe
Ingredients
- 2 ½ cups cake flour plus extra for dusting pans (280 grams)
- 1 ¼ teaspoons baking powder
- ¼ teaspoon baking soda
- ¾ teaspoon salt
- 1 ¾ cups sugar (divided use, so watch out!) (350 grams)
- 10 tablespoons unsalted butter , melted and cooled slightly (140 grams)
- 1 cup buttermilk, room temperature (230 grams/ml)
- 3 tablespoons vegetable oil
- 2 teaspoons vanilla extract
- 6 large egg yolks room temperature
- 3 large egg whites room temperature
Milk Chocolate Frosting
- 8 ounces chopped milk chocolate (dark chocolate is also a delicious alternative)
- 2 ½ sticks unsalted butter, cool and cut into small chunks (280 grams)
- 1 cup powdered sugar (120 grams)
- ¾ cup unsweetened cocoa powder (Dutch process or natural)
- ⅛ teaspoon salt
- ¾ cup light corn syrup
- 1 teaspoon vanilla extract
Instructions
-
Preheat your oven to 350 degrees Fahrenheit (175°C). Prepare two 9-inch-wide by 2-inch-high round cake pans by greasing them thoroughly, lining the bottoms with parchment paper, and then dusting them with a light coating of flour. This careful preparation ensures your cakes won’t stick.
-
In a large mixing bowl or the bowl of a stand mixer, whisk together the cake flour, baking powder, baking soda, salt, and 1 ½ cups of sugar. Make sure these dry ingredients are well combined. Set aside the remaining ¼ cup of sugar for the egg whites.
-
In a separate medium bowl (or a 4-cup liquid measuring cup for convenience), whisk together the slightly cooled melted butter, room temperature buttermilk, vegetable oil, vanilla extract, and room temperature egg yolks until thoroughly combined.
-
Using your mixer on low speed, begin beating the dry ingredients. Gradually pour in the butter/yolk/oil mixture. Mix until the ingredients are almost incorporated, which should take about 15 seconds; a few streaks of dry flour may still be visible. Stop the mixer, scrape down the whisk and the sides of the bowl. Return to medium-low speed and beat for another 10 to 15 seconds until the batter is smooth and fully incorporated, ensuring no dry streaks remain.
-
In a clean, dry bowl, beat the room temperature egg whites until they become foamy. Gradually add the reserved ¼ cup of sugar while continuing to beat. Whip until stiff peaks just barely start to form – they should hold their shape but still be slightly soft, not dry.
-
Using a rubber scraper, gently stir one-third of the beaten egg whites into the cake batter to lighten it. Then, carefully add the remaining egg whites and gently fold them into the batter until no white streaks are visible. Be careful not to deflate the mixture. Divide the batter evenly between your two prepared cake pans. Lightly tap the pans against your counter 2 or 3 times to release any large air bubbles.
-
Bake for 20 to 22 minutes, or up to 27 minutes in my experience, until the cakes appear set, golden, and are just starting to pull away from the sides of the pan. A wooden skewer inserted into the center should come out clean or with a few moist crumbs. Let the cakes cool on a wire rack for 10 minutes in their pans. After 10 minutes, carefully loosen the cakes from the pan edges with a knife, and invert them onto the wire rack to cool completely.
Milk Chocolate Frosting
-
To make the luxurious milk chocolate frosting, melt the chopped milk chocolate in a microwave-safe bowl using 50% power. Stir every 30 seconds to 1 minute until smooth and fully melted. Set aside and allow it to cool slightly, but ensure it remains fluid.
-
In the bowl of a food processor, combine the cool, chunked unsalted butter, powdered sugar, unsweetened cocoa powder, and salt. Process until the mixture is smooth and well combined. Next, add the light corn syrup and vanilla extract, and pulse until smooth again. Finally, scrape down the sides of the bowl and add the cooled melted chocolate. Process until the frosting is incredibly smooth, creamy, and spreadable. Frost your completely cooled cake immediately for the best results, ensuring a rich, delectable coating for your fluffy yellow masterpiece.
The Perfect Pairing: Milk Chocolate Frosting
A cake as delightful as the Cook’s Illustrated Fluffy Yellow Cake deserves an equally magnificent frosting. The accompanying milk chocolate frosting recipe provided here is a match made in heaven. Its smooth, creamy texture and rich chocolate flavor perfectly complement the light and airy yellow cake without overpowering it. While milk chocolate is specified, don’t hesitate to use dark chocolate for a more intense, sophisticated flavor profile. The key to this frosting’s success lies in melting the chocolate carefully and ensuring your butter is cool but not rock-hard when processed, creating a silken consistency that spreads like a dream.
This frosting comes together quickly in a food processor, minimizing effort and maximizing results. The corn syrup contributes to its glossy finish and prevents crystallization, ensuring a smooth spread. Once made, it’s best to use it immediately, as its ideal consistency for icing is right after preparation.
Conclusion: Bake Your Best Yellow Cake Today!
The Cook’s Illustrated Fluffy Yellow Cake is more than just a recipe; it’s a journey to baking perfection. By understanding the reverse creaming method and paying attention to a few crucial details, you can recreate this iconic dessert in your own kitchen. Whether it’s for a special occasion or simply to indulge in a slice of pure comfort, this cake promises to impress with its unparalleled fluffiness and rich flavor. Gather your ingredients, follow these steps, and prepare to be delighted by the best fluffy yellow cake you’ve ever made!
We encourage you to try this timeless recipe and discover why it remains a favorite. Don’t forget to share your baking successes and any personal twists you add in the comments below!
