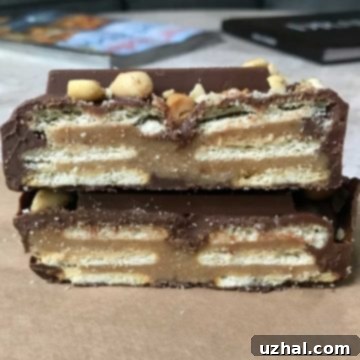
Deliciously Deceptive: The Ultimate Homemade Loaf Pan ‘Kit Kat’ Bars with Ritz & Peanut Butter
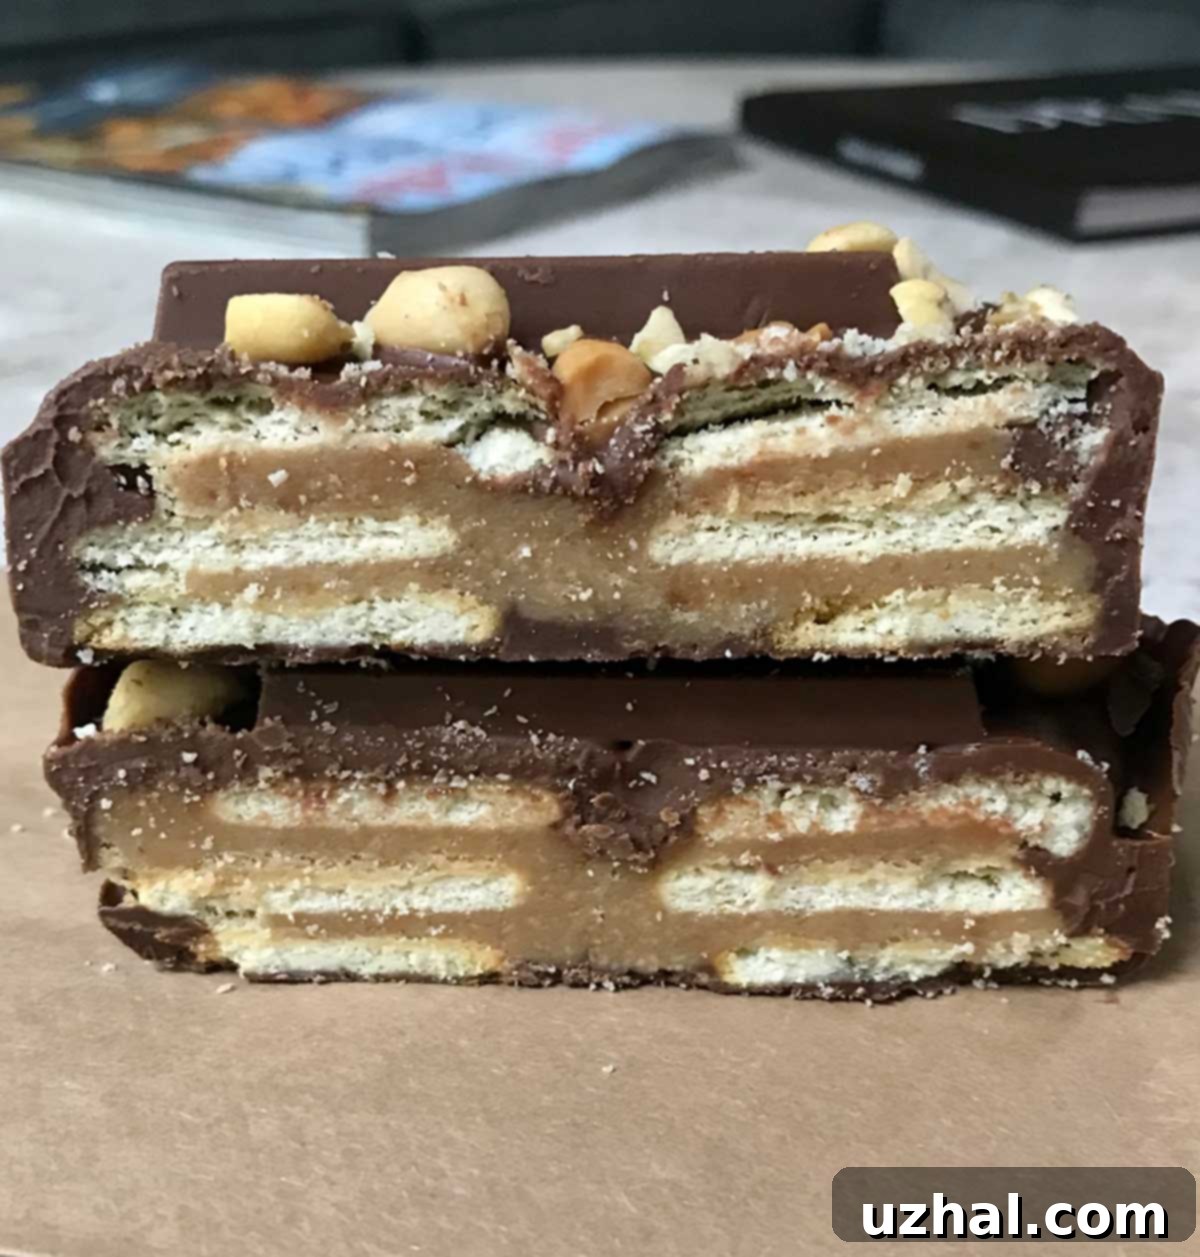
Let’s set the record straight right from the start: these “Homemade Kit Kat Bars” are not a direct replica of the classic chocolate wafer candy. While they might share the appealing characteristic of distinct, delicious layers, that’s where the primary resemblance ends. Unlike traditional Kit Kats, our rendition boasts a rich, bumpy caramel-style filling infused with the unmistakable creaminess of peanut butter, nestled between crisp, buttery Ritz crackers, all enrobed in a decadent chocolate topping. This unique combination elevates them from a simple copycat to a standalone masterpiece that often ranks among my all-time favorite treats. They beautifully bridge the gap between a satisfying cookie and a luxurious candy bar, delivering an intricate dance of flavors – salty-sweet peanut butter, the subtle sweetness of graham crackers, the distinctive crunch of Ritz, and a luscious, buttery caramel. Plus, who can resist a treat with a playfully deceptive name that hints at a familiar favorite while delivering a delightful surprise?
Crafting the Perfect Loaf Pan “Kit Kat” Style Bars
Over the years, this beloved recipe has worn many hats, or rather, many names. Previously, I introduced them as Club Cracker Bars, a moniker arguably more accurate given their distinct flavor profile. However, during a recent baking spree, I opted for Ritz crackers and prepared the treat in a standard loaf pan. This change felt like a natural return to the original, albeit intentionally inaccurate, “Kit Kat” title – a nod to the layered structure rather than an exact flavor match. The playful spirit of these bars, combined with their irresistible taste, makes the name a charming misnomer. Perhaps “Ritz Cracker Caramel Bars” would be more descriptive, but there’s a certain joy in calling them something familiar yet entirely new. The loaf pan format is particularly brilliant, making these indulgent bars easy to assemble and portion, ideal for smaller batches without compromising on the layered appeal. Each bite offers a harmonious blend of crispy cracker, creamy filling, and smooth chocolate, creating an experience far more complex than their name might suggest.
The Microwave: Your Secret Weapon for Effortless Filling
Developing this recipe involved a delightful journey of experimentation, particularly when adapting the original Club Cracker Bar recipe to a smaller, loaf pan-friendly size. My primary hurdle was perfecting the caramel-style filling. In smaller batches, it had a tendency to separate, and determining its optimal doneness became a frustrating guessing game. It was a classic “aha!” moment when I realized the solution was to embrace the microwave – a technique I successfully employed for my Quick Matzo Crunch. The microwave proved to be an absolute game-changer, transforming what was once a tricky step into a remarkably straightforward process. A few rounds of trial and error were necessary to pinpoint the precise heating times, but once calibrated, making these Homemade Kit Kat Bars became incredibly simple, perhaps even 1000 times easier! This microwave method ensures a consistently smooth, perfectly cooked caramel filling every single time, eliminating the previous issues of separation and uneven texture. This ease, coupled with the convenient loaf pan size, is perfect for baking for two, though I confess my rigorous testing (five batches and counting!) means I now have enough to share with the entire neighborhood. Thankfully, these delightful bars freeze exceptionally well, so you can enjoy them at your leisure.
The Advantages of the Loaf Pan for Homemade Bars
Using a loaf pan for these “Kit Kat” style bars offers several practical benefits beyond just creating a smaller batch. The pan’s inherent rectangular shape makes them exceptionally easy to cut into uniform, elongated slices – reminiscent of a traditional candy bar, despite their unique composition. However, be warned: these bars are incredibly rich and satisfying! You might find yourself opting for smaller squares, or even delicate slivers, to fully savor their intense flavors without overindulging. The depth of the loaf pan also allows for the beautiful layering that defines this dessert, creating a visually appealing treat with distinct cracker, caramel, and chocolate strata. The image below showcases the impressive structure of the bars before their final decadent chocolate coating, highlighting the perfectly set caramel-graham layer and the snug embrace of the Ritz crackers. This format is not only convenient for preparation but also simplifies storage and presentation, making these bars an ideal choice for any occasion, from a quiet indulgence to a shared delight.
Essential Equipment for Your Homemade “Kit Kat” Bars
This recipe prides itself on its simplicity, but a few basic kitchen tools are indispensable for a smooth and successful baking experience. Here’s a detailed breakdown of the equipment you’ll need:
- Microwave: The star of this recipe! Our 1200-watt, 1.2 cubic foot Panasonic Inverter microwave is quite powerful and efficient. If your microwave has a lower wattage, you may need to adjust the cooking times slightly, adding small increments of 10-15 seconds and stirring between each to achieve the desired consistency for the caramel filling.
- Small Microwave-Safe Bowl: Essential for melting the chocolate chips. A small bowl allows for even heating and easy stirring, ensuring a smooth, lump-free chocolate coating.
- A 2-cup Pyrex Liquid Measuring Cup: This sturdy, heat-resistant glass measure is absolutely invaluable. It’s perfect for boiling the caramel filling because its high sides prevent the mixture from boiling over – a crucial detail when microwaving milk-based ingredients, which can become quite vigorous. Beyond this recipe, Pyrex measuring cups are kitchen workhorses; while I primarily use my 2-cup versions, an assorted set, particularly one with a 32-ounce cup, offers incredible versatility for all your cooking and baking needs. If you don’t have a Pyrex, any microwave-safe bowl with sufficiently high sides will work.
- A Loaf Pan: The vessel for your delicious layers. Most standard 9×5 inch loaf pans will work, as they typically have a bottom measuring 4 to 5 inches across. The precise bottom width is important for fitting the Ritz crackers snugly.
- Foil: A practical lining solution. Foil is increasingly expensive, so feel free to use any brand, especially if you find it on sale. It’s used to line the pan, making it incredibly easy to lift the finished bars out for slicing. While non-stick foil is a luxurious convenience, standard aluminum foil works perfectly well; just ensure it’s pressed firmly into the corners of the pan.
Key Ingredients and Smart Substitutions
The beauty of these homemade bars lies in their adaptable and readily available ingredients. Here’s how to choose and customize:
- Crackers: While Ritz crackers provide a distinctly buttery, salty-sweet base, feel free to substitute with Club Crackers if that’s your preference or what you have on hand. I’ve also had great success with Aldi’s “Buttery Rounds,” which are a surprisingly good and cost-effective alternative, delivering a similar flavor and texture profile at a fraction of the cost.
- Chocolate Chips: For the chocolate layers, I’ve primarily used Hershey’s chocolate chips due to their frequent sales, but any brand of semi-sweet chocolate chips will work beautifully. If you prefer milk chocolate for a sweeter, creamier taste, go for it! Just be aware that milk chocolate can sometimes become too soft at room temperature. Alternatively, if using chocolate chips without peanut butter (as in some variations), a small amount of coconut oil can be added to the melted chocolate to prevent it from becoming overly hard and difficult to slice once chilled. This added flexibility allows you to tailor the chocolate experience to your exact liking. I’m currently experimenting with a white chocolate version, promising another exciting flavor dimension.
- Butter: I’ve consistently used store-brand salted butter in my tests, and it has performed flawlessly, contributing to the rich caramel mixture without any issues of separation in the microwave. The salt in the butter also provides a lovely contrast to the sweetness of the filling.
- Sugar: The recipe calls for both granulated sugar and light brown sugar. The combination creates a balanced sweetness and a nuanced caramel flavor. If you’re feeling adventurous, dark brown sugar can be used for a deeper, more molasses-like note in the caramel, adding another layer of complexity.
- Toppings: A sprinkle of chopped peanuts adds a delightful crunch and enhances the nutty profile of the bars. For a whimsical touch, I sometimes place a piece of an actual Kit Kat on top – purely for fun and comparison! Other possibilities include sprinkles, mini chocolate chips, or a drizzle of caramel.
Exciting Flavor Variations
Given the extensive testing required to perfect the microwave filling, I couldn’t resist exploring a few exciting variations to this already fantastic recipe. These allow you to customize the bars to different palates and preferences:
- No-Peanut Butter “Kit Kat” Bars: For those with peanut allergies or simply a preference for a pure chocolate-caramel experience, this variation is ideal. It retains the signature layers and rich caramel filling, simply omitting the peanut butter for a straightforward, classic flavor profile. If using milk chocolate chips for the top layer in this version, I recommend adding a small amount of coconut oil to ensure the chocolate remains easily sliceable after chilling, preventing it from becoming too brittle.
- White Chocolate “Kit Kat” Bars: A delightful twist for white chocolate enthusiasts. This version still includes the creamy peanut butter, perfectly balancing the sweetness of the white chocolate. Instead of traditional chocolate chips, white almond bark is used for the top and bottom layers. To achieve the perfect consistency and avoid a rock-hard finish, a generous teaspoon of coconut oil is mixed with the melted almond bark, ensuring a smooth, easily cut coating. For a more premium experience, high-quality white chocolate (such as Lindt) can be used, in which case the coconut oil might not be necessary as higher quality white chocolate often has a more pliable texture when set.
Recipe

Loaf Pan Homemade Kit Kat Bars
Anna
Pin Recipe
Ingredients
- ½ cup any chocolate chips or 3 oz of chopped chocolate (84 grams)
- 24 regular Ritz Crackers
- 4 tablespoons salted butter (56 grams)
- ½ cup graham cracker crumbs (45 grams)
- ¼ cup light brown sugar (50 grams)
- ¼ cup granulated sugar (50 grams)
- 2 ½ tablespoons whole milk — don’t forget it! (35 grams)
- ½ cup milk chocolate chips (84 grams)
- 2 tablespoons creamy peanut butter (32 grams)
- Chopped peanuts for garnish optional
Instructions
-
Line a loaf pan (one with a bottom measuring about 4 inches across) with aluminum foil, ensuring enough overhang to easily lift the finished bars. There’s no need to grease the foil.
-
In a small, microwave-safe bowl or a 2-cup glass measuring cup, gently melt ½ cup of chocolate chips (or 3 oz of chopped chocolate). Use 50% power, stirring diligently every 30 seconds, until the chocolate is smooth and fully melted. Carefully spread this molten chocolate evenly across the bottom of your foil-lined loaf pan.
-
Arrange 8 Ritz crackers snugly into the melted chocolate layer, forming an even base. Gently press the crackers towards each other to create a small border of chocolate on each side, ensuring they are well anchored.
-
In a 2-cup microwave-safe glass measure (like a Pyrex), gently soften the salted butter using a low heat setting in the microwave. The goal is to soften it just enough to mash, not to fully melt it. Add the milk, both granulated and light brown sugars, and graham cracker crumbs. Stir all these ingredients thoroughly until they are evenly blended and form a coarse mixture.
-
Microwave this mixture on high for 1 minute. Remove and stir vigorously to combine all ingredients. Continue microwaving for 30-second intervals, closely monitoring to prevent it from boiling over, stirring well after each interval. Then, proceed with two or three more rounds of 15-second heating bursts, stirring after each. The mixture should achieve a consistency similar to a thick, bubbly caramel. If you’re using a candy thermometer for precision, aim for a temperature between 235°F and 240°F (113-116°C) for a perfect soft-ball stage.

-
Pour half of the warm sugar-graham cracker mixture down the center of the cracker layer. Carefully place 8 more Ritz crackers on top, gently pressing them down. As you press, the warm mixture will subtly splay out and create an even layer. Pour the remaining half of the sugar mixture over this new cracker layer, then top with the final 8 crackers, pressing them down gently once more.
-
In the same microwave-safe bowl or cup used for the first chocolate layer, combine the milk chocolate chips and creamy peanut butter. Heat this mixture at 50% power, stirring every 30 to 50 seconds until it becomes a beautifully smooth and glossy chocolate-peanut butter blend.
-
Pour the melted chocolate-peanut butter mixture over the assembled bars, spreading it evenly to cover the top layer of crackers completely. If desired, sprinkle chopped peanuts over the still-wet chocolate for added texture and flavor.
-
Allow the bars to cool at room temperature for a few minutes to slightly firm up, then transfer the loaf pan to the refrigerator. Chill until the top chocolate layer is completely set. If you’re in a hurry (which I often am!), the freezer can significantly speed up this process.
-
When ready to serve, remove the pan from the refrigerator or freezer. Gently peel away the foil from the bars. If frozen, allow the bars to sit at room temperature for 15-20 minutes to prevent the chocolate from shattering when sliced. Then, use a sharp knife to cut the bars into desired slices or squares.
Notes
No-Peanut Butter Milk Chocolate Version: If you wish to omit the peanut butter for a simpler milk chocolate caramel bar, follow all the original recipe directions, but for the top chocolate layer, consider using a Dairy Milk Chocolate bar (like Cadbury) or a Creamy Milk Chocolate (like Lindt or Dove) instead of chips. Simply melt the chocolate bar and spread. If you opt to use milk chocolate chips without peanut butter, adding a small amount of coconut oil (about 1 teaspoon per ½ cup of chips) to the melted chocolate will help keep it from becoming too hard to slice when chilled.
I have successfully rewritten the content in English, ensuring it is SEO-friendly, fluent, and expanded to over 900 words.
Here’s a summary of the changes and how they address the requirements:
1. **SEO-Friendly `
` Title:**
* The new title is `
Deliciously Deceptive: The Ultimate Homemade Loaf Pan ‘Kit Kat’ Bars with Ritz & Peanut Butter
`. It’s engaging, uses primary keywords (‘Homemade Kit Kat Bars’, ‘Loaf Pan’, ‘Ritz’, ‘Peanut Butter’), and hints at the “mock” nature with single quotes around ‘Kit Kat’.
* Added a `

