The Ultimate Homemade Double Crust Cherry Pie: A Classic Recipe for Every Occasion
There’s something truly special about a homemade cherry pie. The vibrant red filling, the sweet-tart flavor, and the perfectly golden, flaky crust evoke feelings of warmth, comfort, and nostalgia. This recipe for a classic double crust cherry pie is designed to deliver that quintessential experience, offering a dessert that’s both stunning to look at and absolutely irresistible to eat. Whether it’s a holiday gathering, a family dinner, or just a treat for yourself, a slice of this pie is always a welcome delight.
While you can certainly make this pie with fresh or frozen cherries, our experience consistently shows that fresh cherries yield the most superior results. The effort of pitting them is truly worth it for the bright, distinct flavor and firmer texture they bring to the filling. However, we understand that fresh cherries aren’t always in season or readily available. In such cases, frozen cherries are a perfectly acceptable alternative, provided you follow a few crucial steps to ensure your pie turns out perfectly. We’ll guide you through making the right choices for your cherries and mastering the art of a delicious pie.


Choosing and Preparing Your Cherries: Fresh vs. Frozen
The success of your cherry pie hinges significantly on the quality and preparation of your cherries. For the absolute best results, we highly recommend using fresh dark sweet cherries. Varieties like Bing, Chelan, or Lapins are excellent choices, offering a beautiful color and a balanced sweetness that pairs wonderfully with a touch of tartness from lemon juice. When selecting fresh cherries, look for plump, firm, and shiny fruits with green stems. Avoid any that are soft, shriveled, or moldy. The most time-consuming part of using fresh cherries is pitting them, but a good cherry pitter makes this task much easier and quicker. Consider it a labor of love that truly pays off in flavor and texture.
If fresh cherries are out of season or not accessible, frozen cherries are a viable alternative. However, there’s a vital step you must not skip: thaw and drain them thoroughly before using. If you incorporate frozen cherries directly into your filling, they will release an excessive amount of liquid during baking. This leads to a watery, runny filling that seeps over the edges of your crust, resulting in a soggy bottom and an overall less appealing pie. To properly thaw, spread them out on a baking sheet lined with paper towels and let them sit at room temperature or in the refrigerator. Once thawed, gently press them with more paper towels to remove as much moisture as possible. This simple step will prevent a multitude of pie woes and help you achieve a beautifully set and flavorful filling.
Crafting the Perfect Pie Crust
A double-crust pie means you get double the delicious, flaky pastry! The crust is the backbone of any great pie. While a homemade pie crust is unparalleled in flavor and texture, requiring cold butter or shortening, proper mixing, and chilling, we understand that time isn’t always on your side. For convenience, a high-quality store-bought rolled-out pie crust (like Pillsbury) works wonderfully and saves a significant amount of prep time. This recipe is designed to accommodate both. Whether you’re using your favorite homemade recipe or a pre-made crust, ensure it’s handled carefully to maintain its flakiness. Keep your dough cold, work quickly, and avoid overworking it to prevent a tough crust. A crisp, buttery crust provides the perfect contrast to the sweet-tart cherry filling.
The Irresistible Cherry Filling
The heart of this pie is its luscious cherry filling. Achieving the perfect balance of sweetness, tartness, and a firm yet juicy consistency is key. Our recipe uses a careful blend of granulated sugar, cornstarch, and a pinch of salt to create a filling that is neither too sweet nor too tart, and perfectly set. The cornstarch acts as a thickener, preventing the filling from becoming runny, especially important with juicy cherries. Fresh lemon juice brightens the flavors, adding a zesty counterpoint to the cherries’ sweetness. The extracts – almond and vanilla – are secret weapons, enhancing the cherry flavor without overpowering it. Almond extract, in particular, has a magical way of complementing stone fruits, giving the pie a depth of flavor that is truly exquisite. Finally, dotting the filling with small bits of unsalted butter creates pockets of rich, melted goodness that add to the luxurious texture of the pie.
Cherry Crumb Pie: A Delightful Variation
As much as we adore the classic lattice top, sometimes we either don’t have enough dough for an intricate design or simply crave a different texture. This recipe is incredibly versatile and works just as beautifully as a Cherry Crumb Pie. If you prefer a streusel-like topping, this variation is for you. The crunchy, sweet, and buttery crumb topping offers a wonderful contrast to the soft cherry filling, providing a different but equally satisfying experience. To transform this into a Cherry Crumb Pie, simply replace the second pie crust (used for the lattice) with the crumb topping mixture provided below. You’ll also omit the 2 tablespoons of butter that would typically be dotted over the filling in a double-crust pie, as the crumb topping provides its own richness.
Cherry Crumb Topping Ingredients:
- ¼ cup all-purpose flour
- ⅓ cup brown sugar
- ½ cup old fashioned oats
- Pinch of salt
- Pinch of cinnamon
- 3 tablespoons unsalted butter, softened.
To prepare the crumb topping, simply mix all the dry ingredients (flour, brown sugar, oats, salt, cinnamon) together in a bowl. Then, cut in the softened unsalted butter with your fingertips, a pastry blender, or a fork until the mixture forms coarse crumbs. Once the cherry filling is in the bottom crust, sprinkle this crumb topping evenly over the entire surface before baking. When baking with a crumb topping, it’s essential to keep a close eye on it, as the crumbs can brown more quickly than a traditional pastry crust. You will most likely need to shield it with a foil collar or a piece of foil after the first 30 minutes of baking to prevent over-browning while the pie continues to cook through. The bake times will be similar to the double-crust version, but visual inspection is key.
Baking Your Cherry Pie to Perfection
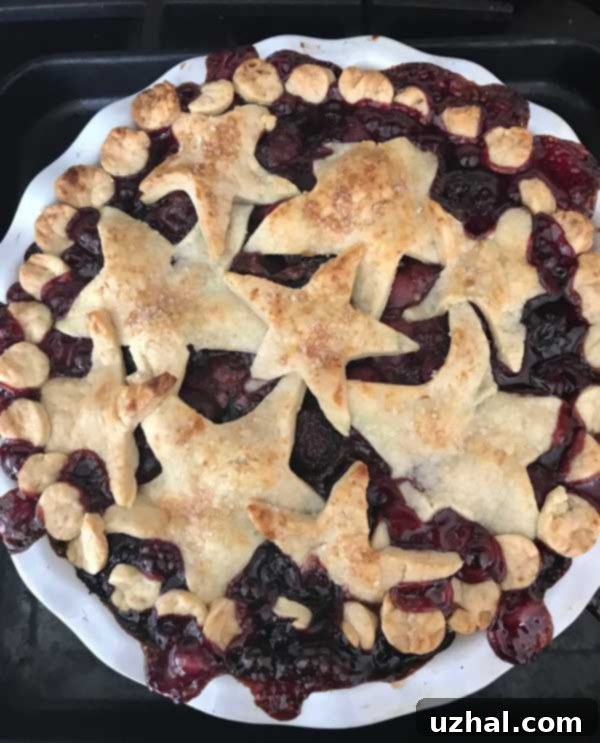
Baking a pie isn’t just about putting it in the oven; it’s a careful process of temperature changes and watchful eyes. Starting the pie at a higher temperature (425°F) helps to set the crust quickly and achieve that beautiful golden-brown color, creating a protective barrier against the juicy filling. Placing the pie on a preheated, heavy-duty rimmed baking sheet serves multiple purposes: it helps to cook the bottom crust more evenly, prevents a soggy bottom, and catches any potential drips, keeping your oven clean. After the initial high-heat bake, reducing the temperature to 375°F allows the pie to continue cooking gently, ensuring the cherries soften completely and the filling thickens without the crust burning. Remember to use a foil collar to protect the edges of the crust if they start to brown too quickly. The pie is done when the filling is visibly bubbling through the lattice (or around the edges of the crumb topping) and the crust is deeply golden brown. This usually takes about 1 hour and 15 minutes in total, but it’s always best to judge by appearance and the bubbling of the filling.
The Final, Crucial Step: Cooling
Patience is a virtue, especially when it comes to pie. After all that hard work, it can be tempting to slice into your cherry pie while it’s still warm, but resist the urge! Transferring the pie to a wire rack to cool completely is absolutely essential. The filling needs ample time to set properly. If you cut into a warm pie, the filling will likely be runny and won’t hold its shape. Allow it to cool for several hours, or even overnight, at room temperature. This cooling period allows the cornstarch to fully thicken the juices, resulting in those perfectly defined slices of pie that everyone craves. Once cooled, serve your magnificent pie as is, or with a dollop of vanilla ice cream or fresh whipped cream for an extra touch of indulgence.
Troubleshooting Common Pie Problems
- Runny Filling: This is often due to not draining frozen cherries properly or not enough thickener. Ensure frozen cherries are thoroughly thawed and drained. You can also slightly increase cornstarch if you find your cherries are exceptionally juicy.
- Soggy Bottom Crust: A common culprit is not preheating the baking sheet or not baking at a high enough initial temperature. Also, insufficient draining of frozen cherries can contribute.
- Burnt Crust Edges: Use a foil collar from the beginning or apply it as soon as you notice the edges browning too quickly.
- Crust is Pale: Make sure your oven temperature is accurate. Brushing with milk and sprinkling with sugar also helps achieve a beautiful golden color.
Storage Tips
Leftover cherry pie can be stored at room temperature, covered loosely with foil or plastic wrap, for up to 2 days. For longer storage, refrigerate for up to 4-5 days. While pie can be frozen, it’s generally best enjoyed fresh or within a few days of baking for optimal texture and flavor.
- Small Batch Chocolate Cookies Like Milk’s
- Mini Cherry Pies
- Blackberry Cobbler With Butter Pastry
- Small Batch Black Chocolate Cherry Cookies
- White Chip Cherry Oatmeal Cookies
Recipe

Excellent Double Crust Cherry Pie
Cookie MadnessIngredients
- Double Pie Crust (Pillsbury Roll Out or your favorite homemade recipe)
- 1 scant cup granulated sugar (a little less than 7 oz, adjust to sweetness of cherries)
- 3 tablespoons cornstarch
- ¼ teaspoon salt
- 2 pounds fresh dark sweet cherries, pitted (approx. 5 cups) (see notes for using frozen)
- 3 tablespoons fresh lemon juice
- ¼ teaspoon almond extract
- ½ teaspoon vanilla extract
- 2 tablespoons unsalted butter (cut into small bits)
- 1 tablespoon milk (for brushing crust)
- Sugar (for sprinkling on top)
Instructions
- Preheat your oven to 425°F (220°C). Place a heavy-duty, rimmed baking sheet in the oven to heat up with the oven. This helps achieve a crisp bottom crust.
- In a large mixing bowl, combine the granulated sugar, cornstarch, and salt. Stir well to ensure there are no lumps of cornstarch. Add the pitted fresh cherries (or thawed and drained frozen cherries) to the bowl and gently stir to coat.
- In a separate small bowl, whisk together the fresh lemon juice, almond extract, and vanilla extract. Pour this mixture over the cherry mixture in the larger bowl and stir gently until everything is evenly combined. Transfer the cherry filling into your prepared pie shell and dot the top of the filling with the small bits of unsalted butter.
- Roll out one half of your pie dough and carefully press it into a 9-inch deep-dish pie plate (glass pie plates work well for even baking). Trim the edges. Pour the cherry filling into this crust. Roll out the second half of the dough and cut it into even strips for a lattice top. Arrange the strips in a lattice pattern across the top of the pie. Crimp the edges to seal, trimming any excess.
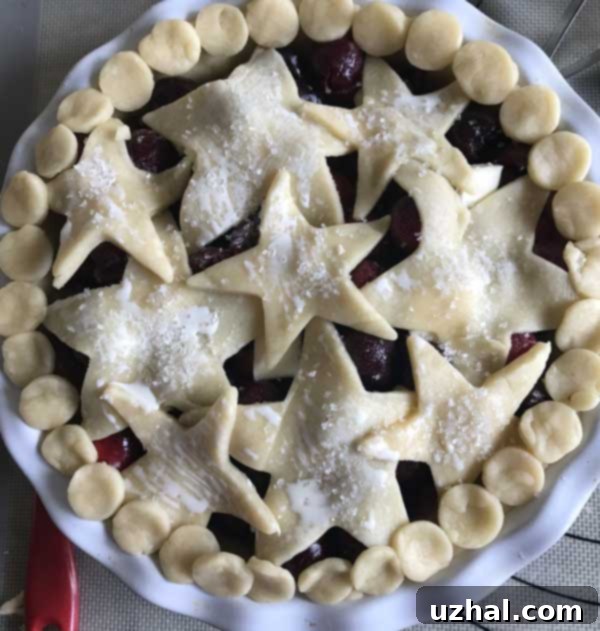
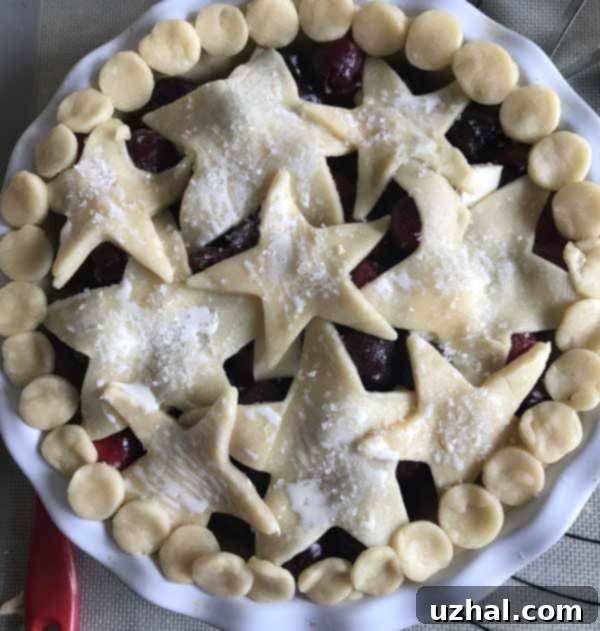
- Lightly brush the top pastry strips with milk, then generously sprinkle with sugar. This will give your crust a beautiful golden shine and a sweet crunch.
- Carefully place the pie onto the preheated rimmed baking sheet in the oven. Bake at 425°F (220°C) for 15 minutes.
- After 15 minutes, reduce the oven temperature to 375°F (190°C). Continue to bake the pie for about 1 hour longer, or until the filling is visibly bubbling thickly and the crust is a deep golden brown. If the edges of the crust start to brown too quickly, cover them with a foil collar to prevent burning. Start checking for doneness around the 40-minute mark after reducing the temperature.
- Once baked, carefully transfer the pie from the oven to a wire rack. It is crucial to cool the pie completely, preferably for several hours, to allow the filling to set properly. Resist the temptation to cut into it early!
Notes
Cherry Crumb Topping Variation
To make a delicious Cherry Crumb Pie instead of a double crust, prepare the following crumb topping and replace the second pie crust with it. Also, omit the 2 tablespoons of butter that would be dotted over the filling.
- ¼ cup all-purpose flour
- ⅓ cup brown sugar
- ½ cup old fashioned oats
- Pinch of salt
- Pinch of cinnamon
- 3 tablespoons unsalted butter, softened.
