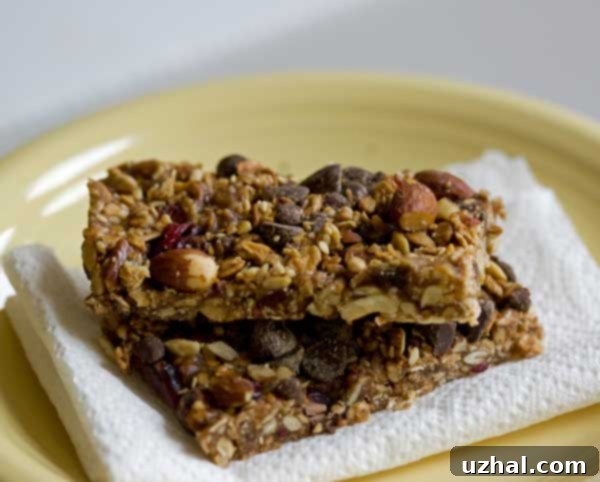
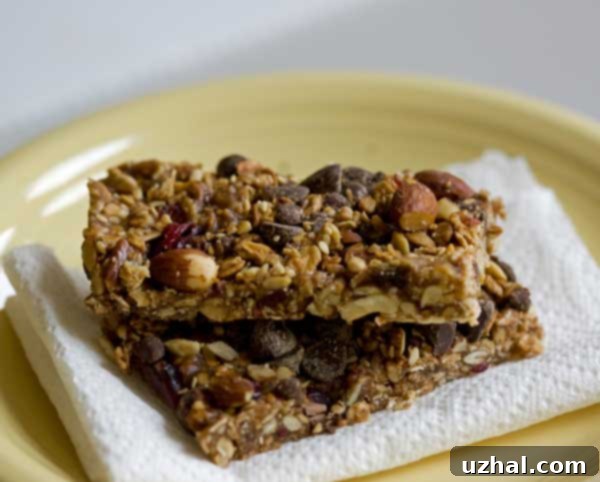
Easy No-Bake Granola Bars: Your Go-To Recipe for Homemade Goodness
My culinary philosophy has certainly evolved over the years, especially when it comes to the humble granola bar. There was a time when I firmly believed that a proper granola bar necessitated raw oats, a medley of nuts and seeds, and a generous dose of sugar. The idea of using already-prepared granola seemed, well, redundant. Why take an ingredient that’s already a complete snack and then turn it into another snack? However, a delightful shift occurred once I plunged headfirst into the wonderful world of making my own granola at home. Now, with an abundance of delicious homemade granola frequently stashed in my freezer, my mission has become to incorporate it into every possible creation. And the latest and perhaps most satisfying method? Transforming it into these incredibly simple, delightfully chewy, and absolutely no-bake granola bars.
The Granola Bar Revelation: Why Prepared Granola is Key
I’ve ventured into various corners of the internet, exploring different renditions of no-bake bar recipes. One particular version, which I hesitantly tried and quickly discarded, opted for regular raw oats instead of the much-loved granola. The result? A decidedly unappetizing bar that tasted overwhelmingly like gummy, uncooked oats. It was a textural and flavor disappointment. However, this particular recipe, which embraces the use of actual granola, truly aligns with my taste and textural preferences. These bars aren’t just good; they’re truly exceptional. They boast a rich depth of flavor from the granola itself, the generous inclusion of nuts, and, of course, the irresistible chocolate. Yet, they manage to be decadent without being overly buttery or dense like a cake. If anything, their delightful chewiness and sweetness lean more towards a gourmet candy bar than a typical wholesome snack.
Mastering the No-Bake Technique: Tips for Perfect Granola Bars
Achieving the perfect no-bake granola bar consistency is crucial. In my experience, these bars hold together beautifully, provided you maintain the right balance of sugar and syrup. While experimentation in the kitchen is always encouraged, be mindful that altering the proportions significantly could lead to issues with binding. The syrup and butter are your binding agents, and a certain amount is essential for that perfectly firm, yet chewy, texture. One of my primary concerns during the preparation process was pouring the hot sugar mixture over the oats and inadvertently melting the chocolate chips into a uniform brown goo. To circumvent this, I made it a point to let the sugar mixture cool down sufficiently. In fact, on one occasion, I let it cool a tad too much, requiring me to literally knead the stiff syrup mixture into the granola. But even then, the outcome was fantastic, and the chocolate chips remained distinct, un-melted morsels of joy.
A fantastic trick I’ve discovered for further safeguarding your chocolate chips (or perhaps M&Ms, if you’re feeling adventurous!) from melting is to use them straight from the freezer. Cold chocolate chips are much more resistant to heat, giving you a wider window of opportunity to mix everything together without sacrificing their shape. This seemingly small step can make a big difference in the final appearance and texture of your bars, ensuring those delightful pockets of chocolate goodness remain intact. Beyond the chocolate, consider the quality of your granola. Homemade granola, with its customizable blend of oats, nuts, seeds, and spices, truly elevates these bars. It brings a depth of flavor and a superior texture that store-bought varieties often can’t match, allowing you to control the sweetness and add-ins right from the start. This makes for a more wholesome and satisfying snack experience.
Customization and Creativity: Making These Bars Your Own
The beauty of these no-bake granola bars lies in their incredible versatility. While the base recipe provides a perfect foundation, feel free to unleash your creativity with various mix-ins. Instead of just almonds, why not try pecans, walnuts, or cashews? Toasted nuts add an extra layer of flavor and crunch. For dried fruits, raisins are classic, but dried cranberries, chopped apricots, or even finely diced dried figs can introduce different textures and tartness. If you’re a fan of seeds, chia seeds, flax seeds, or hemp hearts can boost the nutritional profile without compromising taste. The “trail mix” suggestion in the recipe is a fantastic shortcut, offering a pre-made blend of nuts and dried fruits, often with a few chocolate pieces already included. Just remember to chop any larger pieces to ensure even distribution and a cohesive bar.
Another aspect to consider for customization is the type of granola itself. A plain oat-based granola will offer a neutral canvas, allowing your mix-ins to shine. However, a cinnamon-spiced granola or one with a hint of maple can infuse your bars with an additional layer of warmth and flavor. Just be mindful of the sweetness levels if your granola is already heavily sweetened. For an extra touch of indulgence, a drizzle of melted chocolate or a sprinkle of flaky sea salt on top after chilling can transform these simple bars into a gourmet treat. These bars are not just a quick snack; they are a blank canvas for your culinary imagination, making them a staple in any kitchen.
Why No-Bake is the Best Bake: Convenience Meets Deliciousness
In today’s fast-paced world, convenience is king, and no-bake recipes perfectly fit the bill. These granola bars require absolutely no oven time, making them an ideal choice for hot summer days when you want to avoid heating up your kitchen, or for those busy weeknights when time is of the essence. The process is straightforward, involving simple melting and mixing, which makes it a fantastic recipe to involve children in the kitchen – they’ll love crushing the granola and stirring in the fun add-ins. Beyond the ease of preparation, no-bake bars are often more forgiving. There’s no risk of over-baking or under-baking, ensuring a consistent, delicious result every time. The chilling process simply allows the binding agents to firm up, creating a perfectly portable and satisfying snack.
These bars are also incredibly versatile in terms of when and where you can enjoy them. They make a fantastic grab-and-go breakfast on a busy morning, a healthy and energizing snack to tide you over between meals, or a delightful treat to pack in lunchboxes for school or work. They’re also a great option for hikers, campers, or anyone needing a quick energy boost. Their sturdy nature means they travel well, offering a wholesome alternative to store-bought processed snacks. Plus, by making them at home, you have complete control over the ingredients, allowing you to avoid artificial flavors, excessive sugars, and unhealthy additives often found in commercially produced bars. This recipe truly embodies the best of both worlds: effortless preparation and utterly delicious, wholesome results.
Recipe: No-Bake Granola Bars

No-Bake Granola Bars
Recipe by Cookie Madness
Pin Recipe
Prep time: 15 minutes
Chill time: 1 hour
Ingredients
- 4 tablespoons unsalted butter
- ⅛ teaspoon salt
- ½ cup plus 2 tablespoons packed light-brown sugar
- 3 tablespoons honey
- 3 tablespoons maple syrup
- 1 teaspoon vanilla extract
- 3 cups granola (homemade or your favorite store-bought)
- ½ cup frozen semisweet chocolate chips
- ½ cup toasted and chopped almonds or ½ cup trail mix, chopped
- ½ cup raisins (or use another ½ cup trail mix, chopped)
Instructions
-
Line a 9×13 inch pan with nonstick foil or parchment paper, leaving an overhang on the sides for easy lifting. If you’re making a half batch, an 8-inch square pan works perfectly.
-
In a nonstick saucepan, melt the butter over medium heat. Once melted, stir in the salt, brown sugar, honey, and maple syrup. Bring the mixture to a gentle boil, stirring occasionally to ensure the sugar dissolves completely. Continue to boil gently for exactly 2 minutes. After 2 minutes, remove the pan from the heat and allow it to cool for about 5 minutes. Stir in the vanilla extract. Let the mixture cool for an additional 10 minutes. It’s crucial not to let it cool so long that it becomes stiff and unworkable; the goal is to reduce its temperature enough so it won’t melt your chocolate chips instantly.
-
While the sugar mixture is cooling, prepare your granola. Lightly crush the granola with a rolling pin or in a food processor (pulse briefly to avoid pulverizing it). The aim is to break down larger clusters, but retain some texture. In a large bowl, combine the crushed granola with the cold chocolate chips, chopped nuts (or trail mix), and raisins.
-
Once the sugar mixture has cooled sufficiently (it should still be pourable but not scalding hot), pour it over the granola mixture in the large bowl.
-
Stir vigorously until all the granola and mix-ins are thoroughly coated and blended with the syrup. Immediately transfer the mixture to the prepared pan. Using the back of a spoon or your hands (lightly greased if sticking), press the mixture down as tightly and evenly as possible into the pan. This firm pressing is key to ensuring your bars hold together. Let the bars cool at room temperature for approximately 30 minutes. Then, using a sharp knife, score the bars into your desired size and shape, but do not separate them yet. Chill the pan in the refrigerator for at least 1 hour, or until the bars are completely firm. Once firm, lift the foil overhang to remove the entire block from the pan, and then separate the bars along your scored lines. Enjoy!
Tried this recipe?Let us know how it was!
These no-bake granola bars are more than just a recipe; they are a testament to how simple ingredients, combined with a little creativity and care, can produce a truly remarkable and satisfying snack. Whether you’re a seasoned baker or a kitchen novice, these bars offer a foolproof path to deliciousness. Enjoy the process, experiment with your favorite additions, and savor the homemade goodness!
