Decadent Mocha Mousse Angel Food Cake with Rich Chocolate Whipped Cream: An Easy & Impressive Dessert
Creating a dessert that is both light and incredibly decadent can sometimes feel like a culinary challenge. However, this Mocha Mousse Angel Food Cake strikes that perfect balance, delivering a truly delightful experience without being overly heavy. Originally a beloved recipe from my older archives, this dessert combines the airy texture of angel food cake with a luscious mocha mousse and a rich chocolate whipped cream, transforming a simple cake into an extraordinary treat. While the initial presentation might seem a bit rustic, the flavors are undeniably delicious and remarkably exciting.
The true stars of this recipe, in hindsight, are undoubtedly the mock mocha mousse and the velvety cocoa whipped cream. These elements are so versatile and flavorful that they could easily elevate any dessert, whether you’re pairing them with another angel food creation or using them to adorn a completely different type of cake. But when combined with angel food cake, they form a harmonious symphony of flavors and textures that is simply irresistible.
The Magic of Angel Food Cake: A Light Canvas for Rich Flavors
This week, I’ve found myself in an “angel food cake” mood, exploring various ways to enhance its delicate structure. After several delicious experiments, I decided it was time to share this mocha rendition, which has quickly become a household favorite. Angel food cake, with its cloud-like lightness and subtle sweetness, provides the perfect canvas for richer fillings and toppings. Its spongy texture readily absorbs flavors, ensuring that every bite is infused with the delightful mocha and chocolate notes.
For convenience, you can use a box mix, like Duncan Hines Signature Angel Food Cake, or opt for a store-bought pre-made angel food cake. Both work wonderfully and help simplify the process, allowing you to focus on the delicious mousse and whipped cream. The key is its airy nature, which prevents the final dessert from feeling too heavy despite its rich components.
While this cake is excellent as is, I’m always open to suggestions for improvement. I’ve often contemplated swapping out a couple of the angel food layers with devil’s food cake layers, reminiscent of the famous Heaven and Hell Cake by Stephen Pyles, to introduce a deeper chocolate flavor and denser texture. Another idea is to place a layer of chocolate graham crackers or thin chocolate wafers between the mousse and cake layers, just for an added textural contrast. But perhaps I’m overthinking it, and its current form is perfect in its simplicity.
Crafting the Irresistible Mocha Mousse
The assembly of this cake begins with preparing your angel food cake and slicing it into three uniform layers. For easy stacking and a neat presentation, these layers are then arranged within a 9-inch springform pan. This pan helps keep the layers straight and makes the entire process much more manageable, especially when working with a delicate cake like angel food.
As you build the cake, you generously fill the layers with our signature mocha “mousse.” Now, I call it “mock” mousse because it’s incredibly simple to make, achieving a light, airy, and creamy consistency without the fuss of traditional mousse. Despite its simplicity, the taste is surprisingly sophisticated and utterly delicious. The combination of instant coffee and marshmallow crème creates a smooth, sweet, and subtly bitter mocha flavor that perfectly complements the angel food cake.
The Secret to Effortless Frosting: Freezing Your Cake
To ensure a perfectly smooth and easy frosting experience, there’s a crucial step: freezing the assembled cake. Once all the layers of angel food cake and mocha mousse are stacked in the springform pan, cover it with a layer of plastic wrap and place the entire thing in the freezer until it’s firm. This usually takes about 3 hours, but it’s well worth the wait. A firm cake is much easier to handle and frost, preventing crumbs from mixing into your beautiful whipped cream and ensuring a clean finish.
The Grand Finale: Decadent Chocolate Whipped Cream
And then, the best part! Once your cake is firm from the freezer, it’s time to lavishly coat the entire creation in a rich, homemade chocolate whipped cream. I confess, before this recipe, I had never made chocolate whipped cream from scratch. However, I stumbled upon a fantastic recipe on Epicurious that turned out to be absolutely perfect, delivering a taste remarkably similar to rich chocolate ice cream. This whipped cream is incredibly airy yet intensely flavored, adding another layer of indulgence to the cake.
The chocolate whipped cream is an essential component, tying all the flavors together. Its cool, creamy texture contrasts beautifully with the light angel food cake and the fluffy mocha mousse. Even if you don’t make the entire cake, I highly recommend trying this chocolate whipped cream recipe on something else – a bowl of fresh berries, a scoop of vanilla ice cream, or even just by the spoonful!
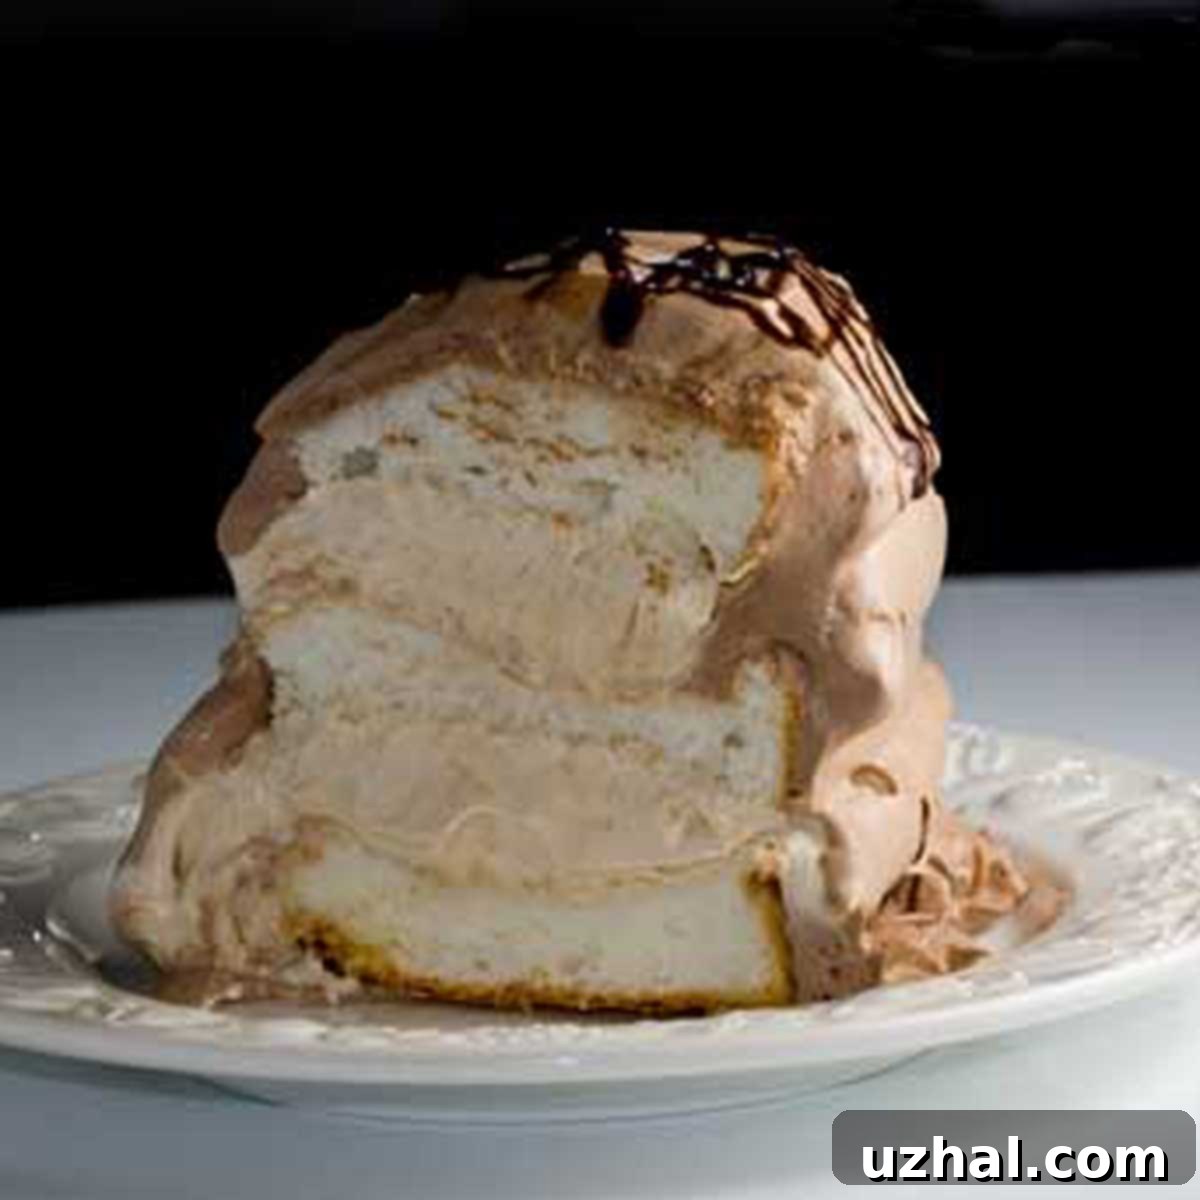
The end result is nothing short of spectacular, both in taste and presentation. The slight messiness from the original post is easily overcome by the sheer deliciousness and the vibrant layers. Each slice reveals the beautiful contrast between the white angel food cake, the light brown mocha mousse, and the rich dark chocolate whipped cream.
My family and I have thoroughly enjoyed this cake on multiple occasions. Its light yet flavorful profile makes it perfect for gatherings, celebrations, or simply as a special treat at home. While it’s fantastic as is, I’m always brainstorming ways to enhance it further. Next time, I am definitely going to experiment with adding a layer of devil’s food cake or some chocolate wafers or graham crackers to introduce a delightful textural variation, creating an even more complex and satisfying bite. The crunch would provide a wonderful counterpoint to the soft cake and creamy mousse. Ultimately, this Mocha Mousse Angel Food Cake is a versatile and impressive dessert that is sure to become a cherished recipe in your kitchen.
For more delightful mousse and chocolate-inspired desserts, check out these related recipes:
- Easy Lemon Mousse with Fresh Berries
- Fresh Strawberry Mousse
- Black Magic Cupcakes with Chocolate Mousse
- Light Mocha Mousse
- Halloween Chocolate Mocha Cupcakes
Recipe: Mocha Mousse Angel Food Cake with Chocolate Whipped Cream

Mocha Mousse Angel Food Cake with Chocolate Whipped Cream
Anna
Pin Recipe
Ingredients
- 1 box Duncan Hines Signature Angel Food Cake or one pre-made Angel Food Cake of any kind
Mocha Mousse
- ¼ cup boiling water
- 1 tablespoon instant coffee or 2 packets Folgers or Starbuck’s instant (the type in the little tubes)
- 7 ounce jar marshmallow crème (210 grams)
- 8 oz tub regular or light whipped topping
Chocolate Whipped Cream
- 1 cup confectioners’ sugar
- ½ cup unsweetened natural cocoa powder (or your favorite)
- ¼ cup milk
- 1 packet Folgers or Starbucks instant coffee (use 2 if you like)
- 1 Pinch of cream of tartar
- 2 cups chilled whipping cream
Instructions
-
Prepare the angel food cake as directed on the package. Let cool completely. With a long serrated knife, carefully cut the cake into three even layers horizontally.
-
To prepare the mocha mousse, place boiling water in a medium mixing bowl. Add the instant coffee and stir until fully dissolved. Add the marshmallow crème and beat on low speed until the mixture is blended and smooth. Gently fold in the whipped topping until no streaks remain and the mousse is light and airy.
-
Line a 9-inch round springform pan with aluminum foil, extending it up the sides to help contain the cake and mousse. Place the first layer of your angel food cake into the bottom of the pan; you may need to gently compress it a bit to fit. Spread approximately half of the prepared mocha mousse evenly over this cake layer. Carefully place the second layer of cake on top of the mousse, then add the remaining mocha mousse, spreading it out. Finish by topping with the final layer of angel food cake. Cover the entire cake in the pan with plastic wrap and place it in the freezer for about 3 hours, or until completely frozen solid. This crucial step will make frosting much easier.
-
As soon as the cake goes into the freezer, begin preparing the chocolate whipped cream mixture. This step requires some chill time, so starting it now ensures everything is ready simultaneously.
-
In the bowl of a stand mixer (or a large mixing bowl if using a hand mixer), whisk together the confectioners’ sugar, unsweetened cocoa powder, milk, instant coffee powder, and a pinch of cream of tartar until the mixture is completely smooth and lump-free. Cover the bowl and refrigerate the chocolate mixture until it is well chilled, which typically takes about 1 hour but can be done up to 4 hours in advance.
-
Once the chocolate mixture is chilled, reattach the stand mixer bowl to the mixer and, using the whisk attachment, begin beating the mixture on medium speed. Gradually pour in the two cups of chilled whipping cream. Continue beating, increasing the speed slightly as the cream thickens, until stiff peaks begin to form. Be very careful not to overbeat, as this can turn your whipped cream grainy.
-
Remove the frozen cake from the freezer. Carefully unlatch the sides of the springform pan and remove them. Peel away the aluminum foil from the cake. Place the frozen cake onto your desired cake stand or serving tray. Generously spread the freshly prepared chocolate whipped cream over the entire cake, covering the top and sides. You will have plenty of whipped cream, possibly even a little leftover to enjoy separately! Store the finished cake in the refrigerator until ready to serve.
Notes
