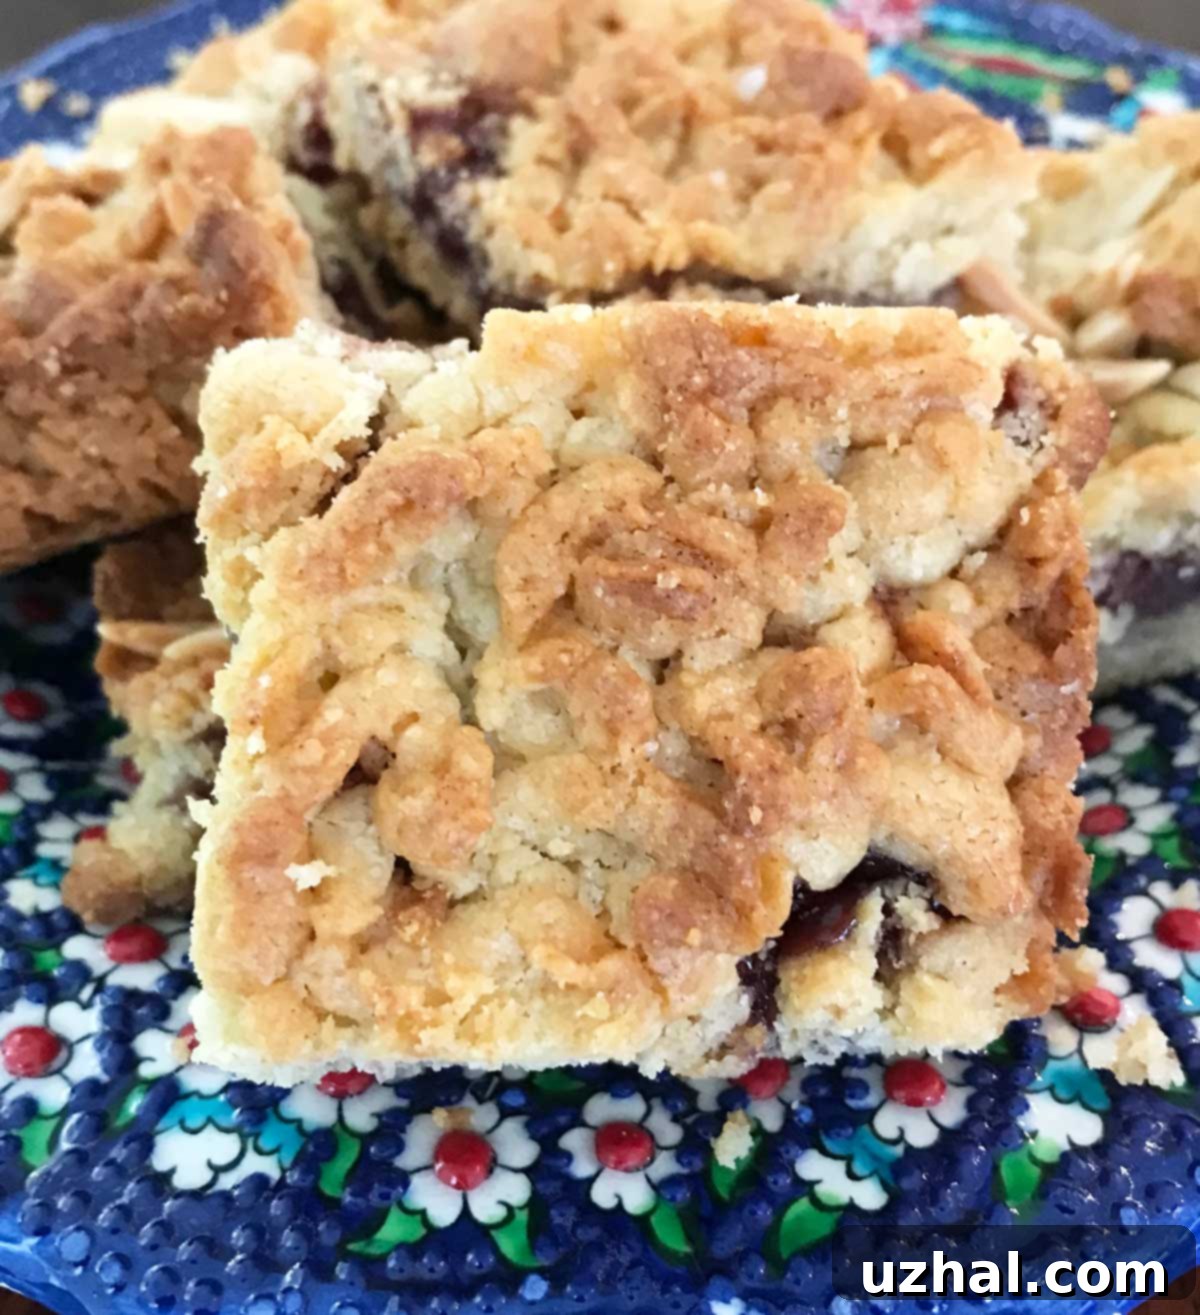
Grated Shortbread Bars: Unlock the Secret to Flaky, Buttery Perfection in a Loaf Pan
The quest for the perfect shortbread often revolves around achieving that elusive, melt-in-your-mouth texture that perfectly complements its rich, buttery flavor. If you’ve ever found yourself wondering how to elevate your shortbread from merely good to absolutely divine, there’s a game-changing technique you need to try: grating the dough. While this might sound unconventional, this ingenious method has been a cherished secret among pastry enthusiasts for a while, celebrated for delivering an unparalleled lightness and crumbly texture that traditional methods sometimes miss. It’s a simple twist that transforms the baking experience and the final product, resulting in shortbread that is both incredibly tender and satisfyingly crisp.
The grated shortbread dough trick isn’t a new invention, but its popularity has surged among home bakers thanks to culinary legends. Many first encountered this brilliant technique through Dorie Greenspan’s seminal work, Baking With Julia, where she and Gale Gand famously showcased Hungarian Shortbread Bars, a recipe that left a lasting impression on countless aspiring bakers. This method introduces air and creates delicate pockets of butter throughout the dough, leading to a texture that is wonderfully sandy and yet incredibly rich – a true revelation for anyone who appreciates the finer points of shortbread.
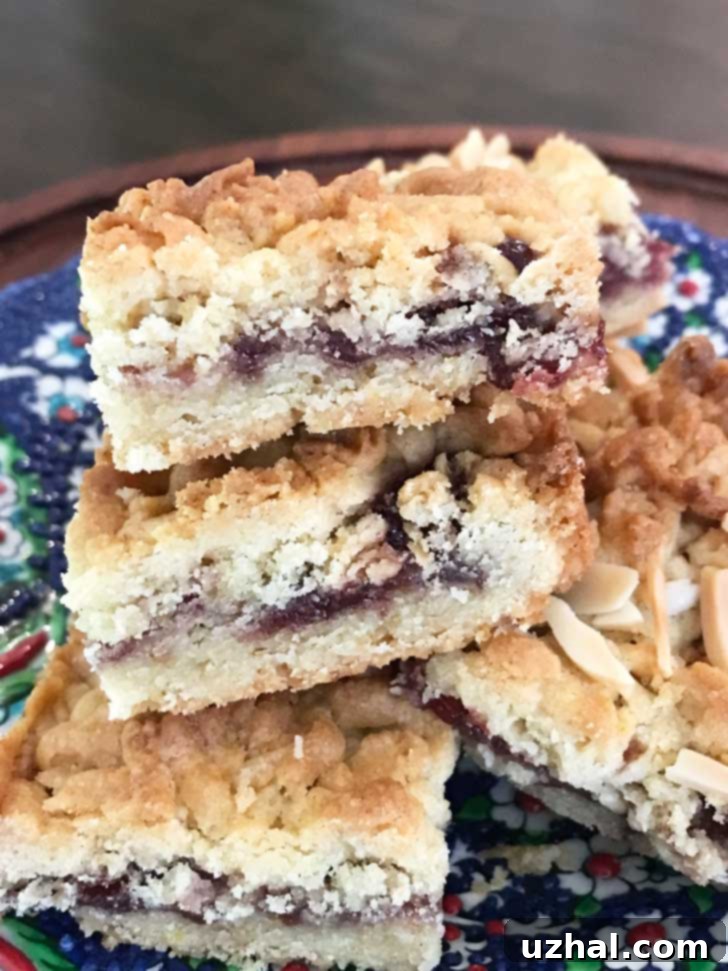
The Inspiration: Baking at the 20th Century Cafe
Despite owning a copy of Baking With Julia, I admit I overlooked this particular recipe for years. Perhaps my attention was too captivated by the allure of Julia Child’s best-ever brownies or other classic treats within its pages. However, the grated shortbread technique recently resurfaced on my radar thanks to Michelle Polzine’s exquisite cookbook, Baking at the 20th Century Cafe. Polzine, a celebrated pastry chef, features a unique version of grated shortbread in her book, which she affectionately calls Bulgarian Shortbread. This creation is distinctively filled with rose petal jelly, a nod to the famed Bulgarian roses, and is a testament to her innovative spirit.
Polzine openly acknowledges her inspiration from Julia Child and Gale Gand’s original Hungarian Shortbread, yet her recipe stands as a testament to her unique vision. She meticulously crafted her version with less sugar and distinct flavorings, and notably scaled down the recipe to a more manageable size. The original Hungarian Shortbread Bars recipe, after all, is quite substantial, famously calling for a generous pound of butter and four cups of flour! Polzine’s adaptation makes this delightful technique accessible for smaller batches, proving that exceptional baking doesn’t always require a colossal undertaking. This renewed encounter with the grated dough concept ignited my curiosity, driving me to explore the core shortbread recipe itself.
The Magic of Grated Shortbread Dough: A Texture Revelation
What truly intrigued me about this method, beyond the delightful fillings conjured by these renowned pastry chefs, was the very foundation of the shortbread itself. The grating technique isn’t just a gimmick; it’s a deliberate choice that significantly impacts the final texture. By grating the chilled butter-laden dough, you achieve several critical advantages. Firstly, it ensures that the butter is distributed more evenly and in finer pieces throughout the flour. This prevents overworking the dough, which is a common pitfall in shortbread making, leading to a tough rather than tender result.
Secondly, the act of grating introduces more air into the dough. As the tiny strands of cold dough bake, the butter melts, creating delicate pockets and layers that contribute to an incredibly light, airy, and crumbly texture. This is further enhanced by the inclusion of several egg yolks in the recipe, which add richness and tenderness without making the shortbread cakey. A thoughtful amount of baking powder also plays a crucial role, providing a gentle lift to ensure the shortbread remains delightfully light rather than dense. Driven by this fascination, I knew I had to try it. However, a huge pan of shortbread was beyond my immediate needs, so I opted to adapt the recipe for a more convenient loaf pan version, perfect for small-batch baking.
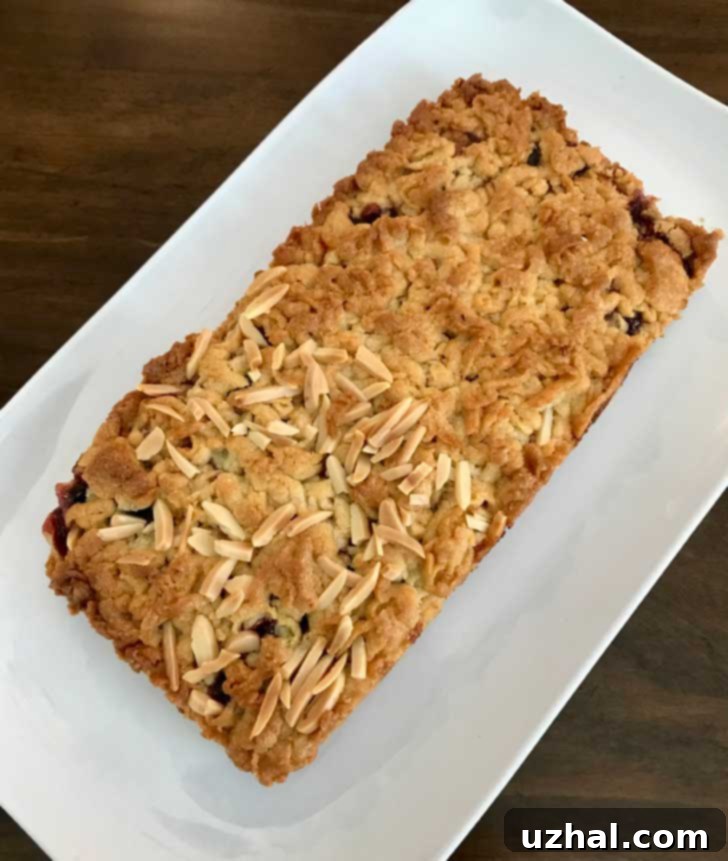
Crafting My Own Loaf Pan Grated Shortbread Bars
I couldn’t be more delighted with how my small-batch grated shortbread bars turned out. In fact, to be completely honest, I made several batches! My commitment to testing meant I probably used almost as much butter as the original large recipe, much to the delight of Todd and myself, who now have a plentiful supply of delicious shortbread. The ratios I eventually settled on for my loaf pan adaptation leaned more towards Michelle Polzine’s recipe than Gale Gand’s. This meant my bars were a little less sweet, allowing the other nuanced flavors to truly shine. To enhance the profile, I incorporated fragrant cardamom and bright lemon zest, which we absolutely adore.
For this specific loaf pan version, these two flavors were non-negotiable. I also made the shortbread a touch saltier, believing that a hint of salt perfectly balances the sweetness of the preserves and enhances the buttery richness. For the filling, I chose our favorite preserves – a classic choice that complements the spiced, citrusy shortbread beautifully. The resulting bars struck a perfect balance of texture and flavor: tender, crumbly, and bursting with delightful notes of spice and fruit. This small-scale approach proved ideal for perfecting the technique and enjoying freshly baked shortbread without an overwhelming quantity.
Below, you’ll find my tried-and-true recipe for Loaf Pan Grated Shortbread, also known as Hungarian Shortbread, along with some essential tips tailored for those who appreciate the convenience and charm of small-batch baking. Get ready to experience shortbread like never before!
Expert Loaf Pan Shortbread Baking Tips
- Choosing the Right Loaf Pan: Loaf pan dimensions can vary slightly, but for shortbread bars, the critical factor is the size of the bottom, as this dictates the surface area for your dough. A standard 9×5 inch pan, or one slightly smaller or larger, will work perfectly. I specifically recommend a pan with a bottom measuring roughly 8×4 inches; this usually means the top will flare out to about 8 ½ x 4 ½ or 9×5 inches, depending on the angle of the sides. Don’t stress too much over exact measurements – simply use the loaf pan you have on hand. Just be aware that your bars might be a little thinner or thicker, which can slightly affect baking time, but they’ll be delicious nonetheless!
- Using a Stand Mixer: For this thick and somewhat dry, crumbly dough, a stand mixer equipped with a paddle attachment is truly ideal. It provides the necessary power and consistent mixing to bring the dough together without overworking it. If you don’t have a stand mixer, a handheld electric mixer can also be used. However, exercise caution: mix in short, controlled pulses on the lowest speed to avoid overbeating the dough. Some handheld mixers, particularly powerful ones, can incorporate too much air or heat the butter too quickly, which is detrimental to shortbread texture.
- Flour Measurement by Weight: As with most baking, accuracy is key, especially when it comes to flour. I highly recommend using a kitchen scale to measure your flour by weight (grams) rather than by volume (cups). This ensures consistency and prevents adding too much flour, which can lead to dry, tough shortbread. Exact measurements are crucial for achieving the perfect crumb.
- Lining the Loaf Pan with Foil: Lining your loaf pan makes the process of removing the baked shortbread bars incredibly easy and mess-free. I find aluminum foil particularly simple to work with, allowing for a neat overhang that acts as “handles” to lift the cooled shortbread from the pan. If you prefer, greased parchment paper also works wonderfully. If you’re not concerned about lifting the bars out perfectly intact, you can simply butter the pan thoroughly. However, a good lining ensures clean edges and effortless presentation.
- Butter Choice and Temperature: The quality of your butter significantly impacts the flavor of your shortbread. You can use either unsalted or salted butter. I personally tested with both and found that the salted version yielded a more pronounced, balanced flavor that truly enhanced the shortbread’s richness. Regardless of your choice, ensure the butter is cold for grating. This is vital for achieving the proper texture as it creates those desirable pockets of butter that make the shortbread flaky and tender.
- Accurate Baking Time: Even in a smaller loaf pan, these shortbread bars require a decent amount of baking time to achieve that perfect golden-brown color and crisp-tender texture. My tests in a Breville toaster oven typically took around 35 to 40 minutes. Keep a close eye on the shortbread towards the end of the baking time. The top should be visibly golden brown, and the edges firm. Remember that ovens can vary, so adjust baking time as needed based on your specific appliance.
- Mindful Preserves Application: When it comes to the jam or preserves, less is often more. About ¼ cup is the ideal amount for this loaf pan recipe. Using too much can make the bars overly soft and introduce excess moisture, which can detract from the crisp shortbread texture. For easier spreading over the grated dough, a fantastic tip is to slightly freeze your preserves. This firms them up, allowing them to be spread smoothly and evenly without disturbing the delicate grated layer beneath.
The Art of Shortbread: Beyond Grating
While grating is a fantastic technique, the essence of great shortbread lies in a few fundamental principles. Always use high-quality butter, as it’s the dominant flavor. Handle the dough as little as possible to prevent gluten development, which leads to tough shortbread. Chilling the dough, whether grated or pressed, is crucial for preventing spread and ensuring a crisp bite. This Hungarian shortbread recipe masterfully combines these traditional tenets with the innovative grating method, offering a truly superior result.
Flavor Variations and Serving Suggestions
Beyond the classic raspberry or cherry preserves, feel free to experiment with other fillings. Apricot, fig, or even a citrus curd would be delightful. For additional flavor in the shortbread itself, consider adding a hint of almond extract, vanilla bean paste, or a different spice like cinnamon or nutmeg. These shortbread bars are perfect with a cup of tea or coffee, as a simple dessert, or even as a thoughtful homemade gift. They store well in an airtight container at room temperature for several days, maintaining their wonderful texture.
Recipe
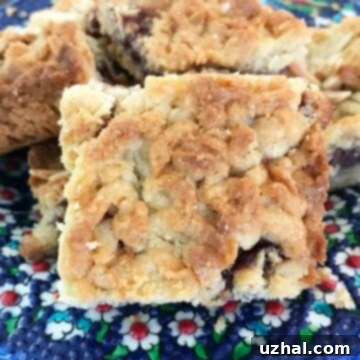
Loaf Pan Hungarian Shortbread Bars
Pin Recipe
Ingredients
- ¾ cup plus 2 tablespoons all-purpose flour (110 grams)
- ⅜ teaspoon baking powder
- ⅛ teaspoon salt
- ⅛ teaspoon ground cardamom
- ¼ cup raspberry jam or preserves or cherry
- 7 tablespoons salted butter plus another ½ tablespoon for the pan.
- ¼ cup sugar (90 grams)
- ½ teaspoon grated lemon zest
- 1 large egg yolk
Instructions
-
In a large bowl, whisk together the flour, baking powder, salt, and cardamom. Set aside.
-
With an electric mixer, preferably a stand mixer with a paddle attachment, beat 7 tablespoons of the cold butter until it’s light and fluffy. Add the sugar and lemon zest and continue beating for another 2 minutes, stopping to scrape down the sides of the bowl as needed to ensure even mixing.
-
Reduce the mixer speed to low and add the egg yolk, beating just until it is fully blended into the butter mixture. Be careful not to overmix at this stage.
-
Gradually add the whisked flour mixture to the butter mixture. Stir with the paddle attachment on the lowest speed just until a cohesive dough forms. The dough will be thick and somewhat crumbly. This step can also be done carefully by hand, or with a handheld mixer on its very lowest speed to avoid overbeating.
-
Scrape the dough out onto a piece of plastic wrap and gently shape it into a log. Wrap it tightly and place it in the freezer for a minimum of 30 minutes to firm up. This chilling process is crucial for successful grating.
-
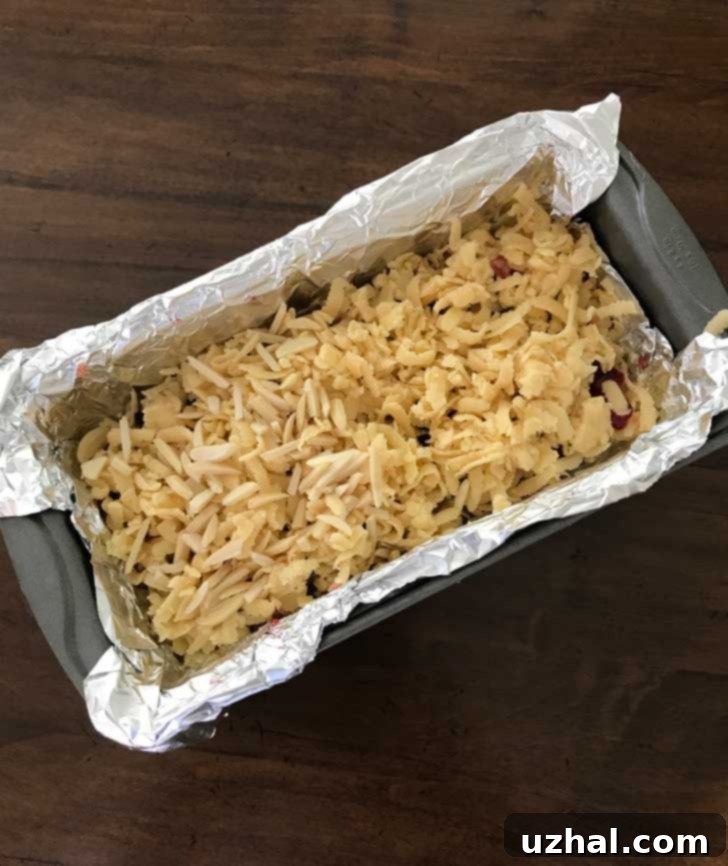
While the dough chills, preheat your oven to 350°F (175°C). Line the inside of a standard loaf pan with aluminum foil, leaving enough overhang on the longer sides to create “handles” for easy lifting. Rub the reserved softened ½ tablespoon of butter across the bottom and about 1 inch up the sides of the foil-lined pan.
-
Using the large holes on a box grater, grate half of the chilled dough directly into the prepared loaf pan. Distribute the grated dough evenly across the bottom, but resist the urge to press it down. Return the pan with the grated dough to the freezer for about 5 minutes while you prepare your jam.
-
Take the pan from the freezer. Using the back of a large spoon, carefully spread the raspberry or cherry jam/preserves over the grated dough layer. For easier spreading, ensure the jam is cold or slightly frozen. Once the jam is spread, grate the remaining dough evenly over the jam layer. It will create a fairly high pile, but it will settle beautifully during baking.
-
Bake the shortbread in the preheated oven for approximately 35 to 40 minutes, or until the top is a deep golden brown and the edges appear set. Allow the shortbread bars to cool completely in the pan before attempting to lift them out using the foil overhang. Once cooled, carefully lift from the pan and cut into desired squares or bars. Enjoy your perfectly textured Hungarian shortbread!
Conclusion: Your New Favorite Shortbread Method
The grated shortbread technique, while seemingly a small deviation from traditional methods, offers a remarkable upgrade in texture and overall enjoyment. Whether you’re a seasoned baker or just beginning your culinary journey, this method is surprisingly forgiving and incredibly rewarding. From its historical roots with Julia Child to modern adaptations by Michelle Polzine and now to your home kitchen, these Loaf Pan Hungarian Shortbread Bars promise a buttery, flaky, and utterly delicious experience. Embrace the grater, and prepare to elevate your shortbread baking to a whole new level of perfection. Happy baking!
