Mastering the Classic Boston Cream Pie: An Indulgent Recipe from Joy of Cooking
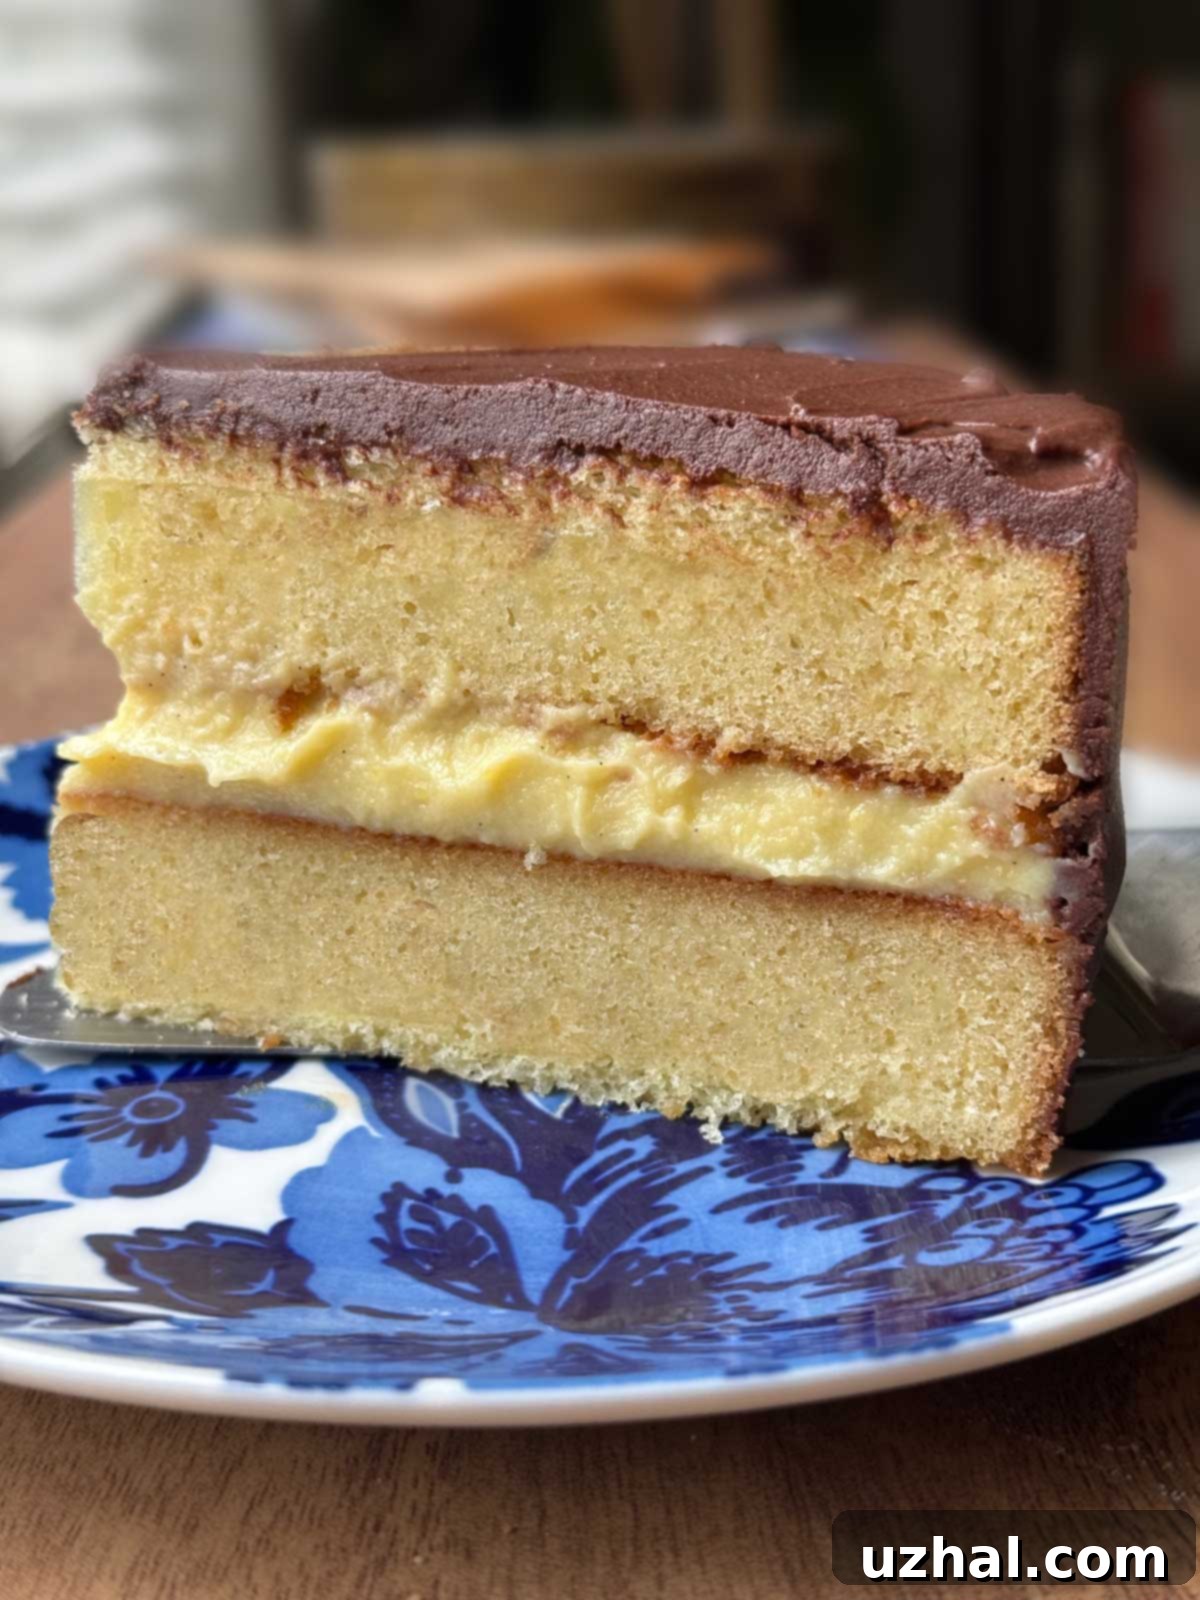
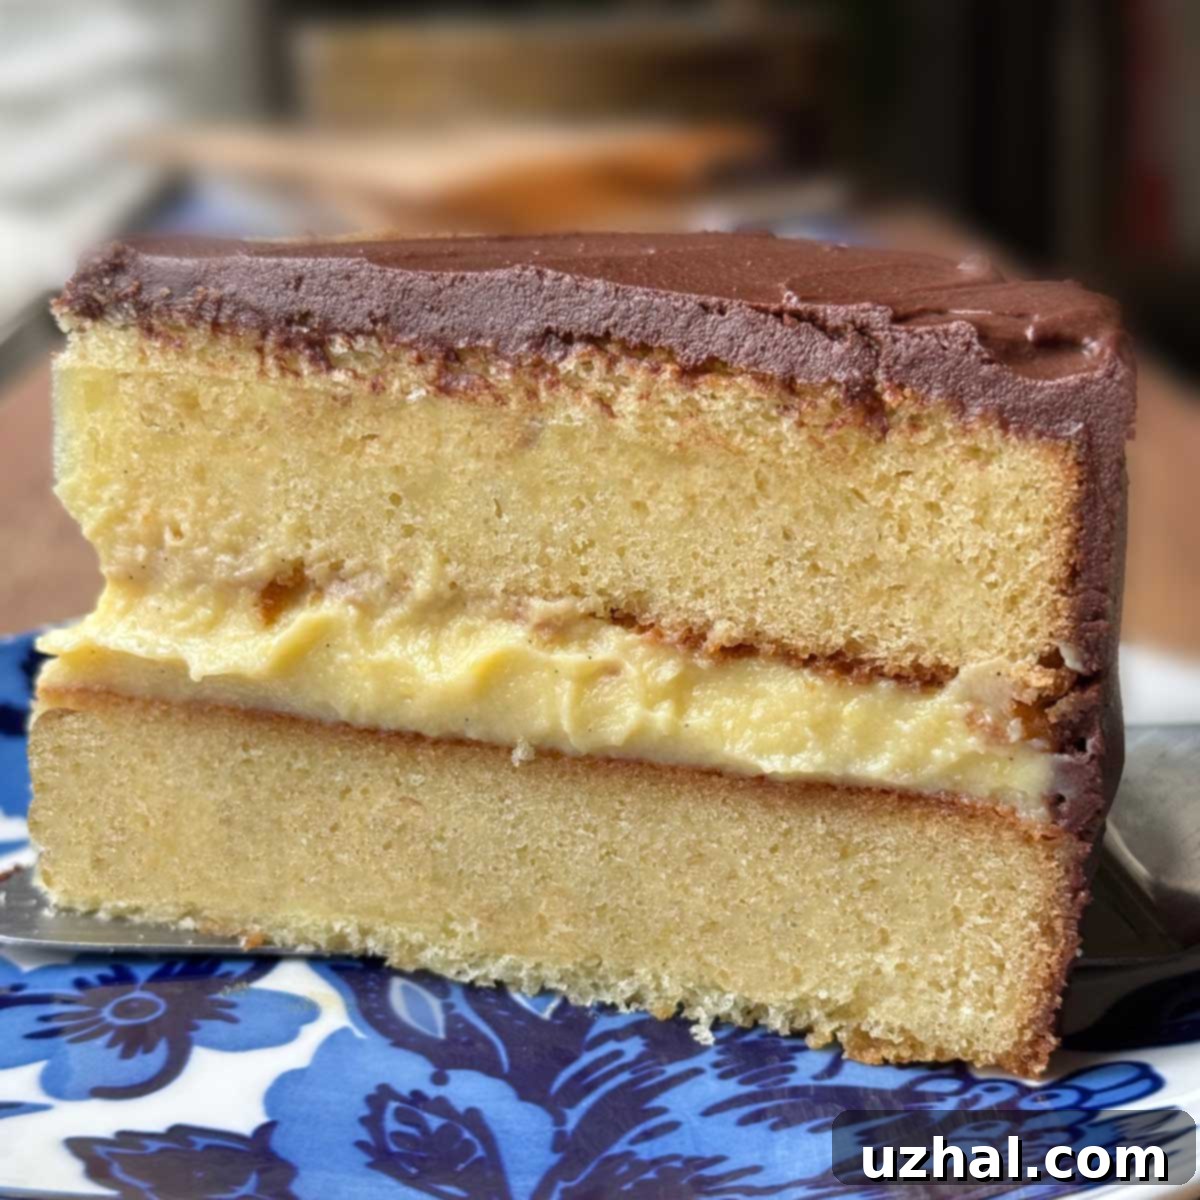
The Boston Cream Pie holds a unique place in American dessert history, a delightful paradox that charms everyone who tries it. Despite its name, this iconic treat is not a pie at all, but rather a luscious two-layer golden yellow cake, generously filled with a velvety pastry cream, and crowned with a gleaming, rich chocolate glaze. It’s a harmonious blend of textures and flavors that has captivated dessert lovers for over a century and a half.
What Exactly is Boston Cream Pie? Unraveling the Delicious Mystery
Its origins trace back to 1856, when it was first introduced at Boston’s renowned Parker House Hotel, making it an enduring symbol of culinary innovation. Originally, it was known as “Chocolate Cream Pie” or “Parker House Chocolate Cream Pie.” The “pie” in its name likely comes from the fact that it was baked in a pie tin, a common practice for cakes in the mid-19th century. Over time, it earned its now-famous moniker and, in 1996, was even declared the official state dessert of Massachusetts.
My own journey with Boston Cream Pie began not in a grand hotel, but through the nostalgic aisles of the frozen foods section, courtesy of Mrs. Smith’s frozen pies. While those convenient slices offered a taste of this classic, my true obsession with crafting the perfect homemade version blossomed much later. The magic of combining a tender cake with a creamy filling and a glossy chocolate topping is simply irresistible.

Embracing Culinary Creativity: My Philosophy on Boston Cream Pie Recipes
For a long time, I harbored a slight sense of guilt about not adhering to a single, definitive Boston Cream Pie recipe. My culinary adventures often lead me to experiment, combining different types of yellow, sponge, or even buttermilk cakes with various pastry cream formulations and chocolate toppings. I’ve always believed that the beauty of baking lies in exploration and personalization. This approach allows for endless possibilities and the chance to discover new favorite combinations, perfectly tailoring the dessert to individual preferences.
This feeling of “guilt” quickly dissipated when I delved into the 2019 edition of *The Joy of Cooking*. To my delight, this esteemed cookbook echoed my own philosophy, encouraging a similar ‘mix and match’ approach. Their recipe, rather than prescribing one rigid path, invites bakers to select a cake recipe from one page, then directs them to another for the ideal pastry cream, and finally suggests a simple, yet elegant, glaze crafted from melted chocolate, water, and butter. This modular approach not only empowers the home baker but also celebrates the versatile nature of the Boston Cream Pie.
A Deep Dive into The Joy of Cooking’s Boston Cream Pie
Inspired by this adaptable philosophy, the Boston Cream Pie recipe I’m sharing today is a carefully adapted version from the 2019 edition of *The Joy of Cooking*. This particular rendition features a luscious buttermilk yellow cake, a classic and robust pastry cream, and a beautifully balanced chocolate glaze. Each component of this recipe has been thoughtfully selected to create a Boston Cream Pie that is both traditional in flavor and refined in execution.
The Buttermilk Yellow Cake: A Foundation of Flavor and Texture
The buttermilk yellow cake in this recipe is truly remarkable. It bakes up with wonderfully flat tops, which is an absolute dream for layer cakes, as it eliminates the need for any trimming – a common hassle with domed cakes. Beyond its practical benefits, the cake boasts a dense yet incredibly moist crumb, almost akin to a rich pound cake. The buttermilk contributes not only to its tender texture but also imparts a subtle tang that beautifully complements the sweetness of the pastry cream and chocolate. I recently used powdered buttermilk for this recipe and am curious to explore if it subtly impacts the leavening action compared to liquid buttermilk, though the results were still exceptional.
The Pastry Cream Filling: Silky Smooth Perfection
The pastry cream filling is the heart of any great Boston Cream Pie, and this recipe delivers a custard that is nothing short of perfect. It achieves just the right level of stiffness – thick enough to hold its shape beautifully between the cake layers without oozing, yet wonderfully creamy and smooth on the palate. Made with a combination of milk, vanilla, sugar, cornstarch, and eggs, it’s a testament to classic patisserie techniques. The richness of the egg yolks combined with the subtle sweetness and fragrant vanilla creates a filling that is both comforting and sophisticated.
The Chocolate Glaze: A Unique and Elegant Finish
Finally, the chocolate glaze sets this recipe apart. Unlike a heavy ganache or a standard buttercream, this glaze is crafted from melted chocolate, water, and butter, creating a distinctively lighter yet equally rich coating. The water helps to thin the chocolate, making it incredibly easy to spread evenly over the cake, while the butter is reintroduced to impart a luxurious richness and a beautiful sheen. Once cooled, it firms up just enough to create a neat, sliceable layer that doesn’t crack or flake, ensuring a pristine presentation every time. This unique preparation method results in a glaze that is both visually appealing and melts delightfully in your mouth.
This particular *Joy of Cooking* adaptation offers a complete and satisfying Boston Cream Pie experience. However, the true beauty of this recipe lies in its versatility. You can certainly follow it precisely as written to achieve a truly classic dessert. Alternatively, feel free to isolate and incorporate individual components into your own baking repertoire. Perhaps you’re searching for a reliable, easily spreadable chocolate glaze, or a perfectly stiff pastry cream, or even a yellow cake that consistently bakes flat. Each element of this recipe is strong enough to stand on its own and elevate other baking projects. I am already looking forward to making this one again, perhaps experimenting with fresh buttermilk next time!
Exploring Boston Cream Pie Variations: Beyond the Classic
While the traditional Boston Cream Pie with its yellow cake and vanilla pastry cream is undeniably beloved, the world of this iconic dessert is rich with delicious variations. My own “mixing and matching” tendencies led me to appreciate how different cake bases and fillings can transform the experience. Here are a couple of popular interpretations that offer a delightful twist:
- Chocolate Boston Cream Pie: For those who can’t get enough chocolate, this version swaps the traditional yellow cake for a rich, moist chocolate cake. The combination of chocolate cake with the creamy vanilla pastry filling and the chocolate glaze creates an even more decadent and deeply flavored dessert. This variation always reminds me of the fantastic versions served at places like Luby’s Cafeteria, where chocolate cake was always the star. It’s a testament to how a simple change can create a whole new level of indulgence.
- Scratch Boston Cream Pie with Sponge Cake: If you prefer a lighter, airier cake texture, a sponge cake version is an excellent choice. This rendition often results in a dessert that feels a bit more delicate, reminiscent of some of the delightful frozen versions, like the Mrs. Smith’s pies I enjoyed in my youth. The sponge cake absorbs some of the moisture from the pastry cream, leading to an incredibly tender and flavorful bite. It’s a slightly different take but equally satisfying for those who appreciate a less dense cake base.
These variations prove that while the classic is perfect, there’s always room to explore and adapt to find your personal favorite Boston Cream Pie experience.
Recipe: Joy of Cooking’s Boston Cream Pie

Boston Cream Pie from Joy of Cooking
Anna
Pin Recipe
Ingredients
Buttermilk Layer Cake
- 2 ½ cups sifted cake flour, measure after sifting (235 grams)
- 1 ½ teaspoon baking powder
- ½ teaspoon baking soda
- ¼ tsp. salt
- 1 ½ sticks unsalted butter, softened (170 grams)
- 1 ⅓ cups sugar (265 grams)
- 3 large eggs, bring to room temperature
- 1 tsp. vanilla extract or vanilla bean paste
- 1 cup buttermilk
FOR THE CUSTARD CREAM FILLING:
- 1 ½ cups milk, whole
- 1 teaspoon vanilla paste or a large vanilla bean, split
- ½ cup sugar
- 2 tablespoons cornstarch
- ¼ teaspoon salt
- 3 large egg yolks
- 1 large egg
- 2 tablespoons butter salted or unsalted)
FOR THE CHOCOLATE ICING:
- 6 oz semisweet chocolate. chopped or Ghirardelli bittersweet chocolate chips
- ½ cup water (or coffee)
- 1 pinch salt
- 6 tablespoons unsalted butter, cut into 6 chunks
Instructions
Buttermilk Layer Cake
-
Preheat your oven to 350 degrees F (175 degrees C). Prepare two 8-inch round cake pans by generously greasing and flouring them. This ensures your cakes release easily.
-
In a medium bowl, whisk together the sifted cake flour, baking powder, baking soda, and salt. Sifting the flour beforehand is crucial for a light and tender crumb. Set this dry mixture aside.
-
In the bowl of a stand mixer fitted with the paddle attachment, beat the softened unsalted butter and sugar together until the mixture is light, fluffy, and pale in color, typically about 2 minutes. Gradually beat in the large eggs, one by one, ensuring each is fully incorporated before adding the next. Stir in the vanilla extract or vanilla bean paste. Now, with the mixer on low speed, add the flour mixture in three parts, alternating with the buttermilk, beginning and ending with the flour. Beat well after each addition until just combined. Overmixing can lead to a tough cake. Pour the batter evenly into your prepared pans. For precision, you can weigh the batter in each pan to ensure consistent cake layers (approximately 18 oz per pan).
-
Bake for approximately 30-35 minutes, or until a wooden pick inserted into the center of a cake comes out clean. A wonderful characteristic of this buttermilk cake is its tendency to bake with flat tops, eliminating the need to level them – a true time-saver! Allow the cakes to cool in their pans for about 15 minutes before carefully inverting them onto a wire rack to cool completely.
Pastry Cream Filling
-
In a medium saucepan, combine the whole milk and vanilla bean (if using, split it lengthwise and scrape the seeds into the milk, then add the pod). Heat over medium heat until it just begins to simmer, then remove from heat. If you’re using vanilla paste, simply heat the milk without it for now.
-
While the milk is heating, whisk together the sugar, cornstarch, and salt in a separate medium-sized bowl. Add the three large egg yolks and the whole large egg, whisking vigorously until the mixture is smooth and pale. A bowl with a spout can be helpful for the next step.
-
Once the milk has simmered and infused with vanilla (remove the vanilla bean pod at this point if used), slowly temper the egg mixture. This involves gradually pouring about half of the hot milk into the egg mixture while continuously whisking to prevent the eggs from scrambling.
-
Pour the tempered egg-milk mixture back into the saucepan with the remaining milk. Cook over medium-low heat, whisking constantly, until the mixture thickens considerably and begins to show large bubbles breaking the surface, similar to a thick pudding consistency. This usually takes about 2-4 minutes after it returns to heat. Once it reaches this stage, continue whisking for another 30 seconds to ensure the cornstarch is fully cooked out.
-
Immediately strain the hot pastry cream through a fine-mesh sieve set over a clean bowl. This step ensures a silky-smooth texture, removing any potential lumps or cooked egg bits. Whisk in the butter (salted or unsalted, as per your preference) until fully melted and incorporated. If you are using vanilla paste, add it now. Taste and add a touch more vanilla extract if desired.
-
To prevent a skin from forming, press a piece of plastic wrap directly onto the surface of the pastry cream. Let it cool slightly at room temperature, then chill in the refrigerator for at least 2-3 hours, or until thoroughly cold and firm enough to spread.
Chocolate Glaze
-
Prepare a double boiler by combining the chopped semisweet or bittersweet chocolate and water (or coffee for a richer flavor) in a heatproof bowl set over a saucepan of barely simmering water. Ensure the bottom of the bowl does not touch the water. Stir gently until the chocolate is completely melted and smooth. Remove the bowl from the heat. Stir in the pinch of salt, then add the unsalted butter, one chunk at a time, stirring until each piece is fully incorporated and the glaze is glossy. Let the glaze cool at room temperature for about an hour, stirring occasionally, until it reaches a pourable but thickened consistency – similar to a thick syrup. This cooling period is essential for an even, non-runny glaze.
-
Assemble: Once your cake layers are completely cooled and your pastry cream is thoroughly chilled, it’s time to assemble your Boston Cream Pie. Place one cake layer onto your chosen serving plate or cake stand. Spread a generous, thick layer of the cold pastry cream evenly over the top of this cake layer, extending almost to the edges. Carefully place the second cake layer on top. Finally, pour the cooled chocolate glaze over the top center of the cake, allowing it to slowly and elegantly drip down the sides. For the best set and flavor, chill the assembled pie in the refrigerator for at least 1-2 hours before slicing and serving. This allows the glaze to firm up and the flavors to meld beautifully.
Final Thoughts on Your Boston Cream Pie Adventure
Baking a Boston Cream Pie from scratch is a rewarding experience, transforming simple ingredients into a dessert that feels both elegant and comforting. Whether you’re a seasoned baker or just starting your culinary journey, this recipe, adapted from *The Joy of Cooking*, provides a robust framework for success. The harmonious combination of the moist buttermilk cake, the smooth vanilla pastry cream, and the sophisticated chocolate glaze is truly a masterpiece that will impress any guest or simply provide a delightful treat for your family.
Don’t be afraid to experiment, just as I’ve enjoyed doing over the years. Perhaps you’ll find that a touch of coffee in the glaze enhances the chocolate flavor even more, or maybe you’ll discover a secret ingredient that makes your pastry cream uniquely yours. The beauty of a classic recipe is that it provides a solid foundation upon which you can build your own culinary interpretations. I encourage you to embrace the joy of creating this iconic American dessert and to share the delicious results with those you love. Happy baking!
