Mastering the Fluffy & Flavorful Unsweetened Chocolate Chiffon Pie Recipe
Embark on a delightful baking journey with our refined recipe for Unsweetened Chocolate Chiffon Pie. After experimenting with various chocolate ratios and ingredient balances, we’ve perfected a version that is not only exquisitely fluffy and bursting with deep chocolate flavor but also a more budget-friendly option compared to its semi-sweet counterparts. This pie offers a sophisticated twist, utilizing unsweetened chocolate to achieve a rich, intense cocoa profile that can be balanced perfectly with sugar, allowing you to control the sweetness to your preference. While it may not reach the same towering heights as some other recipes, its delicate, airy texture and profound flavor more than make up for it, creating an unforgettable dessert experience.
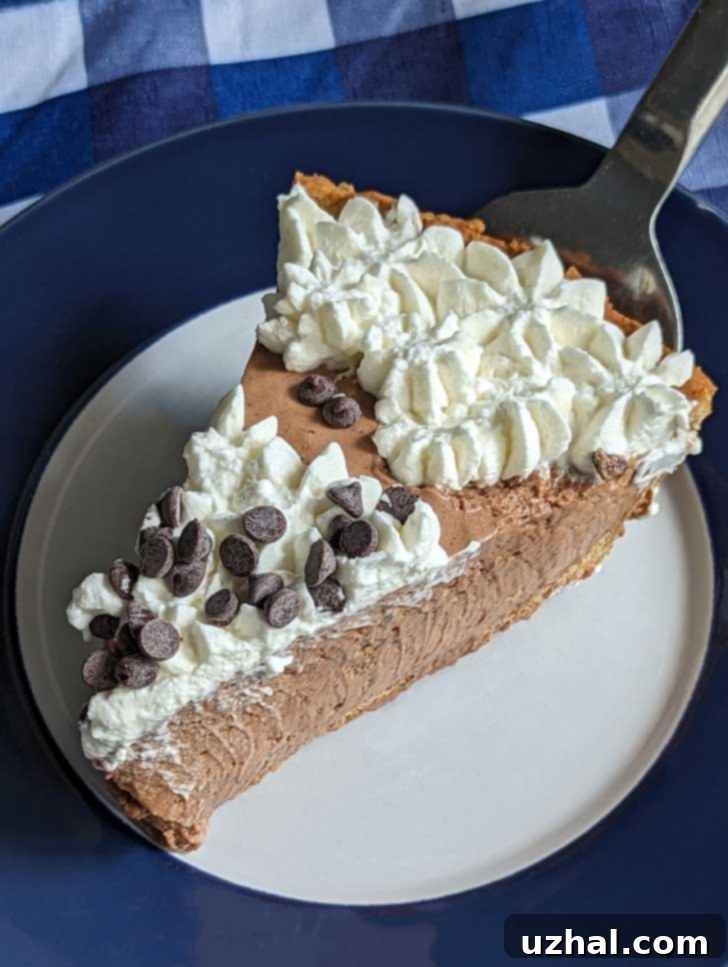
Pictured below is a slice of this heavenly pie, nestled in a beautifully rolled graham cracker crust. For this specific recipe, we’ll guide you through making a classic pressed graham cracker crust, which provides the perfect crunchy counterpoint to the silky smooth filling. The rolled crust is a charming variation I might share another day, but for now, let’s focus on the delightful simplicity and incredible taste of this standard method.

The Art of Chiffon Pie Making: Understanding the Process
Crafting a truly exceptional Chiffon Pie relies on mastering a few fundamental techniques, largely centered around ingredient preparation and temperature control. This Unsweetened Chocolate Chiffon Pie recipe follows a similar elegant pattern to other chiffon pies, but with specific nuances that elevate its final taste and texture. Each step plays a crucial role in achieving that signature light, airy, and melt-in-your-mouth consistency.
Here’s a breakdown of the essential stages, designed to help you understand the ‘why’ behind each action:
- Soften Gelatin in Cold Milk/Water: This crucial first step ensures the gelatin granules absorb liquid evenly and bloom properly, preventing a grainy texture in your final pie. Using cold liquid is key, as hot liquid can cause the gelatin to clump.
- Melt Chocolate with Milk, Then Dissolve Gelatin: Gently melting the unsweetened chocolate with milk creates a smooth, foundational chocolate base. Once hot, the bloomed gelatin is added and stirred until completely dissolved. This step integrates the setting agent seamlessly into the chocolate mixture.
- Whip Egg Yolks with Sugar and Salt: Beating egg yolks with a portion of the sugar and a pinch of salt until they are thick and pale yellow (often described as “lemony”) creates a rich, emulsified base for the custard. The sugar helps stabilize the yolks, while the salt enhances the flavor.
- Whip Heavy Cream: Whipping heavy cream until it holds soft to medium peaks introduces essential airiness and richness to the pie. The cream provides a luxurious mouthfeel and helps lighten the overall texture.
- Whip Egg Whites: This is perhaps the most iconic step in chiffon pies. Whipping egg whites until they form stiff, glossy peaks creates a voluminous, stable foam that is gently folded into the mixture, giving the pie its characteristic light and airy “chiffon” texture.
- Fold Everything Together and Chill: The final stage involves carefully combining the prepared components. Gentle folding is paramount to retain as much air as possible from the whipped cream and egg whites. After assembly, chilling the pie for several hours allows the gelatin to fully set, transforming the mixture into a firm yet delicate dessert.
The most crucial aspect of achieving chiffon perfection lies in harmonizing the consistency and temperature of your main components. The chocolate mixture, after having the gelatin dissolved, needs to cool sufficiently before you integrate it with the delicate whipped cream and airy egg whites. If the chocolate mixture is too warm, it can deflate the whipped ingredients, leading to a dense pie. Conversely, if it cools too much, it might start to set prematurely, making it difficult to fold evenly. The goal is for all three—cooled chocolate, whipped cream, and whipped egg whites—to be roughly the same thickness and temperature before they are combined. After folding, the entire mixture needs to thicken just enough in the refrigerator so that you can artfully pile it high into your waiting pie shell, creating that classic domed silhouette.
This recipe, transcribed from an old handwritten note and personally tested once, has shown immense promise. While I haven’t put it through the rigorous triple-testing process yet, my initial experience was incredibly successful, yielding a pie that was both delicious and visually appealing. I’m excited to make it again soon, pushing it closer to that coveted “double-tested” status, and I encourage you to give it a try!
Double Boiler Debate: Essential Tool or Just Another Gadget?
During a recent visit from my friend Fuzz, who has since moved to Chicago, we found ourselves in a surprisingly engaging discussion about the merits of a double boiler. While “intense” might be an overstatement, it was genuinely fun to delve into the nuances of this kitchen tool with another passionate cook. My stance has always been that a double boiler is an incredibly helpful piece of equipment, particularly for delicate tasks like making custards or melting chocolate without scorching. Its gentle, indirect heat allows you to step away from your preparation without the constant worry of burning, making multitasking in the kitchen much easier.
Furthermore, the design of most double boilers is quite clever: the top pan often fits snugly over a bowl of ice, instantly transforming it into an efficient ice bath. This is invaluable when you need to quickly cool down a mixture to halt cooking or achieve a specific temperature, as we do with our chocolate chiffon filling. Fuzz, however, presented a valid counter-argument. Why invest in another piece of equipment, she posited, when you can simply set a heatproof bowl over a pan of simmering water? She argued it was just another item to store, taking up precious cabinet space.
I certainly see her point; resourcefulness in the kitchen is always commendable. For those with limited space or who rarely engage in delicate cooking, her method is perfectly viable. However, I still maintain that if you have the space, a dedicated double boiler simplifies the process immensely. It’s designed for stability, preventing the clumsy slips that can occur when balancing a random bowl over a pot. The snug fit ensures optimal heat transfer without allowing steam to escape and condense into your mixture. Plus, double boilers are often quite affordable – you can frequently find great deals at thrift stores or kitchen supply shops, and they don’t take up an excessive amount of room. For consistent results and ease of mind, especially when working with temperature-sensitive ingredients like chocolate and eggs, a double boiler remains a valuable asset in my kitchen.
Explore More Chiffon Delights
If you’ve enjoyed the airy texture and rich flavor of this Chocolate Chiffon Pie, you might be interested in exploring other chiffon-inspired recipes from our collection. The versatility of the chiffon method extends to cakes, other pies, and unique desserts, offering a range of light and delightful treats:
- Chiffon Cake: The classic that started it all, a staple for its incredible lightness.
- Lemon Chiffon Cake: A zesty and refreshing variation on the traditional chiffon cake.
- Raspberry Chiffon Pie: For those who love a fruity, vibrant alternative to chocolate.
- Chiffon Gingerbread: A festive and surprisingly light take on a beloved classic.
- Angel and Chiffon: Dive into a category dedicated to these exceptionally airy and delicate baked goods.
Recipe

Chocolate Chiffon Pie
Pin Recipe
Ingredients
Crust
- 1 ½ cups graham cracker crumbs (from 12 sheets or 24 squares)
- 3 tablespoons sugar
- 6 tablespoons unsalted butter, melted
- ⅛ teaspoon salt, omit if using salted butter
Chocolate Filling
- ¼ cup cold water
- 1 envelope unflavored gelatin (2 ½ teaspoons)
- 1 cup whole milk (225 grams)
- 2 ounces unsweetened chocolate, finely chopped
- ½ cup granulated sugar (130 grams)
- 2 large eggs, separated
- ¼ teaspoon salt
- ¾ cup heavy whipping cream (see note)
- 1 teaspoon vanilla extract
Whipped Cream Garnish
- ¾ cup heavy whipping cream
- ⅔ tablespoons confectioners’ sugar
- ½ teaspoon vanilla extract
Instructions
Graham Cracker Crust
-
To begin, prepare your graham cracker crust. In a medium bowl, combine the graham cracker crumbs, sugar, melted unsalted butter, and the optional pinch of salt (omit if your butter is salted). Mix thoroughly until the crumbs are evenly moistened. Press this mixture firmly into the bottom and up the sides of a 9-inch pie plate. For a beautifully golden and slightly crisp crust, bake at 350°F (175°C) for 8 minutes. Once baked, allow the crust to cool completely on a wire rack before adding the filling. This prevents a soggy bottom and helps the filling set properly.
Chocolate Filling
-
First, soften the gelatin. Sprinkle the unflavored gelatin evenly over ¼ cup of cold water in a small bowl. Use the back of a spoon to gently press down any dry gelatin granules, ensuring they are fully submerged. Let this stand for 5-10 minutes, allowing the gelatin to “bloom” and absorb the water.
-
Meanwhile, prepare your double boiler (or set a heatproof bowl over a saucepan). Add a few inches of water to the bottom pot of the double boiler and bring it to a gentle simmer over medium heat. Ensure the water does not touch the bottom of the top pot/bowl.
-
Place the milk and finely chopped unsweetened chocolate in the top of the double boiler. Heat, stirring occasionally, until the chocolate is completely melted and the mixture is very hot and smooth. Remove the double boiler from the heat, then add the softened gelatin to the hot chocolate mixture, stirring continuously until the gelatin is fully dissolved and no granules remain. Set this mixture aside to cool slightly.
-
In a large mixing bowl, beat the egg yolks until they are thick and pale yellow (lemon-colored). Gradually beat in half of the granulated sugar and the vanilla extract until well combined and the mixture is fluffy. Slowly drizzle and stir the slightly cooled chocolate mixture into the egg yolk mixture. It’s important to do this gradually while whisking to temper the egg yolks and prevent them from scrambling. Once combined, set this chocolate-egg yolk mixture aside to continue cooling down to room temperature, ensuring it doesn’t get too cold and begin to gel.
-
To expedite the cooling process for the chocolate-egg yolk mixture, you can gently whisk it over a bowl of ice water (an ice bath). Alternatively, place it in the refrigerator, but keep a close eye on it and stir frequently to ensure it cools evenly and doesn’t start to set or gel around the edges. The ideal consistency is thick but still pourable.
-
In a separate, clean mixing bowl, beat the egg whites with the ¼ teaspoon of salt until soft peaks begin to form. Gradually add the remaining half of the granulated sugar, continuing to beat until stiff, glossy peaks are achieved. In a third mixing bowl, beat the heavy cream until it holds its shape and forms medium-firm peaks. Be careful not to overbeat, as it can turn grainy.
-
Now it’s time to combine everything. Gently fold about one-third of the cooled and slightly thickened chocolate mixture into the whipped egg whites. Use a rubber spatula and a delicate, upward motion to maintain the airiness. Then, fold another third of the chocolate mixture into the whipped cream, again, being careful not to deflate it. Finally, combine the egg white mixture and cream mixture into one large bowl, adding the last third of the chocolate mixture. Fold everything together gently until just combined and uniformly colored. This multi-stage folding helps distribute the dense chocolate mixture without sacrificing the light texture of the whites and cream.
-
At this point, the filling will likely be too runny to beautifully pile into your pie shell. To achieve the perfect consistency, place the entire bowl of filling in the refrigerator. Check it every 15-30 minutes, stirring gently to prevent uneven setting. As soon as it begins to thicken to a spoonable, mousse-like consistency, proceed to the next step.
-
Carefully spoon or pour a portion of the slightly thickened chocolate chiffon mixture into the cooled graham cracker crust, filling it just to the rim. Place the pie with this initial layer of filling into the refrigerator. Keep the remaining filling in its bowl in the refrigerator as well, continuing to check it every 30 minutes. Once the filling in the bowl has thickened enough to be piled high and hold its shape beautifully, gently spoon or pipe it into the center of the pie, creating an attractive dome.
-
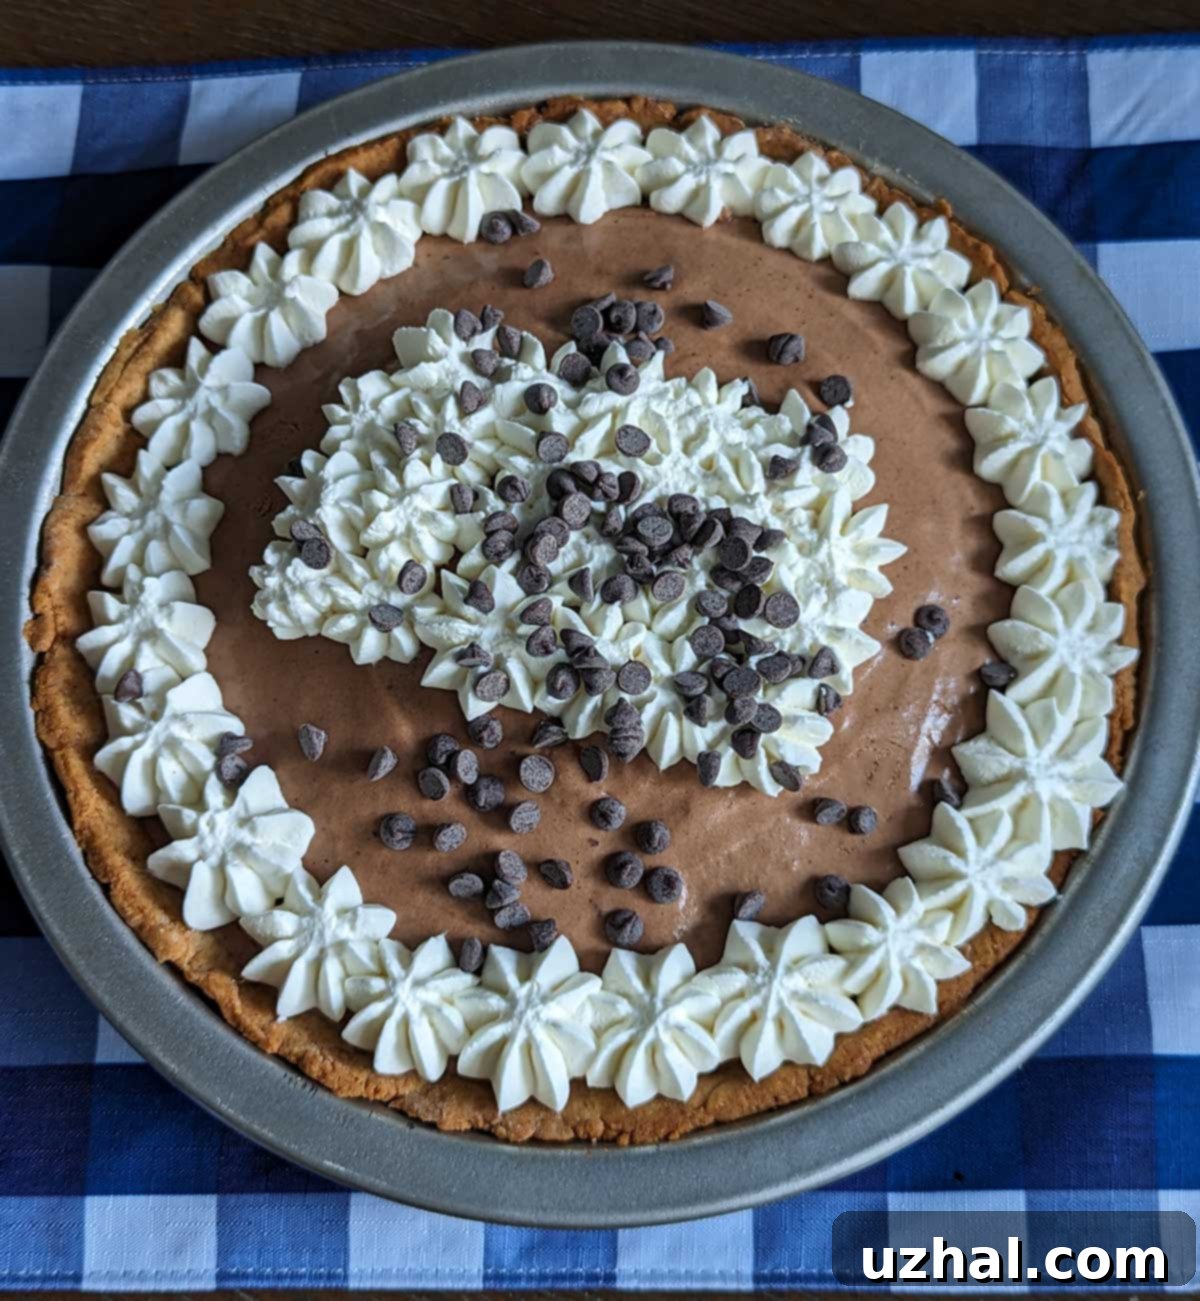
For an elegant finish, garnish the sides of the pie with piped sweetened whipped cream. To prepare, beat the ¾ cup of heavy cream with 2-3 tablespoons of confectioners’ sugar until stiff peaks form. Beat in the ½ teaspoon of vanilla extract for added flavor. Transfer to a piping bag with your desired tip and decorate.
-
Finally, chill the pie in the refrigerator for a minimum of 6 hours, or ideally, overnight. This extended chilling time is essential for the gelatin to fully set, ensuring the pie achieves its optimal light, yet stable, chiffon texture.
Notes
Tips for Chiffon Pie Perfection
Achieving the perfect, ethereal texture of a chiffon pie can be incredibly rewarding. Here are some extra tips to ensure your Unsweetened Chocolate Chiffon Pie turns out flawless every time:
- Ingredient Temperatures Matter: Ensure your egg whites are at room temperature before whipping; they will achieve much greater volume. For the chocolate mixture, always allow it to cool adequately before folding it into the whipped cream and egg whites. Too warm, and it will deflate your airy components; too cold, and it will start to set too quickly, making folding difficult.
- Gentle Folding is Key: The “chiffon” texture comes from the air incorporated into the egg whites and whipped cream. When folding these into the chocolate base, use a light, upward motion with a rubber spatula. Do not stir vigorously, as this will knock out the air and result in a dense pie.
- Don’t Skimp on Chilling Time: Patience is a virtue in chiffon pie making. The full 6 hours (or overnight) chilling time is essential for the gelatin to set completely. Rushing this step will result in a runny, unstable pie.
- Quality Unsweetened Chocolate: Since unsweetened chocolate is the star flavor, choose a high-quality brand. The nuances of its flavor will be very present in the final pie.
- Adjust Sweetness to Taste: Because this recipe uses unsweetened chocolate, you have excellent control over the final sweetness. Taste the chocolate-egg yolk mixture (before adding whites/cream) and adjust sugar if you prefer a slightly sweeter or more bittersweet profile.
- Crust Variations: While the graham cracker crust is classic, feel free to experiment with a chocolate cookie crust (like Oreos) for an extra layer of chocolatey goodness, or a shortbread crust for a buttery contrast.
- Storage: Store the pie loosely covered in the refrigerator for up to 3-4 days. Chiffon pies are best enjoyed chilled.
We hope this detailed guide encourages you to create your own unforgettable Unsweetened Chocolate Chiffon Pie. Its rich, intense chocolate flavor, coupled with an impossibly light and airy texture, makes it a perfect dessert for any occasion. Whether you’re baking for a special gathering or simply indulging in a homemade treat, this pie is sure to impress. Don’t hesitate to share your baking adventures and feedback in the comments below – we love hearing from you!
