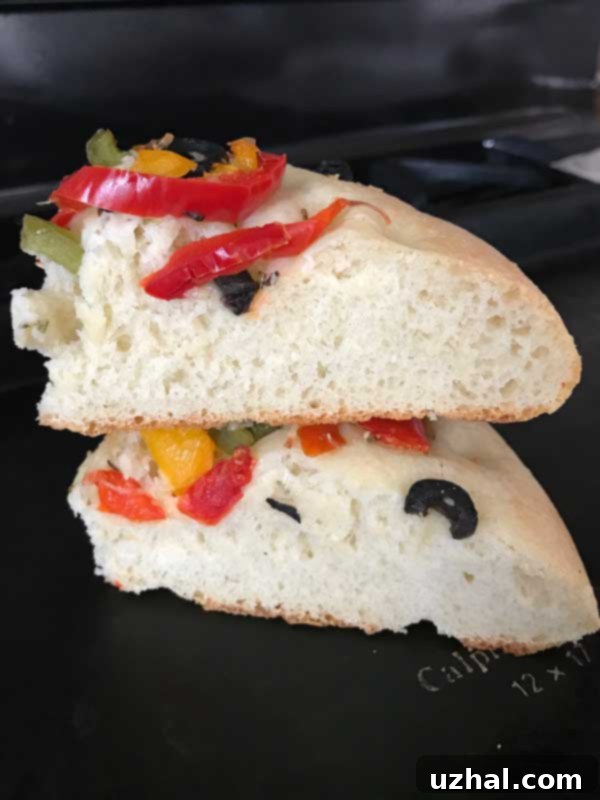
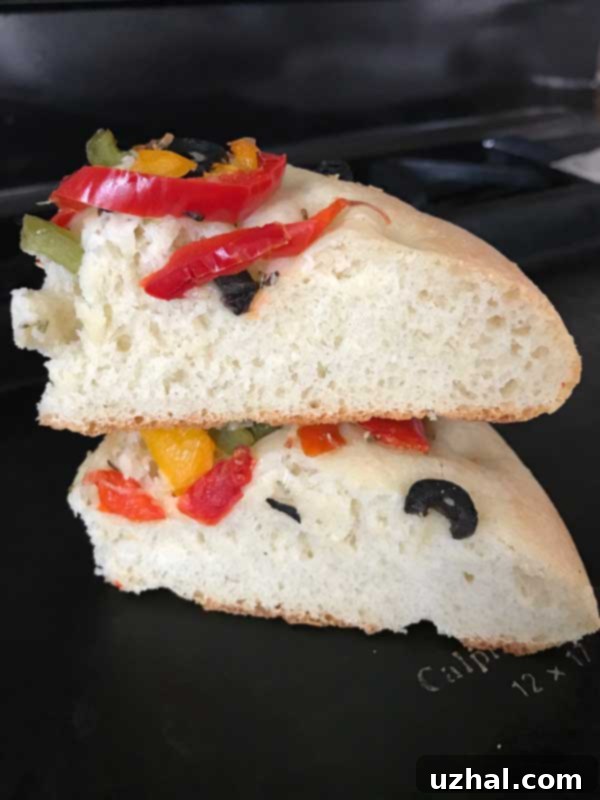
Delicious Small Batch Focaccia: Your Go-To Recipe for Easy Homemade Bread
Focaccia holds a special place in my heart, and among all the delightful things to bake, it’s consistently one of my favorites. Its rustic charm, incredible flavor, and versatile nature make it a perfect choice for any occasion. Because I love enjoying fresh focaccia often, I’ve perfected this Small Batch Focaccia recipe, making it incredibly convenient for smaller households. This recipe yields just enough dough for a single loaf, perfectly sized to serve 2 to 4 people, whether as a delicious appetizer, a side to a main course, or even as the base for a gourmet sandwich. You can keep it simple and classic, or elevate it with aromatic rosemary and other toppings. What’s more, it’s adaptable for those with dietary restrictions – you can even make it gluten-free! I’ve found that King Arthur Gluten-Free Bread Flour works exceptionally well, though it does require a slight adjustment with extra water. More detailed notes on that variation can be found further down in this article.
Kneading Focaccia Dough: By Hand, Mixer, or Food Processor
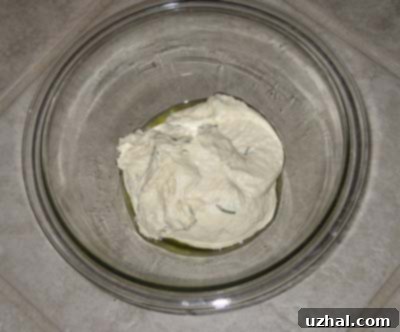
One of the beauties of this small batch focaccia recipe is its flexibility, especially when it comes to kneading the dough. Because it’s a smaller quantity, you have the option to knead it thoroughly by hand, which can be a wonderfully tactile and meditative experience. It allows you to truly feel the dough as it develops elasticity, a key indicator of a well-kneaded bread. However, if you prefer a more hands-off approach, or simply have your trusty kitchen companions at the ready, a stand mixer fitted with a dough hook works exceptionally well. I personally lean towards using my stand mixer because it’s usually already out, and both the dough and the hook are incredibly easy to clean afterwards. The machine does all the hard work, ensuring a smooth, elastic dough without breaking a sweat. For those with a food processor that includes a dough hook attachment, that’s another excellent option that yields similar results, making this small batch focaccia accessible no matter your kitchen setup.
Creative Toppings for Your Small Batch Focaccia
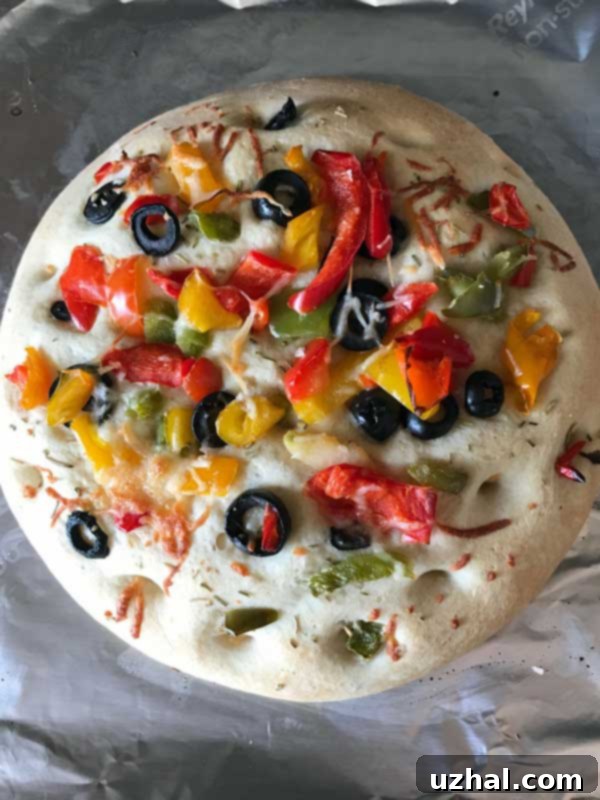
While a plain focaccia is undeniably delicious, the beauty of homemade focaccia lies in its incredible versatility, especially when it comes to toppings. This is where you can truly unleash your creativity and tailor your small batch focaccia to your exact preferences or whatever ingredients you have on hand. For a classic and irresistible upgrade, a sprinkle of grated Parmesan cheese and a scattering of briny olives can make a Rosemary Focaccia even more exciting. The savory notes of the cheese complement the herbaceous rosemary and the salty pop of the olives beautifully. However, if you’re mindful of dairy intake, have a family member who avoids cheese, or simply prefer a lighter option, there are countless other possibilities. Roasted colored peppers, with their sweet and smoky flavor, make a vibrant and delicious topping. Sliced black or green olives, sun-dried tomatoes, thinly sliced red onions, or even fresh cherry tomatoes halved can all add wonderful flavor and visual appeal. You can also opt for a simple drizzle of high-quality olive oil and a generous sprinkle of flaky sea salt, allowing the pure flavor of the bread to shine through. No matter your choice, this dough is forgiving and delicious, making it a pretty easy bread to throw together for a quick and satisfying bake.
Achieving That Perfect Fluffy Focaccia Texture
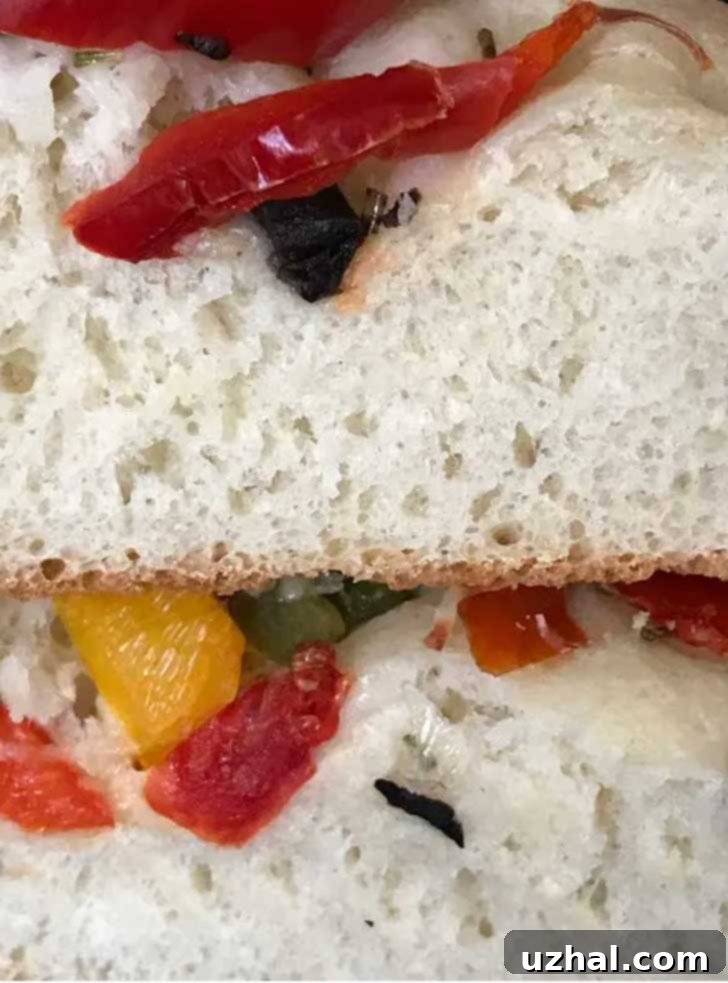
One of the defining characteristics of this particular small batch focaccia recipe is its wonderfully light and airy, almost fluffy, texture. It’s distinctly soft and tender, a characteristic that often reminds me of the exceptional focaccia I’ve enjoyed at Eataly, a renowned Italian market here in Chicago. This fluffy quality is achieved through a careful balance of ingredients and a good rise time, which allows the yeast to work its magic, creating air pockets throughout the dough. The generous amount of olive oil also contributes to its tenderness and rich flavor profile, giving it that desirable melt-in-your-mouth quality. For the topping, which further enhances both flavor and texture, I love to prepare a big handful of frozen tri-color peppers. I make sure to thaw them completely and then pat out all the excess water with paper towels – this step is crucial to prevent the bread from becoming soggy. Once dried, I gently lay the colorful peppers across the risen dough, along with some extra olives, fresh rosemary sprigs, and sometimes a little cheese, which not only adds flavor but also helps to hold the toppings in place during baking. The result is a focaccia that is not only visually stunning but also incredibly satisfying with every fluffy bite.
Important Notes for Focaccia Success: Yeast and Measurements
Over the years, as I’ve continually refined and enjoyed this small batch focaccia recipe, I’ve diligently recorded the precise gram amounts for each ingredient. This has allowed me to update the recipe to include these weights alongside the volume measurements, offering greater accuracy and consistent results for your baking endeavors. For the yeast, you have the flexibility to use either active dry or instant yeast. If you opt for active dry yeast, it’s essential to proof it first by dissolving it in warm water with a pinch of sugar, waiting for it to become bubbly and foamy – this confirms its activity. While instant yeast can often be added directly to the flour, I sometimes still proof it, just to be absolutely sure of its vitality, especially if I haven’t used that particular packet recently. If you do choose to add instant yeast directly to the flour, remember to heat your water to a slightly higher temperature, around 120-125 degrees Fahrenheit (approximately 49-52 degrees Celsius), to ensure it’s warm enough to activate the yeast effectively and jumpstart the fermentation process. Getting these foundational steps right is key to a perfectly risen and delicious focaccia.
I sincerely hope you give this small batch version a try and experience the joy of baking fresh bread at home. It’s truly a rewarding process with delicious results. However, if you find yourself needing a larger loaf, perhaps for a bigger gathering, or if you simply prefer a focaccia with a flatter and slightly denser texture, I’ve also shared a more basic focaccia recipe that we love. That recipe provides a different textural experience, offering a delicious alternative for varied preferences.
Gluten-Free Focaccia with King Arthur Gluten-Free Bread Flour
For those navigating gluten-free diets, baking delicious yeast breads can sometimes be a challenge, but I’m thrilled to share that this focaccia recipe is wonderfully adaptable! I recently tested it with King Arthur Gluten-Free Bread Flour, a fantastic new product designed specifically for yeast-leavened gluten-free baking. This flour blend truly performs well, making it much easier to achieve a satisfying bread texture. For this specific recipe, I used the equivalent amount of the King Arthur Gluten-Free Bread Flour (170 grams) as I would for regular wheat flour. However, the critical adjustment was increasing the water content to ¾ cup, as gluten-free flours absorb liquids differently and often require more hydration. Instead of traditional kneading with a dough hook, which can overwork gluten-free doughs and make them crumbly, I simply mixed all the ingredients with a paddle attachment until just combined. I then allowed the wet dough to stand and thicken for about 10 minutes, giving the flour time to hydrate fully. Following this, I gently kneaded it by folding it over on itself approximately 10 times, taking care not to aggressively handle the dough, and then shaped it into the desired 6-inch round. After a slightly shorter rise time of 25 to 30 minutes, I baked it at 400 degrees Fahrenheit for at least 20 minutes – a little longer than the directions suggest for the regular wheat flour version – to ensure a golden crust and fully cooked interior. The result was a surprisingly delicious and fluffy gluten-free focaccia!
Serving & Storage Suggestions for Your Homemade Focaccia
Once your small batch focaccia emerges from the oven, golden brown and fragrant, the best way to enjoy it is warm. Slice it into wedges or squares and serve it immediately. It’s fantastic on its own, dipped in olive oil, or alongside a hearty soup or salad. Its soft texture also makes it an ideal base for sandwiches; simply slice it horizontally and fill with your favorite deli meats, cheeses, and vegetables. To enjoy it as an appetizer, slice it thinly and serve with a charcuterie board. If you happen to have any leftovers, which is a rare occurrence with this delicious bread, store it in an airtight container at room temperature for up to 2 days. For longer storage, you can freeze individual slices or the whole loaf for up to a month. Simply wrap it tightly in plastic wrap and then foil. To reheat, thaw at room temperature and warm in a preheated oven at 350°F (175°C) for about 5-10 minutes, or until warmed through and slightly crisp.
- Rosemary Focaccia
- Focaccia Muffins
- Stand Mixer Focaccia
- Potato Focaccia with Rosemary and Sea Salt
- A Basic Focaccia Recipe
Small Batch Rosemary Focaccia Recipe
Small Batch Rosemary Focaccia
Anna
Pin Recipe
Ingredients
- ½ cup very warm water (110 degrees F / 43 degrees C)
- 1 ⅛ teaspoons yeast, active dry or instant
- 1 teaspoon sugar (4 grams)
- 1 ¼ cups bread flour or all-purpose flour (170 grams)
- ¾ to 1 teaspoon kosher salt (such as Morton)
- 1 teaspoon fresh rosemary (optional) (chopped, plus more for top, or ¼ teaspoon dried)
- 2 tablespoons olive oil
- Cornmeal for baking sheet (Can just use parchment if desired)
- 2 tablespoons grated Parmesan cheese
- Extra olive oil
- Sliced olives
Instructions
-
In a glass measuring cup or small bowl, combine the warm water, active dry yeast, and sugar. Stir gently and allow it to sit for approximately 5 minutes, or until the mixture becomes visibly bubbly and foamy. This indicates that your yeast is active and ready to work. If you are using instant yeast, you have the option to add it directly to the flour in the next step. However, if doing so, ensure your water is warmer, around 120-125 degrees F (49-52 degrees C), to properly activate the yeast without proofing it separately.
-
In a separate, larger mixing bowl, stir together the flour, salt, and chopped rosemary (if using). Create a well in the center of the dry ingredients. Pour the yeast mixture into the flour, mixing thoroughly until a shaggy dough forms. Next, stir in the two tablespoons of olive oil until well incorporated.
-
Turn the dough out onto a lightly floured surface and knead it until it becomes smooth, elastic, and no longer sticky. This process usually takes about 5-7 minutes by hand. For convenience, or if you prefer a machine to do the work, a stand mixer equipped with a dough hook attachment is ideal. Allow the mixer to knead the dough on medium-low speed for about 5 minutes until it pulls away from the sides of the bowl and forms a smooth ball. Even though this is a small batch recipe, the stand mixer makes the process effortless. Alternatively, a food processor with a dough blade can also achieve well-kneaded dough quickly.
-
Lightly coat a clean bowl with olive oil. Transfer the kneaded dough to this bowl, turning it once to coat all sides with oil (or you can simply leave it in the stand mixer bowl if it’s already oiled). Cover the bowl tightly with a clean dish towel or plastic wrap. Place it in a warm, draft-free spot and let the dough rise for approximately 45 minutes, or until it has noticeably increased in size and appears puffy.
-
Prepare your baking sheet: either sprinkle it evenly with a light layer of cornmeal to prevent sticking and add texture, or simply line it with parchment paper or nonstick foil for easy cleanup. Carefully turn the risen focaccia dough onto the prepared baking surface and gently form it into a round shape, roughly 6 inches in diameter.
-
Loosely cover the dough on the baking sheet with a piece of greased plastic wrap or an inverted mixing bowl to create a humid environment. Allow it to rest for about 30 minutes, during which time it will relax and puff up further. Preheat your oven to 400 degrees F (200 degrees C) towards the end of this resting period. Once rested, use the handle of a wooden spoon or your fingertips to gently make deep indentations across the surface of the dough – this creates those characteristic focaccia dimples. Brush the entire surface generously with extra olive oil. Finally, sprinkle with the grated Parmesan cheese, additional fresh rosemary, and sliced olives if you are using them.
-
Transfer the baking sheet to your preheated oven and bake for approximately 18 to 22 minutes, or until the focaccia is golden brown on top and cooked through. The exact time may vary slightly depending on your oven. Remove from the oven and let it cool slightly on the baking sheet before transferring to a wire rack to cool completely, or serve warm.
Notes
Baking homemade focaccia is a truly rewarding experience, filling your kitchen with an incredible aroma and yielding a delicious bread that’s perfect for so many meals. This small batch recipe ensures you can enjoy freshly baked focaccia whenever the craving strikes, without making an overly large loaf. Whether you stick to the classic rosemary, get creative with diverse toppings, or explore the gluten-free option, this recipe is designed for success and enjoyment. Happy baking!
