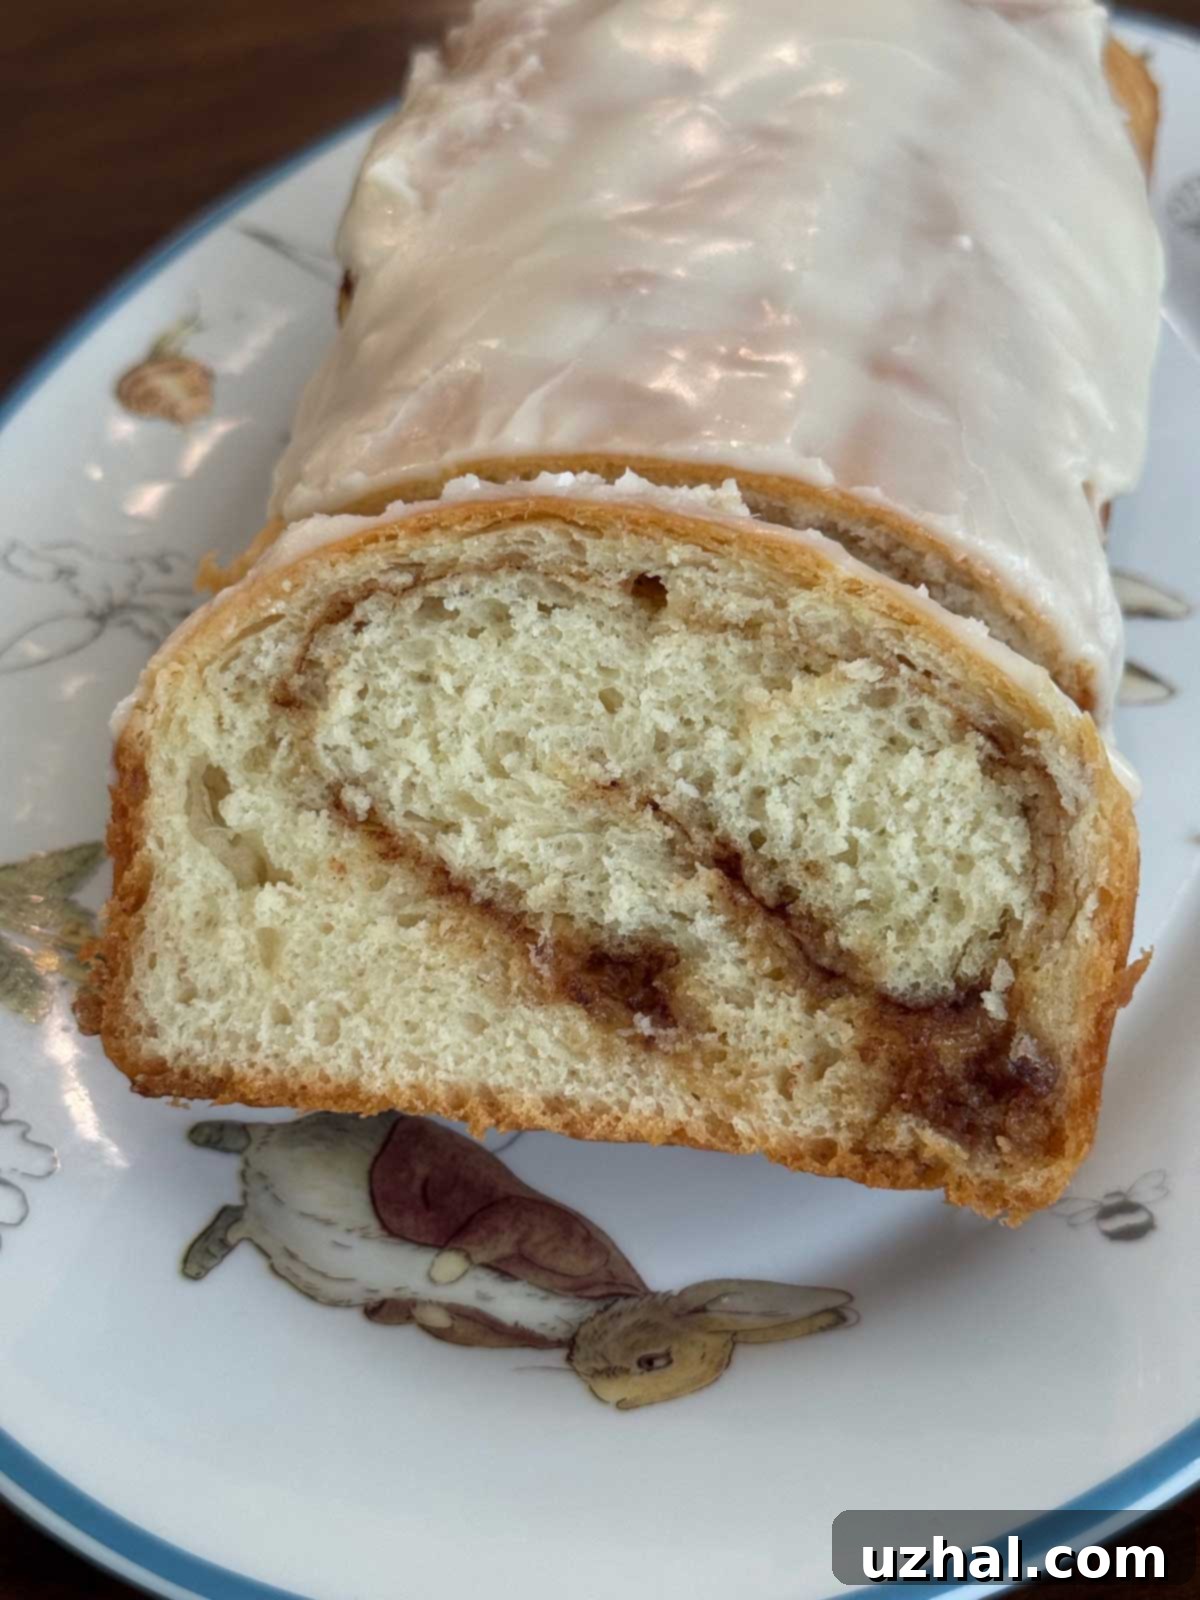
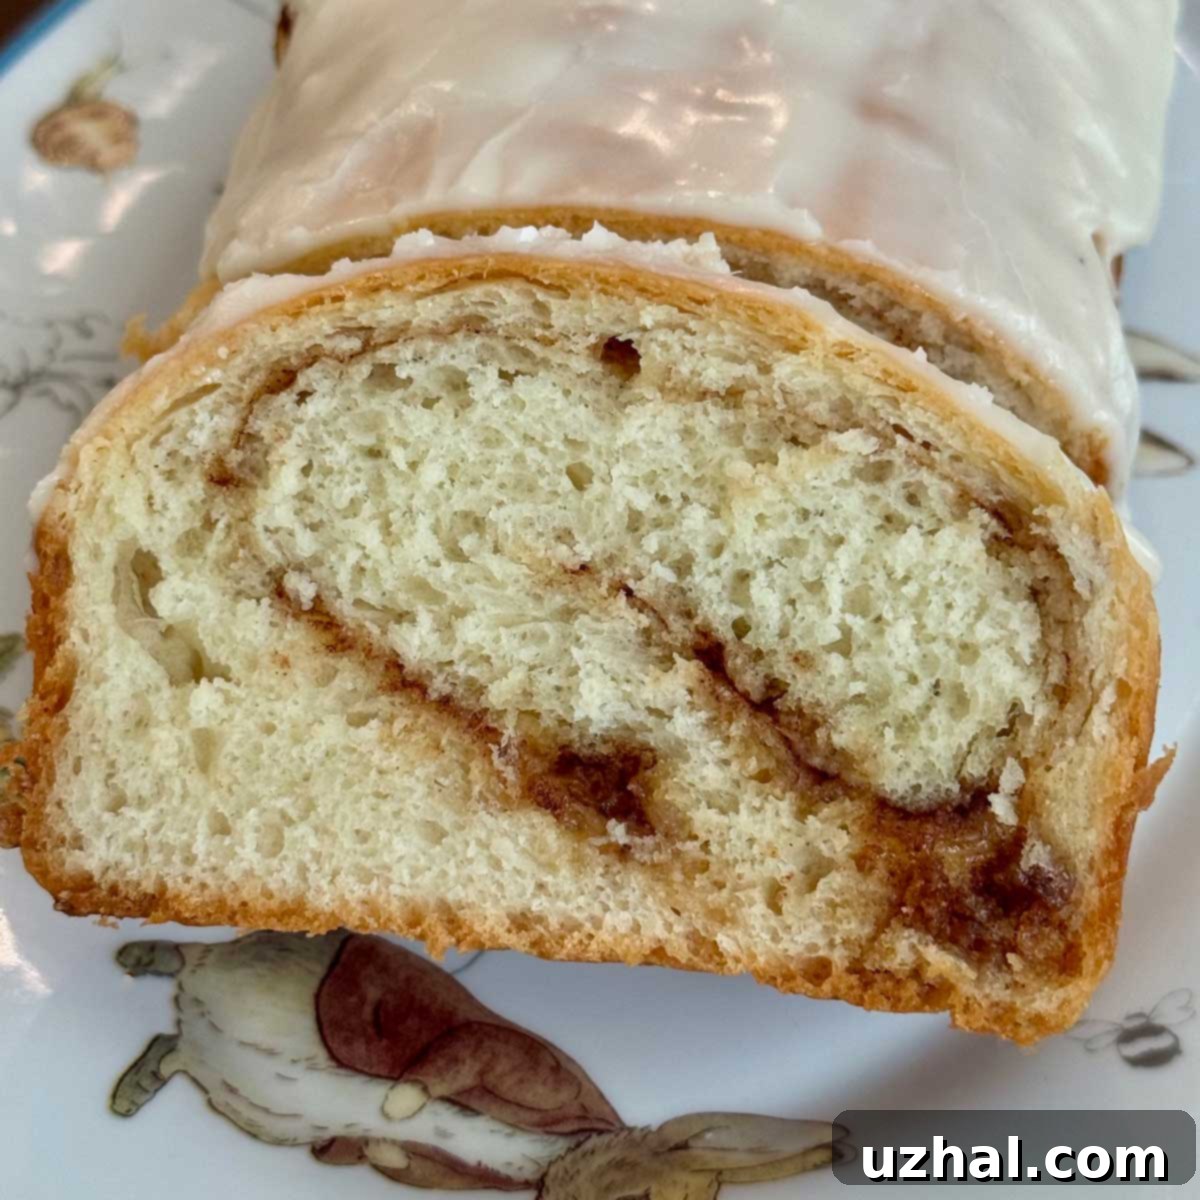
Ryan’s Irresistible Cinnamon Swirl Loaves: A Timeless Recipe for Soft, Sweet Bread
For over a decade, Ryan’s Cinnamon Swirl Loaves have been a beloved staple in my kitchen, a recipe so special it feels like a warm hug in bread form. Originally shared with me by an 18-year-old baker named Ryan (thank you, Ryan!), this recipe, which I once simply called “Cinnamon Swirl Bread,” has evolved into a family favorite prepared as two perfectly sized loaves. This change in format led to its new name, better reflecting its yield and ease of sharing. Imagine the comforting flavor and tender texture of a classic cinnamon roll, but in a convenient, sliceable loaf—that’s precisely what you get with this extraordinary bread. It’s incredibly soft, rich, and bursting with aromatic cinnamon, making it a perfect treat for breakfast, brunch, or an anytime snack.

One of the most remarkable aspects of Ryan’s Cinnamon Swirl Loaves is the dough itself. It’s incredibly forgiving and a joy to work with, even for novice bakers. While it might start out feeling a bit sticky to the touch, a mere 5 minutes of kneading with the dough hook of a stand mixer transforms it into a smooth, elastic, and perfectly consistent dough. This softness is key to the bread’s tender crumb, making it almost melt in your mouth. I typically divide the dough to create two 8×4 inch loaves, which is the ideal amount for our family to enjoy fresh. This size also makes them much easier to handle, slice neatly, and ensures they bake more evenly and quicker than a single, very large loaf. However, if you prefer a grander, single loaf, that option is certainly available—just be mindful of the dough’s richness and adjust baking time accordingly.
To Ice or Not to Ice? The Sweet Dilemma of Cinnamon Swirl Loaves
For many, this cinnamon swirl bread evokes a strong sense of nostalgia, reminiscent of the delicious loaves sold in school cafeterias back in the late ’70s. Those cherished memories often include warm slices generously covered with a sweet, milky icing, served up by the friendly lunch ladies. Given that this bread shares a similar taste and wonderfully soft texture to a giant sweet roll, adding a decadent icing is absolutely an option, and one I highly recommend if you want to elevate it to dessert status. A simple glaze can transform these already delicious loaves into an even more indulgent treat, perfect for special occasions or when you simply crave that extra touch of sweetness. Whether you opt for a classic powdered sugar glaze or a rich cream cheese frosting, a layer of icing will make these loaves even more irresistible.
Mastering Your Bake: Essential Ingredient Notes for Cinnamon Swirl Loaves
The success of these cinnamon swirl loaves lies in understanding the role of each ingredient. Here’s a detailed look at what goes into making this extraordinary bread, ensuring you achieve that perfect soft texture and rich flavor every time:
- All-Purpose Flour — I’ve experimented with both bread flour and all-purpose flour for this recipe, and both yield excellent results. Loaves made with all-purpose flour tend to be slightly softer and more tender, which complements the “cinnamon roll in loaf form” experience. Bread flour, with its higher protein content, will give you a slightly chewier bread with a finer crumb. The amount provided in the recipe is a range (400-520 grams or 3-4 cups), as flour absorption can vary. It’s always best to start with the lower end (around 3 cups or 400 grams) and gradually add more flour as needed during kneading until the dough reaches the desired consistency – soft but not overly sticky.
- Sugar — The generous amount of sugar is what truly makes this bread a sweet roll experience. With ¼ cup in the dough itself and a decadent ⅔ cup in the filling, there’s ample sweetness distributed throughout. This not only contributes to the delightful flavor but also helps tenderize the dough and promotes browning during baking, creating that beautiful golden crust.
- Salt & Yeast — Salt is crucial for balancing the sweetness and enhancing the overall flavor profile of the bread. If you’re using salted butter, remember to reduce the salt in the dough to ¾ teaspoon to avoid an overly salty taste. For the yeast, I highly recommend quick-rising (also known as instant) yeast. Unlike active dry yeast, quick-rising yeast doesn’t require proofing in water beforehand, saving you a step and speeding up the rising process significantly. This means you can enjoy your fresh loaves much sooner!
- Butter — Unsalted butter is preferred for better control over the salt content in the recipe. As mentioned, if you use salted butter or margarine, adjust the salt accordingly. For the filling, the butter’s consistency is paramount. It should be truly softened—think “sloshy” or “pudding-like” in texture. This ensures it spreads easily and melds perfectly with the cinnamon and brown sugar, creating that irresistible, gooey swirl.
- Whole Milk — Whole milk is highly recommended for its fat content, which contributes significantly to the bread’s rich flavor and incredibly soft texture. While low-fat milk might work, I advise against using skim milk as it will result in a drier, less tender loaf. If fresh milk isn’t available, you can use milk powder. Simply add 2 tablespoons of milk powder to the dry ingredients and substitute the 1 ¼ cups of milk with approximately 270 grams of water.
- Vanilla extract — While optional, a touch of vanilla extract adds a lovely depth of flavor that complements the cinnamon and sugar beautifully. It rounds out the sweetness and adds a subtle aromatic note, enhancing the overall deliciousness of the finished product.
Tips for Success: Achieving the Perfect Cinnamon Swirl Loaves
Baking homemade bread can be incredibly rewarding, and with a few key tips, your Ryan’s Cinnamon Swirl Loaves will turn out perfectly every time:
- Temperature Control is Key: Ensure your milk and butter mixture is heated until very hot, then cooled to precisely 130°F (54°C). This temperature is critical for activating the yeast without killing it. Use a reliable thermometer for accuracy.
- Don’t Over-Flour the Dough: This dough is meant to be soft and rich. Resist the temptation to add too much extra flour during kneading or shaping, as this can lead to a dry, dense loaf. The butter and gluten will make it workable, even if it feels a little sticky at first.
- Proper Kneading: Knead the dough until it’s smooth and elastic. This develops the gluten, which gives the bread its structure and chewy yet tender texture. Even though it’s soft, it should pull away from the bowl and feel resilient.
- First Rise Patience: Allow the dough to double in bulk in a warm place. This process is essential for developing flavor and achieving a light, airy texture. Instant yeast speeds this up, but don’t rush it.
- Even Spreading of Filling: When spreading the softened butter and cinnamon sugar mixture, try to get an even layer. This ensures a consistent, beautiful swirl and even distribution of flavor in every slice.
- Don’t Over-Rise the Second Time: The second rise (proof) in the loaf pans should also be until doubled, but be careful not to over-proof. Over-risen dough can collapse in the oven, leading to a dense texture. Aim for loaves that look puffy and risen but not overly airy or fragile.
- Tapping for Doneness: The “hollow sound when tapped” is a classic baker’s trick to check for doneness. Along with a golden-brown crust, it indicates that the bread is fully baked through.
Recipe: Ryan’s Cinnamon Swirl Loaves

Cinnamon Swirl Loaves
Anna
Pin Recipe
20 minutes
30 minutes
1 hour
30 minutes
2 hours
20 minutes
Breakfast, Brunch
American
2
loaves
Ingredients
-
3 or 4
cups
all-purpose or bread flour
(400-520 grams) -
¼
cup
granulated sugar
(50 grams) -
1
teaspoon
salt -
1
packet
quick rise yeast (2 ¼ teaspoons) -
1
large
egg -
4
tablespoons
unsalted butter, softened
(56 grams) -
1 ¼
cups
whole milk
(280 grams) - Optional ¼ teaspoon vanilla extract
Filling:
-
6
tablespoons
softened butter
(84 grams) -
2 ½
teaspoons
ground cinnamon -
⅔
cup
very firmly packed dark brown sugar
(130 grams)
Topping
- Extra melted butter for brushing on the top
- Optional: Icing (recipe in notes)
Instructions
-
In the bowl of your stand mixer, combine 3 cups (400 grams) of the flour, the granulated sugar, salt, and the quick-rise yeast. Give them a quick stir to ensure they are well mixed.
-
In a small saucepan, gently heat the 4 tablespoons of butter and 1 ¼ cups of milk together until the mixture is very hot (but not boiling). Remove from heat and let it cool down to approximately 130 degrees F (54 degrees C). It’s crucial to use a thermometer for accuracy here, as too hot will kill the yeast, and too cool won’t activate it properly.
-
Pour the cooled milk and butter mixture into the flour mixture in the stand mixer. Then, add the large egg (and optional vanilla extract, if using). Stir everything together until just combined. You can do this by hand with a sturdy spoon or using the paddle attachment of your stand mixer on low speed.
-
Gradually add the remaining cup of flour, a quarter cup at a time, until the dough is no longer excessively sticky. The exact amount of flour can vary based on humidity and flour type. If you measured your flour by weight (grams), you will likely use most, if not all, of it. If measuring by volume or using bread flour, you might need slightly less. The goal is a soft, pliable dough.
-
Switch to the dough hook attachment of your stand mixer. Knead the dough on medium speed for about 5 minutes, or until it becomes smooth and elastic. This is a very soft and rich dough, so you’ll probably need to stop the mixer occasionally to scrape the dough from the sides of the bowl and off the hook. As you scrape, you should notice its elasticity and how it peels cleanly away. The butter in the dough, combined with developed gluten, will keep it workable, but it will remain soft. Resist the urge to add more and more flour, as this will result in a dry, dense loaf instead of the desired tender crumb.
-
Lightly grease a large bowl with cooking spray or a little oil. Place the kneaded dough into the bowl, turning it once to coat. Cover the bowl tightly with plastic wrap or a clean kitchen towel, and let it rise in a warm, draft-free place until it has doubled in bulk. With quick-rise yeast, this typically takes about 45 minutes to 1 hour, depending on your ambient temperature.
-
Once the dough has risen, gently punch it down to release the air. Turn the dough out onto a lightly floured work surface or a pastry mat. Divide the dough into two equal halves. Take one half and, using your hands or a rolling pin, pat or roll it into an 8×12 inch rectangle. Evenly brush half of the 6 tablespoons of softened butter over the entire surface of the rectangle, leaving a small border at one of the short ends. In a separate small bowl, mix together the ground cinnamon and dark brown sugar, then sprinkle half of this mixture evenly over the buttered dough.
-
Starting at the short end of the rectangle where you did not leave a border, tightly roll the dough into a log. Pinch the ends of the log firmly closed to seal the filling inside, and then tuck them neatly underneath the log. Prepare an 8×4 inch loaf pan by greasing it and lining it with parchment paper (with overhang for easy lifting). Place the rolled dough log into the prepared pan. Repeat this entire process with the remaining dough and filling ingredients for the second loaf.
-
Cover the loaf pans with plastic wrap or a clean towel and let them rise in a warm place until doubled in bulk, which typically takes another 30-45 minutes. Be careful not to let them over-rise, as this can cause the loaves to deflate during baking, resulting in a denser texture. They should look puffy and light.
-
Preheat your oven to 350 degrees F (175 degrees C).
-
Just before baking, brush the tops of the risen loaves generously with extra melted butter. Place the loaf pans in the preheated oven and bake for approximately 30-40 minutes, or until the tops are beautifully golden brown and the loaves sound hollow when gently tapped on the bottom. If you decide to make one very large loaf or use a different sized pan, be sure to adjust your baking time accordingly; it may require longer to bake through completely.
Notes
Serving and Storage Suggestions
These Cinnamon Swirl Loaves are best enjoyed warm, straight from the oven, with a cup of coffee or tea. They make a fantastic breakfast or brunch item, but are equally delightful as a sweet snack any time of day. Try them plain, or with a generous smear of cream cheese, or as the base for a delightful bread pudding!
Storage: To keep your loaves fresh, store them at room temperature in an airtight container or a bread bag for up to 3-4 days. For longer storage, you can freeze individual slices or whole loaves. Wrap them tightly in plastic wrap, then again in aluminum foil, and place in a freezer-safe bag. They will keep well in the freezer for up to 2-3 months. Thaw at room temperature and warm gently in the oven or microwave for that fresh-baked taste.
Cinnamon Swirl Loaves, Cinnamon Bread, Sweet Bread, Homemade Bread, Breakfast Bread
Tried this recipe?
Let us know how it was!
