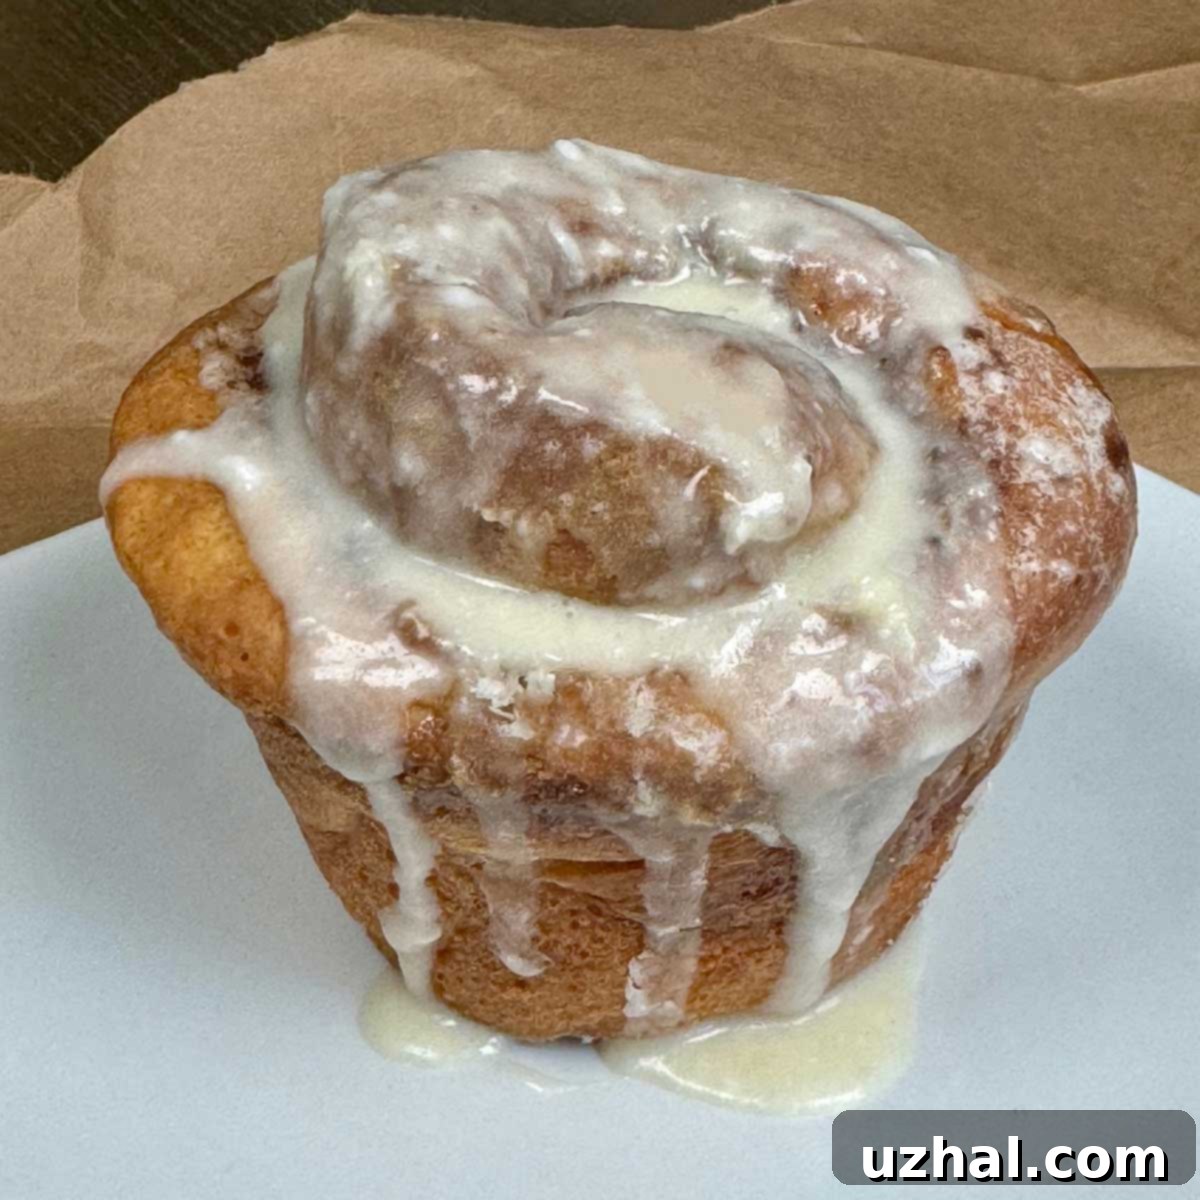
Easy 90-Minute Cinnamon Rolls: The Ultimate Quick & Fluffy Recipe with Instant Yeast
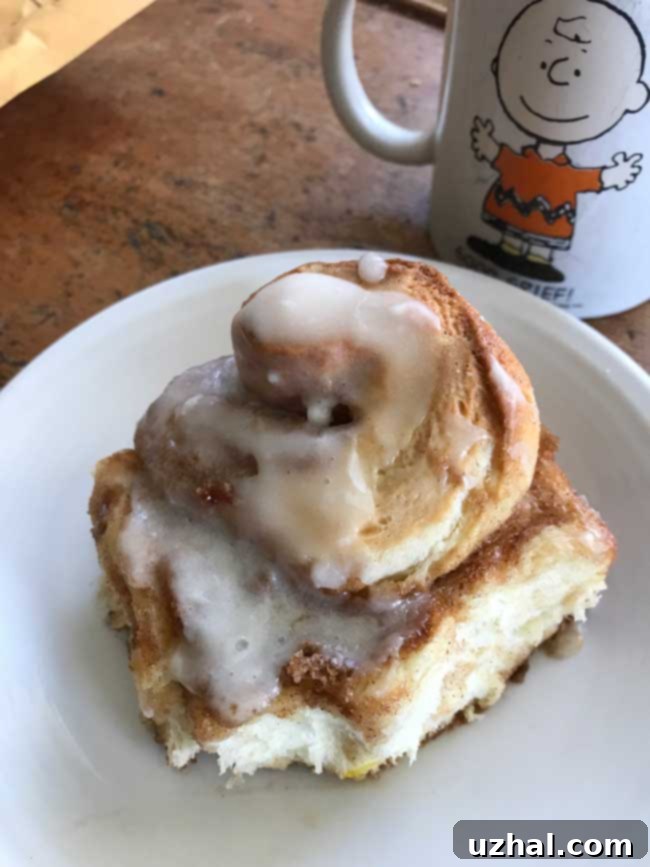
Discover the magic of homemade cinnamon rolls in just 90 minutes! This cherished recipe, often referred to as “Cinnamon Rolls with Instant Yeast,” is my absolute go-to for incredibly soft, gooey, and utterly delicious breakfast treats. While you *can* use muffin tins for a unique shape and texture, this versatile dough is perfect for any pan, always delivering exceptional results. Whether you’re a seasoned baker or new to yeast, this recipe promises a delightful experience, guaranteed to impress even the most discerning palates (and perhaps even Charlie Brown!). Prepare for your kitchen to be filled with the irresistible aroma of warm cinnamon and sweet dough.
The Truth About 90-Minute Cinnamon Rolls: Is It Achievable?
The name “90 Minute Cinnamon Rolls” isn’t a marketing gimmick – it’s an achievable goal! While baking times can naturally vary based on your kitchen’s temperature, altitude, and your personal efficiency, this recipe is designed for speed without compromising on flavor or texture. As an experienced baker, I’ve consistently hit this timeline, and many others find it perfectly doable, especially when the motivation of a warm, fresh cinnamon roll for breakfast is involved. Imagine waking up to that delightful scent and having these ready before everyone else is even out of bed!
Let’s break down how this rapid timeline is accomplished, focusing on efficient steps and leveraging the power of instant yeast:
- Step 1: Prep & Combine Wet Ingredients (8 minutes)
Quickly heat milk in the microwave, then stir in butter to melt and cool to lukewarm. While that’s happening, get your mixer bowl ready and accurately weigh your dry ingredients. Precision in weighing saves time and ensures consistent results. - Step 2: Mixing and Kneading (7 minutes)
Begin by mixing the initial flour, yeast, sugar, and salt with your wet ingredients. Then, use a dough hook on a stand mixer for efficient kneading. Gradually add the remaining flour until the dough is smooth and elastic. This hands-off kneading is a key time-saver. - Step 3: Short Rest for the Dough (10 minutes)
Unlike traditional recipes requiring long proofing times, instant yeast allows for a much shorter rest. This brief period is just enough to let the gluten relax slightly, making the dough easier to work with. Feel free to extend this rest a bit if you need extra time for other prep. - Step 4: Shaping the Dough (5 minutes)
This dough is incredibly forgiving and easy to handle. Whether you choose to roll it out with a pin or simply press it into a rectangle with your hands, this step is surprisingly quick. The short rest helps prevent stickiness, making it a smooth process. - Step 5-10: Filling, Rolling, Cutting, and Placing (5 minutes)
A rapid succession of steps! Liberally sprinkle your spiced brown sugar and butter filling, then roll the dough into a tight spiral. With a sharp knife or even unflavored dental floss, quickly cut the log into individual rolls. Place them into your prepared muffin cups or baking pan without delay. - Step 11: Final Rise (30 minutes)
This is the primary rising time, where the instant yeast truly shines. In a warm spot, your rolls will double in size, becoming light and fluffy, ready for the oven. This is a crucial, but passive, stage. - Step 12: Baking to Golden Perfection (20 to 25 minutes)
Once risen, these rolls bake up beautifully in less than half an hour. Keep an eye on them for that perfect golden-brown hue. - Step 13: Icing Prep & Finish (During baking)
While your cinnamon rolls are baking, you have ample time to whip up the delicious icing. This ensures that as soon as they emerge from the oven, you can smother them in that sweet, creamy glaze, ready to serve warm.
By streamlining the process and utilizing instant yeast, these 90-minute cinnamon rolls are not a myth but a delightful reality. Get ready to enjoy fresh, homemade goodness in record time!
The Power of Zippy Yeast: Why SAF Gold Label Instant Yeast?
The secret to these incredibly fast-rising cinnamon rolls lies in the yeast, specifically SAF Gold Label Instant Yeast. Often referred to simply as “SAF yeast,” this brand (Le Saffre Saf-Instant) comes in two main types: red label and gold label. While the red label is a versatile choice for most bread types, the gold label is meticulously formulated for high-sugar doughs, which perfectly describes these sweet cinnamon rolls.
However, my personal preference (and a useful tip!) is to exclusively purchase and use the gold label SAF instant yeast for all my baking, regardless of sugar content. I’ve found it performs exceptionally well across the board, providing a reliable and vigorous rise every time. This means less confusion in the pantry and consistently excellent results.
Instant Yeast vs. Active Dry Yeast: What’s the Difference?
It’s important to understand why instant yeast is critical for our 90-minute timeline. Unlike active dry yeast, which typically needs to be dissolved in warm liquid and proofed (activated) for 5-10 minutes before being added to dry ingredients, instant yeast can be mixed directly with the flour and other dry ingredients. Its granules are smaller, and it’s designed to activate quickly once it comes into contact with the liquid in the dough. This eliminates a crucial step in traditional bread making, saving you precious minutes and making the process more straightforward.
Tips for Working with Instant Yeast:
- Storage: Keep instant yeast in an airtight container in the freezer for optimal longevity. It will remain active for months, if not years.
- Temperature: While instant yeast doesn’t require proofing, ensure your liquids (milk and water in this recipe) are lukewarm, not too hot (which can kill the yeast) or too cold (which will slow its activation).
- Consistency: Trust the yeast! It works quickly, so don’t be tempted to overproof the dough, especially during the initial short rest.
Using SAF Gold Label Instant Yeast guarantees a strong, consistent rise, contributing significantly to the fluffy texture and quick preparation time of these phenomenal cinnamon rolls.
The Delight of Jumbo Muffin Cups: A Secret for Perfect Cinnamon Rolls
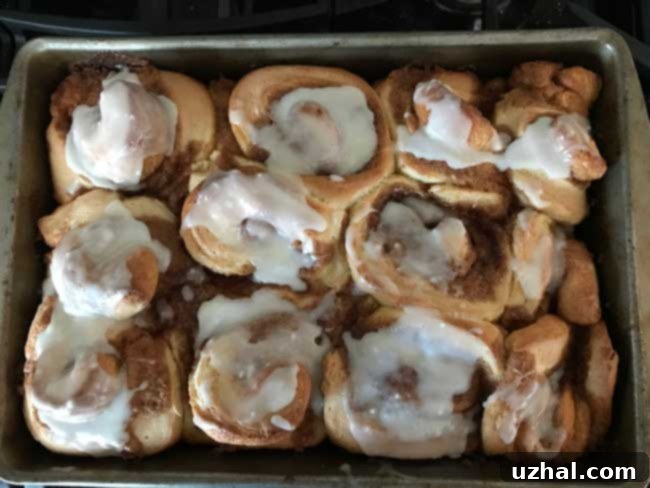
While this recipe is incredibly adaptable and can be baked in a standard 9×13 inch pan, I highly recommend using jumbo muffin cups for an elevated cinnamon roll experience. The individual compartments offer several distinct advantages that truly enhance the final product, transforming a great roll into an unforgettable one.
Benefits of Baking in Jumbo Muffin Cups:
- Taller Rise: The confined space of the muffin cup encourages the rolls to rise upwards rather than spreading outwards. This results in beautifully tall, impressive-looking cinnamon rolls with a more defined spiral.
- Irresistibly Chewy Sides: The direct contact of the dough with the hot metal of the muffin tin creates a slightly chewier, caramelized exterior on the sides of each roll. This textural contrast adds another layer of enjoyment.
- Gooey, Caramelized Bottoms: This is arguably one of the best perks! The brown sugar and butter from the filling often seep down and caramelize slightly on the bottom of the muffin cup during baking. This creates a wonderfully sticky, sweet, and deeply flavorful bottom crust that is absolutely divine.
- Portion Control & Easy Serving: Each roll bakes up perfectly portioned, making them easy to serve individually without tearing or mess.
Important Tips for Using Muffin Cups:
To fully enjoy these benefits and ensure your cinnamon rolls come out cleanly, remember to grease your jumbo muffin cups exceptionally well. I recommend generously brushing the cups with softened butter using a pastry brush. You can do this efficiently while your dough is in its short resting period, maximizing your 90-minute timeline. Don’t be shy with the butter – it helps create that delicious, slightly crispy edge and prevents sticking.
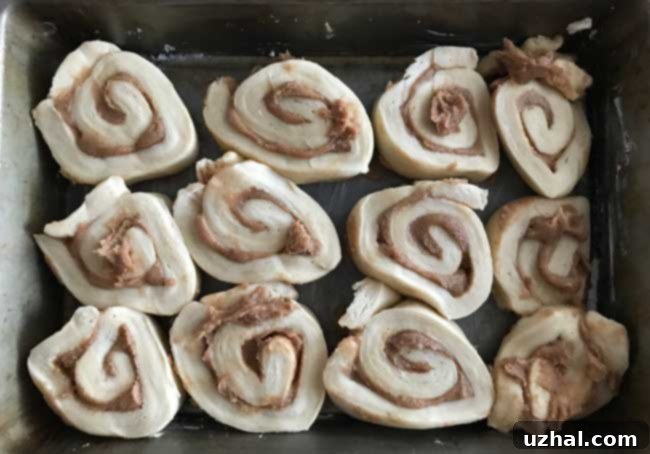
I’ve experimented with both regular and jumbo muffin cups. While a regular-sized muffin cup can yield smaller, charming cinnamon rolls (as seen in the older photo below), the jumbo size truly allows for that satisfying, substantial cinnamon roll experience with all the aforementioned textural advantages. For the best results with this recipe, jumbo is the way to go!
Cream Cheese Icing or Simple Glaze: Customizing Your Topping
No cinnamon roll is truly complete without a generous slathering of sweet icing, but whether that includes cream cheese is entirely up to your preference and what you have on hand. My recipe offers a classic cream cheese icing, which adds a delightful tangy richness that beautifully complements the sweet cinnamon filling. This is the epitome of classic cinnamon roll bliss!
When to Opt for Cream Cheese Icing:
- For a truly decadent and traditional cinnamon roll experience.
- When you love that slight tang that balances the sweetness.
- If you prefer a thicker, more opaque icing.
Simple Glaze Alternative:
If you don’t have cream cheese, or simply prefer a lighter, sweeter glaze, you can easily omit it. The icing will be thinner and more translucent, but still wonderfully sweet and will melt beautifully over the warm rolls. I’ve even made a perfectly delicious icing with just melted butter, powdered sugar, a splash of vanilla, and enough water or milk to reach a pourable consistency. Don’t let the absence of cream cheese deter you from making these incredible rolls!
Tips for Perfect Icing Consistency:
- Start Small: When adding milk or water to your powdered sugar, start with just one tablespoon and mix well. Gradually add more, a teaspoon at a time, until you reach your desired consistency. It’s easier to add more liquid than to fix an icing that’s too thin.
- Warm Rolls, Melted Icing: For the best experience, frost your cinnamon rolls while they are still warm. The icing will slightly melt and seep into the nooks and crannies, creating an even gooier treat.
Experiment with different flavorings too! A tiny pinch of almond extract, a hint of lemon zest, or even a dash of maple syrup can add a unique twist to your homemade cinnamon roll icing.
The Unsung Hero: The Importance of Salt in Cinnamon Rolls
Salt often gets overlooked in sweet recipes, but it plays a crucial role in enhancing flavor and balancing sweetness, even in something as indulgent as cinnamon rolls. Since first developing this recipe, I’ve refined the amount of salt in the dough, increasing it from ½ teaspoon to a more impactful ¾ teaspoon. This seemingly small adjustment makes a significant difference in the overall taste profile, preventing the rolls from being overly sweet and adding depth.
Salted vs. Unsalted Butter: Adjusting Your Salt Levels:
- Unsalted Butter (Recommended): If, like me, you typically use unsalted butter for the dough, then ¾ teaspoon of salt is the ideal amount to achieve that perfect flavor balance. Unsalted butter gives you precise control over the salt content in your baking.
- Salted Butter: If you opt for salted butter in your dough, you might want to stick with the original ½ teaspoon of salt. This will prevent your dough from becoming too salty, as salted butter already contributes a notable amount.
Don’t Forget Salt in the Filling!
The filling also benefits greatly from a touch of salt. If you’re using unsalted butter in your cinnamon-brown sugar mixture, be sure to add a pinch of salt – about ⅛ to ¼ teaspoon. This small addition helps to cut through the richness of the brown sugar and cinnamon, enhancing their flavors and making the filling even more addictive.
Remember, salt isn’t just for savory dishes; it’s a fundamental flavor enhancer that elevates the entire profile of your baked goods. Don’t skip it!
Frequently Asked Questions (FAQ)
Can I prepare the dough ahead of time?
While this recipe is designed for speed, you can certainly prepare the dough the night before. After kneading (Step 2), place the dough in a greased bowl, cover it tightly with plastic wrap, and refrigerate overnight. In the morning, let it come to room temperature for about 30-60 minutes before proceeding with rolling, filling, and the final rise (Step 4 onwards). The final rise might take a bit longer if the dough is still cold.
What if my dough isn’t rising?
The most common reasons for dough not rising are inactive yeast or liquids that are too hot or too cold. Ensure your instant yeast is fresh (store in the freezer!) and that your milk/water mixture is lukewarm (around 105-115°F or 40-46°C). Your kitchen’s ambient temperature also plays a role; a warm, draft-free spot is ideal for rising.
Can I add nuts or raisins to the filling?
Absolutely! Chopped pecans or walnuts, or even plump raisins, make wonderful additions to the filling. Simply sprinkle them over the butter/sugar mixture before rolling up the dough. This adds extra texture and flavor dimension.
How do I store leftover cinnamon rolls?
Store cooled cinnamon rolls in an airtight container at room temperature for up to 2-3 days. For longer storage, refrigerate for up to a week. To reheat, microwave individual rolls for 15-30 seconds or warm them in a preheated oven at 300°F (150°C) for about 5-10 minutes until soft and warm.
Can I freeze these cinnamon rolls?
Yes, you can! There are a couple of options:
Baked and Frosted: Freeze individual baked and frosted rolls wrapped tightly in plastic wrap, then in foil. Thaw overnight in the refrigerator and reheat.
Unbaked (After the final rise): After the rolls have completed their 30-minute rise in the muffin cups or pan, cover tightly and freeze. When ready to bake, transfer directly from the freezer to a preheated oven (no thawing needed), and bake for an additional 10-15 minutes, or until golden brown and cooked through.
- Pecan Pie Muffins
- Muffin Tin Keto Chocolate Chunk Cookies
- Holiday Cookie Tin Ideas
- Jumbo Banana Chocolate Chip Muffins
- Cinnamon Roll Biscotti
Recipe

90 Minute Cinnamon Rolls with Instant Yeast
Anna
Pin Recipe
Equipment
-
Stand mixer with dough hook
-
Silicone Pastry Brush
-
Jumbo Muffin Tin (optional, but recommended for tall rolls)
Ingredients
- ¾ cup milk
- 4 tablespoons unsalted butter (cut into chunks, or use salted butter and adjust salt in dough)
- 3 ¼ cups all-purpose flour, divided use (approx. 410 grams)
- 2 ¼ teaspoons instant yeast (such as SAF Gold Label)
- ¼ cup granulated sugar (50 grams)
- ¾ teaspoon salt (use ½ tsp if using salted butter)
- ¼ cup water
- 1 large egg
Filling:
- 1 cup dark brown sugar, packed (200 grams)
- 1 tablespoon ground cinnamon
- ½ cup butter, softened (salted, or use unsalted and add ⅛ to ¼ tsp salt)
Icing
- 1 tablespoon butter, melted (14 grams)
- 1 cup powdered sugar
- 1 tablespoon cream cheese (softened; optional for a thinner glaze, use heavy cream or extra milk instead)
- 1-2 tablespoons milk (or heavy cream, as needed for consistency)
- ¼ teaspoon vanilla extract
Instructions
-
Prepare Milk & Butter: Heat the milk in a small saucepan over medium heat until it just begins to bubble around the edges; remove from heat. Stir in the 4 tablespoons of butter until completely melted. Let this mixture cool to lukewarm (about 105-115°F or 40-46°C). Alternatively, quickly heat the milk in a microwave-safe cup for about 1 minute, stirring every 30 seconds, then add the butter to the hot milk and let cool.
-
Mix Dough: In a large mixing bowl (or the bowl of a stand mixer), combine 2 ¼ cups (280 grams) of the all-purpose flour, instant yeast, granulated sugar, and salt; mix well with a whisk. Stir in the ¼ cup water, the large egg, and the lukewarm milk/butter mixture. Begin mixing with a scraper or low speed on your stand mixer. Gradually add the remaining flour (about ½ cup at a time), stirring well after each addition, until the dough comes together. Once the dough has just pulled together, transfer it to a lightly floured surface and knead until smooth and elastic, about 5 minutes. If using a stand mixer, attach the dough hook and knead on medium-low speed until the dough is smooth and elastic (my preferred method!).
-
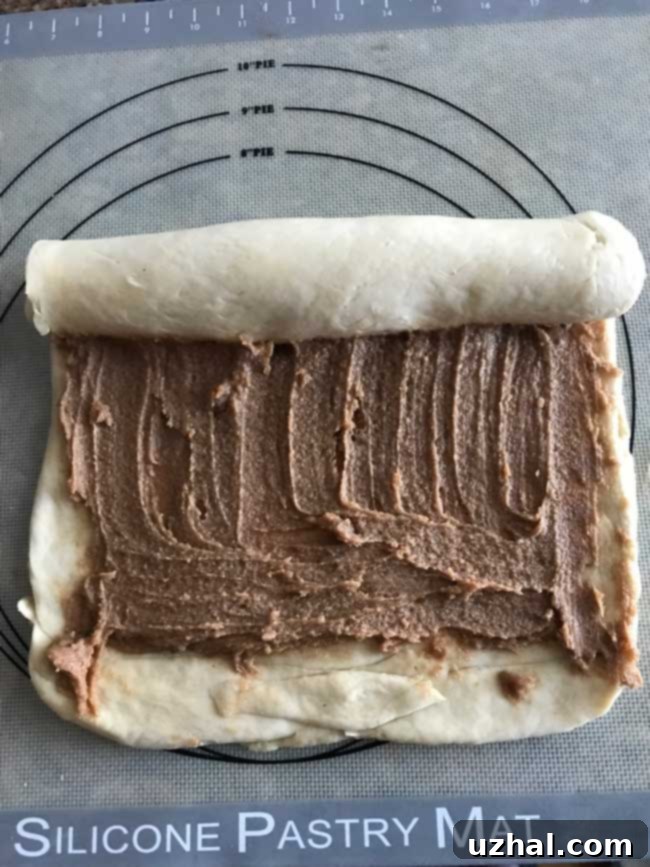
Short Rest & Prepare Filling: Lightly cover the dough with a damp cloth or plastic wrap and let it rest in the bowl for 10 minutes. During this brief resting period, prepare your filling: In a small bowl, thoroughly mix together the dark brown sugar, ground cinnamon, and ½ cup softened butter until well combined and paste-like. If using unsalted butter for the filling, add ⅛ to ¼ teaspoon of salt here.
-
Shape & Rise: On a lightly floured surface, roll out (or simply press with your hands, as the dough is quite pliable) the rested dough into a 12×9 inch rectangle. Evenly spread the prepared butter/sugar/cinnamon mixture over the entire surface of the dough. Carefully roll up the dough tightly from the short (9-inch) side to form a log, then pinch the seam gently to seal it. Using a sharp knife or unflavored dental floss, cut the log into 10-12 equal-sized rolls. Place each cut roll, spiral-side up, into generously greased jumbo muffin cups (or a well-greased 9×13 inch baking pan for traditional rolls). Cover the rolls loosely with a damp cloth or plastic wrap and let them rise in a warm place until doubled in size, which should take approximately 30 minutes. Meanwhile, preheat your oven to 375 degrees F (190 degrees C).
-
Bake: Bake the risen cinnamon rolls in the preheated oven for 20-25 minutes, or until they are beautifully golden brown and the filling is bubbling. Remove from muffin cups (or pan) immediately after baking to cool slightly on a wire rack. They can be served warm, or allowed to cool completely before frosting. For an extra gooey experience, apply icing while they are still warm.
-
Prepare Icing: In a medium bowl, stir together the 1 tablespoon of melted butter and powdered sugar until a thick, pasty substance forms. Stir in the softened cream cheese (if using). Gradually add the milk, one tablespoon at a time, stirring well after each addition, until you achieve a smooth, pourable consistency that is perfect for drizzling or spreading over your cinnamon rolls. Finally, stir in the vanilla extract.
