Mastering the Art of New York Cheesecake: Your Ultimate No-Water-Bath Recipe
For many dessert enthusiasts, the classic New York Cheesecake represents the pinnacle of creamy, rich indulgence. Its smooth texture, slight tang, and often-dense consistency are legendary. Yet, achieving this perfection at home can feel like a daunting task, often involving finicky water baths and the dread of cracks appearing on the surface. If you’ve been on a quest for that quintessential New York cheesecake recipe – one that’s not only delicious but also consistently achievable – your search might just end here. I’ve personally put this recipe through rigorous testing, baking it multiple times to refine every detail, and I’m convinced it’s destined to become your new go-to. My days of recipe-hopping are finally over, and I hope yours will be too.
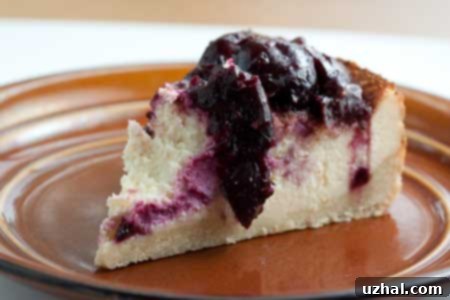
This recipe has undergone significant evolution in my kitchen. What started as a promising attempt quickly revealed the common pitfalls of cheesecake baking – a dense texture on the first try and an unfortunately burnt top. It was a learning experience, to say the least! My initial solution involved a quick fix: carefully trimming away the burnt edges and generously topping it with luscious cherry pie filling. While it saved the day for that particular occasion, I knew I needed to revisit the recipe to achieve the flawless result I envisioned. This commitment led to a series of adjustments and a completely revamped crust, transforming the subsequent bake into a truly great success.
My Journey to a Flawless New York Cheesecake
The pursuit of the perfect cheesecake often involves trial and error, and my experience was no different. The first iteration of this New York cheesecake, though tasty, was on the denser side – not quite the airy-yet-rich texture I was aiming for. And then there was the burnt top, a common frustration for many bakers, especially when dealing with high oven temperatures. It underscored the need for precise temperature control and careful monitoring. But these initial setbacks only fueled my determination to master the recipe. Understanding what went wrong was the first step towards getting it right.
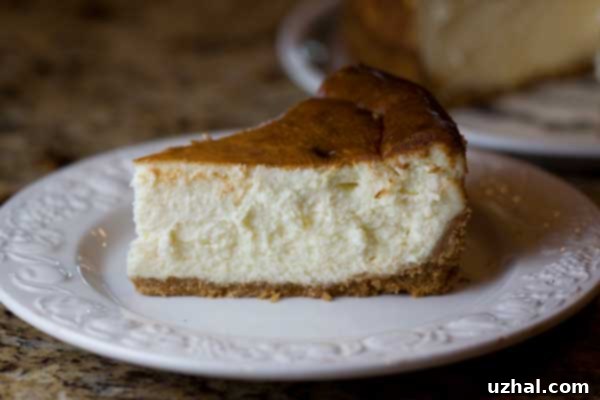
Through careful experimentation, I identified key areas for improvement. The texture, while good, needed to be more consistent and perhaps a touch lighter without sacrificing the signature richness. The baking process needed to be re-evaluated to prevent the dreaded dark crust while ensuring the cheesecake cooked through perfectly. The crust itself also presented an opportunity for enhancement. By making a few critical adjustments, particularly to the baking method and the crust, the second attempt yielded a cheesecake that was everything I had hoped for – beautifully golden, wonderfully creamy, and without a single crack.
Key Adjustments for a Perfect Cheesecake
Since first sharing this recipe, I’ve continued to refine and update it, ensuring it consistently delivers exceptional results. The most significant evolution involves eliminating the water bath. While many traditional cheesecake recipes advocate for a water bath to prevent cracks and promote even baking, I’ve found that with the right temperature and timing adjustments, a perfect cheesecake can be achieved without this often cumbersome step. This simplification makes the baking process much more approachable for home bakers without compromising on quality.
Another crucial area of adjustment was the baking times and temperatures. Many recipes, especially for New York-style cheesecakes, suggest starting with very high temperatures, sometimes even up to 500 or 550°F. While this can create a beautiful browned top, it also carries a significant risk of burning or overbaking the edges before the center is cooked, especially in a typical home oven. I’ve learned that anything over 500°F can be too aggressive for a standard wall oven, leading to the kind of burnt top I experienced initially. However, it’s vital to remember that all ovens vary, so understanding your own appliance’s quirks is key.
The Crust Debate: Graham Cracker vs. Shortbread
The crust forms the foundation of any great cheesecake, and the choice between a shortbread crust and a graham cracker crust is a matter of personal preference and tradition. This recipe was originally inspired by the famous Lindy’s Cheesecake, which traditionally features a shortbread crust. While a shortbread crust offers a buttery, crumbly texture, I personally prefer the classic, slightly spiced sweetness of a graham cracker crust. Beyond taste, there’s a practical consideration: a graham cracker crust typically takes up less volume in the pan. This means that for a cheesecake of this richness and height, a 9-inch springform pan is perfectly adequate with a graham cracker base. Recipes calling for a shortbread crust, which is often thicker, are generally best prepared in a 10-inch cheesecake pan to accommodate the volume. My adaptation to a graham cracker crust in a 9-inch pan simplifies the process while delivering that beloved flavor profile.
Why This No-Water-Bath Method Works
The key to this simplified, crack-free method lies in a specific baking temperature strategy. By starting the cheesecake at a higher temperature (475°F for 12 minutes) and then immediately reducing the heat to a much lower temperature (300°F) for the remaining bake time, we achieve several things:
- **Initial Browning:** The initial high heat creates that desired golden-brown top, a hallmark of many New York cheesecakes.
- **Even Setting:** The quick blast of heat helps set the outer edges of the cheesecake without overcooking the entire batter.
- **Gentle Internal Cooking:** The drastically reduced temperature allows the cheesecake to continue cooking slowly and gently, from the outside in, without causing rapid expansion and contraction that leads to cracks.
- **Cooling in the Oven:** Leaving the cheesecake in the turned-off oven to cool gradually further prevents temperature shock, which is a major culprit for cheesecake cracks. This slow cooling ensures the cheesecake settles beautifully.
This two-stage baking, combined with careful monitoring and knowing your oven’s true temperature, provides an excellent alternative to the traditional water bath, making homemade New York cheesecake much more accessible and less stressful.
Essential Tips for Cheesecake Perfection
- **Room Temperature Ingredients:** This is paramount for a smooth, lump-free batter. Cream cheese, eggs, and heavy cream should all be at room temperature to ensure they emulsify properly and create a silky-smooth consistency.
- **Do Not Overmix:** Overmixing is the enemy of a perfect cheesecake. Incorporating too much air into the batter will cause the cheesecake to puff up excessively in the oven and then collapse and crack as it cools. Mix on low speed, just until ingredients are combined.
- **Scrape the Bowl:** Make sure to scrape down the sides and bottom of your mixing bowl frequently to ensure all ingredients are thoroughly incorporated.
- **Release Air Bubbles:** After pouring the batter into the crust, gently tap the pan on the counter a few times to release any large air bubbles. You can also use a spatula to drag through the batter, as mentioned in the recipe. This prevents large air pockets from forming within the cheesecake and potentially causing cracks.
- **The Knife Trick:** The step of running a knife around the edges of the pan after initial cooling is crucial. As the cheesecake cools, it shrinks slightly. If the edges are stuck to the pan, the center can crack. This simple action helps the cheesecake pull away cleanly.
- **Chill Overnight:** While it’s tempting to dive in, New York cheesecake truly benefits from an overnight chill. This allows the flavors to meld and the texture to firm up to its ideal dense and creamy state.
By following these guidelines and this carefully refined recipe, you’ll be well on your way to baking a show-stopping New York cheesecake that impresses every time.
Recipe

New York Cheesecake
Cookie Madness
Pin Recipe
Ingredients
Crust:
- 2 cups graham cracker crumbs
- ¼ cup granulated sugar
- 8 tablespoons butter salted or unsalted is fine
Filling:
- 5 packages 8 ounces each cream cheese, softened
- 1 ¾ cups sugar
- 2 teaspoons lemon zest
- ½ teaspoon vanilla extract
- 5 large eggs room temperature
- 2 large egg yolks room temperature
- 3 tablespoons all-purpose flour
- ¼ cup heavy cream
Instructions
-
Preheat the oven to 475 degrees F.
-
Grease a 9 inch round springform pan. Mix all the crust ingredients and press into the pan, going about ½ inch up the sides. This crust is not baked ahead of time. Keep in the refrigerator until ready to fill.
-
In a large mixing bowl or the bowl of stand mixer, beat the cream cheese, sugar, lemon zest and vanilla until well mixed. With mixer on low, add the eggs one at a time, beating on low and being careful not to add a lot of extra air to the batter. Add the yolks. With the mixer still on low, add the flour and cream. Pour into the prepared pan and drag a spatula through the batter to remove air bubbles. Let stand for about 10 minutes and drag the spatula again.
-
Put the cheesecake on a rimmed baking sheet to catch any drips.
-
Bake in lower third (right below center) of oven for 12 minutes. Without opening door, reduce heat to 300 F. and bake another 35 minutes. Turn off the oven and let cheesecake sit in closed oven for 30 minutes. Remove from oven and let cool for 15 minutes, then run a knife between the sides of the cheesecake and the pan without removing the sides. Let cool completely, then chill overnight.
