Bake the Best Soft Pumpernickel Pretzels: Easy Homemade Recipe & Tips
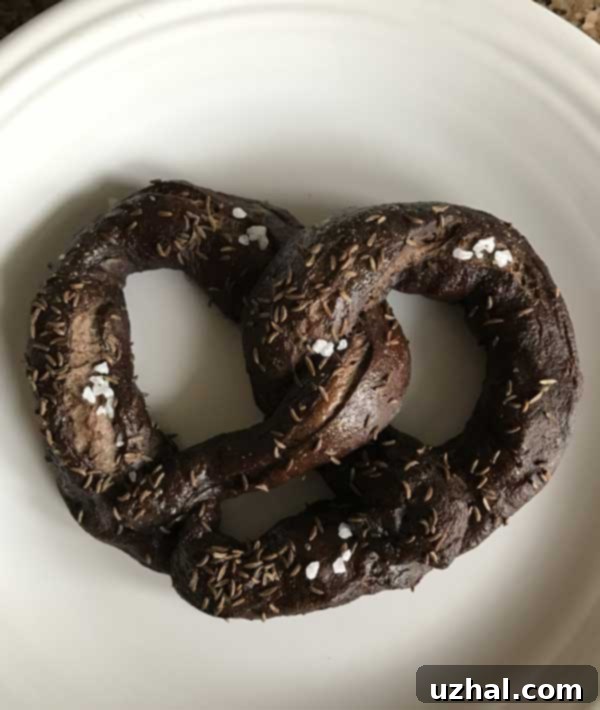
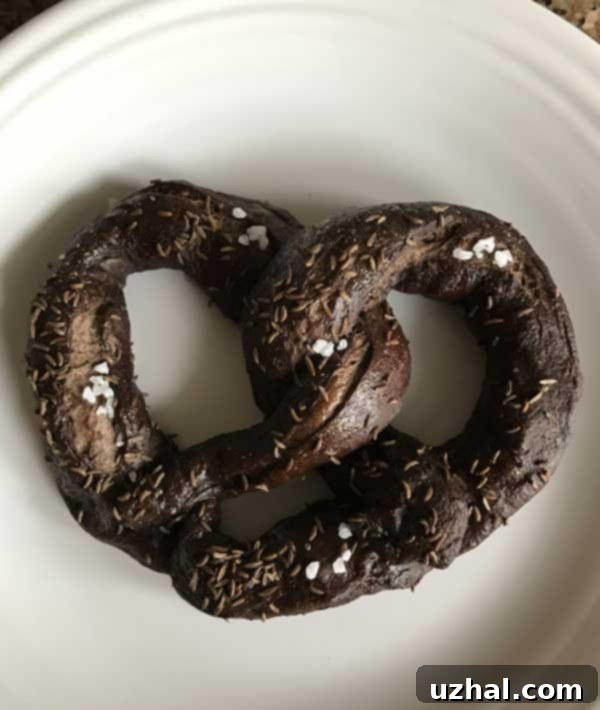
The pretzel obsession continues to grow in our household! After the resounding success of our homemade beer-flavored pretzels, it was only natural to venture into new, exciting flavor territories. This time, I set out to create a truly unique twist on a classic: delicious, pillowy **Soft Pumpernickel Pretzels**. These aren’t just any pretzels; they boast a distinct, rich flavor profile thanks to a thoughtful blend of flours and aromatic additions, promising a delightful culinary experience for any pretzel enthusiast.

Building on the foundation of my favorite soft pretzel recipe, this pumpernickel version incorporates a carefully balanced mix of all-purpose, rye, and whole wheat flours. But the magic doesn’t stop there. We enhance the signature pumpernickel essence with a touch of molasses for depth and color, rich cocoa powder (not for chocolate flavor, but for a beautiful dark hue and subtle complexity), a hint of brown sugar for sweetness, and, of course, the unmistakable aroma of caraway seeds. To keep things manageable for a home baker, I also halved the original recipe, yielding five generously sized pumpernickel pretzels – perfect for sharing, or keeping all to yourself!

Crafting the Perfect Soft Pumpernickel Pretzel Dough
One of the joys of this recipe is how incredibly easy the dough is to handle. Unlike some pretzel doughs that fight back, this blend of flours – all-purpose, rye, and whole wheat – creates a wonderfully pliable and elastic dough that is a pleasure to work with. It doesn’t snap back excessively when you’re forming those long, 24-inch strands, which is often a challenge with high-gluten bread flours. While I typically adore using bread flour for many baked goods, for pretzels, it can sometimes make the dough too “snappy” and resistant to shaping. This pumpernickel dough strikes the perfect balance, resulting in pretzels that bake up beautifully chewy on the inside with a satisfyingly crisp crust.
The unique flavor of these **soft pumpernickel pretzels** truly comes alive through its carefully selected ingredients. Rye flour is essential, lending its characteristic earthy, slightly tangy note that defines pumpernickel bread. The addition of molasses provides not only a touch of sweetness but also contributes significantly to the dough’s dark, rich color and a wonderfully moist crumb. Dark cocoa powder, used in a small amount, acts as a natural food coloring, intensifying the deep brown hue of the pretzels without imparting a chocolatey taste. Brown sugar adds another layer of subtle sweetness and helps with browning, while caraway seeds infuse the dough with that unmistakable aromatic, slightly peppery flavor that pairs so perfectly with rye. Remember, for the best results and a consistent dough every time, it’s highly recommended to weigh your flour. The precise blend used here is 3 ounces each of rye and whole wheat flour, combined with 5 ounces of all-purpose flour, totaling 11 ounces of flour.
And a crucial step you absolutely cannot skip? The baking soda boil! This seemingly simple step is what gives soft pretzels their signature chewy texture and deep, glossy crust. We’ll delve into why this process is so vital shortly.
The Etymology of “Pumpernickel”: A Humorous Discovery
While perfecting this **homemade pumpernickel pretzel recipe**, I found myself pondering the origin of the name “pumpernickel.” It’s a word we hear often in relation to dark rye bread, but its etymology isn’t widely known. It turns out that the name “pumpernickel” has quite an interesting, and somewhat humorous, history! The word originates from an old Bavarian dialect, where it roughly translates to “hard” or “devil’s fart.” This amusing etymology referred to the bread’s perceived indigestibility and its very dense, dark nature. Given that I’ve named these creations Soft Pumpernickel Pretzels, the contrast is quite delightful!
Historically, pumpernickel bread is a traditional German bread, particularly from Westphalia, known for its incredibly long baking times at low temperatures. This slow process, often lasting 16 to 24 hours, caramelizes the starches in the coarse rye flour, giving the bread its characteristic dark color, deep flavor, and dense, moist texture. While our pretzels don’t require such extreme baking conditions, the name connects them to a rich tradition of robust, flavorful rye-based baked goods, albeit with a wonderfully soft and chewy modern twist.
The Science Behind the Chew: Why the Baking Soda Bath is Essential
For any soft pretzel recipe, the brief dip in a boiling baking soda solution is absolutely critical, and our **soft pumpernickel pretzels** are no exception. This isn’t just a tradition; it’s a scientific process that significantly impacts the final texture and appearance of your pretzels. When the dough hits the alkaline boiling water, it instantly gelatinizes the starches on the surface of the pretzel. This creates a barrier that prevents the pretzel from puffing up too much in the oven, leading to that dense, chewy interior we all love.
Furthermore, the high pH environment of the baking soda bath promotes the Maillard reaction – a complex chemical process responsible for the browning and development of deep, rich flavors in many foods. This reaction is what gives pretzels their beautiful dark, glossy crust and their distinctive, slightly malty flavor that can’t be achieved by simply baking the dough. While traditional German pretzels sometimes use a lye solution (sodium hydroxide) for an even darker, more intensely flavored crust, baking soda is a much safer and readily available alternative for home bakers, delivering fantastic results without the hazardous handling requirements of lye. So, never skip that essential 30-second dip!
Expert Tips for Pretzel Perfection: Shaping & Baking
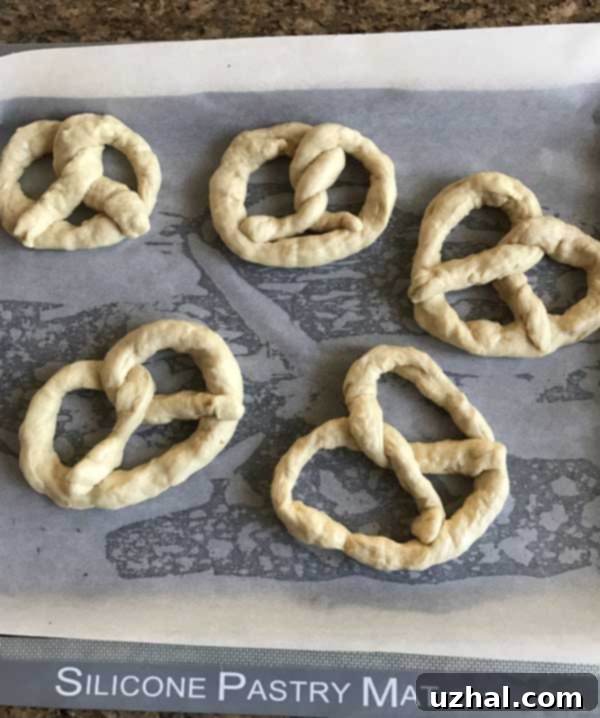
Achieving perfectly shaped and baked **homemade pretzels** is easier than you think with a few simple tips. After your dough has risen, dividing it into even chunks is the first step to uniform pretzels. For these **soft pumpernickel pretzels**, we aim for five large pieces. The next crucial step is shaping. Roll each piece of dough into a long, thin rope, approximately 24 inches in length. Consistency is key here; try to make the rope uniform in thickness to ensure even baking. If the rope is too thin in some spots and too thick in others, you’ll end up with overcooked brittle bits and undercooked chewy parts.
Once you have your rope, it’s time to form the classic pretzel shape. Lay the rope in a “U” shape, then cross the ends over each other twice to create a twist. Finally, bring the twisted ends down and press them firmly onto the bottom curve of the “U.” This creates the iconic pretzel look. Don’t be afraid to experiment a bit to find a technique that works for you. The beauty of this particular dough is its forgiving nature, making it ideal for practicing your pretzel-shaping skills.
For baking, ensure your oven is preheated to a hot 450 degrees F (232 degrees C). High heat is essential for a quick bake that crisps the exterior while keeping the interior soft. The parchment-lined baking sheet is also vital to prevent sticking and aid in easy cleanup. After the baking soda bath and before baking, the egg yolk wash will give your pretzels an extra golden sheen, and it acts as a binder for the coarse salt or additional caraway seeds, ensuring they adhere beautifully. Bake until they are deeply golden brown, typically 12-14 minutes, then transfer them to a wire rack to cool slightly. While they are delightful warm, allowing them to cool for a few minutes helps set the crust and develop their full chewy texture.
Serving Suggestions and Customization
Once your **soft pumpernickel pretzels** are freshly baked and still warm, they are an absolute delight. Their unique, earthy flavor, complemented by the subtle sweetness of molasses and the aromatic kick of caraway, makes them incredibly versatile. Classic pairings are always a hit: a robust stone-ground mustard or a creamy cheese dip perfectly complements their savory notes. For a German-inspired meal, serve them alongside bratwurst or a hearty soup.
You can also get creative with toppings. Beyond coarse salt and caraway seeds, consider sprinkling them with everything bagel seasoning for an extra layer of flavor and texture. A sprinkle of grated Parmesan cheese or a hint of onion powder mixed into the egg wash before baking could also offer interesting variations. For those who enjoy a touch of sweetness, a cinnamon-sugar topping is always an option, though the pumpernickel flavor truly shines with savory accompaniments. These pretzels are not just a snack; they can be a standout appetizer or a unique addition to any bread basket.
Homemade Soft Pumpernickel Pretzels Recipe
Ready to bake your own batch of these incredible **soft pumpernickel pretzels**? This detailed recipe will guide you through every step, ensuring a delicious outcome every time. Remember to weigh your ingredients for precision!
Recipe

Soft Pumpernickel Pretzels
Anna
Pin Recipe
Ingredients
- 1 cup all-purpose flour 5 oz
- ¾ cup plus 2 tablespoons rye flour 3 oz
- ¾ cup plus 2 tablespoons whole wheat flour 3 oz
- 1 ⅛ teaspoon quick rising yeast ½ packet
- ¾ teaspoon salt
- 1 ½ tablespoons dark cocoa powder such as Hershey’s Dark
- ½ tablespoon light brown sugar
- 1 tablespoon molasses
- 2 tablespoons softened unsalted butter
- ½ tablespoon caraway seeds plus more for garnishing
- ⅔ to ¾ cups water warmed to 130 degrees F.
Boiling Mixture
- ⅓ cup baking soda
- 5 cups water
- 1 egg yolk mixed with a tablespoons of water
- Some coarse salt
Instructions
-
In the bowl of a stand mixer, combine all 3 flours (11 oz weight total), quick-rising yeast, salt, dark cocoa powder, light brown sugar, molasses, softened unsalted butter, and caraway seeds.
-
Gradually add the warmed water (130 degrees F), stirring until all ingredients are well blended and a cohesive dough forms. The dough should not be overly sticky.
-
Attach the dough hook to your stand mixer and knead the dough for approximately 8 minutes. During kneading, observe the dough’s consistency: if it appears too dry, add a tiny bit more water, a teaspoon at a time. If it’s too wet, incorporate a small amount of flour. The goal is a dough that feels firm, smooth, and elastic once fully kneaded.
-
Transfer the kneaded dough to a lightly oiled bowl. Turn the dough once to ensure it’s evenly coated with oil, preventing it from drying out. Cover the bowl with plastic wrap or a clean kitchen towel and let the dough rise in a warm place for one hour, or until it has roughly doubled in size.
-
After the dough has risen, gently punch it down to release the air. Divide the dough into 5 equal chunks for large pretzels.
-
While you’re shaping the pretzels, preheat your oven to 450 degrees F (232 degrees C). Line a heavy-duty baking sheet with parchment paper, ensuring it’s ready for the boiled pretzels.
-
In a large saucepan, bring the 5 cups of water and ⅓ cup of baking soda to a rolling boil. Be cautious as the baking soda will cause the water to foam up.
-
Take each dough chunk and roll it into a long, thin rope, approximately 24 inches in length. Aim for consistent thickness across the entire rope. Once rolled, form it into the classic pretzel shape by making a “U” shape, crossing the ends over twice, and pressing them firmly onto the bottom curve.
-
Working with one shaped pretzel at a time, carefully place it into the boiling baking soda solution. Let it boil for exactly 30 seconds, then use a slotted spatula to gently lift it out, allowing excess water to drip off. Immediately transfer the boiled pretzel to your prepared parchment-lined baking sheet.
-
Once all the pretzels are shaped and boiled, brush the tops generously with the egg yolk mixture (one egg yolk whisked with a tablespoon of water). This will give them a beautiful golden-brown color. Immediately sprinkle with coarse salt or additional caraway seeds, according to your preference.
-
Bake the pretzels in the preheated oven for about 12-14 minutes, or until they are deeply golden brown and have that characteristic pretzel sheen. Once baked, transfer them to a wire rack to cool slightly before serving. They are best enjoyed warm!
Storage and Reheating Tips
While these **soft pumpernickel pretzels** are undoubtedly best enjoyed fresh from the oven, you can store any leftovers to savor later. To maintain their freshness, place cooled pretzels in an airtight container or a plastic bag at room temperature for up to 2 days. For longer storage, you can freeze them for up to 1 month. To reheat, simply pop them in a preheated oven at 350°F (175°C) for 5-7 minutes (longer if frozen) until warmed through and the crust is crisp again. This will bring back much of their original charm.
More Delicious Pretzel & Caraway Inspired Recipes
If you’re as enamored with these **homemade soft pumpernickel pretzels** as we are, you might enjoy exploring other recipes that feature similar flavor profiles or are part of the broader pretzel family. Here are a few more delicious options to inspire your next baking adventure:
- Caraway and Rye Peanut Butter Cookies
- White Chocolate Cookie Butter Pretzels
- Chocolate Chip Pretzel Bars
- Caraway Cottage Cheese Bread
- Chocolate Pretzel Toffee
Share Your Pumpernickel Pretzel Experience!
There’s nothing quite like the aroma of freshly baked pretzels filling your kitchen, and these **soft pumpernickel pretzels** bring an exciting, gourmet twist to the experience. We truly hope you enjoy making and savoring this unique recipe. If you decide to give these homemade soft pretzels a try, please don’t hesitate to let me know how they turn out! Share your baking journey and any delicious serving ideas in the comments below. Happy baking!
