Classic Comfort: Bake the Best Small Butterscotch Pie with Our Easy Recipe
There’s something truly special about a recipe that carries a rich history, a story woven into its very existence. Today, we’re diving into such a treasure: a Small Butterscotch Pie recipe, lovingly shared by Sue from Basically Baked. This isn’t just any recipe; it’s a nostalgic journey back to childhood, originating from a charming Mother’s Day cookbook Sue and her third-grade classmates assembled many years ago. It’s a testament to timeless flavors and the enduring power of simple, homemade sweets.
The story behind this pie is as sweet as the dessert itself. Sue’s teacher, with a wonderful idea, compiled recipes secretly submitted by the students. She then made mimeograph copies and had the children create their own construction paper covers. Imagine the excitement and pride! Sue’s mother, recognizing the unique value of such a creation, carefully preserved this cookbook through the years. On a recent visit, she presented it back to Sue, knowing it would bring joy and a flood of memories. And it certainly did, especially since the book featured just one chili recipe amidst a delightful collection of sweets! This truly sounds like a cookbook after my own heart, prioritizing the joy of desserts.
The Charm of a Small Pie: Perfect Portions and Pure Indulgence
Sue’s special contribution to this cherished childhood cookbook was this very butterscotch pie. What makes this particular recipe stand out, beyond its sentimental value, is its original design for a 7-inch pie dish. This proved to be serendipitous for me, as I had recently acquired a small 7-inch pie dish myself, eager to experiment with smaller, more manageable pies. Small pies offer a wonderful alternative to their larger counterparts. They’re perfect for smaller households, provide ideal portion control, and bake more quickly. Plus, there’s an undeniable cuteness factor to a miniature pie that just makes it feel extra special, like a little personal indulgence.
While Sue thoughtfully updated the recipe with a modern twist, suggesting a microwave method for convenience, I chose to honor the original spirit of the recipe by preparing the filling in a saucepan. The microwave, however, proved invaluable for warming the milk, a small shortcut that helps streamline the cooking process without sacrificing the traditional technique. The rich, creamy butterscotch filling, made from scratch, is truly the heart of this pie, offering a deep, caramelized flavor that’s utterly irresistible.
Mastering the Meringue: A Fluffy Crown for Your Butterscotch Pie
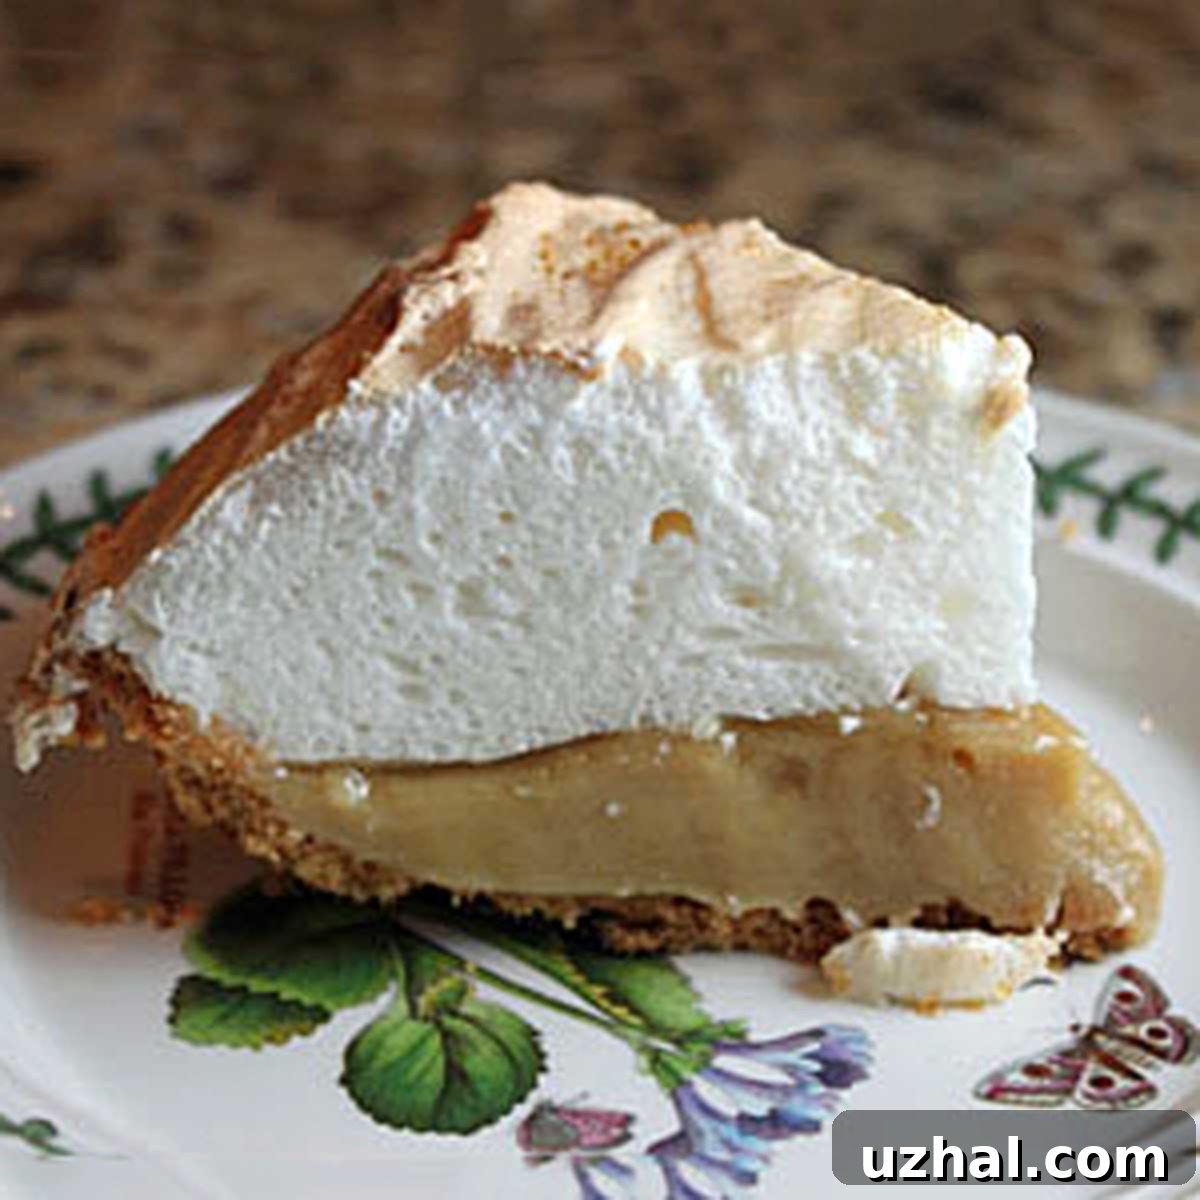
One of the most delightful aspects of this butterscotch pie is the generous topping of meringue. Three egg whites might seem like a lot for a 7-inch pie, but the abundant, fluffy meringue is precisely what gives this dessert its charming character. It evokes the image of a grand, “flashy diner pie,” but in a perfectly scaled-down, miniature form. The contrast between the rich butterscotch and the light, airy meringue is simply divine, offering a textural experience that elevates each bite.
Creating a stable and beautiful meringue is key to achieving that classic look. Starting with room temperature egg whites is crucial, as they whip up with more volume. Gradually adding sugar while beating to stiff peaks ensures a glossy, stable meringue that holds its shape beautifully and provides a delightful golden crust after a brief bake. Sealing the meringue firmly to the pie crust edges prevents weeping, ensuring your pie remains picture-perfect.
Tips for Pie Perfection: From Crust to Chilling
This recipe consistently delivers my favorite butterscotch pie. Its balanced sweetness, creamy texture, and the delightful chewiness of the meringue make it a true standout. For those who wish to scale it up to fit a standard 9-inch pie plate, I highly recommend multiplying all ingredients by 1.33. This simple calculation ensures the perfect ratio of crust, filling, and meringue for a larger crowd. If you’re keen on making the smaller 7-inch version but don’t own a specialized dish, don’t despair! A cheap aluminum 9-inch pie plate or even a recycled tin from a store-bought graham cracker crust can work in a pinch. Just be mindful of the baking time, as a shallower crust might bake a little faster.
Beyond the measurements, here are a few extra tips for pie perfection:
- For the Crust: Ensure the graham cracker crumbs are finely crushed and mixed thoroughly with the melted butter and sugar. Press the mixture firmly and evenly into your pie dish, especially up the sides, to create a solid foundation that won’t crumble.
- For the Filling: Whisking is your best friend! Constant whisking of the brown sugar, flour, and salt with the warm milk prevents lumps and ensures a smooth, creamy base. When tempering the egg yolks, gradually whisk in about half of the warm milk mixture before adding the egg yolks back to the saucepan. This slowly raises the temperature of the yolks, preventing them from scrambling. Continue whisking constantly over medium heat until the mixture thickens significantly and bubbles for a full two minutes. This ensures the flour is cooked out and the pie sets beautifully.
- For the Meringue: As mentioned, room temperature egg whites and gradually added sugar are vital. Ensure your mixing bowl and beaters are impeccably clean and grease-free, as even a speck of fat can prevent the egg whites from whipping properly.
- Cooling and Chilling: Don’t rush the process! Allowing the pie to cool at room temperature for an hour before refrigerating helps it set gradually. The subsequent 4 hours (or more) in the refrigerator are essential for the filling to firm up completely, ensuring clean, beautiful slices. Patience truly is a virtue when it comes to pie.
Whether you’re making this pie for a special occasion or simply to satisfy a craving for classic comfort food, Sue’s Small Butterscotch Pie recipe is guaranteed to impress. It’s a reminder that some of the best culinary delights come from the simplest, most heartfelt origins. Happy baking!
- Sue’s Pumpkin Cookie Recipe
- Sue’s Butterscotch Pie (Full Size)
- Sue’s Toffee Crunch Cookies
- Sue’s Snickerdoodles
- Sue B’s Chocolate Cake
Recipe: Sue’s Nostalgic Small Butterscotch Pie

Small Butterscotch Pie
Anna
Pin Recipe
Ingredients
Crust:
- 1 cup crushed graham crackers
- 1 tablespoon sugar
- 3 tablespoons unsalted butter melted
Filling:
- 3 large egg yolks
- ¾ cup packed brown sugar
- 2 tablespoons flour
- ¼ teaspoon of salt
- 1 cup whole milk measured in a Pyrex glass
- 2 tablespoons unsalted butter room temperature
- ½ teaspoon vanilla
Meringue:
- 3 large egg whites room temperature
- ⅛ teaspoon salt – note Sue used ¼, but I found ¼ a bit salty.
- 6 tablespoons granulated sugar
Instructions
-
For the Crust: In a bowl, combine the crushed graham crackers and sugar. Stir in the melted butter until well mixed. Press this mixture evenly into the bottom and up the sides of a well-greased 7-inch pie dish. Bake in a preheated oven at 350°F (175°C) for 8 minutes. While the crust bakes, proceed to prepare the filling.
-
Prepare the Filling Base: Whisk the egg yolks together in a separate bowl and set aside. In a medium saucepan (not yet on the heat), stir together the brown sugar, flour, and salt. Once these dry ingredients are combined, pause to prepare your meringue. The meringue can rest while you complete the next step of the filling.
-
Make the Meringue: In a clean, dry bowl, combine the room temperature egg whites and salt. Using a hand mixer on high speed, beat until soft peaks form. Gradually add the granulated sugar, 2 tablespoons at a time, continuing to beat until the sugar is fully dissolved and stiff, glossy peaks form. Set the meringue aside.
-
Finish the Filling: Warm the whole milk in the microwave for about 1 minute until it’s comfortably warm but not boiling. Place the saucepan with the brown sugar mixture over medium heat. Gradually whisk in the warm milk, stirring constantly. Continue to whisk over medium heat until the mixture begins to simmer. To temper the egg yolks, slowly pour about half of the hot milk mixture into the whisked egg yolks, whisking continuously. Then, pour the tempered egg yolk mixture back into the saucepan with the remaining milk mixture. Continue whisking and stirring over medium heat until the mixture thickens considerably and begins to bubble. Whisk and stir for another 2 minutes while it actively bubbles to ensure the flour is fully cooked. This entire cooking process for the filling is quite quick, especially with warm milk and a metal saucepan.
-
Assemble and Bake: Remove the filling from the heat and whisk in the room temperature butter and vanilla extract until smooth and fully incorporated. Immediately pour the hot filling into the prepared and baked pie crust. Quickly top the pie with the meringue, ensuring you spread it all the way to the edges of the crust to create a seal, which helps prevent shrinking and weeping. Bake the pie in the 350°F (175°C) oven for 10 minutes, or until the meringue is beautifully golden brown. Let the pie cool completely at room temperature for at least 1 hour, then transfer it to the refrigerator to chill for a minimum of 4 hours before serving. This chilling time is crucial for the pie to set properly, ensuring perfect slices.
