Mastering Irresistible Chocolate Peanut Butter Ribbon Cookies: An Easy Cake Mix Recipe Guide
Have you ever wondered how bakeries create those beautiful, distinct ribbons of peanut butter, caramel, or chocolate swirled through their cookies, seemingly defying gravity and remaining perfectly defined against the dough? It’s a common baking enigma, one that captivated a reader named Renee, whose insightful question in our comment section sparked a delightful culinary experiment. The challenge: how to achieve those vibrant ribbons without them melting and blending completely into the cookie dough during baking. After some delicious trials and errors, we’ve cracked the code, and we’re thrilled to share this remarkably simple and incredibly satisfying recipe with you.

The Secret to Perfect Ribbons: Preventing the Soak
The key to maintaining those gorgeous, defined ribbons lies in controlling the texture and temperature of your ribbon mixture. Traditional methods often result in the filling melting too quickly and being absorbed by the surrounding dough, especially if it’s too soft or warm. Our approach focuses on creating a firm, yet pliable, peanut butter mixture that can withstand the heat of the oven just long enough to set, leaving you with visually stunning and texturally exciting cookies. This technique, once mastered, opens up a world of possibilities for ribboning other delightful fillings into your favorite baked goods, from scratch cookies to brownies.
Why Cake Mix Cookies? The Foundation of Simplicity and Flavor
Remember how we were just working with half a box of cake mix yesterday? Well, today, we’re down to a quarter box, making it the perfect foundation for another fantastic small-batch recipe. Using a high-quality cake mix, like Duncan Hines Moist Deluxe Devil’s Food, simplifies the baking process significantly without compromising on flavor or texture. Cake mix provides a consistent, moist, and tender base for your cookies, ensuring a delightful chewiness that perfectly complements the creamy peanut butter ribbons. It’s an excellent shortcut that allows you to focus on the fun part: the ribboning technique!
This recipe is designed to be incredibly forgiving and adaptable. While we’re showcasing a chocolate peanut butter combination, the cake mix base can easily be adapted for various flavors. The pre-measured dry ingredients in a cake mix eliminate the need for multiple flour and leavening agents, making it an ideal choice for both novice bakers and seasoned pros looking for a quick and reliable cookie fix. Plus, the convenience means less time fussing with ingredients and more time enjoying warm, fresh-baked cookies!
The Appeal of Small Batch Baking
This particular recipe makes about 7 perfectly sized cookies. Small batch baking has a unique charm and several practical benefits. Firstly, it prevents overindulgence – perfect for satisfying a sweet craving without an abundance of leftovers. Secondly, it’s a fantastic way to experiment with new flavors and techniques without committing to a huge recipe. For those living alone, in smaller households, or simply wanting a fresh-baked treat on demand, a small batch is ideal. If you fall in love with these cookies (and we’re confident you will!), you can easily double, triple, or even quadruple the recipe to feed a crowd. But for now, let’s savor the intimacy of a freshly baked small batch.
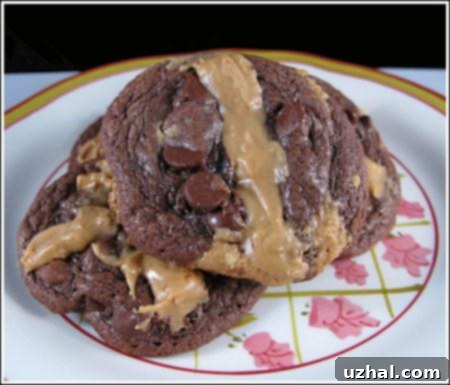
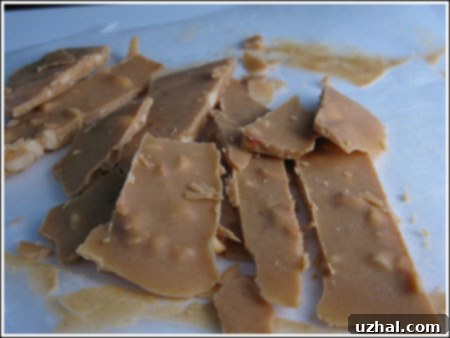
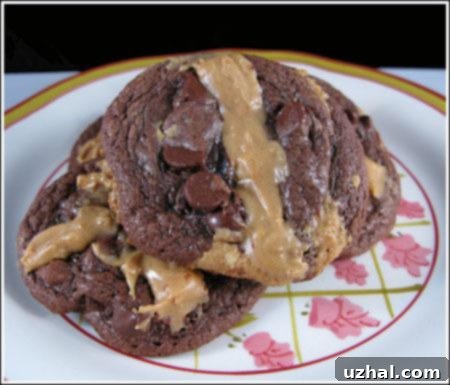
The pictures below illustrate both the final cookie and the magical peanut butter ribbon mixture before it’s nestled into the dough. You’ll see how the ribbon holds its shape, promising a delightful surprise in every bite.

The Recipe: Small Batch Chocolate Peanut Butter Ribbon Cookies
Get ready to create some truly special cookies that are as fun to make as they are to eat. This recipe balances rich chocolate with creamy, perfectly set peanut butter ribbons, creating a treat that’s both visually appealing and incredibly delicious.
Ingredients You’ll Need:
For the Peanut Butter Ribbons:
- 2 tablespoons peanut butter chips: These help the mixture firm up nicely and add an extra burst of peanut butter flavor.
- 2 tablespoons creamy peanut butter: The classic, smooth base for our ribbons.
- 1 teaspoon unsalted butter: Sliced from a stick, this adds richness and helps with texture.
For the Chocolate Dough:
- 2 tablespoons unsalted butter: Melted, it binds the dough together.
- 1 cup plus ½ tablespoon chocolate cake mix: We used Duncan Hines Moist Deluxe Devil’s Food for its deep flavor and excellent texture. This precise measurement ensures perfect consistency for our small batch.
- 1 tablespoon light brown sugar: Adds a hint of caramel sweetness and helps keep the cookies moist.
- 2 tablespoons lightly beaten egg: Provides structure and moisture to the dough. Using just two tablespoons helps maintain the small batch size without waste.
- ⅓ cup semi-sweet chocolate chips: For extra pockets of melted chocolate goodness throughout the cookie.
Step-by-Step Instructions: Creating Your Ribboned Masterpiece
- Prepare the Peanut Butter Ribbons First: This is a crucial step for achieving those distinct ribbons.
- Line a small plate with wax paper or parchment paper. This prevents sticking and makes it easy to handle the firm mixture later.
- In a small, microwave-safe bowl (a custard cup works perfectly for this small amount), combine the peanut butter chips, creamy peanut butter, and the sliced butter.
- Microwave the mixture for 30 seconds. This is just enough to soften the ingredients.
- Stir until the mixture is completely smooth and uniform. If there are still lumps, microwave for an additional 10-15 seconds and stir again.
- Carefully spoon the smooth peanut butter mixture onto the wax paper-lined plate. You can spoon it into a 2-inch wide line, or create several smaller lines, depending on your preference for ribbon size. The key is to have a shape that you can easily slice into ribbons.
- Place the plate in the refrigerator for about 30 minutes to allow the peanut butter mixture to firm up completely. It needs to be firm enough to slice without crumbling or becoming too sticky.
- Meanwhile, Get Ready for the “Complicated” (Just Kidding!) Dough: While your peanut butter chills, you can whip up the chocolate cookie dough.
- In a medium-sized microwave-safe mixing bowl, melt the 2 tablespoons of butter. This should only take about 15-20 seconds in the microwave.
- Stir in the cake mix, brown sugar, and the 2 tablespoons of lightly beaten egg. Mix until just combined. The dough will be thick and may seem a little crumbly at first, but keep mixing until it comes together.
- Important Tip: At this stage, the dough might still be warm from the melted butter. If it is, chill it in the refrigerator for about 20 minutes. This prevents the chocolate chips from melting prematurely when you add them.
- Once the dough has cooled slightly, stir in the semi-sweet chocolate chips until they are evenly distributed.
- Preheat and Prepare:
- Preheat your oven to 350 degrees F (175 degrees C).
- Line a cookie sheet with parchment paper or a Silpat baking mat. While an ungreased sheet might work, parchment or Silpat ensures easy removal and prevents sticking, especially with gooey fillings.
- Assemble Your Ribboned Cookies: This is where the magic happens!
- Remove the now-firm peanut butter mixture from the refrigerator. It should be solid enough to handle.
- Using a sharp knife, slice the firm peanut butter mixture into little ribbons of various sizes. Don’t worry about being perfectly precise; natural variations add to their charm. Mine were typically about ⅓ of an inch wide by 1 ½ inches long. Just go with the flow and enjoy the process!
- Using a tablespoon, scoop up a portion of the chocolate cookie dough and gently shape it into a round of about 1 ¼ inches in diameter.
- Break this small dough round in half. This creates a pocket for your ribbon.
- Carefully nestle one of your peanut butter ribbons in the center of one half of the dough.
- Place the other half of the dough on top and gently enclose the peanut butter ribbon, shaping the dough back into a neat round or oval. You want the ribbon to be fully encased within the dough.
- Place the formed cookie onto your prepared cookie sheet. Repeat this process for the remaining dough and ribbons, aiming for about 7 cookies.
- For an extra decorative touch: Take a small, thin ribbon of peanut butter and gently lay it across the top of each unbaked dough round. This will create a beautiful surface swirl after baking.
- Bake to Perfection:
- Bake for 10 minutes, or until the edges of the cookies appear set and the center looks just slightly soft. Be careful not to overbake, as cake mix cookies can dry out quickly.
- Remove the cookies from the oven. While they are still hot, quickly and carefully lay another ribbon (or two!) of peanut butter across the top of each cookie. This step is purely decorative and allows the warmth of the cookies to slightly melt and adhere the ribbon, enhancing their visual appeal. Do this artfully and creatively!
- Let the cookies cool on the baking sheet for 2 to 3 minutes. This crucial step allows them to set and prevents them from breaking when transferred.
- Carefully transfer the cookies to a wire rack to cool completely and firm up. The peanut butter mixture will continue to set as it cools, ensuring those distinct ribbons hold their shape beautifully.
The peanut butter mixture will firm up even more as it sits, ensuring a delightful texture contrast in every bite. This recipe consistently yields about 7 delicious, beautifully ribboned cookies, perfect for an afternoon treat or sharing with a loved one.
Tips for Perfect Ribbons Every Time
- Chill Thoroughly: The most critical step is ensuring your peanut butter mixture is very firm before slicing. If it’s too soft, it will be hard to handle and may melt too quickly.
- Work Quickly: Once the ribbons are out of the fridge, work fairly quickly to enclose them in the dough, especially if your kitchen is warm.
- Don’t Overmix the Dough: Overmixing can lead to tough cookies. Mix until just combined.
- Experiment with Thickness: For more pronounced ribbons, make them a bit thicker. For a more subtle swirl, slice them thinner.
- Temperature Control: If your dough gets too warm during assembly, pop it back in the fridge for 5-10 minutes. This makes it easier to handle.
Creative Variations and Customizations
Once you’ve mastered the fine art of making these peanut butter ribbons, don’t stop there! This technique is incredibly versatile:
- Other Fillings: Try ribbons of melted caramel, Nutella, or even a cream cheese frosting that has been chilled until firm.
- Different Cookie Bases: While a chocolate cake mix cookie is fantastic, you can ribbon these fillings through other types of cookies. Imagine vanilla scratch cookies with chocolate ribbons, or oatmeal cookies with a cream cheese swirl.
- Beyond Cookies: Lay these firm ribbons over brownies before baking for a stunning visual and flavor upgrade. They can also be chopped and folded into ice cream or used as a topping for cupcakes.
- Flavor Combinations: Explore different cake mix flavors – yellow cake mix with raspberry jam ribbons, or spice cake mix with apple butter ribbons. The possibilities are endless!
Why You’ll Love These Cookies
These Chocolate Peanut Butter Ribbon Cookies are more than just a dessert; they’re a delightful experience. They’re easy enough for a weeknight treat, yet impressive enough to share with guests. The distinct layers of rich chocolate cookie and creamy peanut butter create a perfect harmony of flavors and textures, while the visual appeal makes them truly stand out. Whether you’re a seasoned baker or just starting out, this recipe provides a foolproof way to create bakery-quality treats right in your own kitchen, satisfying that sweet tooth with a touch of homemade magic.
So, go ahead and give this recipe a try! We can’t wait to hear about your beautiful, ribboned creations. Happy baking!
